
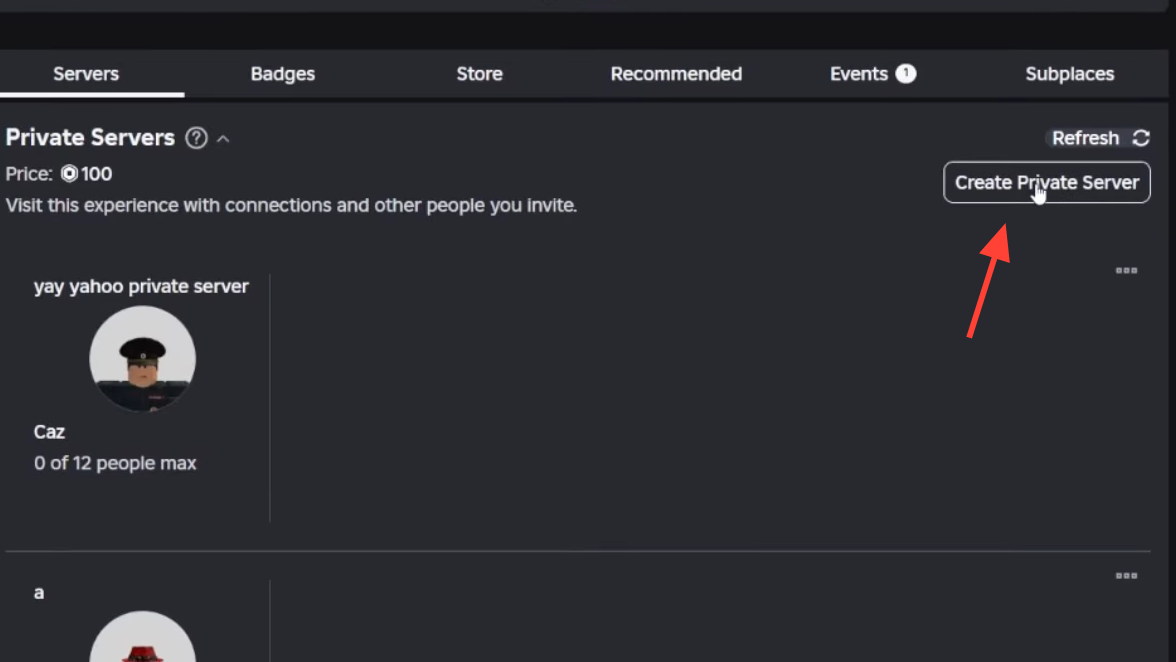
The Forge on Roblox supports private servers, which let you mine without competing with random players in public lobbies. Creating one takes a minute from the game’s Servers page, but it’s also a paid, recurring subscription, so it helps to understand the knobs you can control before you commit.
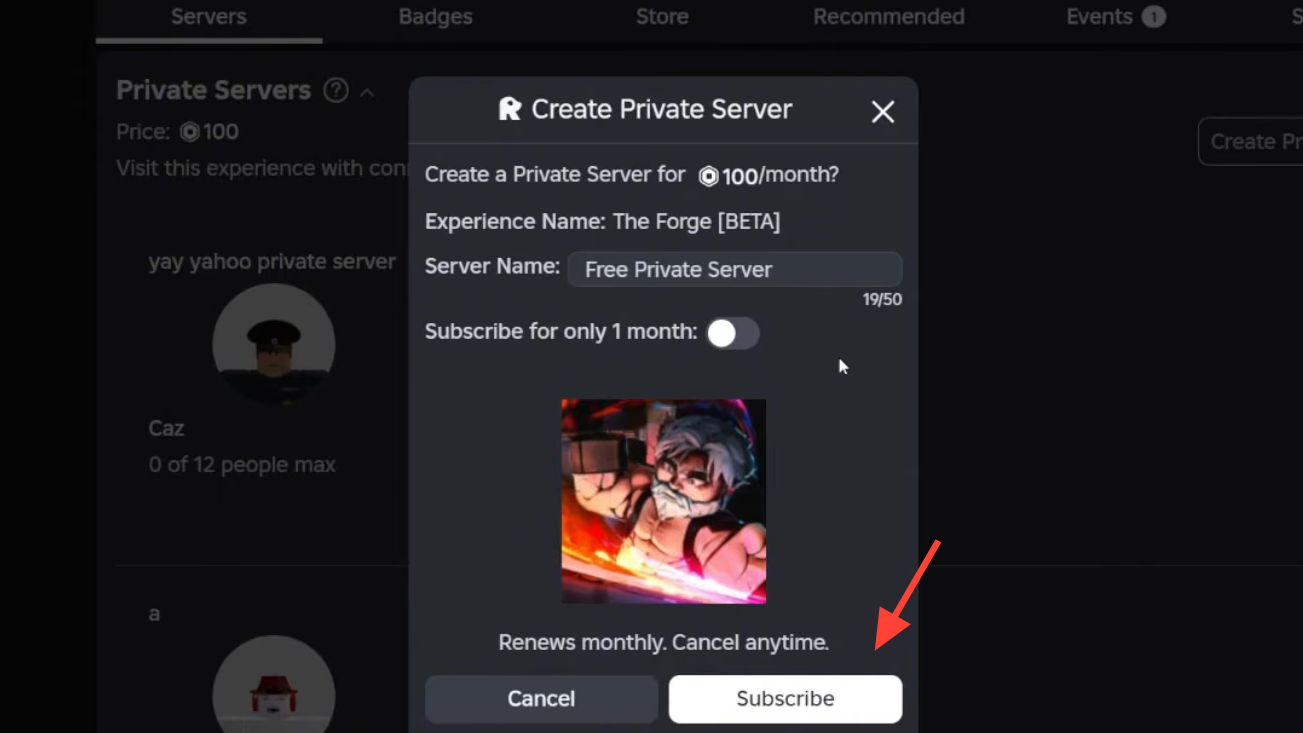
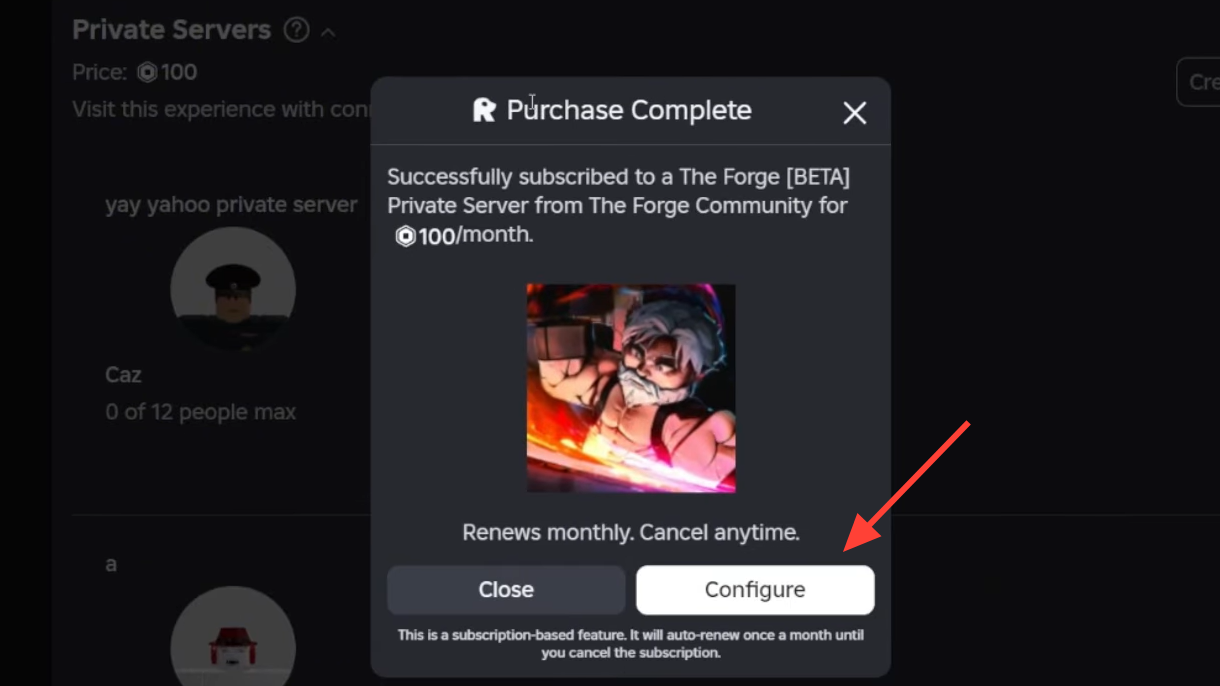
Create a private server in The Forge (100 Robux subscription)
You can create a private server from the Roblox website in a browser or from the Roblox app. In both cases, you’ll use the game’s Servers page and the Private Servers section.
Invite friends (and keep everyone else out)
After your server exists, you manage access from the same Servers page. The key control is the Allow Joining toggle, plus a list that can limit access to specific people.
Cancel the private server subscription
If you’re done with the server, you can stop the monthly charge from the configuration screen.
Workarounds people used before private servers
Before The Forge supported private servers, players commonly tried to approximate “VIP” play by hunting for nearly empty servers. One approach was joining at off-peak hours so the lobby naturally emptied out. Another relied on locating a low-population server, identifying someone in it, and attempting to join their session if their Roblox settings allowed joins. These methods can still be useful if you’re trying to land in a quiet public lobby, but they’re not a substitute for the access controls a real private server gives you.
If you’re mining with friends or you’re tired of crowded public servers, a private server is the most direct way to control your lobby. The main tradeoff is the ongoing 100 Robux monthly subscription, so it’s worth cancelling when you know you won’t use it.