How to find a Roblox decal asset ID and paste it correctly into your Sailor Piece guild icon field.
How to find a Roblox decal asset ID and paste it correctly into your Sailor Piece guild icon field.
by Pallav Pathak
Setting a custom guild icon in Sailor Piece comes down to one thing: pasting a valid Roblox decal asset ID into the Guild Image ID field when you create or edit your guild on Punch Island. The game does not let you upload an image directly. It pulls the picture from a decal you already own or one that exists in the Roblox catalog.
⚡
Quick answer: Upload your image as a decal on the Roblox Creator Hub (or pick an existing decal from the Roblox store), copy its asset ID, then paste that ID into the Guild Image ID box at the Guild Master NPC on Punch Island in Sea 2.
Image credit: Roblox (via YouTube/@NoobBlox)
What you need before you start
The image field only appears once you can actually open the guild creation menu. That means you need to be deep enough into the game to talk to the Guild Master.
If you only want to change the icon on an existing guild, the same image rules apply. The first guild name change is free, but later changes consume another Guild Key on a 24-hour cooldown.
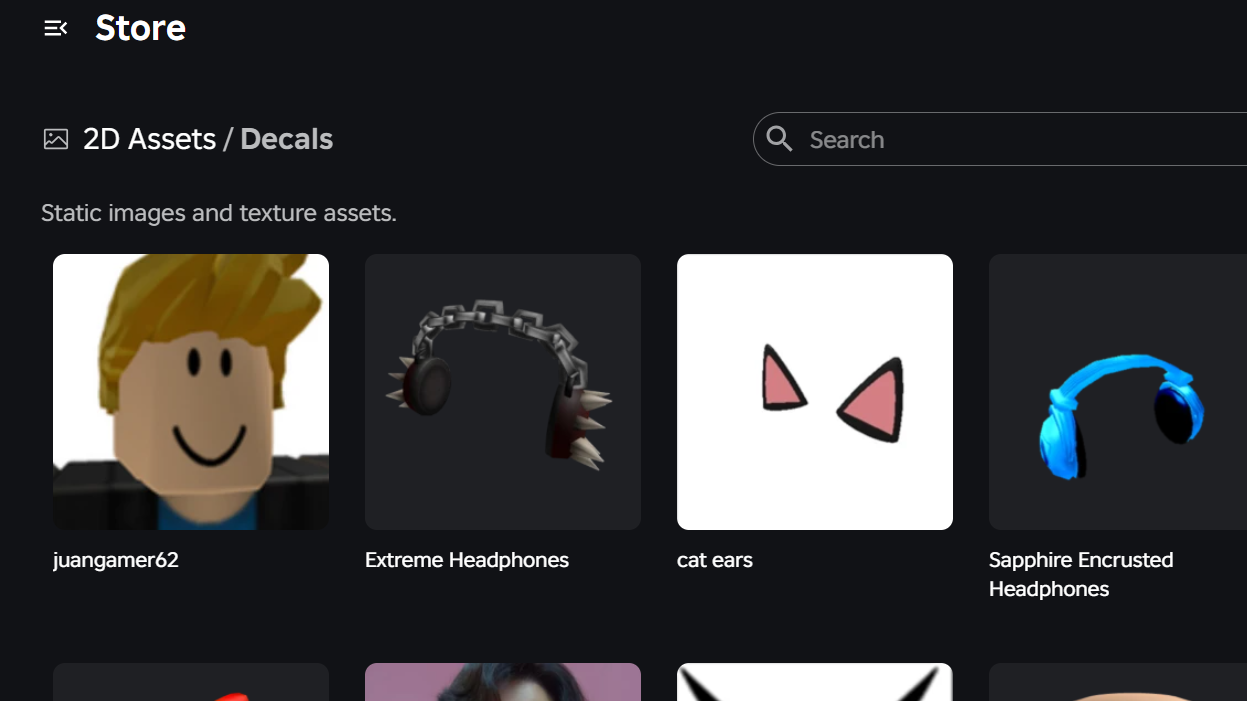
Get a decal asset ID from Roblox
Sailor Piece accepts any public Roblox decal ID for the guild icon. You have two paths: pick a decal that already exists in the catalog, or upload your own image and use the ID Roblox generates for it.
Open the Roblox decals store in your browser. Use the search bar to find an image that fits your guild theme, such as an anime character, logo, or meme.
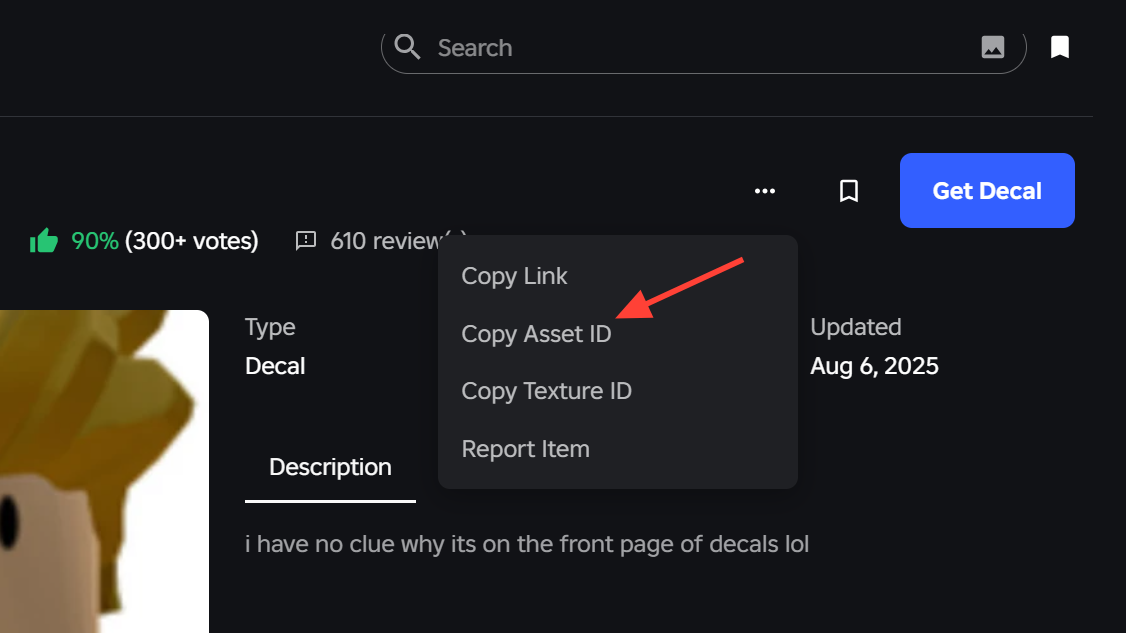
Click on a decal to open its detail page. The asset ID is the long number at the end of the URL. You can also click the three-dot menu in the top right of the decal page and choose Copy Asset ID.
Click Upload Asset and choose your image file. Roblox accepts PNG, JPEG, TGA, and BMP, with a 20 MB limit, and a 512×512 square image works well for a circular guild icon.
Once it appears in your Decals list, click the three-dot menu on the asset and select Copy Asset ID. That number is what Sailor Piece needs.
⚠️
Note: The Roblox audio or model ID will not work here. The game expects a decal ID specifically. If you grab the ID before moderation finishes, the icon may appear blank until the asset is approved.
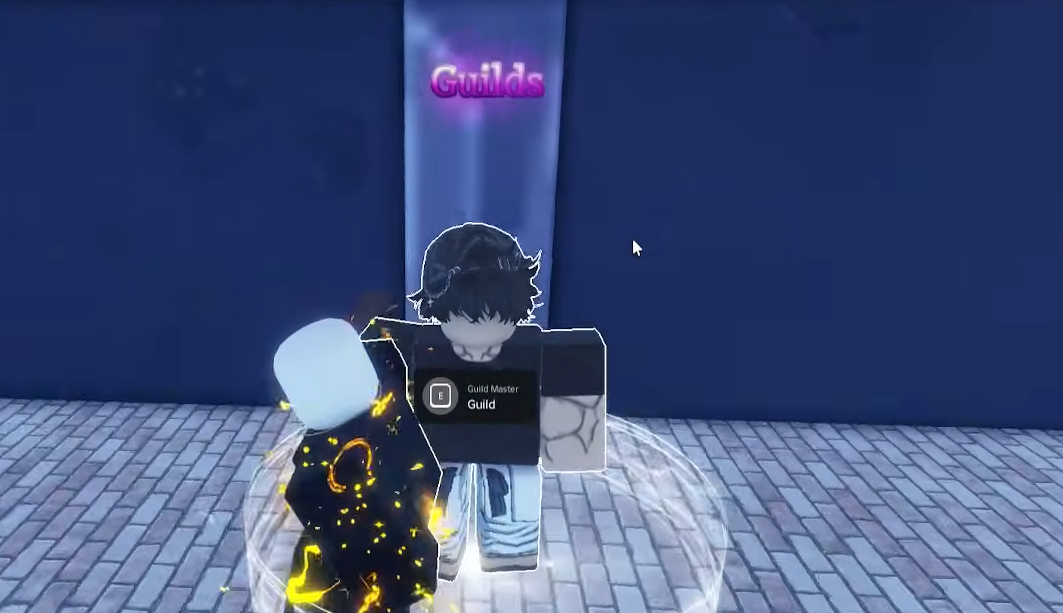
Travel to Punch Island in Sea 2 and walk to the central road intersection where the Cosmic Being boss spawns. The Guild Master NPC stands to the right of that area.
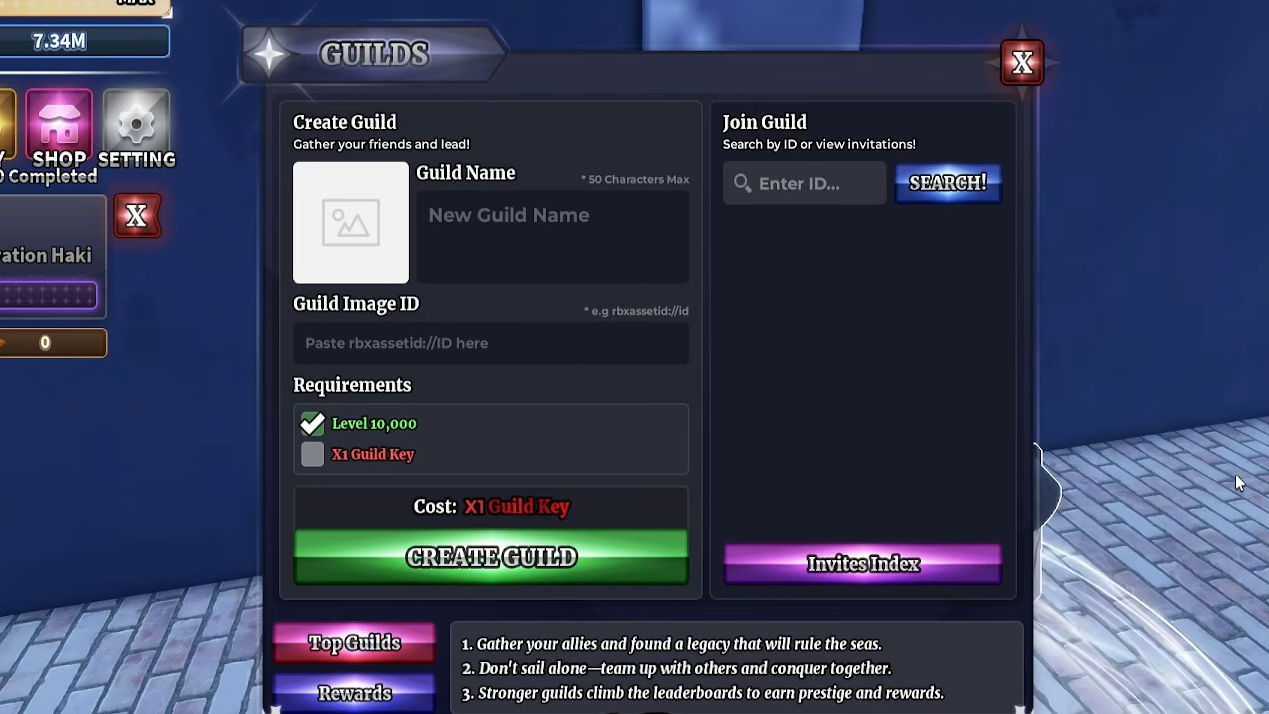
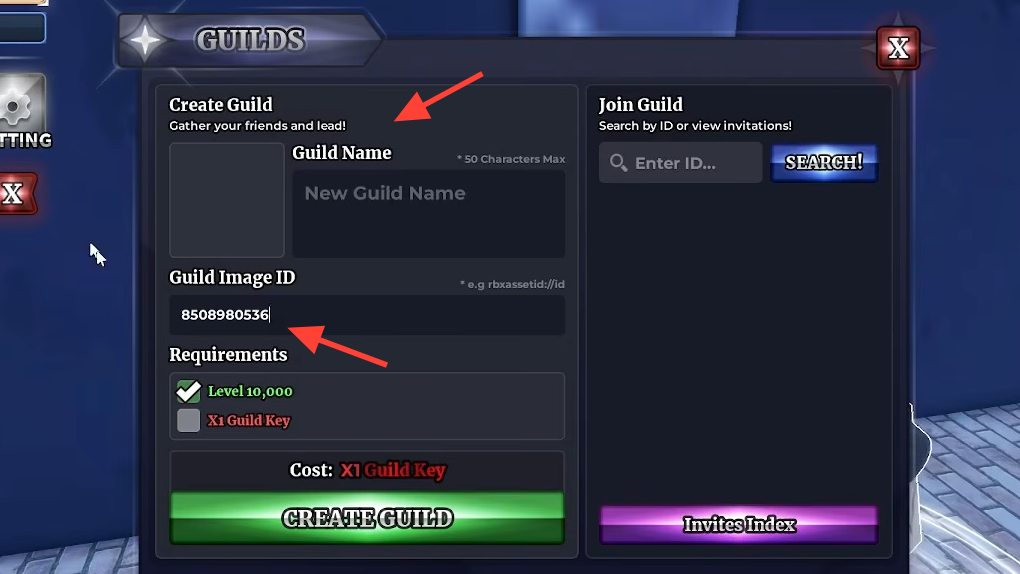
Type your guild name in the Guild Name field. Then, click the Guild Image ID field labeled “Please paste asset ID here” and paste the decal asset ID you copied.
Enter a Guild name and paste the Asset ID you copied in the Guild Image ID section | Image credit: Roblox (via YouTube/@NoobBlox)
Confirm both requirements are checked (Level 10,000 and 1x Guild Key), then press Create Guild. The icon should render immediately on the guild overview screen and on the leaderboards.
To change the icon later, open the Settings tab inside the guild menu and update the icon ID field. The first name change is free, but icon changes follow the same Guild Key cost rules as other admin edits after the initial setup.
If the icon shows up gray or blank
A missing or gray icon almost always traces back to the asset itself, not the game. Run through these checks in order before assuming something is broken.
You will know the icon is correctly linked when it appears next to your guild name on the overview tab and inside the Top Guilds leaderboard. If it shows there, every member and every player browsing guilds will see the same image.
Image credit: Roblox (via YouTube/@NoobBlox)
Picking an image that actually reads at small sizes
Guild icons render fairly small on the leaderboard and inside invite cards. Detailed artwork tends to turn into mush at that scale. Bold shapes, a single character, or a clean logo on a contrasting background hold up better than busy compositions. A square image around 512×512 keeps things sharp without forcing Roblox to downscale a much larger file.
Once your icon is set, the rest of the guild systems open up as expected: contributions, point upgrades for damage, crit, HP, luck, and member capacity, plus the leaderboard race for top 100 rewards. The image is purely cosmetic, but it is the first thing other players see when deciding whether to send a join request.