Relics arrived in Sailor Piece alongside the Sea 2 expansion, and they work as equippable stat buffs aimed at the tougher enemies waiting in the second sea. There are four to collect, each crafted from numbered Relic Parts that drop from specific NPCs scattered across Sea 2 islands.
Every relic and its buff
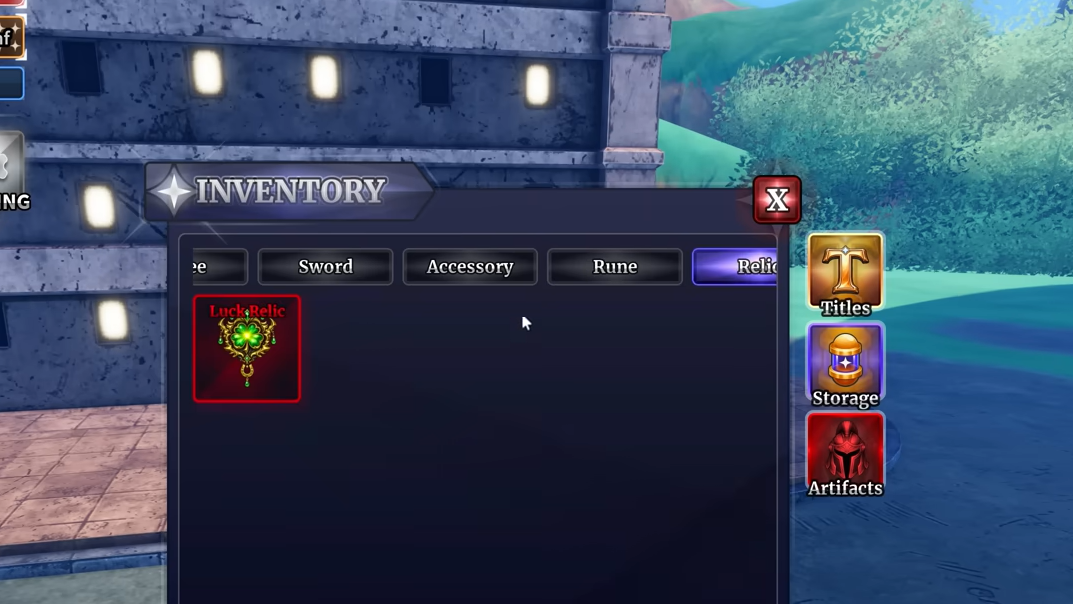
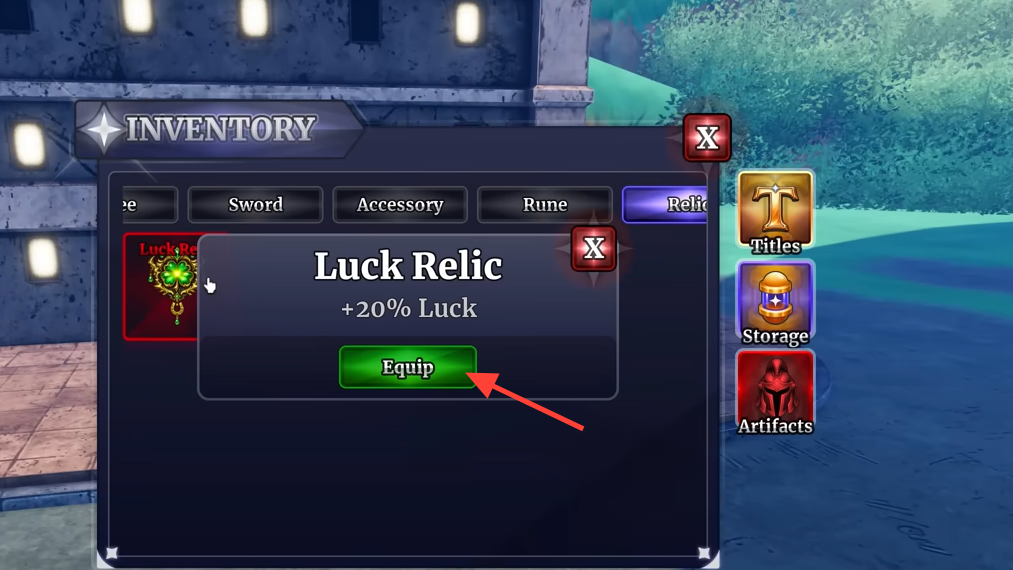
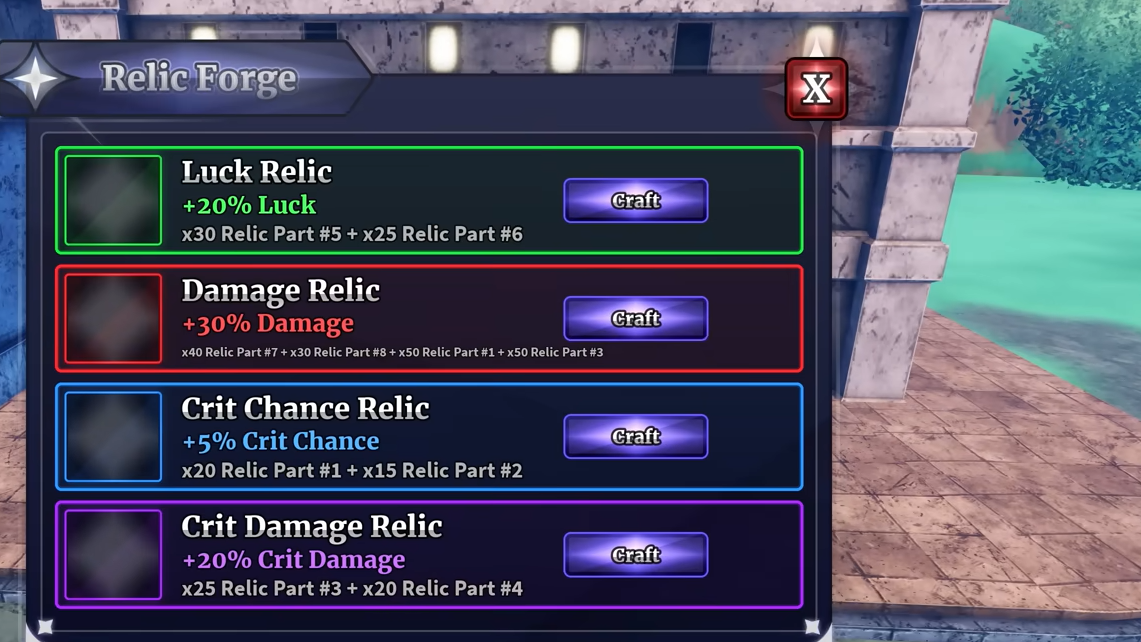
Four relics exist right now, split between offensive scaling and a luck option for drop farming. Only one relic can be equipped at a time through the Relics tab in your inventory, similar to how auras and runes slot in.
| Relic | Buff | Parts required |
|---|---|---|
| Luck Relic | +20% Luck | 30× Relic Part #5, 25× Relic Part #6 |
| Damage Relic | +30% Damage | 40× Relic Part #7, 30× Relic Part #8, 50× Relic Part #1, 50× Relic Part #3 |
| Crit Chance Relic | +5% Crit Chance | 20× Relic Part #1, 15× Relic Part #2 |
| Crit Damage Relic | +20% Crit Damage | 25× Relic Part #3, 20× Relic Part #4 |
The Damage Relic is the most expensive by a wide margin since it pulls from four different part types, including the two deepest in Sea 2. The Crit Chance Relic is the cheapest entry point and a reasonable first craft while you build a damage setup.
Where each Relic Part drops
Relic Parts only drop from regular NPCs in Sea 2, and each enemy type is tied to two specific part numbers. Normal mobs in Sea 2 take 25% reduced damage, bosses take 35% reduced, and world bosses and Sea Beasts take 40% reduced, so expect your usual numbers to look smaller here, even with a strong build.
| Parts | NPC | Location |
|---|---|---|
| #1 and #2 | Delinquent | Starter Island Sea 2 |
| #3 and #4 | Strong Fighter | Starter Island Sea 2 |
| #5 and #6 | Strong Bandit | Bizarre Island |
| #7 and #8 | Fast Ninja | Punch Island |
Because mob damage resistance is high across Sea 2, AFK farming a single spawn pocket is the cleanest way to stack parts. Bring your strongest damage setup before committing to a long session, otherwise kill speed will drag the drop rate down with it.
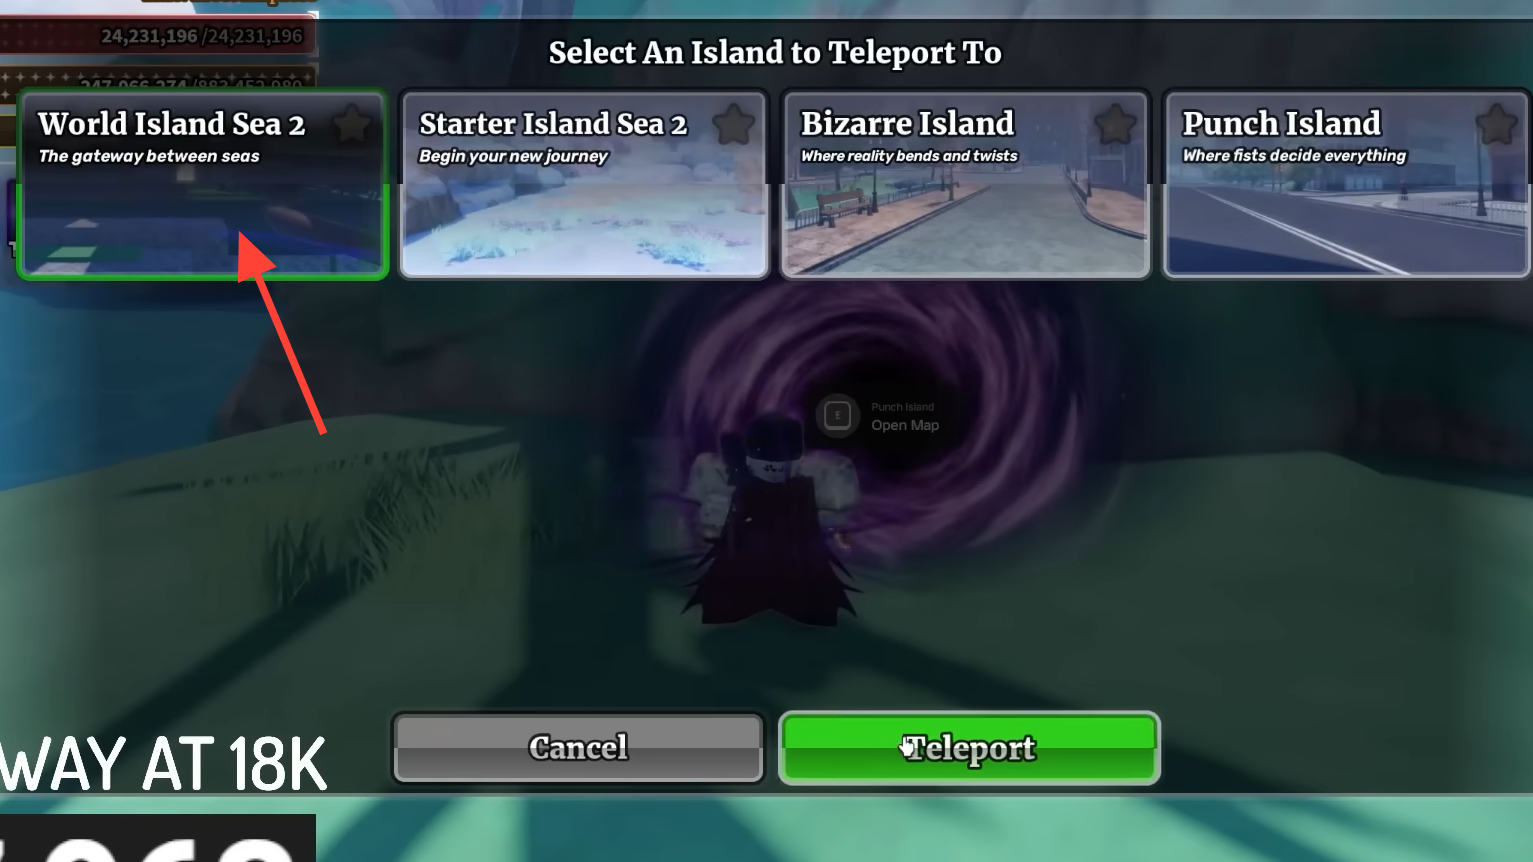
Unlocking Sea 2 first
Relics and Relic Parts do not drop anywhere in Sea 1, so entry to Sea 2 is a hard requirement. You need to collect the two Ancient Fragments and the Map Pieces to open the route, which is tied into the second sea quest chain.
Once you reach Sea 2, use any nearby teleporter to hop between islands. Starter Island Sea 2 is where you will spend the most early time, since both the Delinquent and Strong Fighter live there and together cover half of the relic crafting materials.
Crafting at the Relic Crafter NPC
Equipping a relic
Open your inventory and switch to the Relics tab. Select the relic you want active and confirm to equip it. Your character profile will reflect the new stat, which is how you verify the buff is applied. Swapping relics follows the same flow as auras and runes, and only one relic slot is available.
Farming notes that matter
Since all eight part numbers come from only four enemy types, plan which relic you want before grinding. The Damage Relic alone eats 170 parts across four types, which means visiting all three islands in rotation. The Luck Relic, by contrast, is a Bizarre Island-only farm once you are already there for crafting.
If drops feel slow, the only real levers are raising your Luck stat through runes, clan bonuses, or a luck-focused species reroll, and increasing your raw damage so kills happen faster. The 25% damage reduction on Sea 2 mobs is a flat environmental rule, so brute-forcing through it with a stronger build is usually more productive than chasing any single farming trick.