Sandrone is a 5-star Cryo Claymore character who plays as an on-field main DPS, and her entire kit hangs on one thing: keeping the Stellar-Conduct reaction going. She is the first unit that can trigger it, so building her team is less about mixing elements freely and more about guaranteeing that Electro and Cryo keep landing on the enemy. Get that right and her Charged Attack, Skill, and Burst all pay out. Get it wrong and most of her damage simply never happens.
Quick answer: Run Sandrone with one off-field Electro applicator (Yae Miko is best) and one off-field Cryo unit (Qiqi), then fill the last slot with a buffer or healer such as Escoffier, Nicole, Sucrose, or Xilonen. For a free-to-play version, use Beidou, Diona, and Fischl around her.
What Sandrone needs from her team
Stellar-Conduct is built on top of Superconduct, so it needs both Electro and Cryo applied to the same enemy. Instead of dealing flat damage like Superconduct, it drops a Polestar Field on the target. Inside that field, Cryo and Electro DMG go up, the field’s own multipliers scale with how much Electro and Cryo you apply, and enemy Physical resistance drops by 40 percent.
The catch is uptime. The field’s strength is calculated from the amount of Electro and Cryo applied in short intervals, so you want teammates that keep hitting the target from off-field while Sandrone stays on it. That is why off-field application matters more than raw off-field damage here. Cyno and Wriothesley can also use Stellar-Conduct, but they are on-field DPS themselves, so they do not slot in next to Sandrone.
Note: the 40 percent Physical resistance shred is not enough to justify a Physical DPS team, so don’t try to force one around it.
Premium Stellar-Conduct team
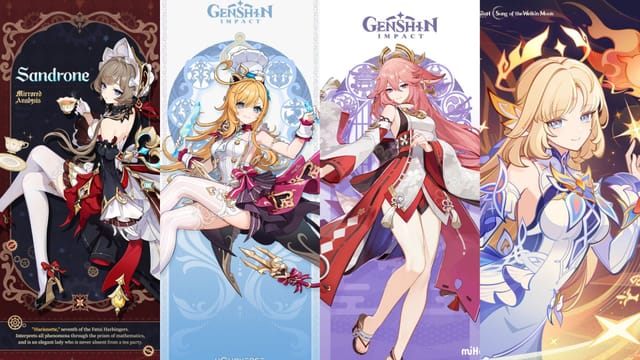
The strongest current setup is Sandrone, Yae Miko, Qiqi, and a flexible fourth slot. Yae Miko is the standout because she is the only 5-star Electro off-field sub-DPS with Stellar-Conduct synergy, applying Electro through the whole rotation while dealing solid damage of her own. Qiqi handles Cryo application and healing, and while her Skill is active she raises the party’s Stellar-Conduct DMG by 50 percent, which is exactly where most of Sandrone’s damage comes from.
| Slot | Character | Role |
|---|---|---|
| Main DPS | Sandrone | On-field Stellar-Conduct trigger and carry |
| Electro | Yae Miko | Off-field Electro application and sub-DPS |
| Cryo | Qiqi | Off-field Cryo, healing, +50% Stellar-Conduct DMG on Skill |
| Flex | Escoffier / Nicole / Sucrose / Xilonen | Cryo shred, ATK buff, RES shred, or healing |
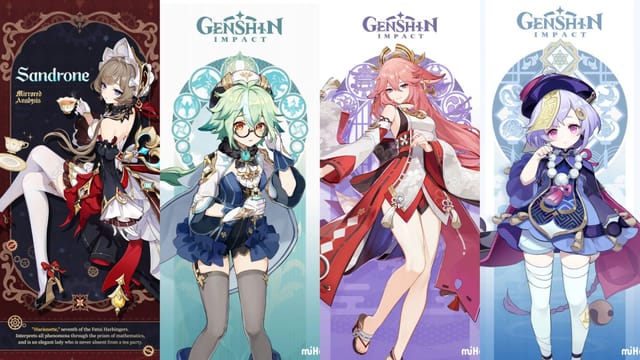
For that last slot, pick based on what your team is missing. Escoffier adds off-field Cryo, resistance shred, and Burst healing. Nicole shields the team and buffs Sandrone’s ATK, which she scales from directly. Sucrose brings Viridescent Venerer resistance shred plus an Elemental Mastery boost. Xilonen shreds both Cryo and Electro resistance and can heal, but keep her off Scroll of the Hero of Cinder City, since that set does not buff Stellar-Conduct damage. Put her on Instructor instead.
Free-to-play Sandrone team
You can run a fully free-to-play Sandrone team thanks to buffed 4-star supports. Beidou and Diona carry most of the work, so a lineup of Sandrone, Beidou, Diona, and Fischl covers both elements without any 5-star pulls.
- Beidou lowers enemy Cryo resistance by 15 percent at C6 and grants 200 Elemental Mastery, on top of damage reduction and interruption resistance. Her reworked Skill generates more Energy and has a shorter cooldown, so her Burst comes back reliably.
- Diona provides shields, healing, and off-field Cryo, and at C6 she raises the team’s Stellar-Conduct DMG by 40 percent along with her own 200 Elemental Mastery buff.
- Fischl is a dependable off-field Electro enabler to keep Stellar-Conduct triggering. Sucrose can take this slot instead if you want grouping and resistance shred.
Best support options for Sandrone
Because Sandrone scales off ATK and wants constant elemental application, her supports fall into a few clear jobs. Use this to swap pieces in and out depending on who you own.
| Character | Element | What they bring |
|---|---|---|
| Yae Miko | Electro | Best off-field Electro sub-DPS; adds buffing at C1 (free from Temper Thy Fate) and C2 |
| Beidou | Electro | 15% Cryo RES shred at C6, 200 EM, defensive utility |
| Fischl | Electro | Reliable off-field Electro for F2P teams |
| Qiqi | Cryo | Healing, off-field Cryo, +50% Stellar-Conduct DMG while Skill is active |
| Diona | Cryo | Shield, healing, +40% Stellar-Conduct DMG and 200 EM at C6 |
| Escoffier | Cryo | RES shred, off-field Cryo damage, optional Burst healing |
| Nicole | — | Team shield and ATK buff that also helps Yae Miko and Escoffier |
| Bennett | Pyro | Large ATK buff for a wildcard build |
| Sucrose | Anemo | Viridescent Venerer RES shred and teamwide EM |
| Xilonen | Anemo | Cryo and Electro RES shred, healing, big CRIT DMG buff with Sandrone C2 |
Diona at C6 buffs more than a pre-C6 Qiqi and adds a shield, but her Burst cooldown pushes rotations to 20 seconds, which can lower overall DPS. Weigh that against Qiqi’s more flexible timing when you decide between them.
Team variations when you’re missing key units
Not everyone has the full premium roster, and Sandrone still works with several substitutions. These lineups trade a little raw output for flexibility.
No Escoffier, Nicole, or Sucrose
Slot a C6 Beidou or C6 Diona into the fourth spot alongside Yae Miko and Qiqi. Both bring Stellar-Conduct-related boosts and hold Noblesse Oblige comfortably. They aren’t quite the premium picks, but they stay competitive with top-tier teams.
No Yae Miko
Beidou at C6 can stand in as your Electro sub-DPS with Qiqi and Nicole rounding out the team. A C0R1 Sandrone paired with C6 Beidou performs close to a C0R0 Sandrone with Yae Miko, especially if you invest the wishes you saved into Sandrone’s signature weapon instead.
Double Pyro wildcard
Sandrone, Yae Miko, C6 Bennett, and Nicole leans on huge ATK buffs to Sandrone and Yae Miko rather than the Stellar-Conduct field. It ignores the reaction’s field mechanics, so it isn’t the default way to build her, but it can be handy for specific boss gimmicks. Bennett runs Noblesse Oblige here.
Lunar-Charged hybrid
Stellar-Conduct and Lunar-Charged can sit on the same target while both keep their defining effects, the Lunar-Charged cloud and the Polestar Field. An Ineffa and Columbina pairing already deals strong sub-DPS damage on its own, and adding Sandrone still nets a DPS gain because she can trigger Stellar-Conduct off Ineffa’s application.
Build choices that change your team
A couple of gear rules affect who you bring. Stellar-Conduct damage does not benefit from plain elemental DMG Bonus passives, so weapons like Serpent Spine and the Scroll of the Hero of Cinder City artifact set fall off on Sandrone and her Anemo support. Her best set is Disenchantment in Deep Shadow, which boosts Superconduct damage and adds CRIT Rate against Superconduct-affected enemies. Yae Miko can share that same set, while Qiqi runs Tenacity of the Millelith for a teamwide ATK buff.
You’ll know a team is working the moment the Polestar Field appears on the enemy and Sandrone’s Charged Attack, Skill, and Burst start registering Stellar-Conduct hits. If those numbers aren’t showing up, the usual cause is a gap in Electro or Cryo application, so add or re-time an off-field applicator before touching anything else.
Sandrone’s roster is still young, and her teams are expected to grow once Snezhnaya characters arrive. For now, the Yae Miko and Qiqi core is the safest place to start, and every other option here is really about how you fill the space around it.