Sandrone lands in Genshin Impact Version 6.7 as a 5-star Cryo Claymore main DPS built entirely around the reworked Stellar-Conduct reaction. She already performs well at C0 R0, but her signature weapon and her first constellation both push her damage higher in different ways. With most players unable to fund both, the real question is which one earns your Primogems first.
Quick answer: Pull R1 (A Teaspoon of Transcendence) first. It is the larger and more reliable damage gain in most accounts. Only lean toward C1 instead if you already own a strong Claymore stat stick like The Unforged or A Thousand Blazing Suns.
R1 signature: A Teaspoon of Transcendence
Sandrone’s signature Claymore is her clear best-in-slot weapon, and the gap over everything else is wide. At level 90 it carries a Base ATK of 674 and a CRIT DMG substat of 44.1%, which already matches her stat priorities.
The passive raises ATK by 28% at R1. On top of that, every time she lands a Charged Attack she gains “Transcendence,” increasing her Stellar-Conduct DMG by 16% for 5 seconds. The effect can refresh once every 0.2 seconds and stacks up to three times. Because her whole rotation is built on holding Charged Attacks, she keeps this bonus at near-permanent uptime, so all three stacks are live for most of her damage.
In relative terms the signature sits far above her other options. It benchmarks around 133% against Tidal Shadow at 100%, which is her best craftable free-to-play weapon. A Thousand Blazing Suns follows at roughly 113%, then Redhorn Stonethresher near 109% and The Unforged around 108%. If your only real choice for her is Mailed Flower or Tidal Shadow, the signature is a large upgrade and the priority pull.
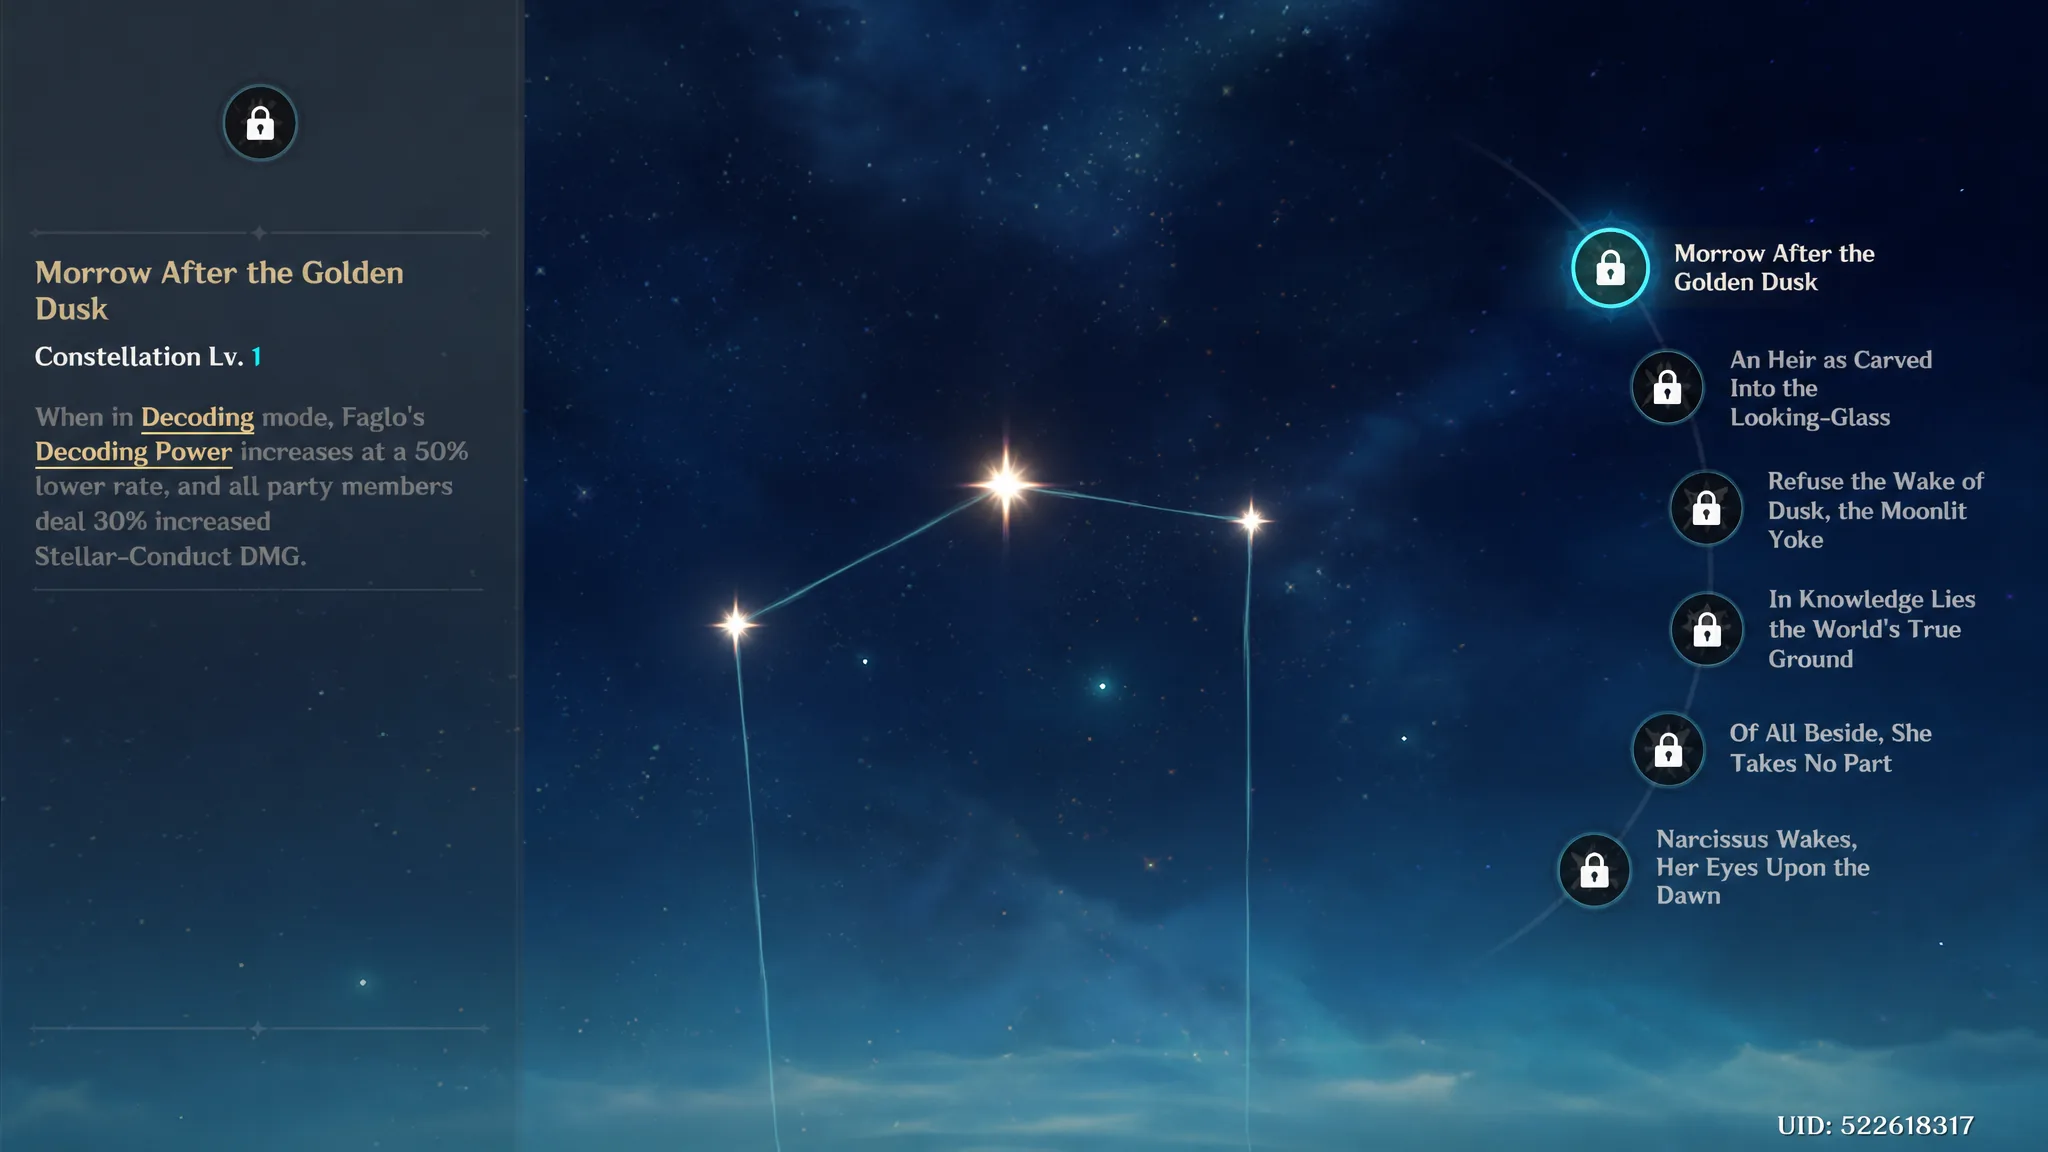
C1: Morrow After the Golden Dusk
Sandrone’s first constellation, Morrow After the Golden Dusk, does two things. While she is in Decoding mode, Fagio’s Decoding Power builds at a 50% slower rate, and all party members deal 30% more Stellar-Conduct DMG.
The slower Decoding Power build is the comfort upgrade. It lets Sandrone hold her Charged Attack beams for longer before she has to cast her Elemental Skill to reset, so the rotation feels smoother and less rushed. At C0 the loop cycles quickly, which some players find frantic. C1 stretches each beam window and turns the gameplay into a calmer one-and-done rhythm.
The 30% party-wide Stellar-Conduct boost is the raw damage half. It is a solid team-wide buff, but for pure personal DPS the constellation is modest. Early feedback pegged the personal gain as small, and some setups even measured C1 as roughly neutral before other buffs entered the picture. Its strongest case is team DPS in Cryo/Electro reaction comps rather than Sandrone’s own numbers.

C1 vs R1 side by side
| Factor | R1 (A Teaspoon of Transcendence) | C1 (Morrow After the Golden Dusk) |
|---|---|---|
| Main effect | +28% ATK, up to +48% Stellar-Conduct DMG at 3 stacks | +30% party Stellar-Conduct DMG, 50% slower Decoding Power gain |
| Personal DPS gain | Large, and consistent through her Charged Attack loop | Small |
| Team DPS gain | Strong through her own output | Larger buff to the whole party |
| Quality of life | None beyond stats | Longer beam windows, calmer rotation |
| Best when | You lack a strong Claymore for her | You already own a top-tier stat stick |
One nuance worth keeping in mind is team versus personal damage. Measured in team DPS, moving from Redhorn Stonethresher up to R1 lands around an 8.2% increase, while C1 sits closer to 12.9% in some setups. If you already have Redhorn or a similar Attack stat stick equipped, C1 can pull ahead on total team output. Without a strong Claymore in hand, R1 stays the better single investment.
Which to pull based on your current weapons
| What you already own | Recommended pull |
|---|---|
| Only Mailed Flower or Tidal Shadow for her | R1 signature |
| The Unforged or A Thousand Blazing Suns | C1 constellation |
| Redhorn Stonethresher or Wolf’s Gravestone | Either works; C1 favors team DPS, R1 favors comfort and personal DPS |
| No strong Claymore at all | R1 signature |
Note: Claymore users are known for weak free-to-play options, and several usually strong DPS Claymores fall short here. Weapons whose passives grant flat elemental DMG Bonus%, including Serpent Spine, do not apply to Stellar-Conduct damage, so they underperform on Sandrone despite looking good on paper. That makes the signature more meaningful for accounts without a suitable stat stick.
For most players the path is straightforward. Take R1 first for the biggest, most consistent boost to Sandrone’s damage and to complete her kit, then revisit C1 on a later rerun once you decide whether you want the smoother rotation and the extra team buff. As a Harbinger, Sandrone is expected to return multiple times, so skipping the constellation now costs you very little in the long run.