
Hollow Knight: Silksong replaces the original game’s Charms with Tools — a color‑coded loadout system that sits at the center of both combat and traversal. Tools slot into your currently equipped Crest, and that Crest doesn’t just govern how many Tools you can run; it also nudges Hornet’s fundamentals, from attack animations to dash and pogo angles and even Silk economy. The result is a kit you actively tune for boss phases, gauntlets, and route planning rather than a passive set‑and‑forget build.
Slots, colors, and what they actually do
Tools fall into three in‑game categories, each tied to matching slots on your Crest:
- Red (active): Projectiles, traps, bombs, and other gadgets you actively deploy. They carry limited charges and are refilled at benches, typically by spending Shell Shards.
- Blue (passive combat): Always‑on effects that influence offense, defense, healing, or resource flow — think damage auras while binding or faster Silk regeneration.
- Yellow (utility/support): Passive perks geared toward exploration, mobility, and economy, like map tracking, better loot pickup, or cling‑to‑wall options.
Silk Skills are separate from Tools (they’re effectively the “white” category you see on the HUD). They spend Silk directly for powerful attacks or defensive techniques and sit alongside Tools on your Crest.
Crests define your build — and they evolve
You can equip only one Crest at a time, and each Crest sets the number and color of Tool slots, adds a unique mechanic, and tweaks the feel of Hornet’s core moves. As you progress, locked slots on Crests can be opened with Memory Lockets. That makes Lockets a quiet power curve: every unlock widens your configuration options across multiple Crests.
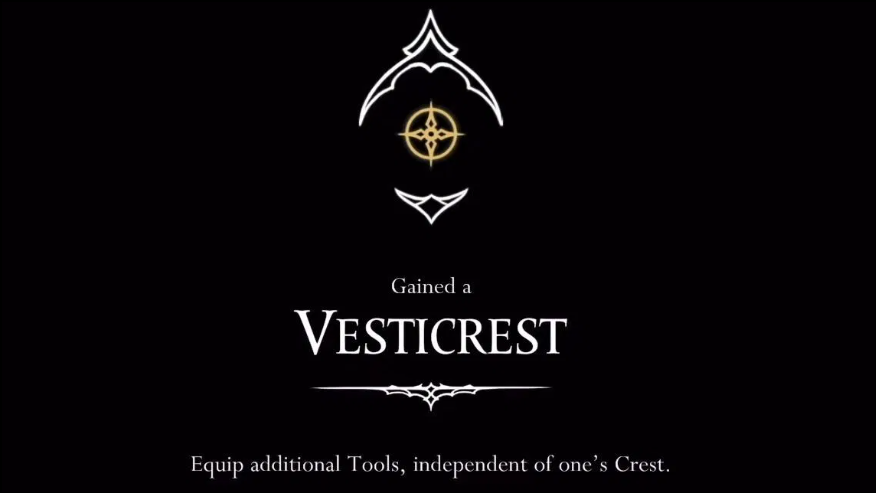
There’s also a Vesticrest layer. After opening enough total slots across Crests, you gain additional always‑available Tool slots — first a Yellow slot, then later a Blue. Whatever you assign to the Vesticrest carries across any Crest you equip, which is ideal for a utility staple (like Compass) and a favorite combat passive (for example, a binding buff).
How Tools are acquired
Nearly every route through Pharloom will surface new Tools. You’ll find them in the world, buy them from vendors, craft them at benches, win them from bosses, or earn them through Wishes (side quests). A few upgrade or transform after meeting follow‑on conditions rather than taking up new slot space.
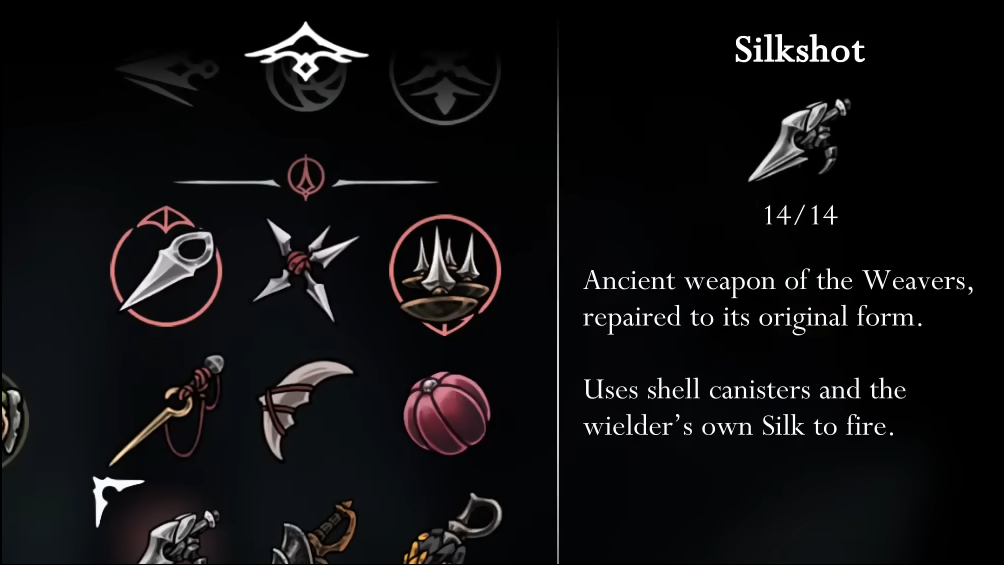
The Silkshot fork: one item, three behaviors
One standout Red Tool, the “Ruined Tool,” can be repaired in three different places, and each repair permanently changes how Silkshot fires. You only get one version in a playthrough:
- Forge Daughter: A slow, heavy slug — think shotgun slug behavior.
- Twelfth Architect: An ascending three‑round burst per trigger pull.
- Mount Fay workshop: A brief charge into a high‑damage rail beam.
All three spend Silk to fire; the choice is about reliability and burst profile. The burst favors close, multi‑hit windows, the slug rewards single‑target pacing, and the rail beam trades setup time for consistent payoff.
Notable Tools worth knowing
There are dozens of Tools, but a subset tends to anchor most loadouts. Here are the ones players routinely build around, grouped by their slot color and job.
Red (active)
- Straight Pin / Threefold Pin: Quick throwables for safe chip and stance checks.
- Sting Shard: Ground trap that controls space and enables pogo punishes.
- Curveclaw / Curvesickle: Arcing throws to delete airborne threats or tag multiple targets.
- Tacks: Scatter on the floor; excellent against dashing bosses and add waves.
- Throwing Ring: Rebounding disc for sustained, low‑maintenance pressure in cramped arenas.
- Pimpillo: A classic bomb — burst damage, fuse timing, terrain checks.
- Conchcutter: Angled ricochet blade to hit around corners and catch rolls.
- Delver’s Drill: Downward drive that breaks clusters and doubles as a positional tool.
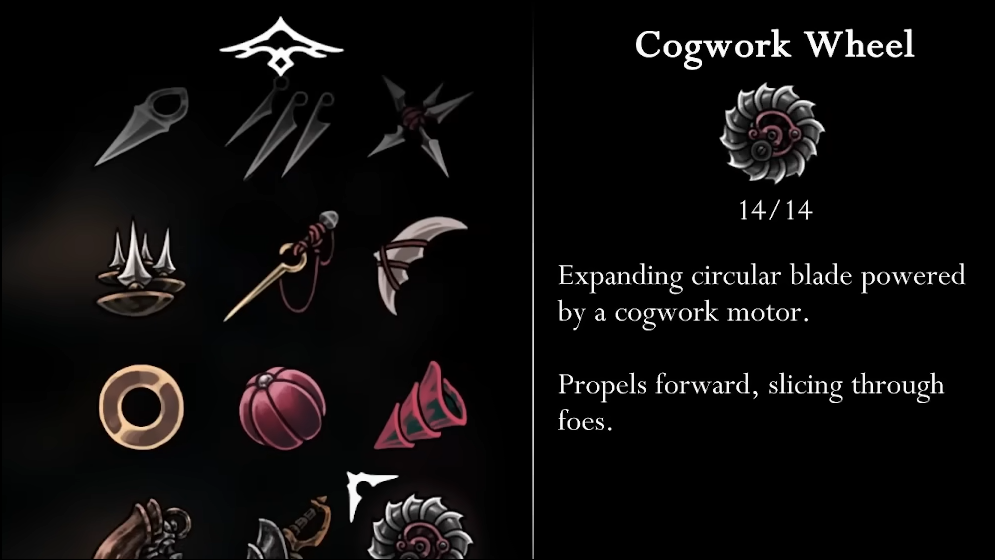
- Cogwork Wheel: A forward, lingering hitbox that shreds lines of enemies and multi‑hits bosses.
- Snare Setter: Silk rune trap that ignites on contact; great for phase starts and choke points.
- Flintslate: Temporary fire on the needle — a DPS window you plan around.
- Cogfly: A summon‑style companion that seeks and chips at nearby foes.
- Flea Brew: Short burst of movement and attack speed to compress damage windows.
- Plasmium Phial: Temporary health beyond your mask total; stabilizes greedy phases.
- Voltvessels: Throwable or stakeable electricity that either bursts in a bola or columns upward.
- Rosary Cannon: A resource‑hungry ranged option that reloads with rosaries for sustained output.
Blue (passive combat)
- Druid’s Eye → Druid’s Eyes (upgrade): Generates Silk when hit, improving bind uptime.
- Magma Bell: Cuts damage from heat and magma; a must in fire‑heavy routes.
- Fractured Mask: One free save against a lethal spike, repaired at benches.
- Pollip Pouch: Poisons your equipped Tools; excellent with multi‑hit or trap‑heavy kits.
- Warding Bell: Protective shield while binding — turns small heal windows into safe ones.
- Multibinder: Longer bind animation for a bigger heal; good if you can reliably create space.
- Weavelight: Faster Silk regeneration to feed both Skills and binds.
- Sawtooth Circlet: Cloak flare deals damage in a ring — passive add clear during movement.
- Reserve Bind: Stores an extra full bind for emergencies, refreshes at benches.
- Spool Extender: Increases your Silk capacity; enables more Skills before a heal tax.
- Injector Band: Faster binding — the simplest way to widen safe‑heal windows.
- Claw Mirror → Claw Mirrors (upgrade): Emit damaging flashes while binding; pairs naturally with bind‑centric Crests.
- Memory Crystal: Leaves a crystal “memory” on damage that bursts into spines when touched.
- Quick Sling: Doubles the number of Tools thrown; huge force multiplier for Red‑focused builds.
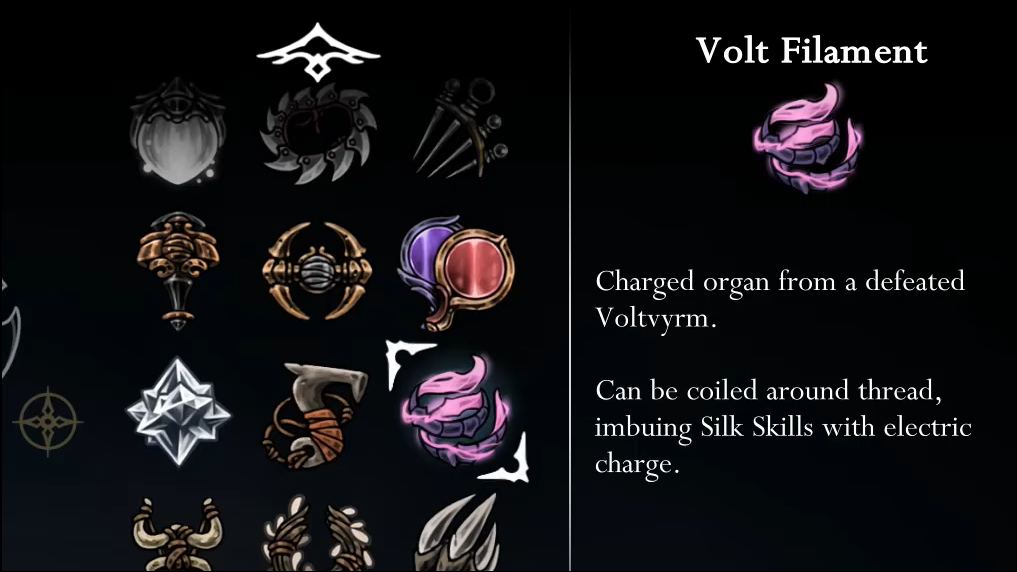
- Volt Filament: Charges Silk Skills with electricity; a cornerstone for Skill‑centric play.
- Snitch Pick: Harpoons foes to steal rosaries and Shell Shards while dealing damage.
- Wreath of Purity: Repels muckmaggots; repairs at benches if broken.
- Longclaw: Extends melee range — safer pokes and cleaner aerials.
- Wispfire Lantern: Spawns wisps that burn foes, consuming Silk; passive damage over traversal.
- Pin Badge: Reduces Needle Strike charge time to land more charged hits.
- Egg of Flealia: Lowers Silk Skill cost while at full health to front‑load damage.
Yellow (utility/support)
- Compass: Shows your position on the map — quality‑of‑life that saves time everywhere.
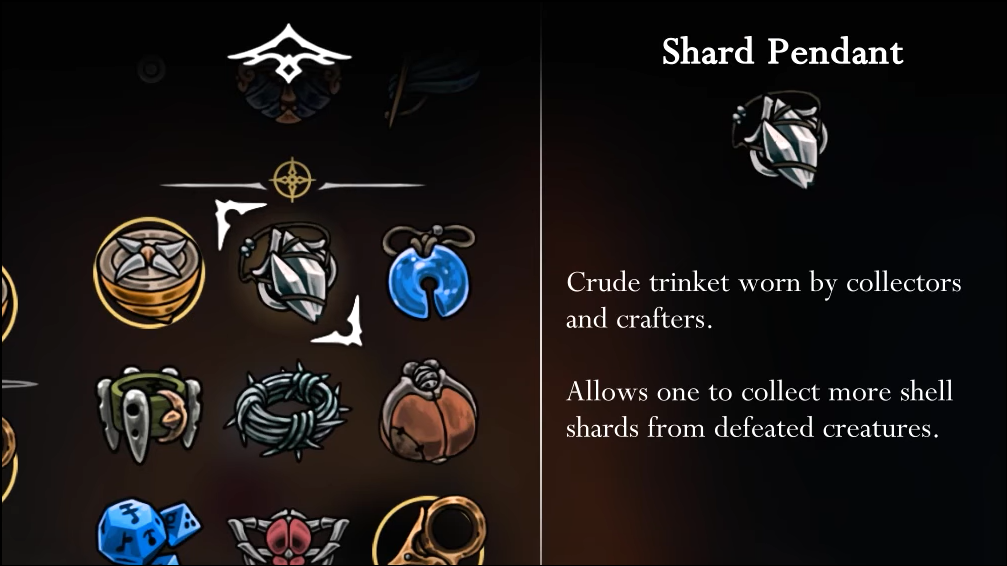
- Shard Pendant: More Shell Shards from kills to keep Red Tools topped off.
- Magnetite Brooch: Pulls rosary beads to you; makes cleanup and farming painless.
- Dead Bug’s Purse: Retains some rosaries on death; a safety net during expensive routes.
- Barbed Bracelet: Glass‑cannon trade: take more damage, deal more with the needle.
- Weighted Belt: Reduces recoil when hitting and when getting hit; steadies spacing.
- Shell Satchel: In Steel Soul, increases the quantity of crafted Tools you can carry.
- Magnetite Dice: RNG mitigation that can occasionally negate damage — small but meaningful.
- Scuttlebrace: Extra flexibility for quick retreats; useful in “learn the fight” runs.
- Silkspeed Anklets: Faster sprinting by consuming Silk; strong for sequence routing.
- Spider Strings: Amplifies Needolin; a mobility‑and‑control boost in music‑driven areas.
- Ascendant’s Grip: Lets you hold position on a wall, turning climbs into stable platforms.
- Thief’s Mark: Earn extra rosaries on kills but drop some when you take a hit — risk/reward economy.
Loadouts that just work
Because Crests change your slot mix, “best” is contextual. These templates are flexible and fit common scenarios:
- Exploration kit: Compass (Y), Magnetite Brooch (Y), Ascendant’s Grip (Y) on the Vesticrest; Weavelight (B) for resource flow; a single reliable Red (Straight Pin or Curveclaw) plus Plasmium Phial for insurance.
- Boss learning (safe binds): Warding Bell (B), Injector Band (B), Reserve Bind (B); a control Red (Sting Shard or Tacks) and one burst option (Flintslate or Cogwork Wheel).
- Red‑centric DPS: Quick Sling (B), Pollip Pouch (B), Spool Extender (B); pair with multi‑hit Reds (Tacks, Curveclaw/Curvesickle, Cogwork Wheel) and time a Flintslate window.
- Skill‑forward (Shaman‑leaning): Volt Filament (B), Spool Extender (B), Egg of Flealia (B) if you can maintain full health; a single complementary Red such as Throwing Ring to occupy down time.
- Glass‑cannon needle: Barbed Bracelet (Y), Longclaw (B), Pin Badge (B); supplement with a defensive Blue (Fractured Mask) to blunt the inevitable mistake.
Tip: Put your “always take” Yellow on the Vesticrest so you’re not swapping it every time you change Crests, and mirror that approach for a Blue staple you trust in any fight.
Practical notes and small advantages
- Red Tools and economy: If you lean on actives, Shard Pendant and Magnetite Brooch quietly keep the engine fed and reduce downtime between benches.
- Binding builds love AoE: Claw Mirror/Claw Mirrors, Sawtooth Circlet, and Warding Bell convert heal windows into pressure or safety — especially effective with Crests that incentivize frequent binds.
- Quick Sling is a multiplier: Doubling throws doesn’t just add damage; it doubles on‑hit riders (like Pollip poison) and increases the chance to stagger during short openings.
- One Silkshot, full stop: The repair choice is permanent per save. If you’re undecided, test your own consistency: do you land three quick hits often, or do you prefer a single, guaranteed beam?
- Slot unlock pacing matters: Memory Lockets that open additional slots can be bigger upgrades than a single new Tool. Prioritize routes that yield Lockets if your favorite Crest is still locked down.
What to equip first
Early on, grab a control Red (Sting Shard or Curveclaw), a survival Blue (Druid’s Eye or Fractured Mask), and a Yellow quality‑of‑life pick (Compass). Mid‑game, Quick Sling plus a multi‑hit Red turns short attack windows into real damage, and Plasmium Phial smooths shaky boss phases. Late‑game, lean into specializations: a binding core with Warding Bell/Injector Band, or a Skill core with Volt Filament and a larger Silk spool.
Why it matters: Silksong’s Tools aren’t just add‑ons — they’re the scaffolding for how you fight and move. Once you start swapping Crests and re‑slotting based on the room ahead rather than the last boss behind, the game opens up. There’s no single “best” setup; there is a set that’s best for the next five minutes.