
Factory resetting or freshly installing Windows 11 often results in a system cluttered with bloatware—unwanted apps like TikTok, Instagram, trial software, and various Microsoft Store suggestions. These apps can reappear after system updates or resets, frustrating users who want a clean, streamlined setup. Addressing this issue requires more than simply uninstalling apps; it involves changing system policies and, in some cases, customizing installation images to prevent these apps from returning.
Configure Group Policy to Block Consumer Features and Suggested Content
Setting specific Group Policy options is the most reliable way to prevent Windows 11 from reinstalling consumer bloatware and suggested apps, especially after a reset or feature update. This method works for both individual systems and enterprise deployments, and helps block Microsoft’s cloud-driven content from being reinstalled or pinned to the Start menu.
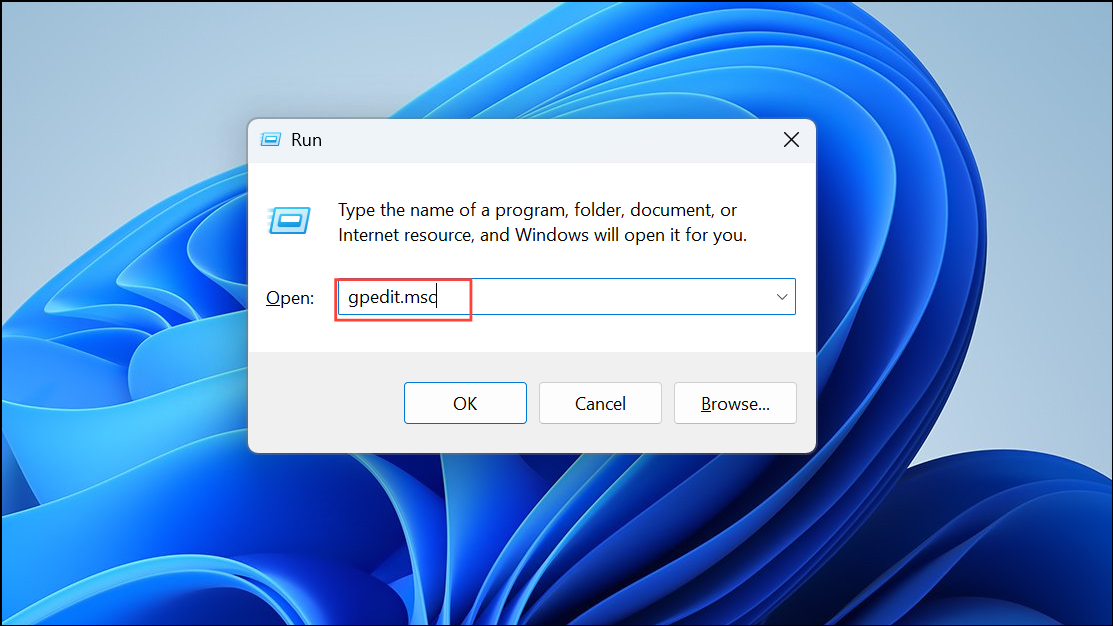
Step 1: Open the Local Group Policy Editor by pressing Windows + R, typing gpedit.msc, and pressing Enter. If you’re on Windows 11 Home, you’ll need to enable Group Policy Editor first or use registry tweaks as an alternative.
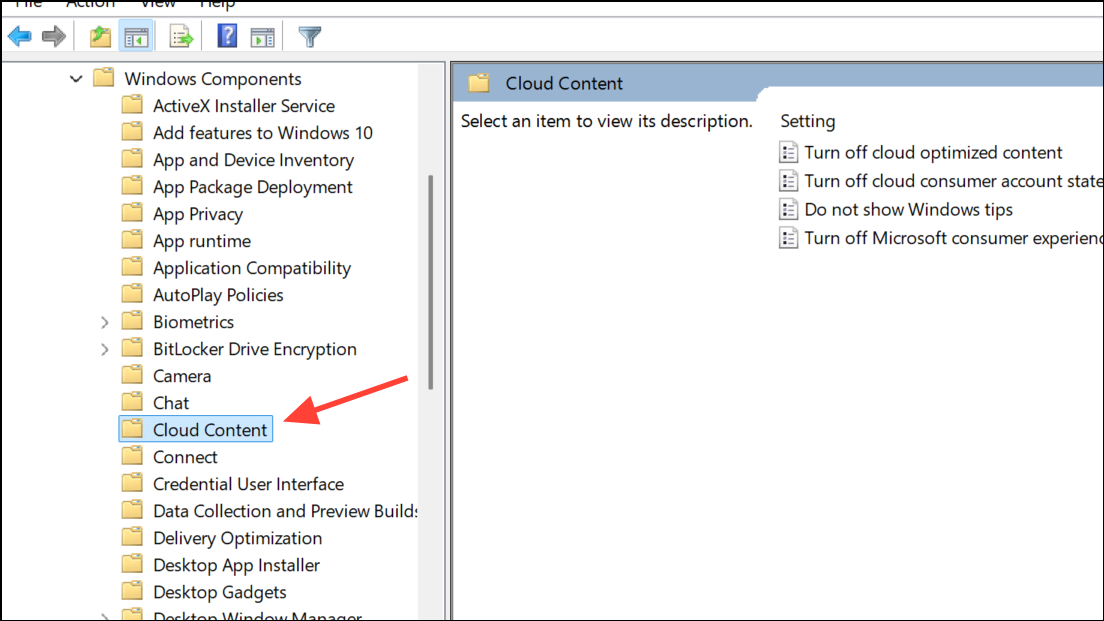
Step 2: In the Group Policy Editor, navigate to Computer Configuration > Administrative Templates > Windows Components > Cloud Content.
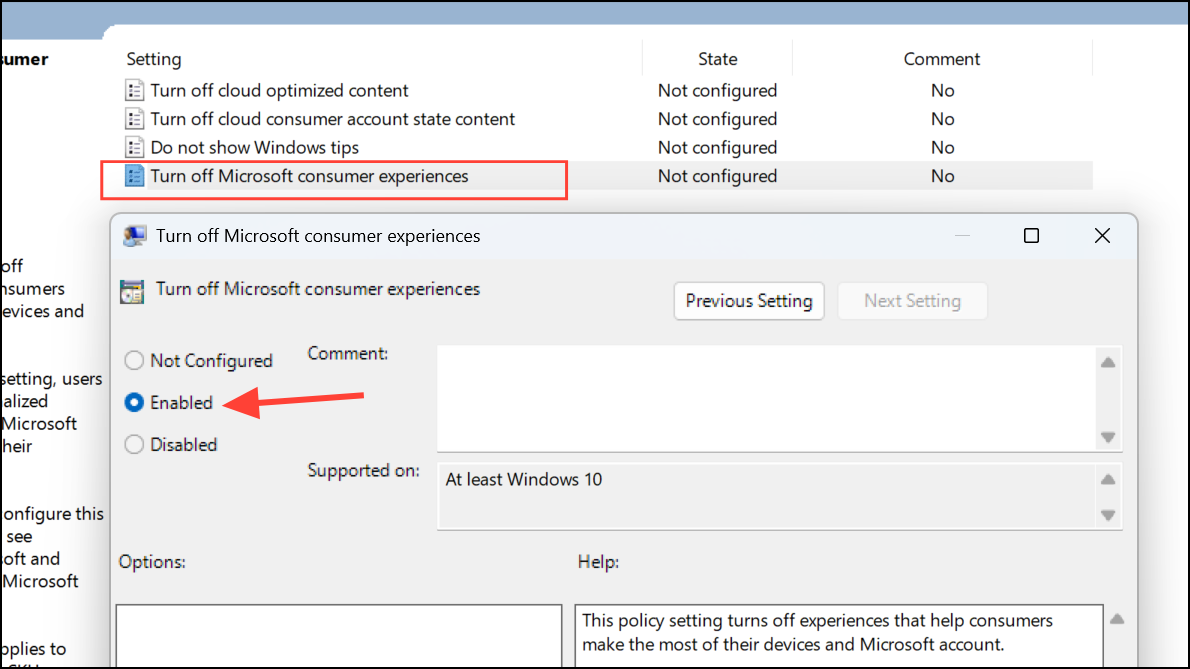
Step 3: Double-click Turn off Microsoft consumer experiences and set it to Enabled. This blocks the automatic installation of suggested apps and content, such as Candy Crush, Disney+, or Facebook, after resets or updates.
Step 4: Double-click Do not suggest third-party content in Windows Spotlight and set it to Enabled. This stops Windows from promoting third-party apps and services on the lock screen and Start menu.
Step 5: If you manage devices with Intune or similar MDM, set Consumer Features and Third-party suggestions in Windows Spotlight to Blocked in device restriction policies.
Step 6: Restart your computer to apply the new policies. These settings prevent Windows from automatically reinstalling most consumer bloatware and suggested content after future resets or updates.
Remove Preinstalled and Provisioned Apps Using DISM and PowerShell
For a more permanent solution, especially when preparing deployment images or VM templates, removing provisioned apps from the installation media ensures they are never installed on new accounts. This method is more technical and is best for IT pros or advanced users.
Step 1: Mount the Windows 11 installation image (ISO) to a folder on your PC. For example, copy all files from the ISO to C:\Windows11\Image.
Step 2: Use the Deployment Image Servicing and Management (DISM) tool to mount the Windows image. Identify the correct index for your edition (e.g., Enterprise) with:
dism /get-wiminfo /wimfile:C:\Windows11\Image\sources\install.wim
Then mount the image:
dism /mount-wim /wimfile:C:\Windows11\Image\sources\install.wim /mountdir:C:\Windows11\Mount /index:X
Replace X with your edition index.
Step 3: List all provisioned (preinstalled) apps in the image:
dism /image:C:\Windows11\Mount /Get-ProvisionedAppxPackages > C:\Windows11\apps.txt
Review the list and decide which packages you want to remove.
Step 4: Remove unwanted apps with the following command for each package:
dism /image:C:\Windows11\Mount /Remove-ProvisionedAppxPackage /PackageName:PackageFullName
Repeat for each bloatware package. Avoid removing core system apps unless you’re certain of their purpose.
Step 5: Commit changes and unmount the image:
dism /unmount-wim /mountdir:C:\Windows11\Mount /commit
Step 6: Use the modified image to install Windows 11. The removed apps will not be provisioned for any new user accounts, and will not return after resets.
Alternatively, for existing installations, use PowerShell as administrator to remove provisioned and installed apps:
Get-AppxPackage -AllUsers | Select Name, PackageFullName
Then remove apps with:
Get-AppxPackage -AllUsers AppName | Remove-AppxPackage
Replace AppName with the actual package name. Note: Some apps may be reinstalled by future updates unless Group Policy is configured as described above.
Uninstall Bloatware Manually Using Settings and Microsoft Store
Manual removal works for most user-facing bloatware, especially after a reset. However, this approach is less permanent, as some apps may return with updates if policies are not set.
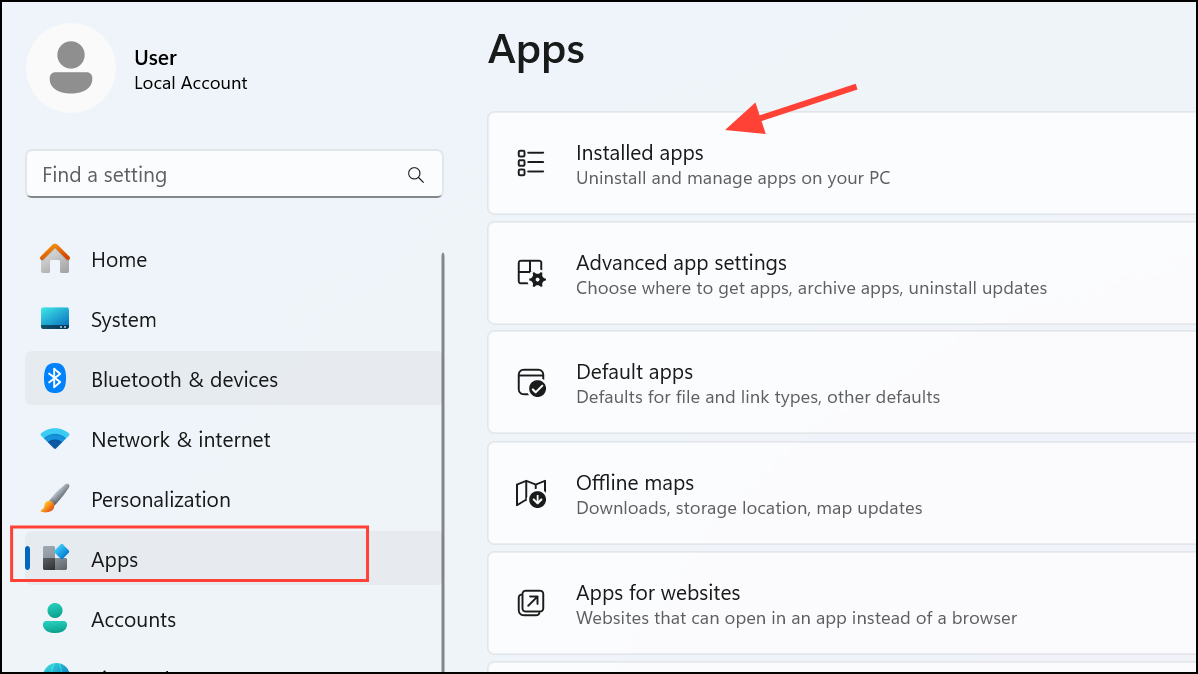
Step 1: Open the Settings app with Windows + I.
Step 2: Navigate to Apps > Installed apps.
Step 3: Scroll through the list and uninstall any unwanted apps. Click the three dots next to an app and select Uninstall.
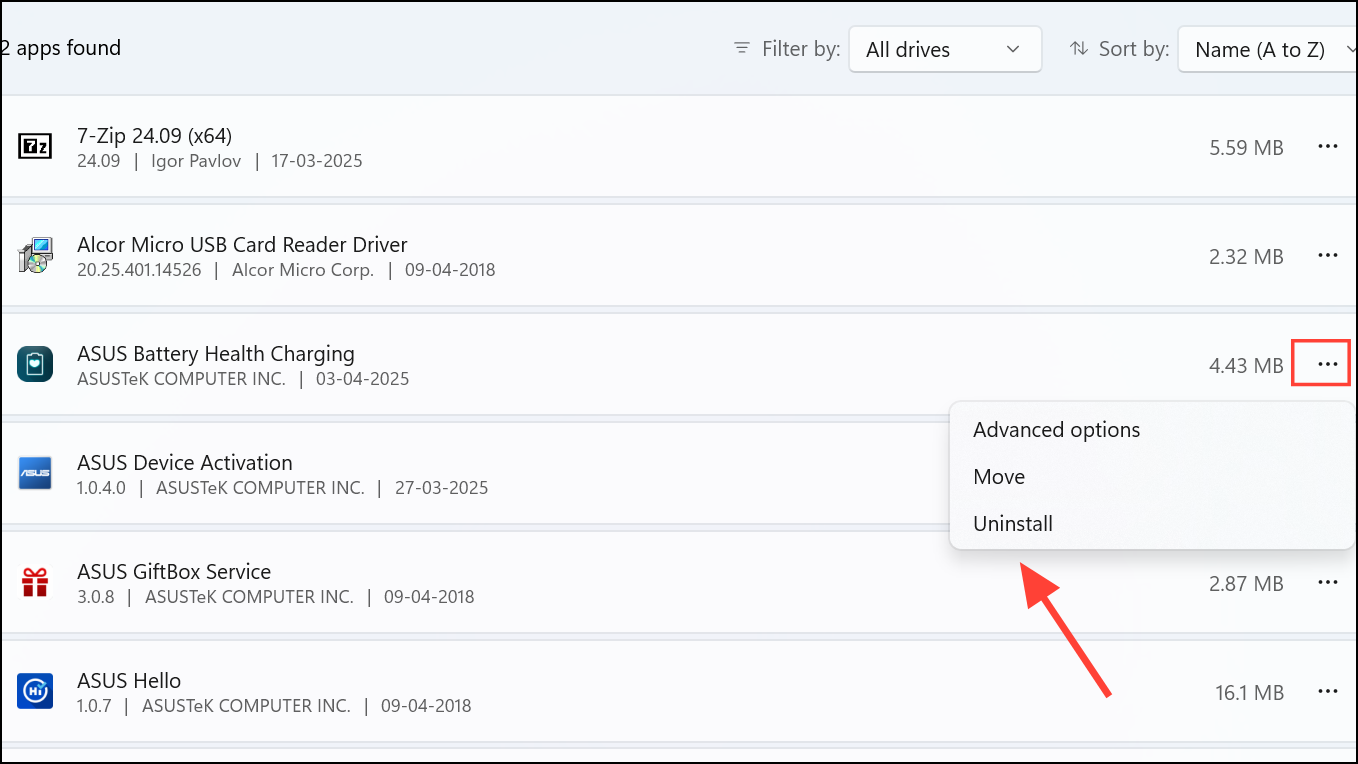
Step 4: Open the Microsoft Store, go to Library, and remove any unwanted apps listed there.
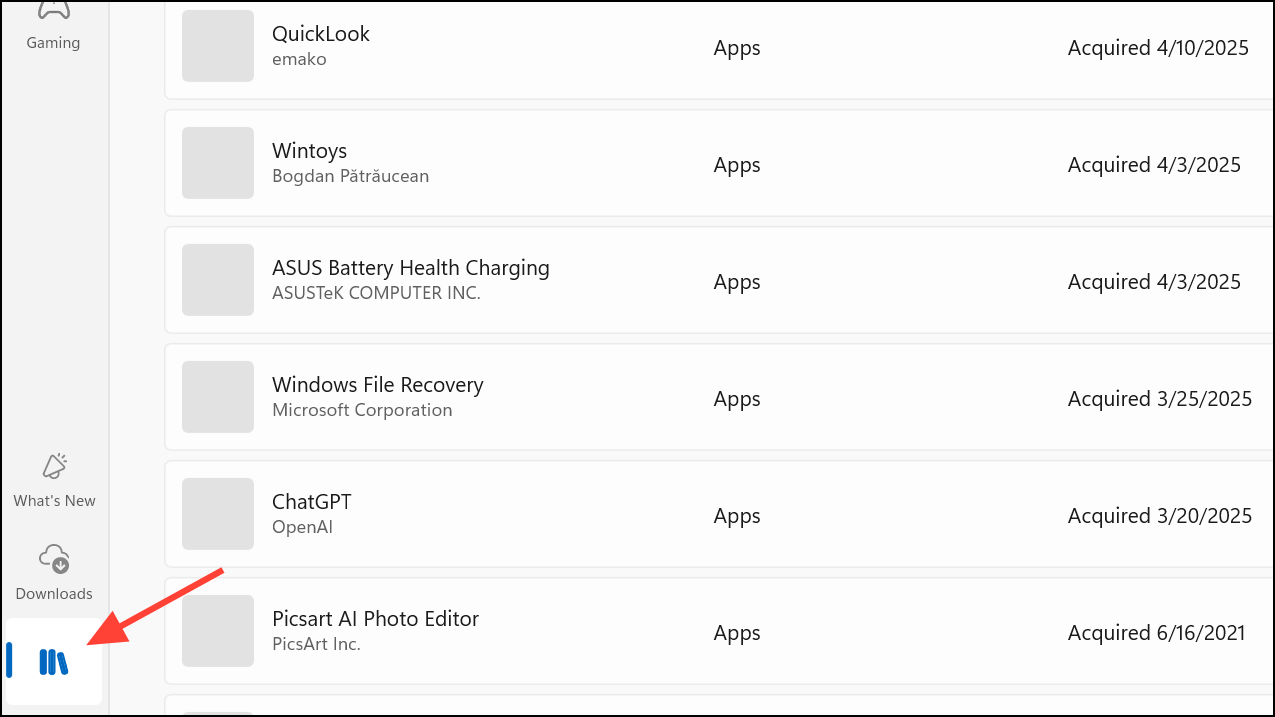
Unpin from Start to remove these placeholders.Use Third-Party Tools for Automated Removal
Several free utilities can help automate bloatware removal, but use them with caution. Automated tools may remove apps or components required for system stability, and future Windows updates might restore removed items.
- O&O AppBuster: Safely lists and removes Windows apps, including system apps, for all users. Also allows you to restore removed apps if needed.
- Windows 11 Debloater: Provides a graphical interface to run PowerShell scripts for removing built-in apps and adjusting privacy settings. Always back up your system before using such tools.
- Revo Uninstaller: Offers thorough removal of installed apps, including leftovers, and can target both Windows Store apps and classic desktop programs.
Always create a system restore point or full backup before running automated removal tools. Test on a non-critical system if possible, especially before deploying to multiple machines.
Prevent Bloatware During Installation by Adjusting Region Settings
Windows 11 sometimes installs fewer suggested apps when the region is set to "English (World)" or "English (International)" during the initial setup. This approach is not guaranteed and may affect language, keyboard, and time zone settings, so only use if you’re comfortable adjusting these after installation.
Step 1: During Windows Setup, select English (World) or English (International) as your region and language.
Step 2: Complete installation. After setup, you can change your region and language back to your preference in Settings > Time & Language.
This method reduces the number of preinstalled and suggested apps but does not guarantee a completely bloatware-free experience.
Blocking Windows 11 from reinstalling bloatware after a reset requires a combination of Group Policy changes, careful app removal, and, for advanced users, customizing installation images. Regularly review your settings after updates to ensure unwanted apps don’t return.