
Encrypting DNS requests prevents third parties—like ISPs, network administrators, or governments—from monitoring which websites you visit. Windows 11 includes a DNS over HTTPS (DoH) feature that routes DNS lookups through encrypted HTTPS connections, instead of sending them in plain text. This upgrade makes DNS traffic private across all applications, not just web browsers, and can also help bypass some types of network censorship and spoofing attacks.
Enable DNS Over HTTPS Through Windows 11 Settings
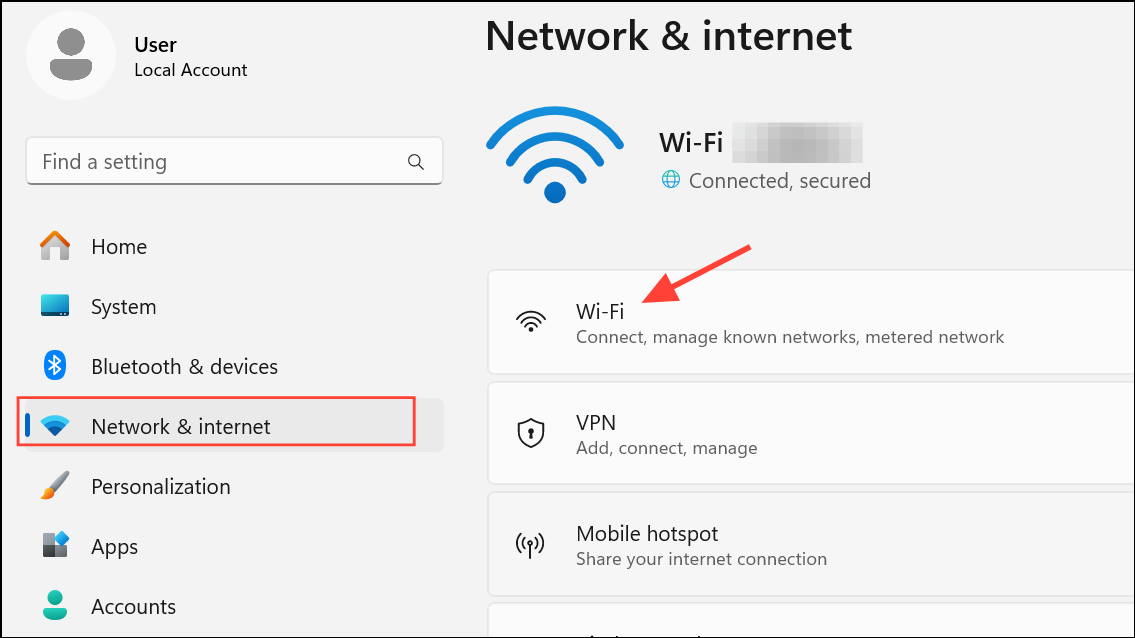
Step 1: Press Windows+i to open the Settings app, or right-click the Start button and select Settings.Select Network & Internet from the sidebar.
Step 2: Click your active internet connection—either Wi-Fi or Ethernet—from the list. Be sure to click the connection name, not the "Properties" shortcut at the top.
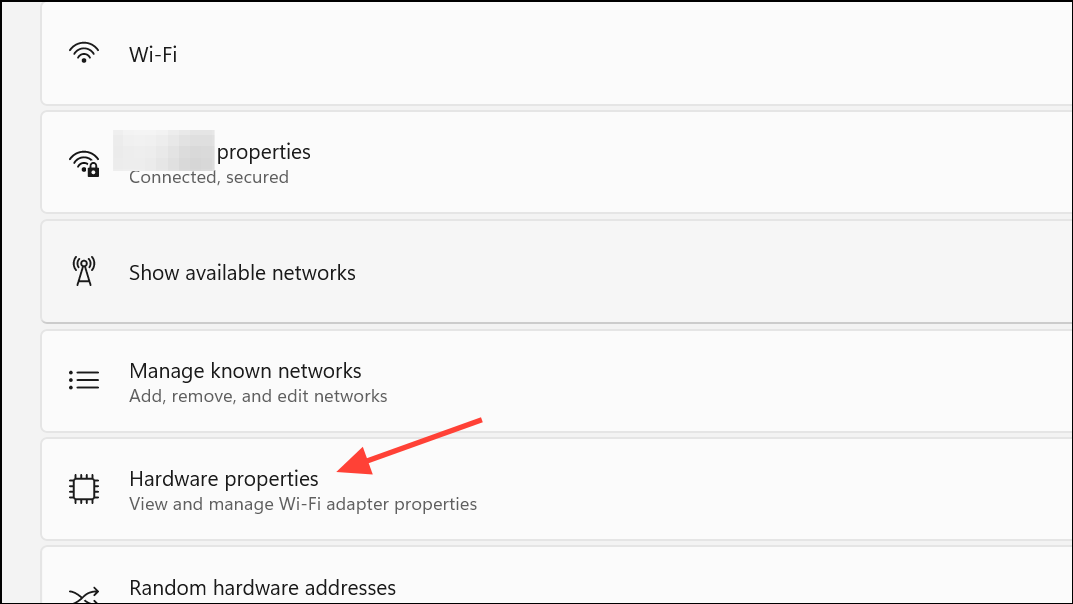
Step 3: On the connection's properties page, select Hardware Properties.
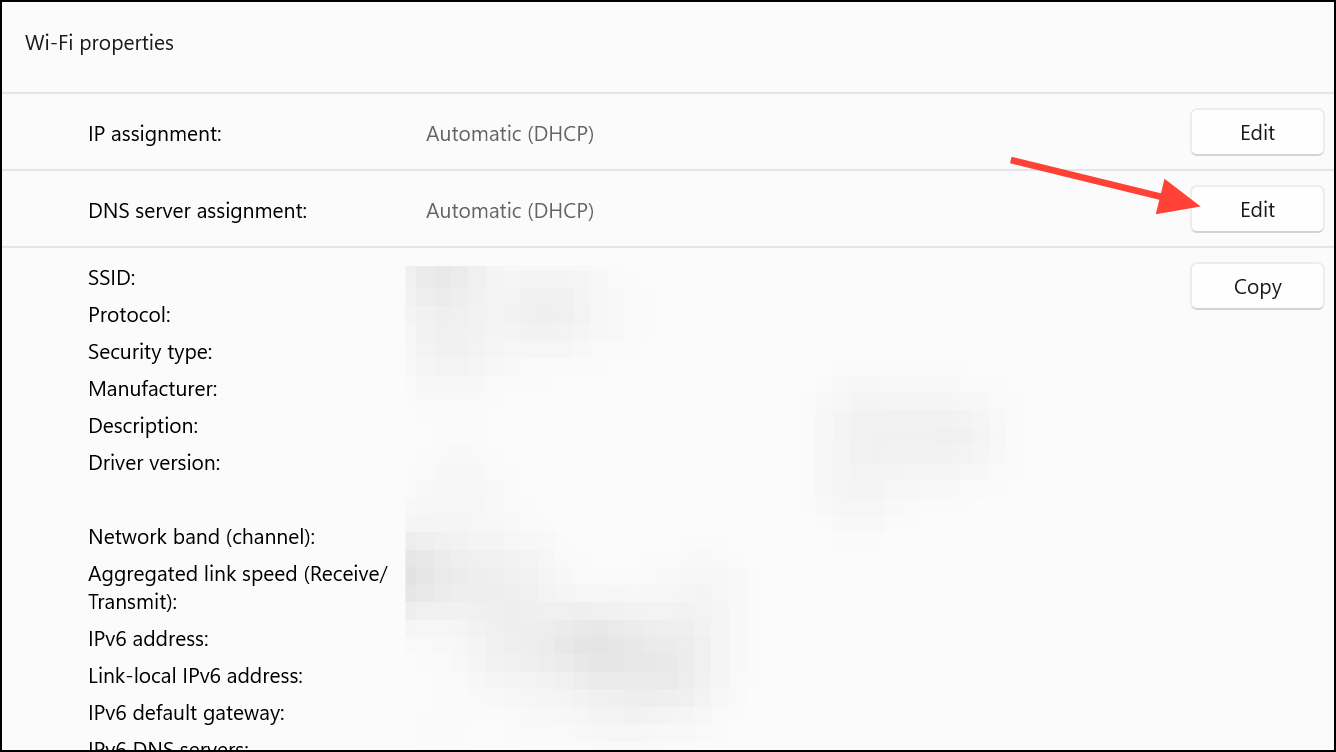
Step 4: Find DNS Server Assignment and click the Edit button next to it.
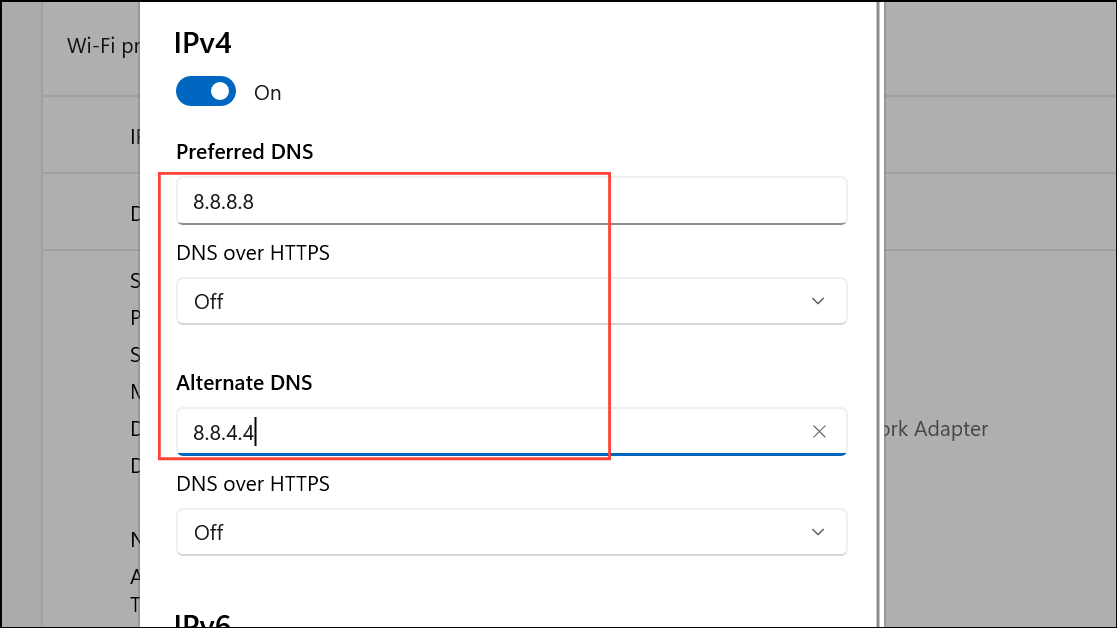
Step 5: In the dialog that appears, set DNS settings to Manual. Turn on the IPv4 switch.
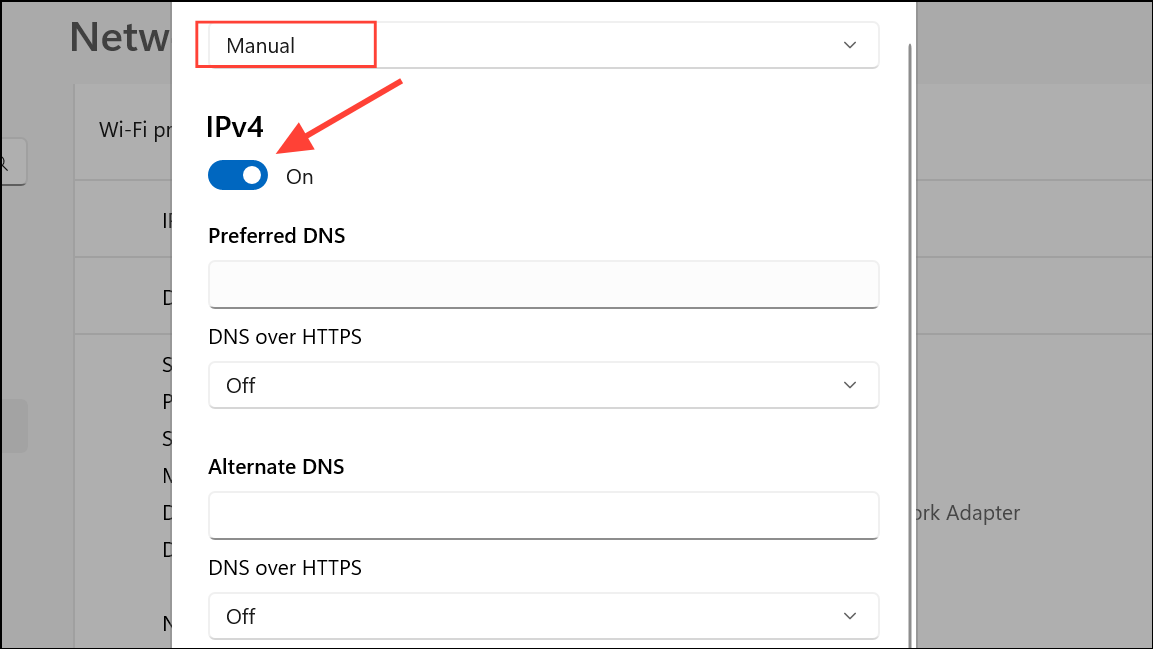
Step 6: Enter a supported DNS server address in the Preferred DNS field, and an alternate in the Alternate DNS field. For example, you can use:
- Google DNS:
8.8.8.8and8.8.4.4. - Cloudflare DNS:
1.1.1.1and1.0.0.1. - Quad9 DNS:
9.9.9.9and149.112.112.112.
For IPv6, toggle the IPv6 switch and enter the corresponding addresses if your network supports IPv6.
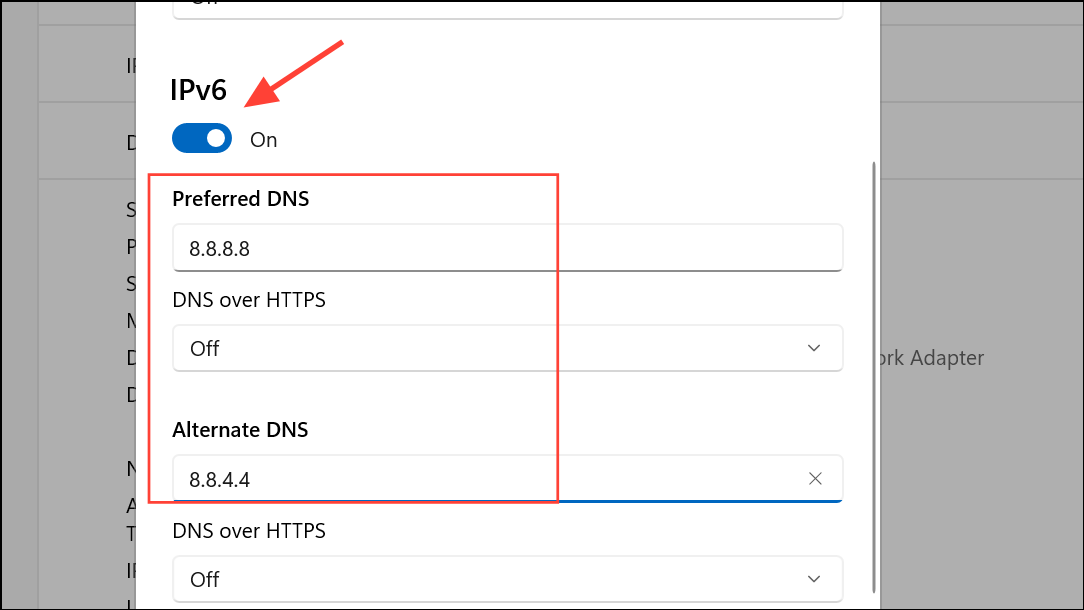
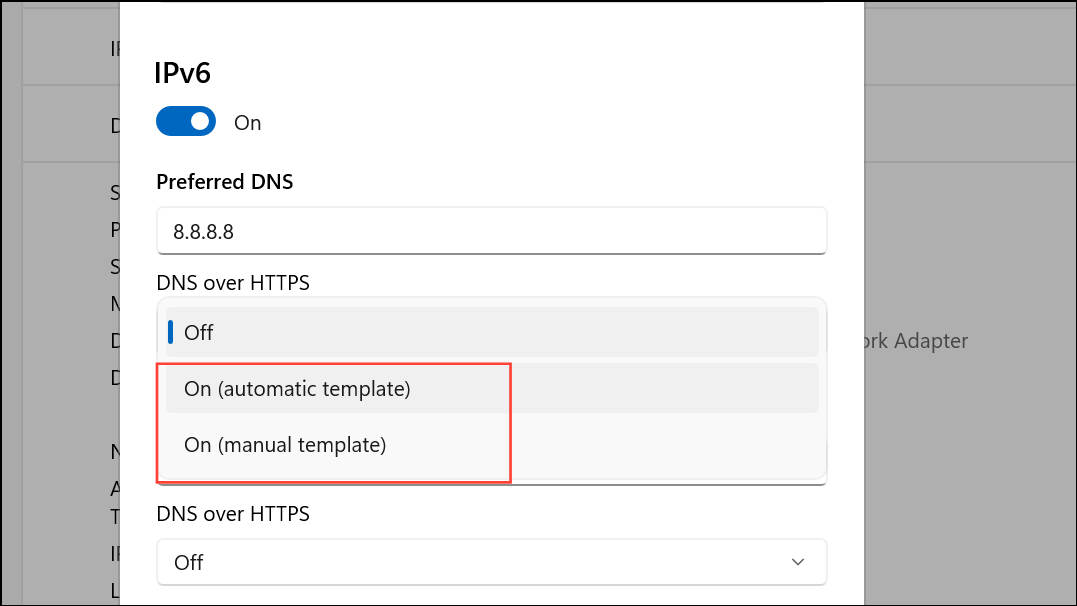
Step 7: Set DNS Over HTTPS to On. This ensures Windows only uses encrypted DNS for lookups. Click Save to apply the changes.
Step 8: Verify that your DNS servers are now labeled as (Encrypted) in the connection properties. All DNS queries from Windows and most applications will now be encrypted.
If you experience connectivity issues, double-check the IP addresses for typos. If your system or network does not support IPv6, disabling IPv6 DNS in this dialog may resolve problems.
Add Custom DoH Servers Using PowerShell
Windows 11 only enables DoH for a predefined list of DNS providers by default. If you want to use a custom DNS server that supports DoH, you'll need to register it first.
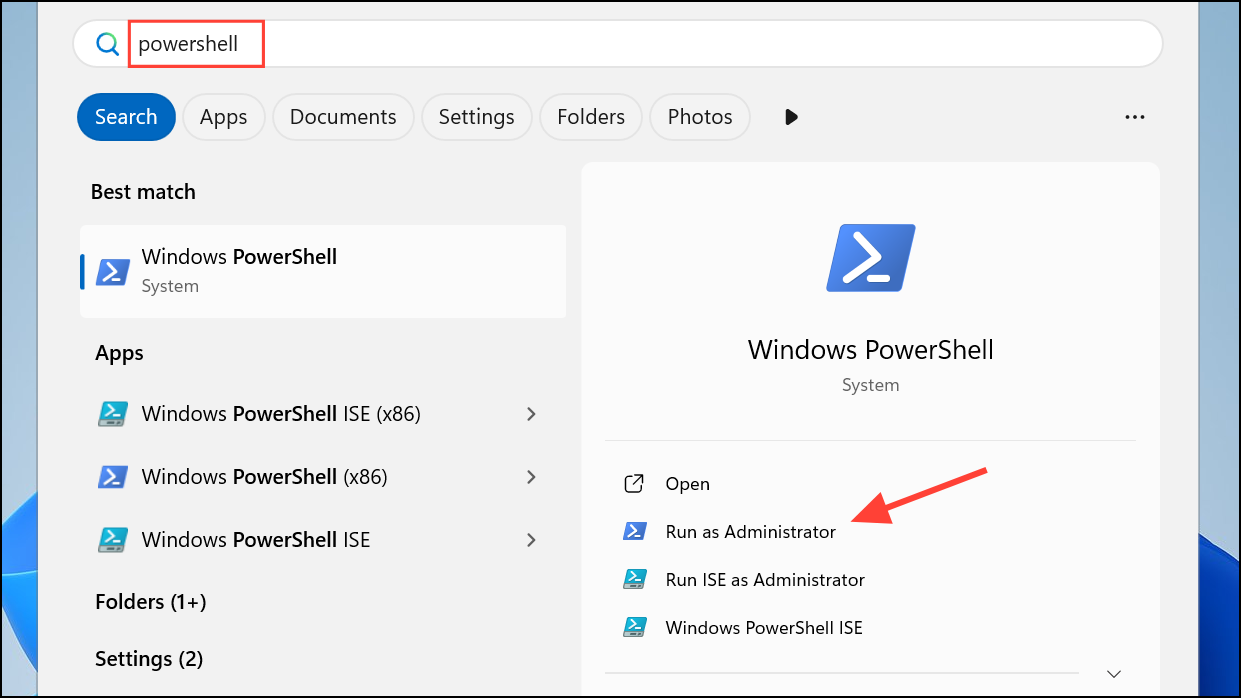
Step 1: Open PowerShell as an administrator. Click the Start menu, type powershell, right-click Windows PowerShell, and select Run as administrator.
Step 2: Use the following command to add your custom DoH server:
Add-DnsClientDohServerAddress -ServerAddress 'IP_ADDRESS' -DohTemplate 'https://your-doh-server/dns-query' -AllowFallbackToUdp $False -AutoUpgrade $True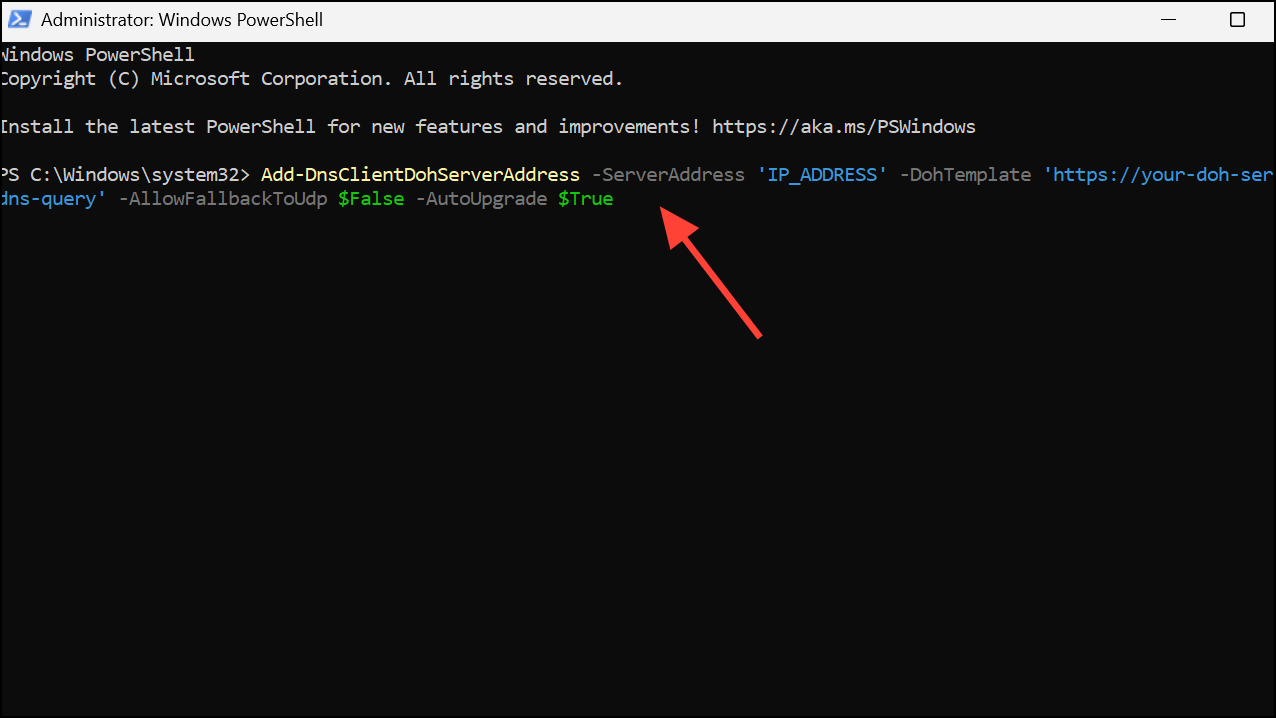
Replace IP_ADDRESS and https://your-doh-server/dns-query with your DNS provider's information. After this, the server will appear in the DNS server list, and you can select it in the network settings as described above.
To confirm the list of DoH-enabled servers, run:
Get-DnsClientDohServerAddress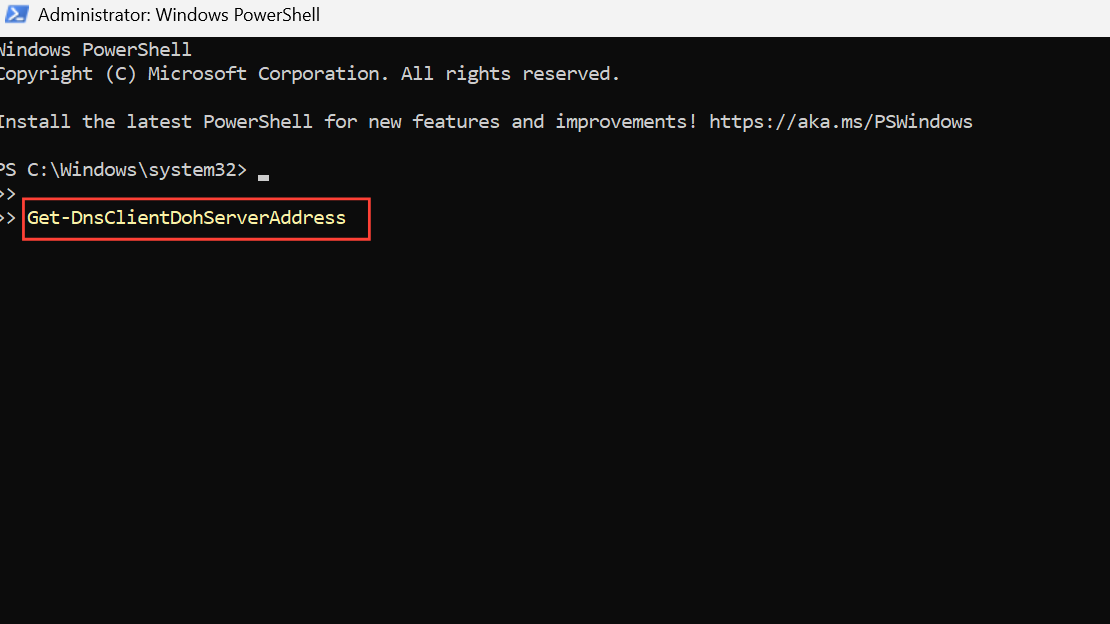
Now, you can repeat the steps from the previous section to assign your custom DoH server in the network connection settings.
Configure DNS Over HTTPS via Group Policy
On managed systems or when certain settings are locked, the DoH option might be greyed out with a message like "Some of these settings are disabled or managed by your organization." This is usually controlled by Group Policy.
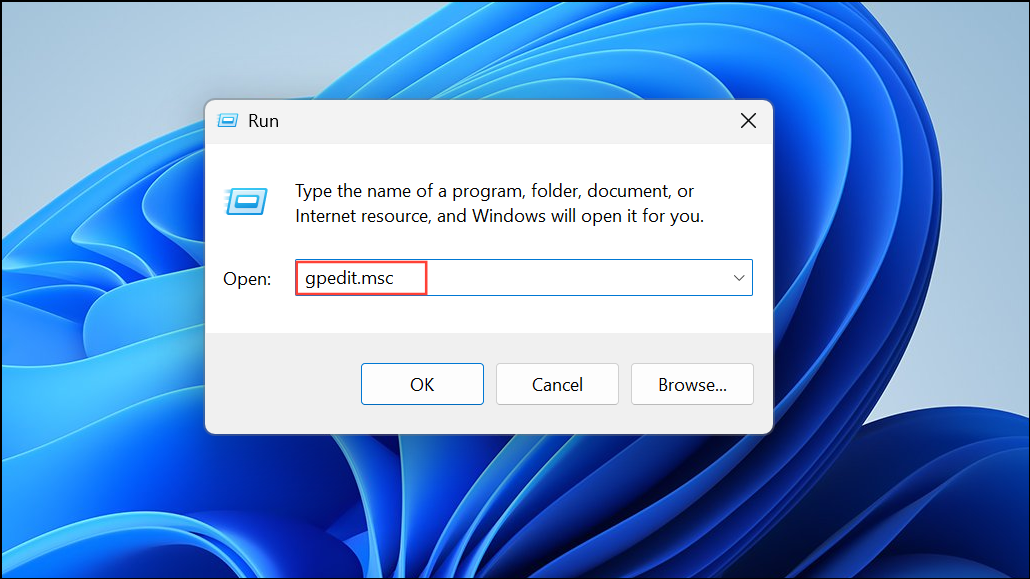
Step 1: Open the Group Policy Editor by pressing Windows+R, typing gpedit.msc, and pressing Enter.
Step 2: Navigate to Computer Configuration > Administrative Templates > Network > DNS Client.
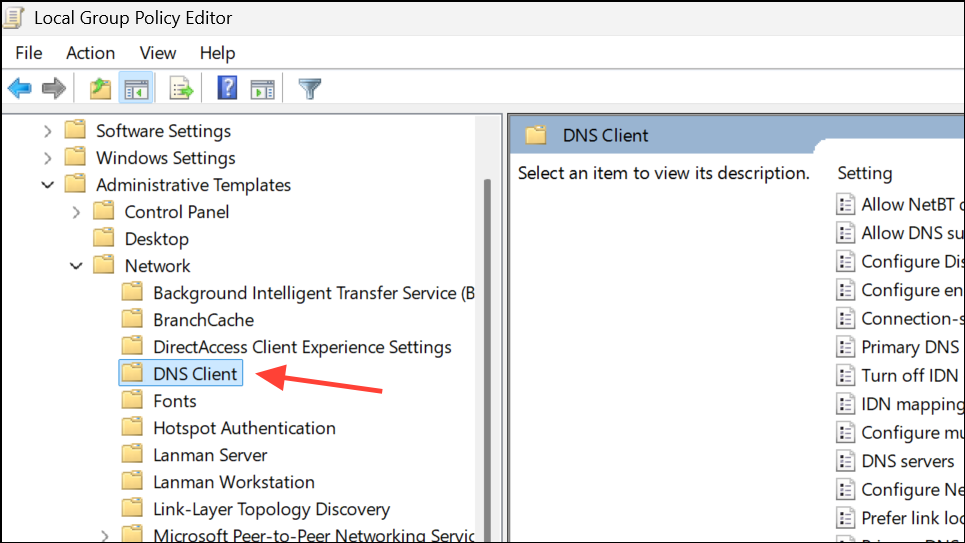
Step 3: Find the policy called Configure DNS over HTTPS (DoH) name resolution. Double-click it.
Step 4: Set the policy to Enabled, then choose your preferred mode:
Unencrypted only: Disables DoH.Encrypted preferred, unencrypted allowed: Tries DoH first, falls back to standard DNS if unavailable.Encrypted only (DNS over HTTPS): Requires DoH for all DNS lookups.
Step 5: Click Apply and OK. Restart your computer for the changes to take effect.
If the DoH policy keeps reverting to "Prohibit DoH," a third-party application (such as a VPN client) may be enforcing this setting. Some VPN agents (like Cisco AnyConnect) automatically set the registry value DoHPolicy to 1 at startup, which blocks DoH. Stopping or uninstalling the interfering software, or manually removing the registry value HKLM\SOFTWARE\Policies\Microsoft\Windows NT\DNSClient\DoHPolicy after each reboot, can temporarily resolve this. However, the policy will return if the software is still present.
Browser DNS Over HTTPS Settings and Limitations
Some browsers—like Chrome, Edge, and Firefox—have their own DoH settings that may override or ignore Windows system DNS configuration. For instance, Chrome may default to Google DNS or its own DNS resolver, even if Windows is set to use a different DoH provider. To ensure browsers respect system-level DoH settings:
- Disable the browser's internal secure DNS option, or set it to "Use system DNS."
- In Chrome, you can visit
chrome://flags/#enable-async-dnsand disable the Async DNS resolver to force Chrome to use Windows DNS settings. - For Firefox, set the network.trr.mode to 5 in
about:configto use the system resolver, or configure DoH directly in Firefox if you prefer browser-level control.
Encrypting DNS lookups in Windows 11 strengthens privacy and can help bypass censorship or ISP monitoring. Keep an eye on group policies and third-party software that might override your settings, and verify browser configurations for consistent privacy across all your apps.