
Arc Browser is full of fun ideas that aim to reinvent browsing, and they have features to support these ideas. Easels are one such feature you’ll find that supercharges the Arc Browser and makes it more fun and practical to use than any other browser out there.
Easel is a notable feature within the browser that acts as a virtual canvas, allowing users to collect webpage screenshots and URLs, and also provides tools for typing and drawing. It enhances the browser’s usability by offering a space for brainstorming, sketching, and sharing ideas. It’s basically a superpowered whiteboard where you can also collaborate with others.
Creating an Easel
Like much else in the Arc Browser, there are countless easy ways to create an Easel.
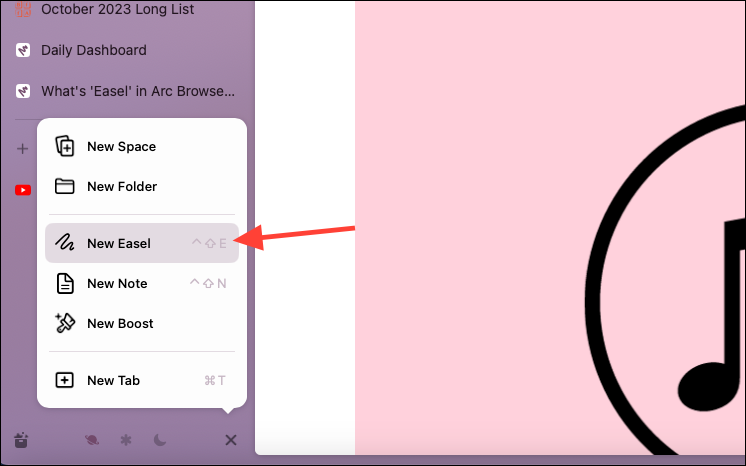
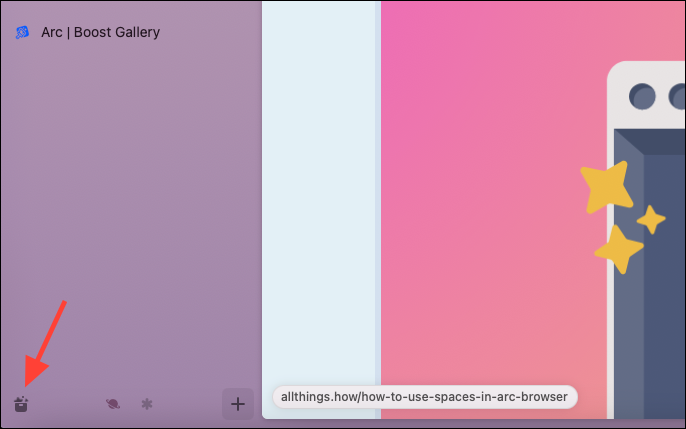
- You can click the ‘+’ button in the bottom-right corner of the sidebar and select ‘New Easel’ from the menu.
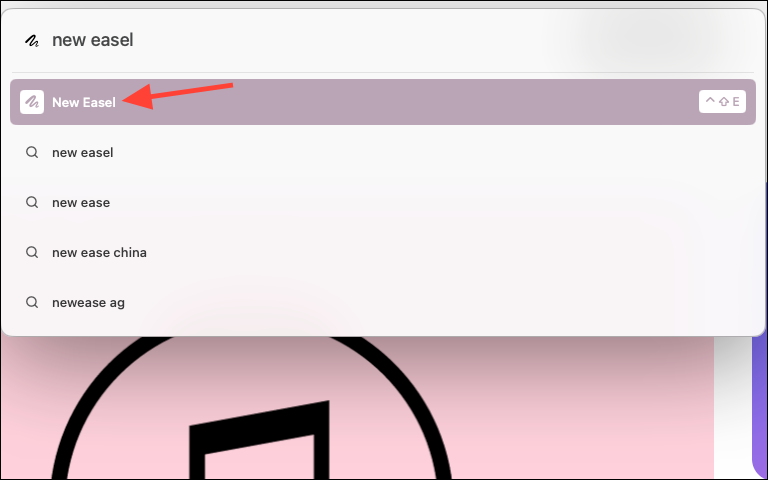
- Alternatively, you can use type ‘New Easel’ in the Command Bar (
Cmd+T).
- There’s also the keyboard shortcut
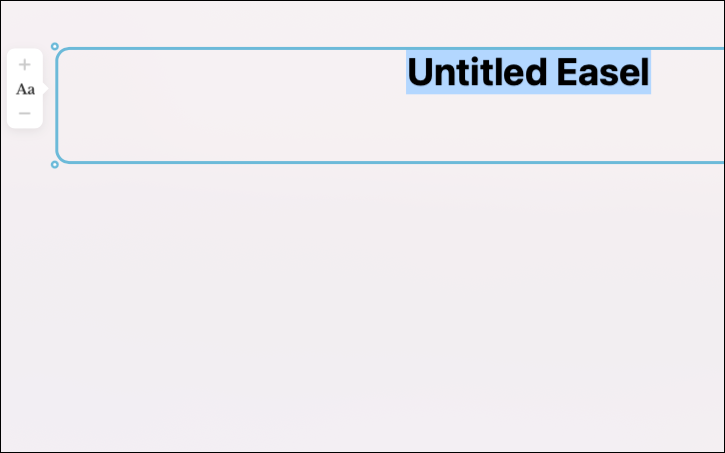
Ctrl+Shift+Efor creating a new Easel. - A new blank Easel will be created.
Capturing Images for the Easel
Once you’ve created an Easel, it’s easy to add screenshots to it. You can also start a new Easel by capturing a part of the page instead of creating a blank Easel.
- Navigate to the website that has the portion you want to include in the Easel.
- Then, go to the URL bar and click the ‘Site Control’ icon.
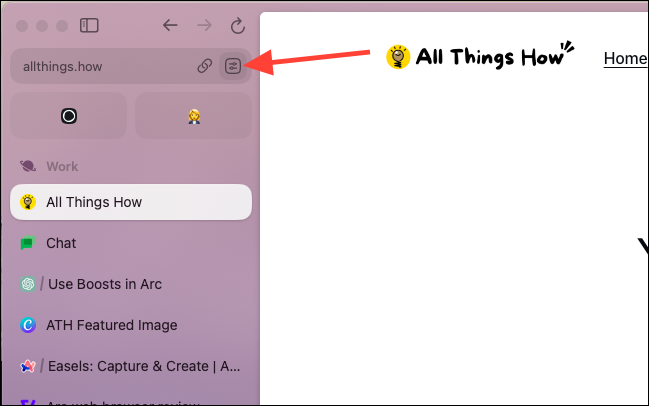
- Click the ‘Capture a portion of this page’ option (Camera icon) from the menu.
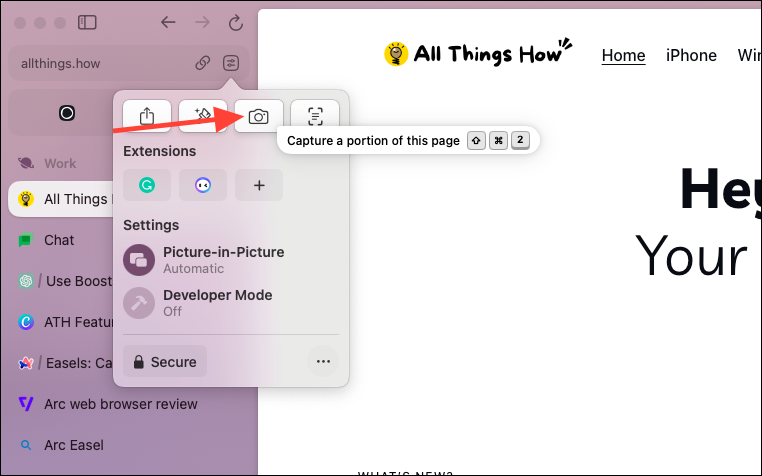
- You can also use the keyboard shortcut
Cmd+Shift+2to kickstart the capture. - Then drag your mouse across the portion you want to capture. A menu will open once you release the mouse. Select whether you want to include the screenshot in a ‘New Easel’ or an existing one.

Adding Live Websites
One of the things that sets Easels apart from any other Whiteboard is the fact that you can add live websites to them! With Live Websites, the screenshots that you capture are automatically updated with the latest, interactive view of the website. You can even click the screenshot to open the website, which will open it in a Peek.
- After capturing a screenshot, go to the Easel and click the ‘Play’ button on the thumbnail.

- When you’re using Live Websites for the first time, a message will appear asking whether you want to replace the screenshot with the live website. Click on ‘Make it Live’.
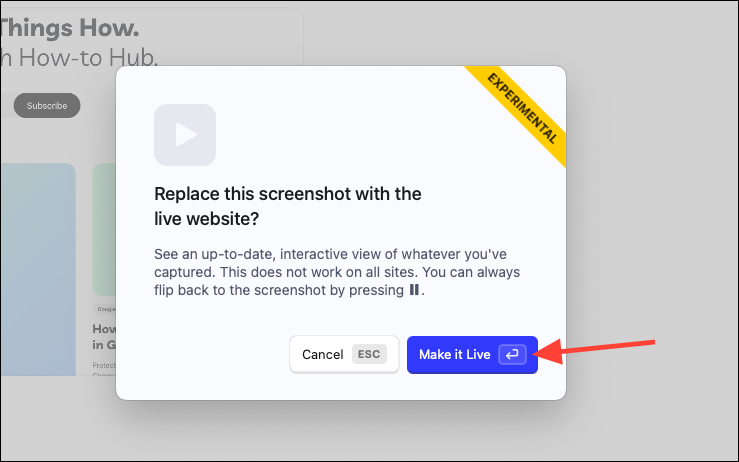
- If the website is supported, your screenshot will be replaced with an up-to-date, interactive version. To go back to your original screenshot, click the ‘Pause’ button.

As the feature is experimental, it doesn’t work with all websites, and you might even face some glitches sometimes for websites with which it does work. But it’s an amazing feature with great potential.
Using Other Easel Tools
Apart from capturing website screenshots, Easel is like a whiteboard, and you have tools that you can expect from a whiteboard.
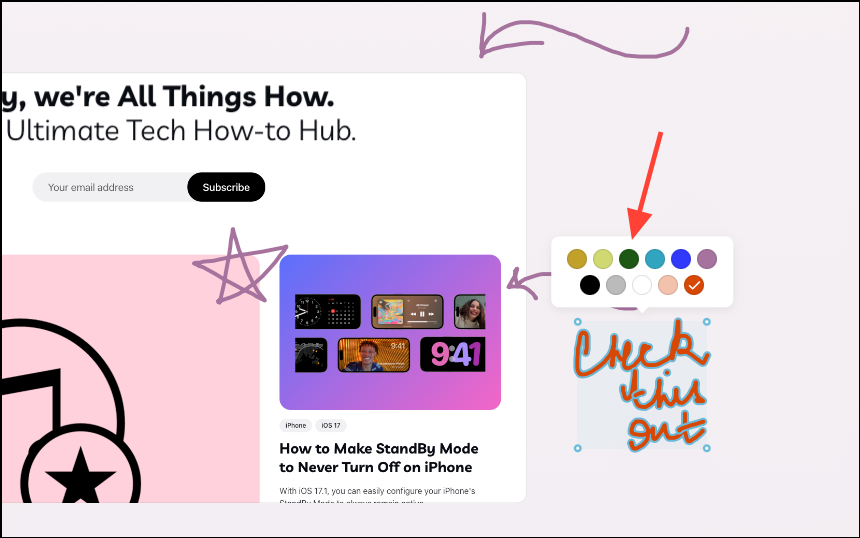
- At the bottom of the Easel, you’ll find the toolbar with various options. You can upload photos from your Mac, add textboxes, draw circles, squares, arrows, or freehand.
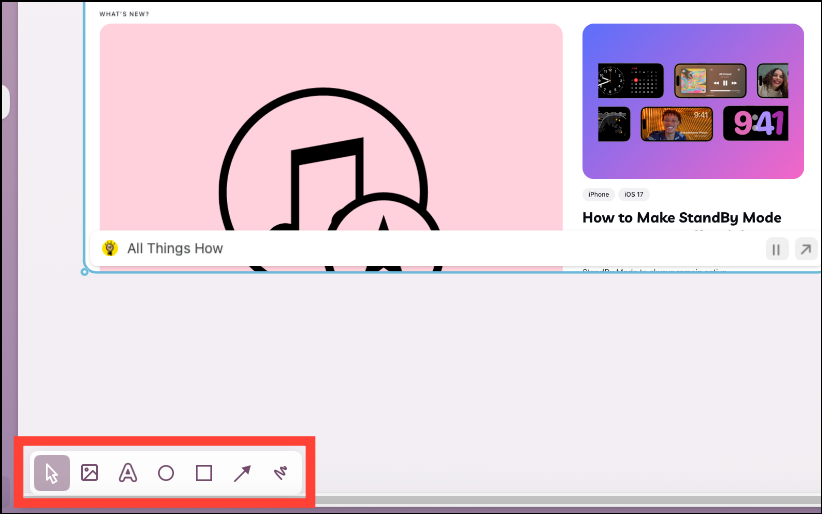
- You can change the color of the drawings by selecting them. You can also delete them after selecting them using the ‘Delete’ button on the keyboard; there’s no erase or delete button on the toolbar.
- The
Ctrl+Zkeyboard shortcut also works to undo any changes.
Finding your Easels
By default, Easels appear in the Pinned section of whatever Space you opened it in. But if you end up closing an Easel, it’s easy to find it again.
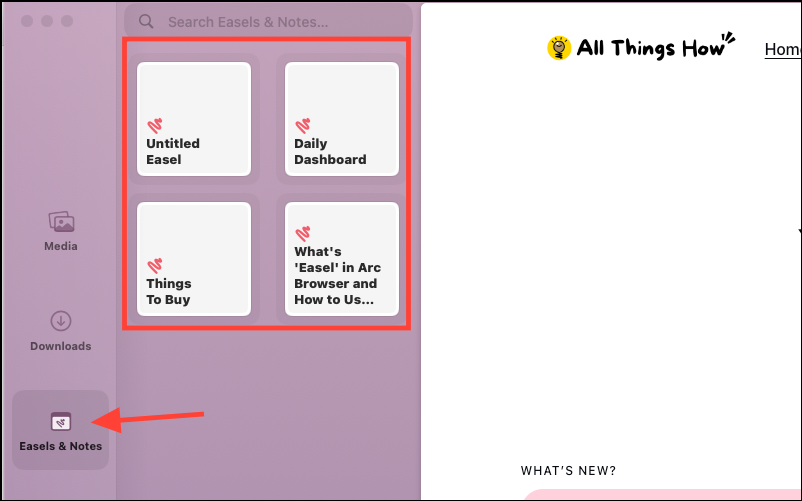
- Click the ‘Library’ button at the bottom left corner of the Arc sidebar.
- Then, go to ‘Easels & Notes’. Here, you’ll find all your Easels in one place, even ones that are from different profiles and spaces.
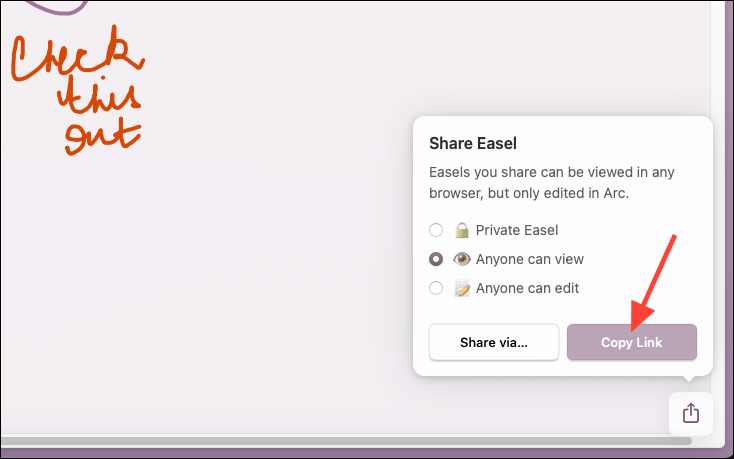
Sharing the Easel
Easels can also be shared with others. In fact, they are collaborative. You can also share them with non-Arc users, but they can only view the Easel and not edit it.
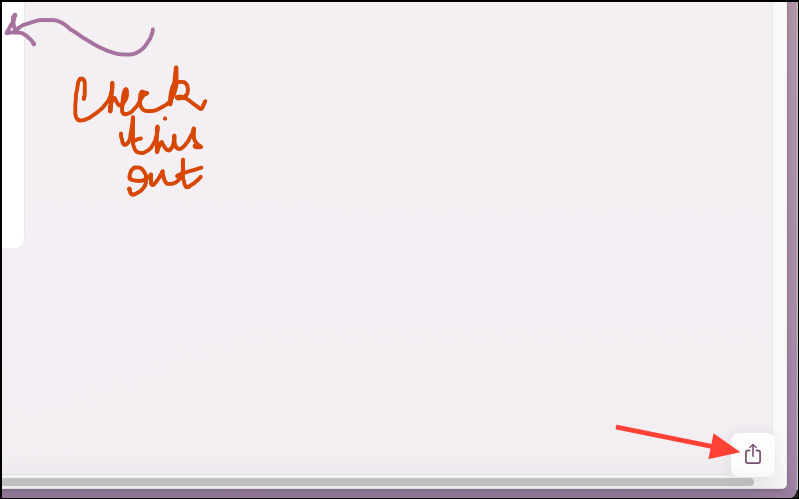
- To share an Easel, click the ‘Share’ button in the bottom-right corner of the Easel.
- A sharing menu will open. By default, it will be set to ‘Private Easel’, which means only you can access it. To make it shareable, select whether you want others to be able to only view it or also edit it; click the respective radio button.
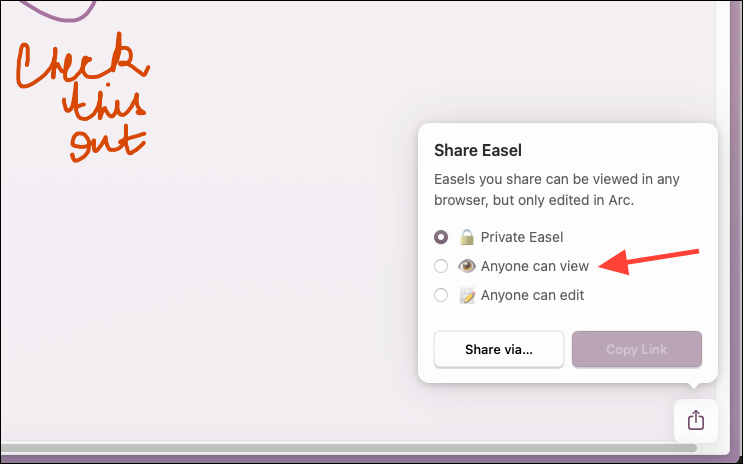
- Then, click on ‘Copy Link’ and share the link with others.
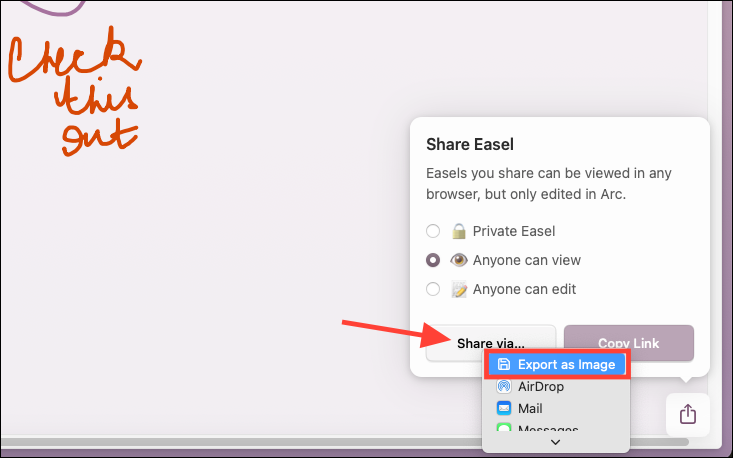
- You can also export Easels as PNGs by clicking the ‘Share Via’ button. The button will also work only after you select either of the two buttons that make an Easel not private.
By creating an Easel, you can easily jot down ideas, capture essential information from web pages, and share these canvases with others for collaborative engagements. You can even create easels to share your ideas with a larger community; they can be very fun to read.


