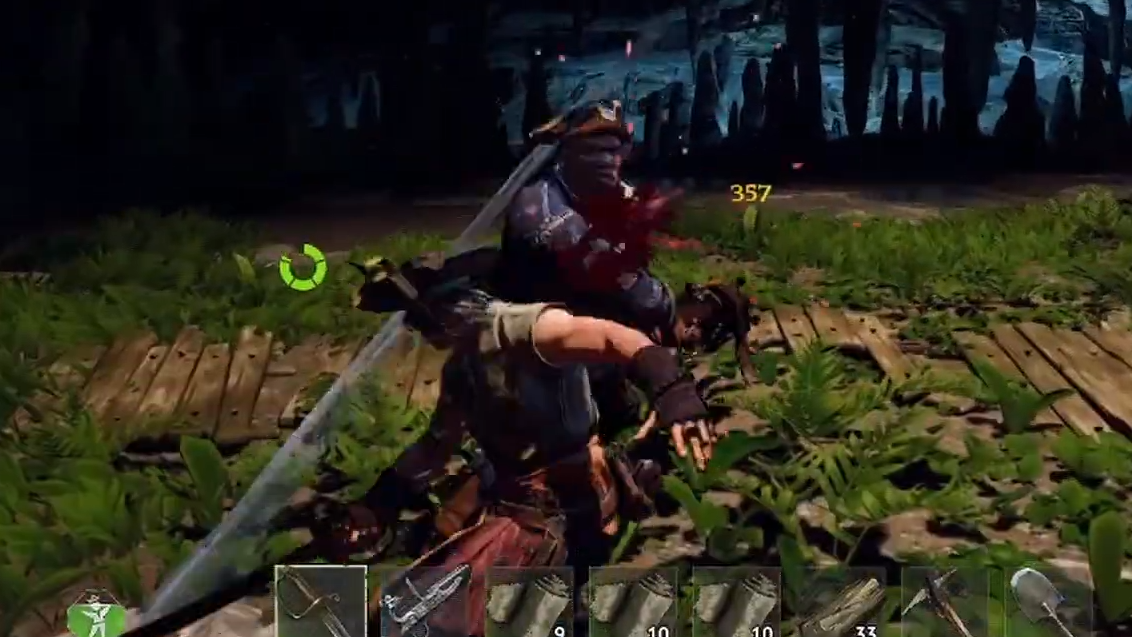
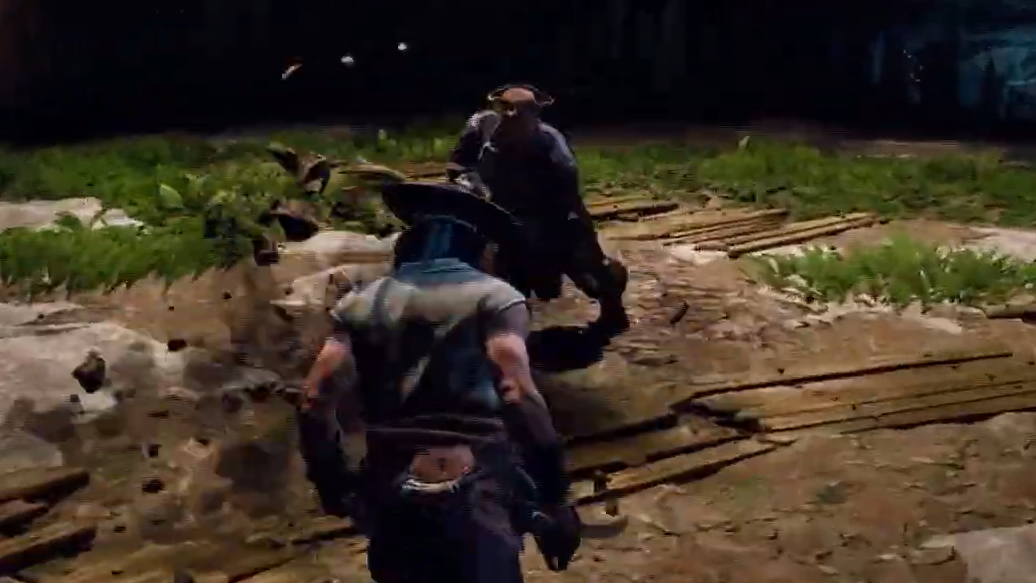
Thomas Richards is the first real wall in Windrose, the gatekeeper between the starting Coastal Village and the Foothills zone where iron smelting opens up. He hits hard, has a generous health pool, and punishes players who rush in with starter gear. The fight is winnable on any difficulty, but only if you prep the loadout and learn his five moves before swinging.
Gear check before you engage
Level 5 is the highest upgrade tier available before the Foothills, and that cap exists for a reason. Thomas scales against your gear, so walking in with Level 2 or 3 equipment turns a tough fight into a dozen wipes. Upgrade your melee weapon, your ranged weapon, and all five armor slots before you even approach his room.
Armor set bonuses carry this fight. Running two pieces from two different sets gives you the best of both worlds without committing to a full four-piece bonus you probably don’t have yet.
| Loadout slot | Recommended choice | Why it works |
|---|---|---|
| Armor (2 pieces) | Pikeman Set | +160 Health bonus, extra margin for mistimed dodges |
| Armor (2 pieces) | Conquistador’s Set | +15% Damage Resistance against his heavy swings |
| Melee | Rapier of a Thousand Cuts or a blue greatsword | Bleed stacks or big heavy-attack posture damage |
| Ranged | Blunderbuss (or rifle with iron bullets) | High burst damage while kiting or punishing stagger |
| Consumables | 2 stacks of healing potions, full bandages, damage tonic | His running grab chunks half your HP; you will need them |
Armor plans come from the Faction Provisioners, and individual pieces drop from points of interest around the Coastal Village. Buy whichever set the nearest faction happens to sell and mix to hit the two-piece thresholds.

Buffs and consumables that actually matter
Food buffs stack. Cook two different dishes and eat both before the fight rather than chewing on raw bananas or peppers. Vitality food is the priority, because his running attacks can take out half your life bar, even with full Level 5 gear. An Endurance food plus an Agility or Vitality food is a clean pairing.
Sleep near your bonfire or bed before leaving home to apply the Rested buff. If you have a tonic that grants roughly 8% extra damage, drink it just before triggering the encounter so the full duration covers the opening phase.
Bring bandages for chip damage, and save green or blue healing potions for the moments when he connects a full combo. Expect to spend 10 to 14 potions on a clean kill at Level 5 on standard difficulty.
Thomas Richards’ move set and counters
He has five moves, and learning the tells is the entire fight. The red glint is your cue for his unblockable attacks, which must be dodged rather than parried.
| Attack | Tell | Counter |
|---|---|---|
| Double Swing | Two wide horizontal sweeps | Perfect block each hit, or dodge back |
| Triple Swing | Three-hit combo, last swing is heaviest | Perfect block the sequence, or roll after the second |
| Frontal Lunge | Red glint, forward step | Dodge sideways with Ctrl |
| Charge & Grab | Red glint, full sprint at you | Late dodge to the side, timing is tight |
| Bomb Toss | Pulls an object, windup | Run out of the AoE, do not try to dodge through |
Perfect blocks shred his posture, shown as the shield segments above his health bar. Each clean parry removes roughly 1.5 shield segments. Break all the shields, and he drops to a knee, giving you a free window for heavy attacks or a point-blank ranged shot.
Two builds that reliably work
Build 1: Rapier bleed. The Rapier of a Thousand Cuts applies stacking bleed that ticks through his defenses. The pattern is simple. Bait out a swing, dodge, land one or two quick stabs to keep five bleed stacks active, then back off. Repeat until he dies. This works solo and is the most forgiving approach on higher difficulties.
Build 2: Blunderbuss kite. If you saved gunpowder, a ranged build melts him. Keep distance, fire the Blunderbuss whenever he commits to an animation, then reposition. Gunpowder is scarce before the Foothills since you cannot craft it yet, so only attempt this if you have stockpiled plenty of bullets and powder from exploration.
Hybrid. A blue greatsword at Level 5 with heavy attacks during his recovery frames, paired with a rifle you swap to when he kneels, also works. The rifle reloads while stored, so you can cycle parry into heavy attack into headshot repeatedly.
Multiplayer notes
His health scales with party size. Three players gives him significantly more HP than a duo, so a two-person team often kills him faster than a three-person team where someone keeps dying. Players who die during the encounter do not receive quest credit for the kill, which appears to be intended behavior. If you need the quest completion, stay alive.
Stacking two Vitality foods with the Pikeman and Conquistador two-piece bonuses can put a Level 7 player above 1,000 HP, which is enough to survive his grab without a heal.
How to know you won
When his HP bar empties, he drops, and the encounter ends cleanly. The Revenge Is Best Served Cold quest updates, and you gain access to his camp area, which is a separate, higher-level zone tied to the follow-up quest. Defeating him also unlocks the iron smelting progression, letting you start producing iron ingots once you reach the Foothills.
If he resets to full HP, you either left the arena bounds or every player in the party died. Run it back with more potions and tighter parry timing. The fight rewards patience far more than aggression, so treat it as an endurance match and only attack during clear openings.