The computer and the internet have become synonymous in the last couple of years. Whenever you turn on the computer, the first thing you check is whether you are connected to the internet. However, many users have reported encountering the ‘Windows Can’t Connect To This Network’ error.
The error prevents you from connecting to a network and accessing the internet without providing any reason as to what leads to it. This is both frustrating and troublesome, since you aren’t sure how to proceed. However, the fix is as simple as the issue that leads to it.
Before we move to the fixes, it’s important that you identify any recent changes that you made to the system, Wi-Fi or router settings, or the password itself, amongst others. Once you identify the underlying cause, it wouldn’t be a hit-and-trial troubleshooting process anymore.
However, if you can’t pinpoint a particular issue that’s leading to the ‘Windows Can’t Connect To This Network’ error, execute the following fixes in the sequence they are mentioned for a quick resolution.
1. Restart the Modem/Router
In most cases, it’s the modem or router that malfunctions and leads to the ‘Windows Can’t Connect To This Network’ error. If you encounter the error, your prime approach should be to turn off the router, wait for a couple of minutes and then switch it back on. Now check if you are able to connect to the network.
2. Enable and Disable Airplane Mode
Enabling the ‘Airplane Mode’ on Windows 10 disconnects both Wi-Fi and Bluetooth. This has proven as an effective fix for most of the users, in case the underlying issue is trivial.
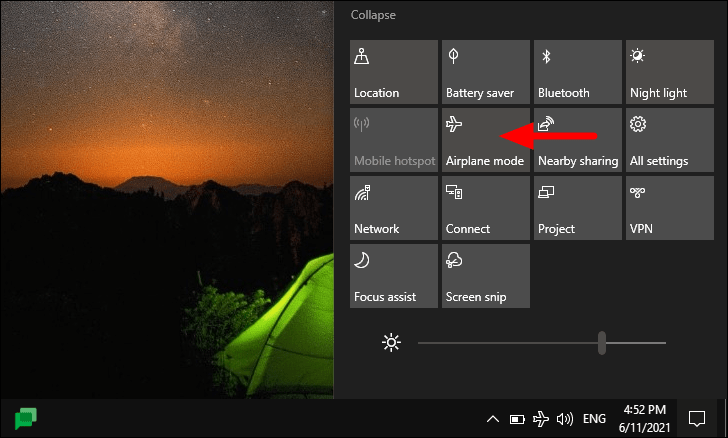
To enable and disable the ‘Airplane Mode’, click on the ‘Action Center’ icon on the ‘Taskbar’. This will launch a menu with notifications at the top and several tiles at the bottom. Click on the ‘Airplane mode’ tile to enable it.
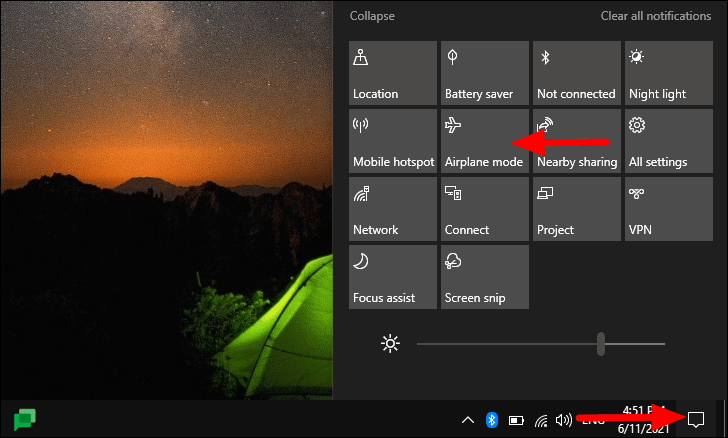
After ‘Airplane mode’ has been enabled, its icon will be visible in the ‘System Tray’. Now, wait for a minute or two and then again click on the same tile to disable the ‘Airplane mode’.
Now, check if the error is fixed and you can connect to the internet without any hindrance.
3. Forget and Reconnect to the Network
If the current network has been misconfigured by the system, it would lead to the ‘Windows Can’t Connect To This Network’ error. To fix this, all you have to do is to forget the network and then reconnect to it. It will reconfigure the connection settings and fix the error, if it’s causing the error in the first place.
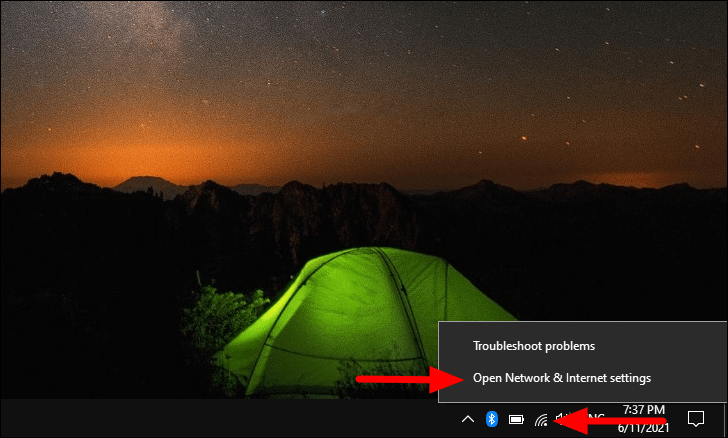
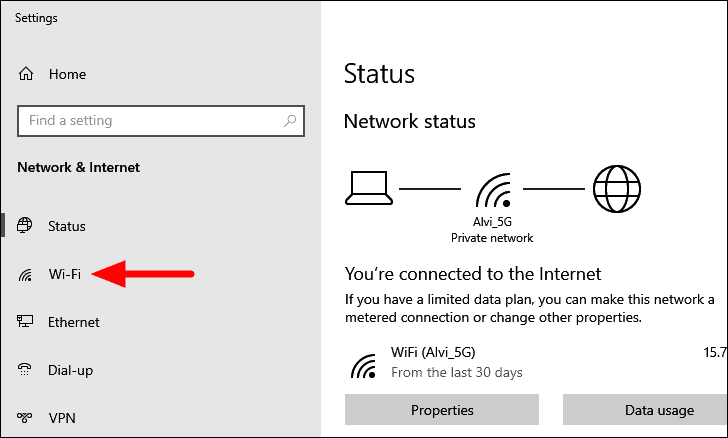
To forget a network, right-click on the ‘Wi-Fi’ icon in the ‘System Tray’, and select ‘Open Network & Internet settings’ from the menu.
In the ‘Network & Internet’ settings, you will find multiple tabs listed on the left. Select the ‘Wi-Fi’ tab.
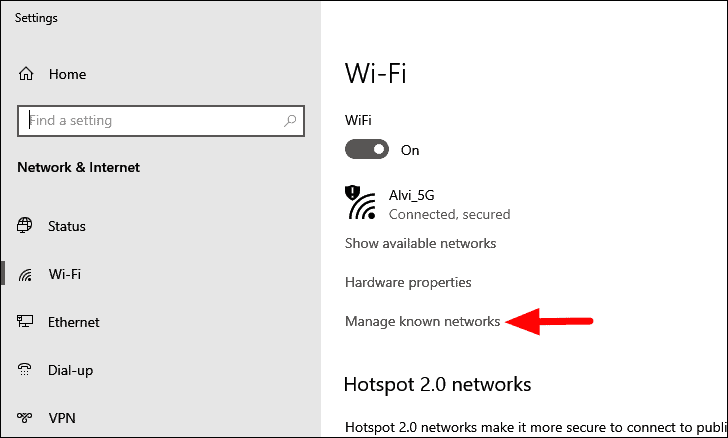
Next, click on ‘Manage known networks’.
Now, locate the network you are having trouble connecting with and click on it. Next, click on the ‘Forget’ option that appears.
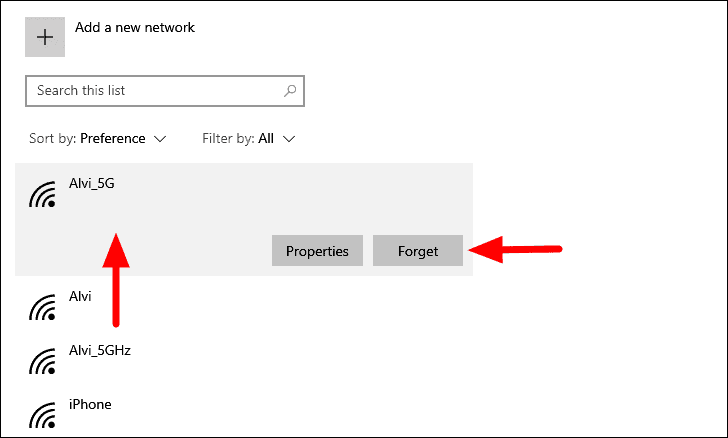
The network will now be removed from the list of known networks. The next step is to reconnect to it.
To reconnect to the network, click on the ‘Wi-Fi’ icon in the ‘System Tray’, select the network, and then click on ‘Connect’.
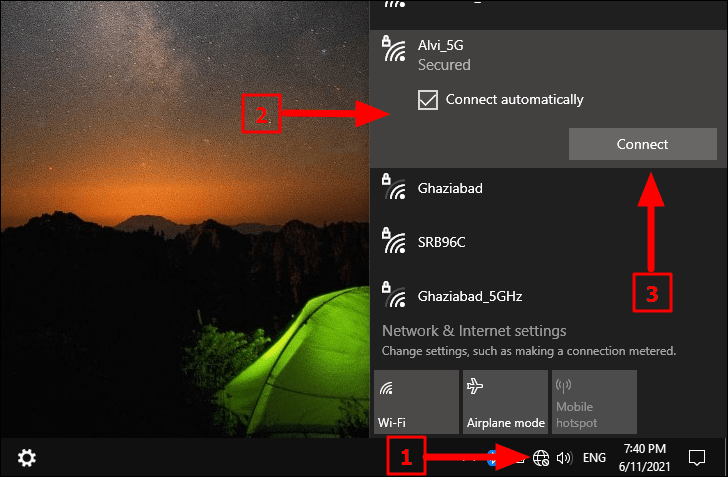
If the network is secured password with a password, you would be asked to enter it for authentication. After you enter the password, you should be able to connect to the network without encountering any error.
4. Update Windows
Running an older version of Windows could also lead to multiple errors, therefore, it’s recommended that you keep the Windows up-to-date. In simple terms, if you are encountering the error due to a bug in the current version, there is a high possibility that the bug has been fixed in the newer versions. Therefore, updating to the latest version should fix the error.
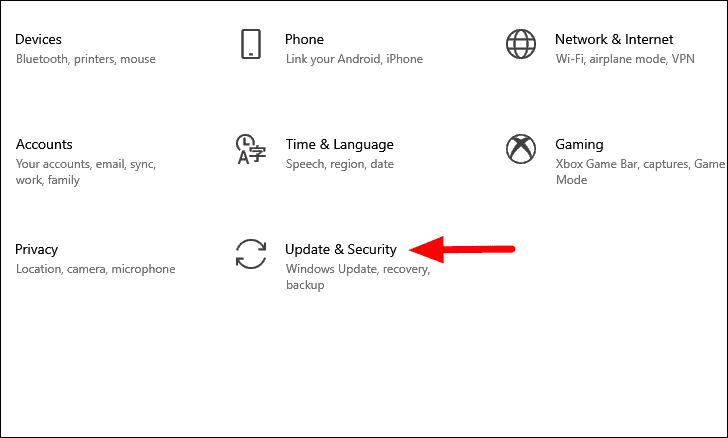
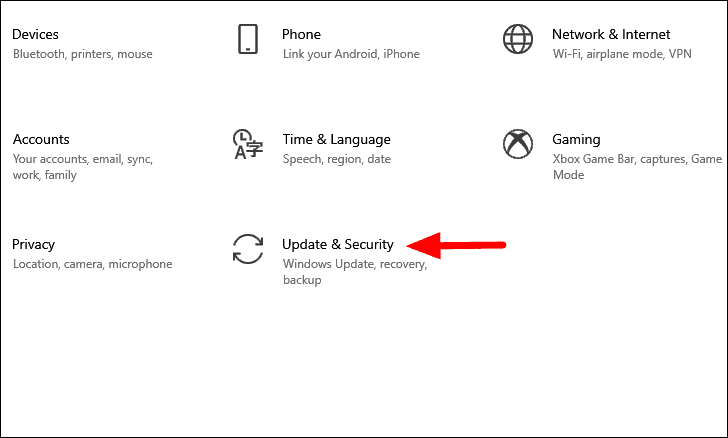
To update the Windows, press WINDOWS + I to launch the system ‘Settings’, and select ‘Update & Security’ from the list of options.
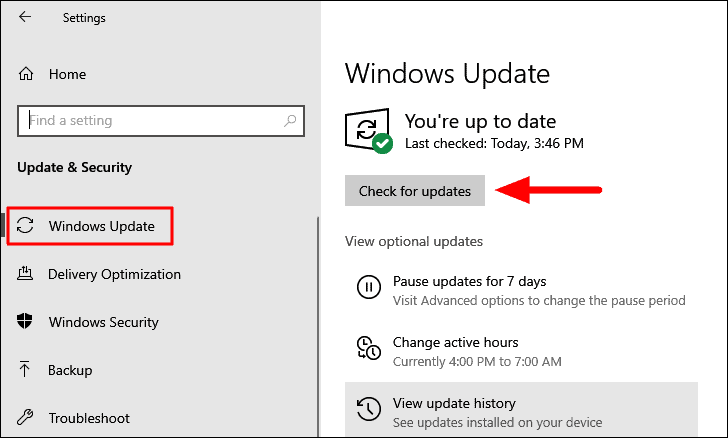
The ‘Windows Update’ tab will open by default in the ‘Update & Security’ settings. Next, click on the ‘Check for updates’ option at the right.
Windows will now search for any available updates, and download and install them on the system, if any are available. Check if updating the Windows fixes the ‘Windows Can’t Connect To This Network’ error.
5. Reinstall Network Driver
In many cases, the ‘Windows Can’t Connect To This Network’ error can be encountered due to corrupt network drivers. Corrupt drivers can be identified by a yellow exclamation mark sign next to them in the ‘Device Manager’. However, even if there is no sign, reinstalling the driver is worth a shot.
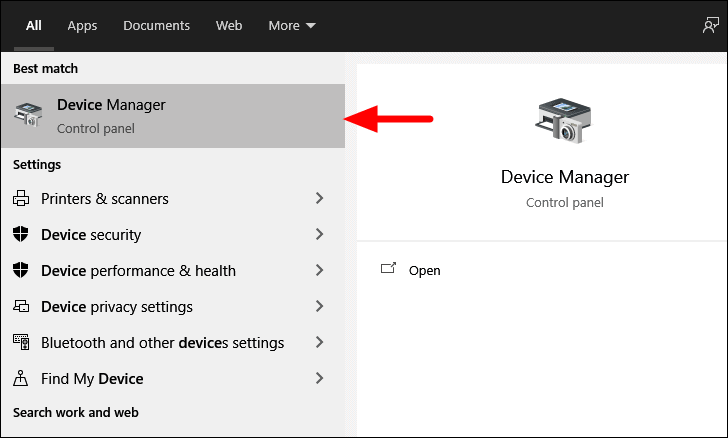
To reinstall the ‘Network’ driver, search for ‘Device Manager’ in the ‘Start Menu’, and then select the relevant search result to launch the app.
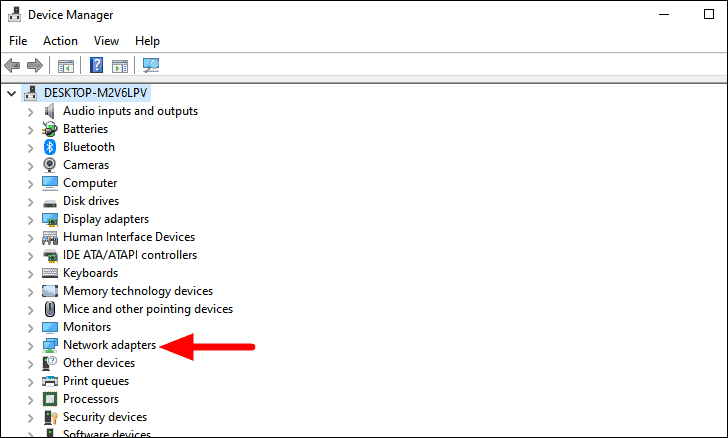
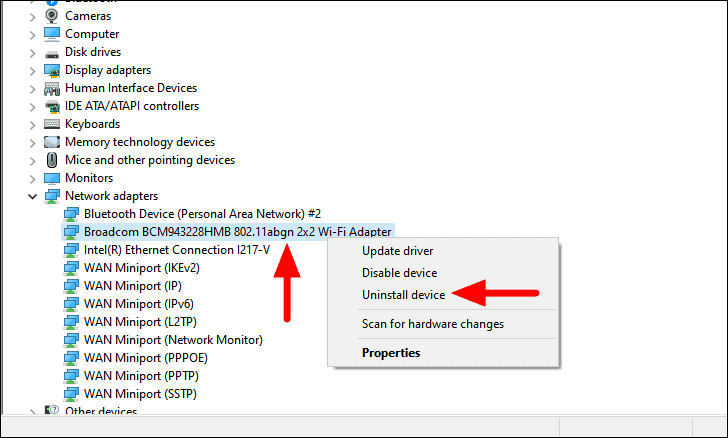
In the ‘Device Manager’ window, locate the ‘Network adapters’ option, and double-click on it to expand and views the drivers under it.
Now, right-click on the ‘Wi-Fi’ driver, and select ‘Uninstall Device’ from the context menu.
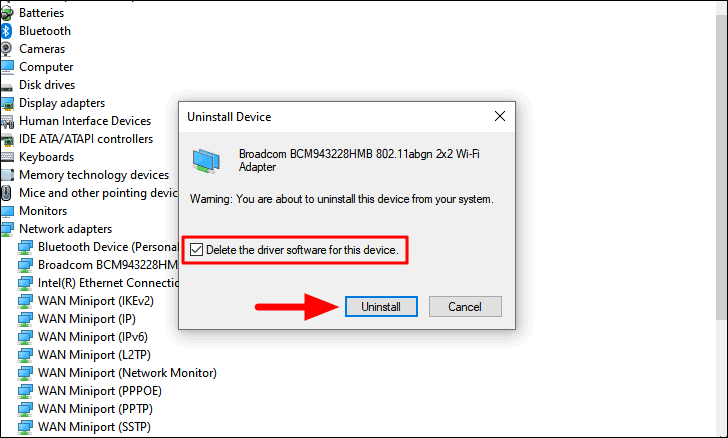
Next, tick the checkbox for ‘Delete the driver software for this device’, and then click on ‘Uninstall’ at the bottom to complete the process.
After the driver is uninstalled, restart the computer. When the system restarts, a fresh driver will automatically be installed. Now check if you are able to connect to the network. In case you still encounter the error, try the next fix.
6. Update Network Driver
In case, reinstalling didn’t work, the next fix is to update the ‘Network’ driver. If you are using an outdated version of the driver, there might be compatibility issues, thus leading to the ‘Windows Can’t Connect To This Network’ error.
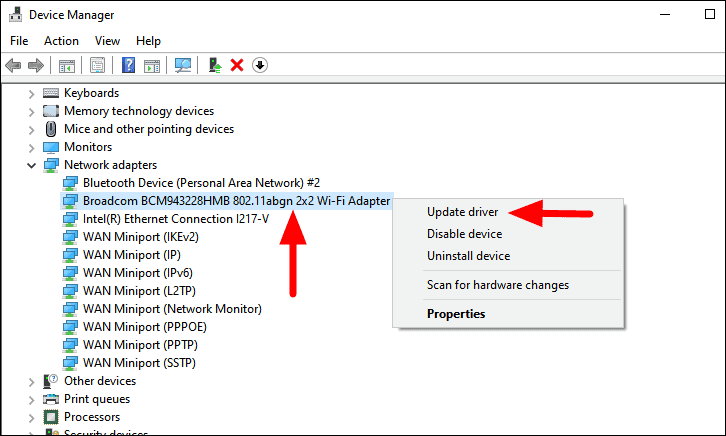
To update the driver, right-click on it, and then select the ‘Update Driver’ option from the context menu.
In the ‘Update Drivers’ window, you will be presented with two options. The first one is to let Windows automatically search for drivers and install the best one on your system or manually install it. If you are not a tech-savvy person, it’s recommended that you select the first option and let Windows search for the update.

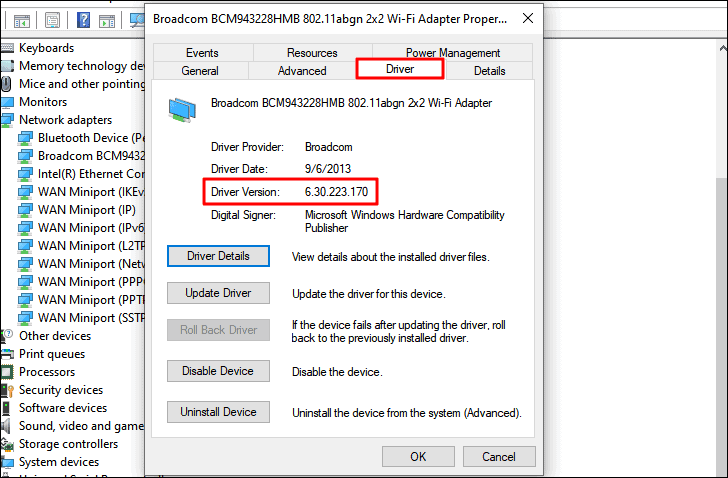
If Windows couldn’t find an update, you cannot rule out the fact there ain’t one available. Many a time, the manufacturer’s release updates on the official website which Windows cannot fetch. In this case, you will have to manually download and install the driver. But before you proceed, you need to find the current driver version so as to identify the newer version of it.
To find the current driver version, right-click on the driver, and select ‘Properties’ from the context menu.
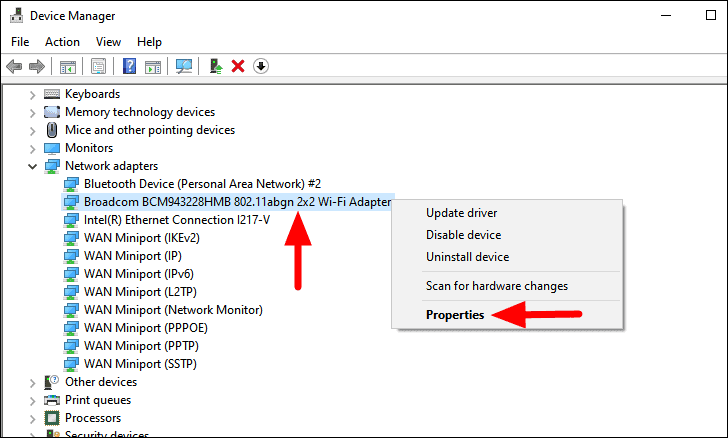
Next, navigate to the ‘Driver’ tab, and the current version will be mentioned next to ‘Driver Version’.
Once you have the current driver version, search for the driver on the web. From the search results, locate the manufacturer’s website and see if an update is available. In case there’s one, download it. Now, double-click on the downloaded file and follow the on-screen instructions to complete the installation process.
After you have installed the driver, restart the system and check if the error is fixed.
7. Run Network Adapter Troubleshooter
If none of the above fixes have worked for you, it’s time you run the ‘Network Adapter’ troubleshooter. Windows 10 offers a series of built-in troubleshooters that automatically identify and fix the issues leading to the error. In case of the ‘Windows Can’t Connect To This Network’ error, it’s the ‘Network Adapter’ troubleshooter that comes to your aid.
To run the ‘Network Adapter’ troubleshooter, press WINDOWS + I to launch ‘Settings’, and select ‘Update & Security’ from the list of options.
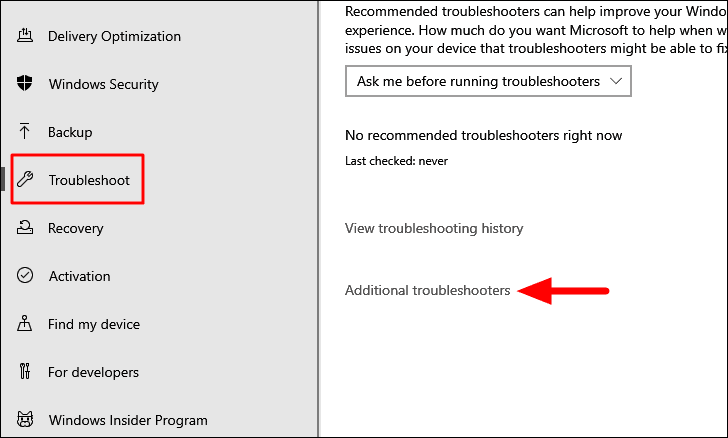
In the ‘Update & Security’ settings, you will find multiple tabs listed on the left. Select the ‘Troubleshoot’ tab, and then click on the ‘Additional troubleshooters’ option on the right.
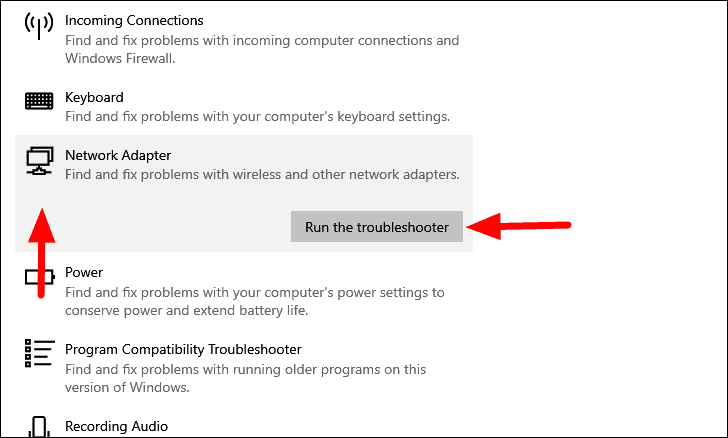
Now, scroll down and locate the ‘Network Adapter’ troubleshooter. After you have located it, select the troubleshooter, and then click on the ‘Run the troubleshooter’ option that appears.
The troubleshooter window will now launch. Follow the on-screen instructions to complete the troubleshooting process and check if you are now able to connect to the network.
8. Reset Network Settings
If there’s a glitch or bug in the ‘Network Settings’, it may lead to issues in connecting to a network. In this case, the easiest and highly efficient option is to reset the ‘Network Settings’.
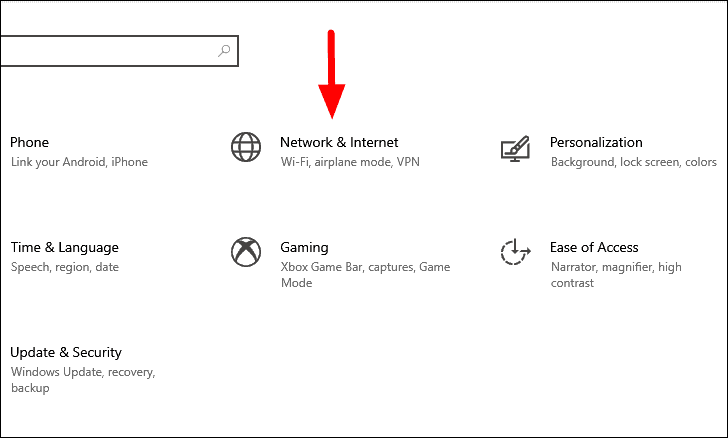
To reset ‘Network Settings’, press WINDOWS + I to launch the system ‘Settings’, and then click on the ‘Network & Internet’ option.
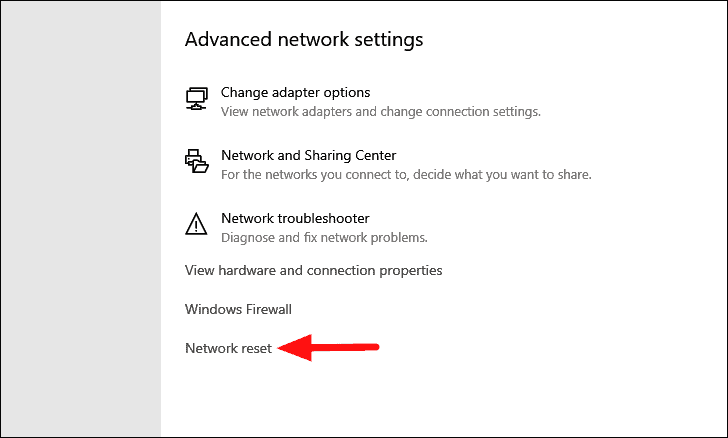
In the ‘Network & Internet’ settings, the ‘Status’ tab will launch by default. Scroll down and click on the ‘Network reset’ option.
Next, click on the ‘Reset now’ option and wait for the reset process to complete.
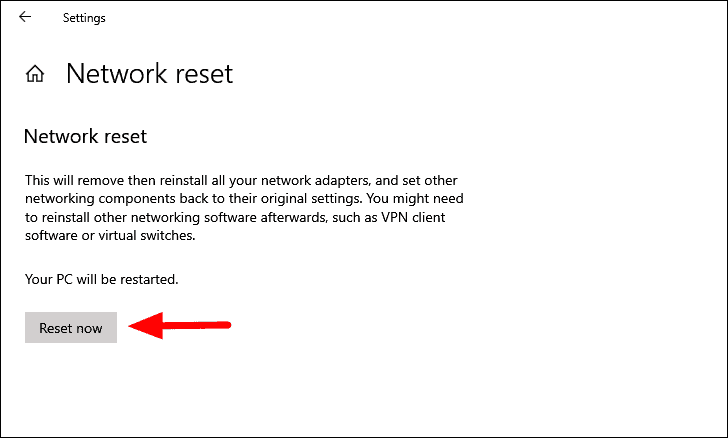
After the system restarts, check if the ‘Windows Can’t Connect To This Network’ error is fixed.
9. Disable IPv6 Settings
Many users have reported that it was the IPv6 settings that lead to the error and disabling it worked as a fix for them. Your computer in all likelihood can function on IPv4 settings for general use and only require the IPv6 settings for specific tasks, therefore, disabling it wouldn’t be much of a trouble.
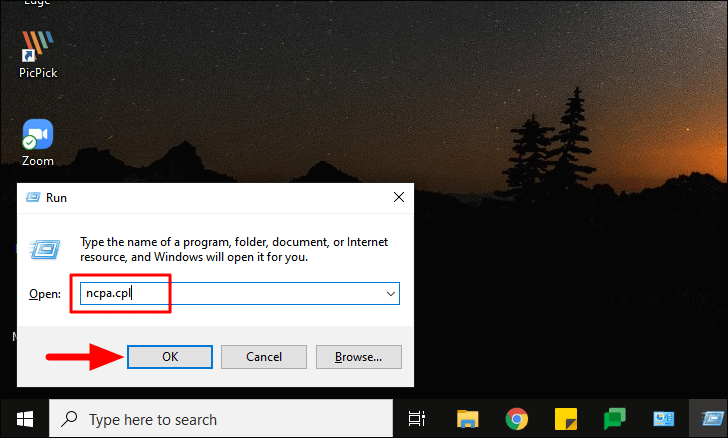
To disable IPv6 settings, press WINDOWS + R to launch the ‘Run’ command, enter ‘ncpa.cpl’ in the text box, and then either click on ‘OK’ at the bottom or press ENTER to launch ‘Network Connections’.
In the ‘Network Connections’ window, right-click on the ‘Wi-Fi’ option, and select ‘Properties’ from the context menu.
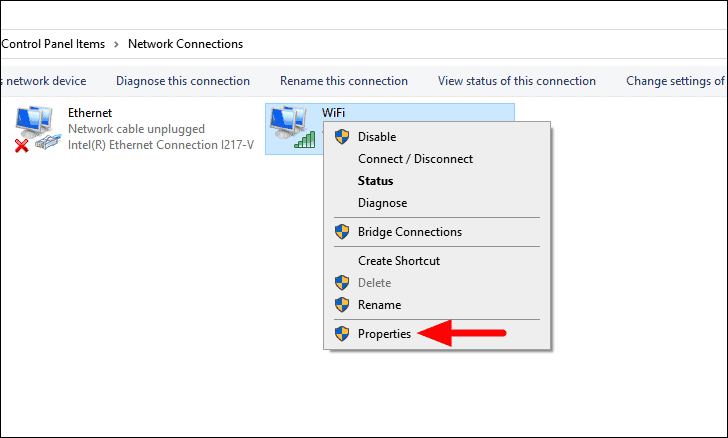
In the ‘Networking’ tab of ‘Wi-Fi Properties’, locate the ‘Internet Protocol Version (TCP/IPv6), and untick the checkbox for it. Finally, click on ‘OK’ at the bottom to save the changes.

Now, restart your computer and check if the error is fixed. If it persists, move to the next fix.
10. Run System Restore
If none of the above methods fixed the ‘Windows Can’t Connect To This Network’ error, it’s time you go for ‘System Restore’. This feature in Windows allows you to take your system back in time to a point where the error didn’t exist altogether. It will remove certain settings and apps from the computer, although, the files will not be affected.
Running ‘System Restore’ should be your last resort, since it removes your preferred settings. Also, you can only revert your system to certain restore points that exist on your computer. Windows automatically creates a restore point before any major changes are made, for instance, updating the Windows. You can also manually create restore points.
After you have run ‘System Restore’, the ‘Windows Can’t Connect To This Network’ error would be fixed.
When you are unable to connect to the internet, it affects both your progress and the Windows experience. With the fixes mentioned above, the ‘Windows Can’t Connect To This Network’ error can easily be resolved.


