
Sovereign Tower drops you onto the throne of a magical tower with a bickering court, four restless factions, and a demon in the crypts who can turn back time. It’s a story-rich Round Table management RPG from Wild Wits Games, published by Curve Games, and it plays out in daily cycles rather than real-time combat. The game launched on Steam for Windows, macOS, and SteamOS, with a downloadable demo covering Act 0 and Act 1.
Quick answer: Each cycle you hold morning audience, explore the tower, then assign knights to quests from the Round Table. Keep all factions from cratering, match a knight’s stats and traits to each quest, repair armor before it hits zero, and use the crypt rewind only when a mistake would permanently wreck your run.
The daily cycle in Sovereign Tower
Every in-game day follows the same rhythm, and learning it is the fastest way to stop losing runs. There is no open-world wandering. You listen, you decide, you delegate, then you read the fallout and roll into the next cycle.
| Phase | What you do | Why it matters |
|---|---|---|
| Morning audience | Hear petitions from subjects, nobles, merchants, and scholars, then pick dialogue. | Choices shift faction reputation, raise your Sovereign Archetypes, and spawn quests. |
| Tower downtime | Talk to knights, visit the Lady of the Tower, check the map room and inventory. | Builds affinity, reveals hidden traits, and unlocks new annexes. |
| Round Table | Assign knights to the quests that came out of audience. | Match stats and traits to the job to avoid failure. |
| Results | Read outcomes and note damage, XP, and gold. | Dead knights and empty coffers compound quickly. |

Quest results come in three flavors. A Critical Success pays strong rewards, faction goodwill, and affinity boosts. A plain Success or Unexpected Outcome gives solid or quirky payouts, and unexpected results often unlock special items or story beats. A Critical or Major Failure brings damage, faction penalties, missed opportunities, and possibly a dead knight.
Keep the four factions balanced
The core factions are the Nobility, Scholars, Merchants, and the People, with the Treasury sitting alongside them as your fuel. Almost every audience choice nudges their approval, and often one rises while another drops. You cannot please everyone forever, so steady, moderate approval across all of them is far safer than pushing one faction sky-high while the rest collapse.
Faction standing decides which quests appear and how difficult they look, and higher satisfaction unlocks better dialogue and shop options. Treat audience choices as long-term relationship management, not isolated yes-or-no buttons. Ignore a faction long enough and the penalties start to snowball.
Your Sovereign Archetypes, Audacity, Wisdom, Tyranny, and Kindness, also rise and fall with your choices. Hit certain thresholds and new options appear, and some lines only show up when one archetype is clearly in the lead. Pick a lane, but leave room to pivot.
Assign knights without getting them killed
Knights are the heart of the game. Each one carries five stats, Strength, Agility, Charisma, Magic, and Wit, on a 0 to 15 scale, plus visible attributes and hidden personality traits. They also have an affinity toward you and armor that takes real damage on quests.
Success depends on how well the assigned knight matches the required stats, modified by traits, party size, and a bit of randomness. A trait that clashes with the quest can turn a safe job into a disaster even when the numbers look fine, so read the quest text carefully. Highlighted words are usually hints about traits that will help or hurt.
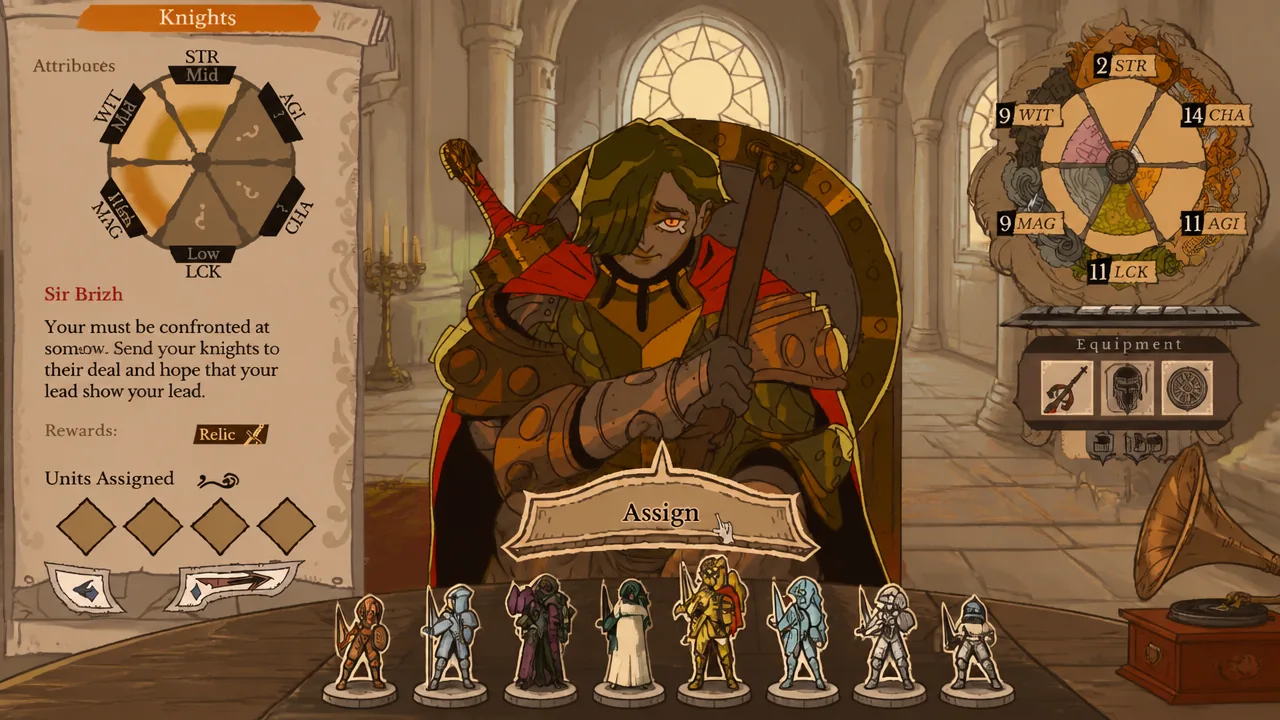
Prefer knights whose known stats sit at or above the requirements, and dig up hidden traits by talking to them, praising the right things, or leaning on advisors later. Early on you usually work with only one or two knights per cycle. Two rules keep them alive: armor takes damage even on success, and zero armor means permanent loss; gear, mounts, potions, and meals give temporary boosts and can nudge affinity.
Affinity is its own system. Matching a knight’s preferences, feeding them meals they like, and picking dialogue they approve of raises it and unlocks personal scenes. It does not directly change the quest math, but low affinity means a knight might simply leave your court for good.
Spend gold on the Blacksmith’s Forge first
Gold comes from taxes, quest rewards, and the occasional audience choice. You spend it paying for solutions during audiences, crafting and repairing gear, and expanding the tower. When it comes to building, the Blacksmith’s Forge is the top priority by a wide margin. It lets you repair armor and craft weapons and equipment, which matters most when you are limited to a single knight per cycle.
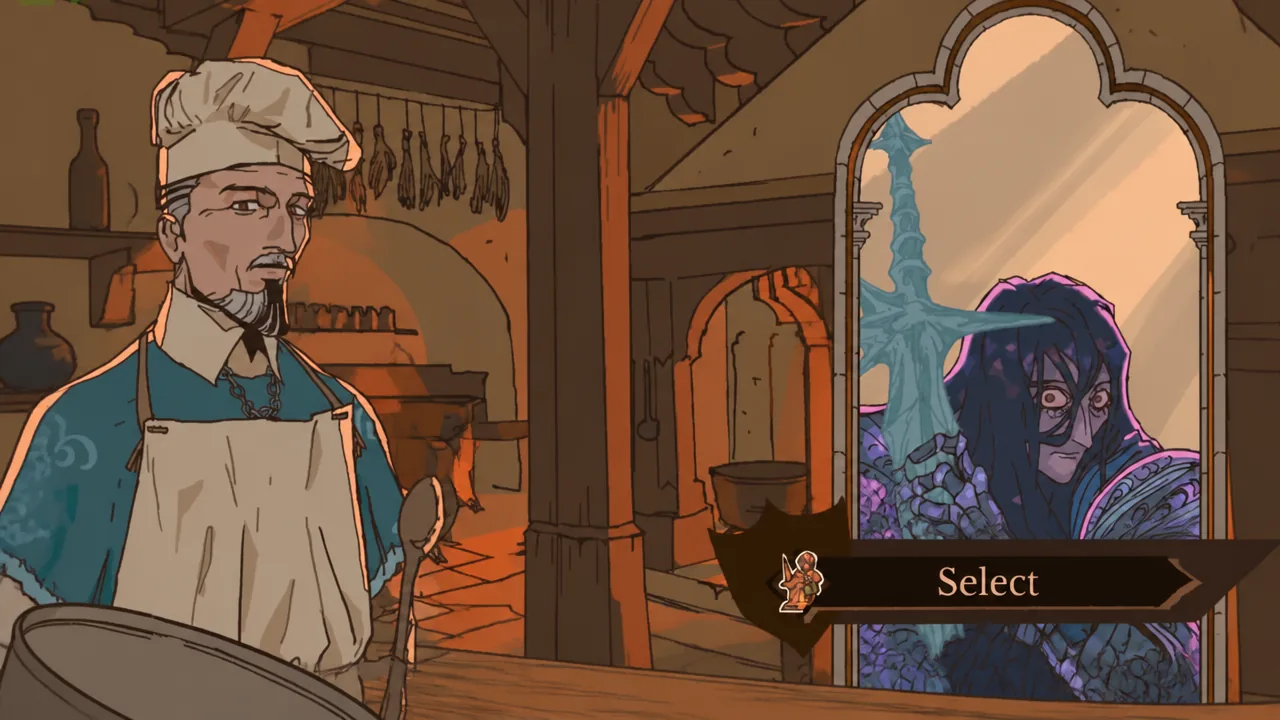
Carina’s hammer quest in Cycle 1 is the natural route to unlocking the Forge. Everything else, like the Alchemy room and the Intendancy, comes afterward once you recruit the right specialists through the Lady of the Tower, the statue in the gallery. Talk to her often, since expanding the tower opens more court positions and options. Above all, do not skip armor repairs. A dead knight costs far more than the gold you spent fixing their gear.
The crypt rewind, and when to use it
Deep in the tower sits a demon who can rewind previous cycles. You keep your knowledge and some progress, including Archetype levels, but the timeline itself gets rewritten. This is not free save-scumming. Overusing it carries narrative and mechanical costs.
Repeated use unlocks Omniscience levels that slowly reveal more information, including hidden traits, success chances, faction previews, and eventually deeper secrets about the tower and the demon. Higher Omniscience makes optimization easier, but it can fragment the story and change how characters react to you.
Save it for moments that actually matter. Good reasons to rewind early include a critical failure that kills a useful knight or tanks a key faction, realizing you sent the wrong person after the results screen, or wanting to test a different audience choice without restarting the whole run. The knowledge you gain sticks around for that playthrough, which is what makes the mechanic worth using deliberately rather than spamming.
First-cycle checklist
After Cycle 1 you usually unlock more knights, with Goberto being a common addition, along with the Forge path. Cycle 2 introduces the Crypt and the rewind mechanic more fully.
Early mistakes that wreck runs
- Going all-in on one faction while the others collapse.
- Ignoring traits and looking only at raw stats.
- Skipping armor repairs after the first few quests.
- Accepting every petition without weighing the long-term faction or resource cost.
- Sending knights on high-risk jobs when their armor is already low.
- Forgetting to talk to knights and the Lady of the Tower between audiences.
- Treating the rewind like a free undo button and ignoring its costs and revelations.
- Rushing past the first cycle without learning the systems.
Sovereign Tower is a management game and a visual novel at once, with heavy character writing layered over real systems. Knights can die permanently, so armor repair is non-negotiable, and there are no “correct” choices. The whole design is built around branching consequences and the ability to rewrite timelines, so learn the three-phase day, keep your factions steady, and let the demon fix the disasters you cannot recover from.