


Bellanoir Libero is the single hardest-hitting Pal in Palworld 1.0, and a base full of them can grind down every raid boss in the game. The reason is a stacking multiplier on its signature move that turns an already huge attack stat into damage nothing else on the roster matches.
Quick answer: Mass-breed Bellanoir Libero, give each one Diamond Body plus offensive passives, deploy them as base Pals so they fire Nightmare Bloom at 2.5x damage, and swap their secondary active skills to match each boss’s elemental weakness.

Why Bellanoir Libero has the highest damage in 1.0
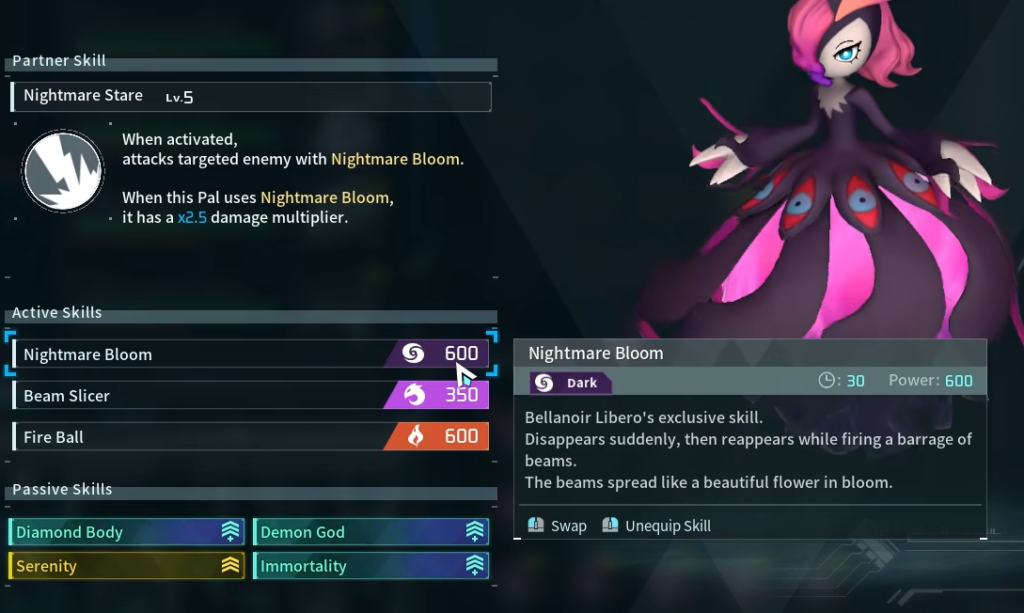
Bellanoir Libero is a Dark-type subspecies of Bellanoir with a base Attack of 150, the highest of any Pal in the game. It shares Bellanoir’s stat line but keeps its own signature active skill, Nightmare Bloom, a laser that widens partway through its animation.
Nightmare Bloom lists at 600 Power on paper, but its Partner Skill, Nightmare Stare, multiplies the move’s damage as its level rises. At Level 5 that multiplier reaches 2.5x, pushing the effective Power to 1,500. The key detail is that the 2.5x boost applies every time the Pal uses Nightmare Bloom, not only when you manually trigger the Partner Skill. That means a Bellanoir Libero deployed as a raid base Pal casts it at full boosted strength on its own.
| Nightmare Stare level | Nightmare Bloom multiplier |
|---|---|
| 1 | 1.1× |
| 2 | 1.3× |
| 3 | 1.6× |
| 4 | 2.0× |
| 5 | 2.5× |
Raise the Partner Skill level with Starfruits, or fully condense the Pal using duplicates at a Pal Essence Condenser. At Level 80 a fully built Bellanoir Libero reaches roughly 6,426 Attack, which is what lets a stack of them tear through multi-million HP raid targets.
Best passive skills for a Bellanoir Libero raid army
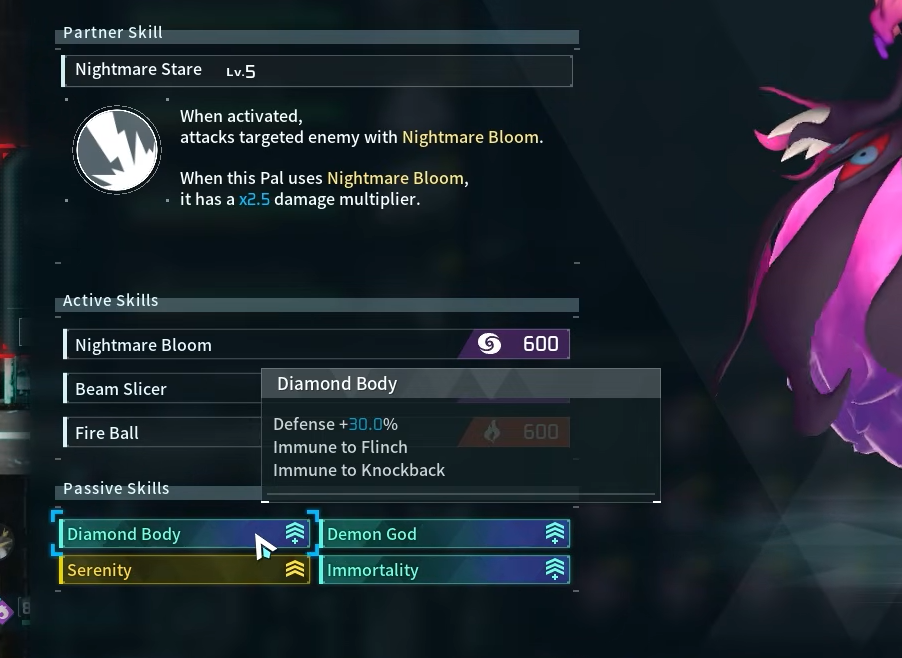
For a raid build, the standout choice is Diamond Body over the Pal’s own Siren of the Void. Diamond Body grants flinch immunity, so bosses cannot interrupt a Nightmare Bloom cast mid-animation. Since the whole strategy depends on the laser actually landing, uninterrupted casting matters more than a raw damage passive here.
| Passive | What it does for the army |
|---|---|
| Diamond Body | Flinch immunity, so Nightmare Bloom casts finish without being staggered |
| Demon God | Boosts attack output |
| Serenity | Keeps sanity stable so damage stays high |
| Immortality | Extends survivability during long raids |
Siren of the Void still works and can be inherited by either Bellanoir form, so it is not what separates the two subspecies. For raids specifically, flinch immunity is the higher priority slot.
Match the army’s active skills to each raid boss
Nightmare Bloom is Dark-type, which some bosses resist. To get around elemental resistance, keep Nightmare Bloom as the primary skill and swap the second and third active slots to skills that hit the current boss’s weakness. Palworld 1.0 has six raid bosses across eleven encounters counting the Ultra and Master variants, and the same army clears all of them with the right loadout.
| Boss | Element / weakness | Army skills to add |
|---|---|---|
| Bellanoir Libero (Ultra) | Dark, weak to Dragon | Nightmare Bloom, Beam Slicer, Fire Ball |
| Blazamut Ryu (Ultra) | Fire, then Electric at low HP | Geyser Gush, Sand Twister |
| Xenolord (Ultra) | Dark / Dragon, weak to Ice | Comet Strike, Absolute Frost, Diamond Rain |
| Moon Lord (Master) | Crossover, no element | Defensive base setup, keep Nightmare Bloom |
| Hartalis (Ultra) | Water/Grass, then Neutral | Dark hitters finish the Neutral phase |
| Zenara & Astralym | Hard Mode duo | Apocalypse, Sand Twister |
Bellanoir Libero is especially valuable in the Zenara and Astralym Hard Mode fight and in Hartalis’s Neutral second phase, where Dark damage breaks through where other elements stall.

Maximize your own player damage alongside the army
The Bellanoir Libero base Pals handle bulk damage, but your personal shots stack on top. The most effective setup uses element-conversion mounts to change your attack element to whatever the boss is weak to, then unloads with a Plasma Rifle or Drone Launcher.
- Ride element-swapping mounts like Pyrin, S.S. Azure, Gildane, or Frostallion to match the boss’s weakness (for example, ice mounts against Xenolord).
- Keep condensed Gobfin in your party to multiply your gun damage.
- Invest into your Attack stat and eat attack-boosting food such as Mammorest Curry or Galeclaw Nikujaga before starting.
- Equip damage-oriented accessories like the Attack Pendant and Katress Ring.
Note: the raid boss focuses whoever deals the most damage, and your own death does not fail the fight. You only lose if the 10-minute timer runs out or your Pal Box is destroyed, so bred-to-be-replaceable Pals are fine to lose.
How to get Bellanoir Libero
You cannot catch Bellanoir Libero. It is summoned as a raid boss and drops an egg when defeated, which hatches a usable, non-boss version of the Pal.

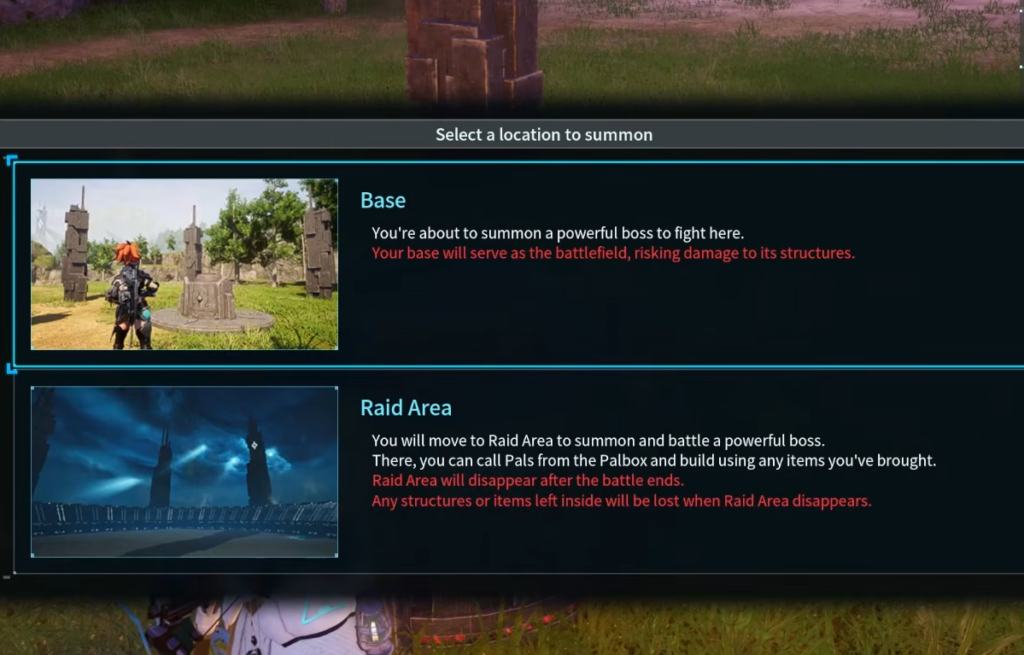
The recommended raid level is 45, but that will be a punishing fight. A main team around Level 60 clears the standard version comfortably, and the Level 80 Ultra tier, with HP pools reaching into the millions, expects a maxed, condensed roster. Once you have a stack of fully built Bellanoir Libero with Diamond Body and Nightmare Stare at Level 5, you can rotate their active skills per boss and use the same army to farm the entire raid ladder.





