
Breakout rooms are a valuable tool for facilitating group collaboration during virtual meetings. While Google Meet doesn’t offer a built-in breakout room feature, you can create them using a combination of Google Meet and Google Slides. This guide will provide detailed instructions on how to set up and manage breakout rooms in Google Meet, allowing participants to engage in group discussions and activities seamlessly.
How breakout rooms work in Google Meet
You can set up breakout rooms in Google Meet by creating separate meeting links for each group and organizing them using Google Slides. Each breakout room is essentially a unique Google Meet session where a subset of participants can collaborate independently. By assigning participants to specific rooms ahead of time and sharing a visual guide through a Google Slides presentation, you can ensure everyone knows which room to join.
Creating a Breakout Rooms Google Slide
To visually communicate breakout room assignments to your participants, you can create a Google Slide that lists the groups, their members, and provides links to join the respective rooms. Here’s an example of what the slide might look like:

This slide clearly outlines each group and the participants assigned to them, minimizing confusion and ensuring a smooth transition into breakout sessions. You can create your own slide from scratch or use a pre-designed template as a starting point.
We have prepared a template that you can use:
Copy from the menu.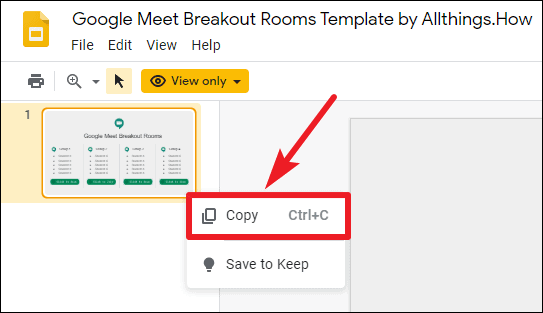
+ icon to start a new slide.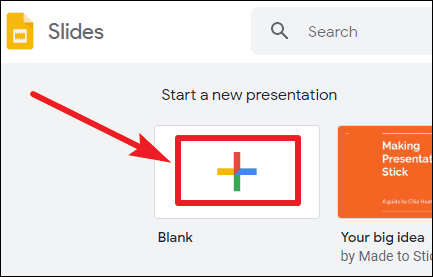
Paste to insert the copied template slide. You can now modify the slide to suit your specific needs, such as updating group names and participant assignments.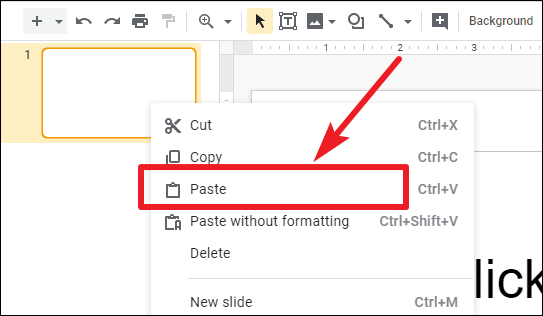
Creating breakout rooms in Google Meet
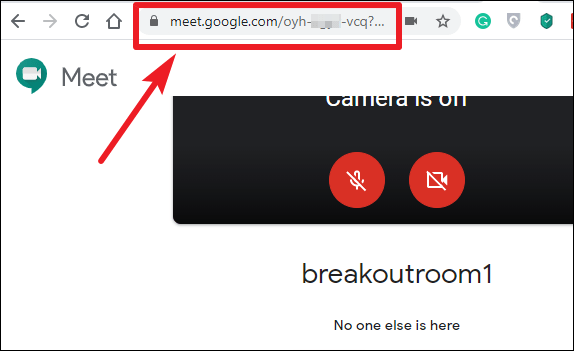
With your Breakout Rooms slide prepared, the next step is to create the individual Google Meet sessions that will serve as the breakout rooms.
Join or start a meeting.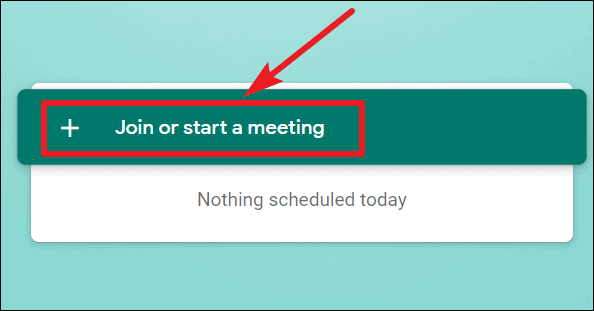
Breakout Room 1 as the nickname, then click Continue.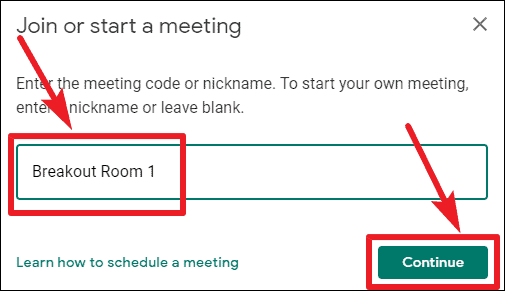
Note: Assigning nicknames is optional but can be helpful for organizing multiple meetings.
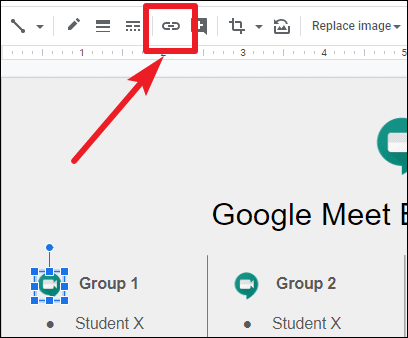
Click to Join button (if you’re using our template) or the text or image you want participants to click to join the breakout room. Click on it, then select Edit to modify the link.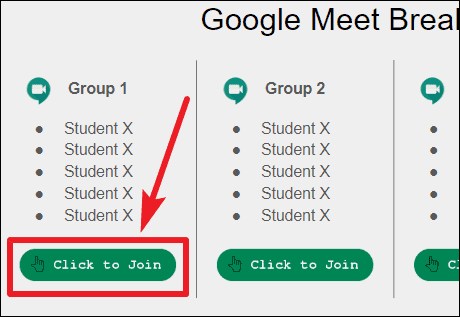
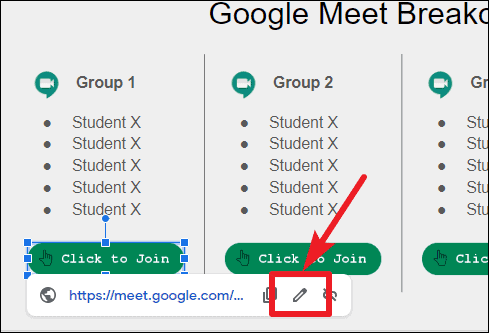
If you’re creating your own slide, highlight the text or image you want to link, click the Insert link icon, and paste the meeting URL.
Sharing breakout rooms with participants
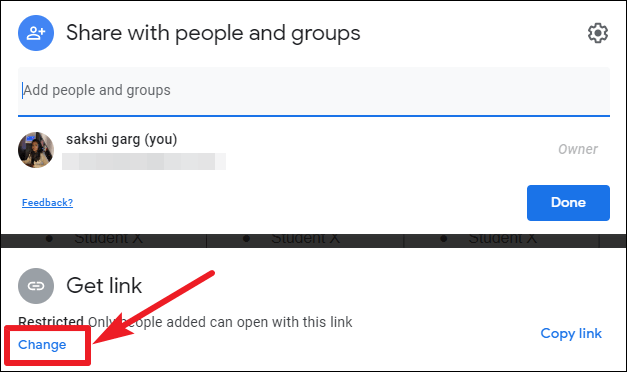
Once you’ve set up all the breakout rooms, it’s time to share them with your meeting participants.
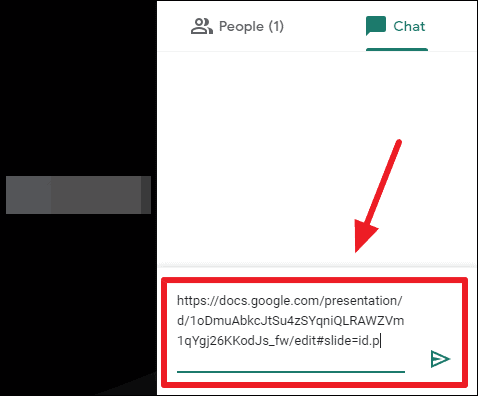
Share button in the top-right corner to get a shareable link.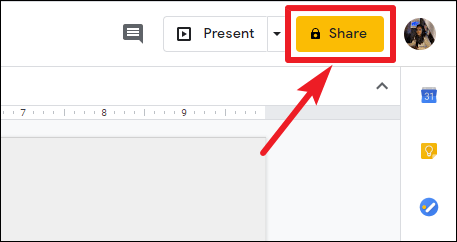
Anyone with the link from the drop-down menu to ensure that all participants can view the slide. Make sure the access level is set to Viewer, then click Done.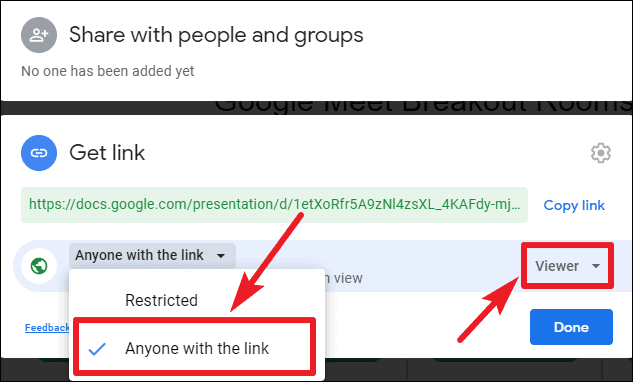

Participants can now join their assigned breakout rooms while remaining connected to the main meeting. This setup allows for easy coordination and helps facilitate group activities and discussions.
Managing multiple Google Meet sessions
When you’re connected to multiple Google Meet sessions simultaneously, one challenge you might encounter is overlapping audio from different meetings.
Mute site.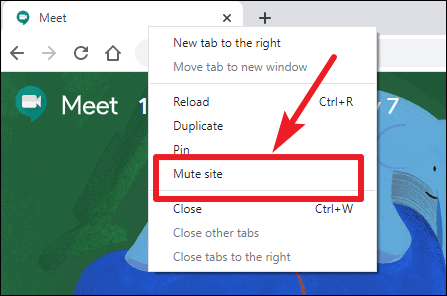
You can unmute a tab the same way when you’re ready to join that breakout room. This method allows you to navigate between different breakout sessions without audio interference.
By following these steps, you can effectively create and manage breakout rooms in Google Meet, enhancing collaboration and group participation during your virtual meetings. This approach is beneficial for educators conducting remote classes and organizations facilitating team discussions.