


The Version 7.0 rotation of Stygian Onslaught puts three very different shields in front of you. The Chimeric Winged Lion is the newcomer, pulled from Snezhnaya, while the Veteran Wind Operative and the Knuckle Duckle are returning faces with mechanics you may already know. Each one gates its own health bar behind a shield that only breaks properly if you bring the right reaction, so team building here is less about raw damage and more about matching the check.
Quick answer: Run Sandrone, Odette, Yae Miko, and Qiqi against the Chimeric Winged Lion; Arlecchino, Fischl, Chevreuse, and Nicole against the Veteran Wind Operative; and Flins, Ineffa, Columbina, and Sucrose against the Knuckle Duckle.
What each 7.0 battlefield is checking for
Every boss in this cycle opens with a defensive layer, and every one of them punishes itself when that layer falls. Break the shield and you get a single large chunk of damage plus a paralysis window. That window is where almost all of your real damage happens.
| Battlefield | Boss | What breaks it |
|---|---|---|
| 1 | Chimeric Winged Lion | Stellar Glimmer reactions; Stellar-Conduct is easiest thanks to its own Electro shield |
| 2 | Veteran Wind Operative | Raw damage into a non-elemental shield, reflected back on break; Bond of Life carries benefit |
| 3 | Knuckle Duckle | Lunar-Charged and Electro-Charged; it also drops Electro RES for a stretch of the fight |
Roster rules that shape your three teams
From Menacing IV upward, no character can appear on more than one battlefield. That single rule is what makes this mode hard, because your three best supports usually want to be in all three lineups. Plan the whole set at once instead of optimizing one fight at a time.
Fearless V and Dire VI rewards are solo only, and matchmaking co-op stops at Hard III. Menacing IV can still be run co-op, but only with people already in your world. Everyone also starts each fight with zero energy, so bring units that can build up their bursts quickly.
Exalted Ones are worth checking before you lock anything in. Sixteen characters rotate daily based on server-wide Dire clears, and if you already own one of them, they gain a flat ATK, DEF, and HP buff. They do not give you access to characters you do not own.
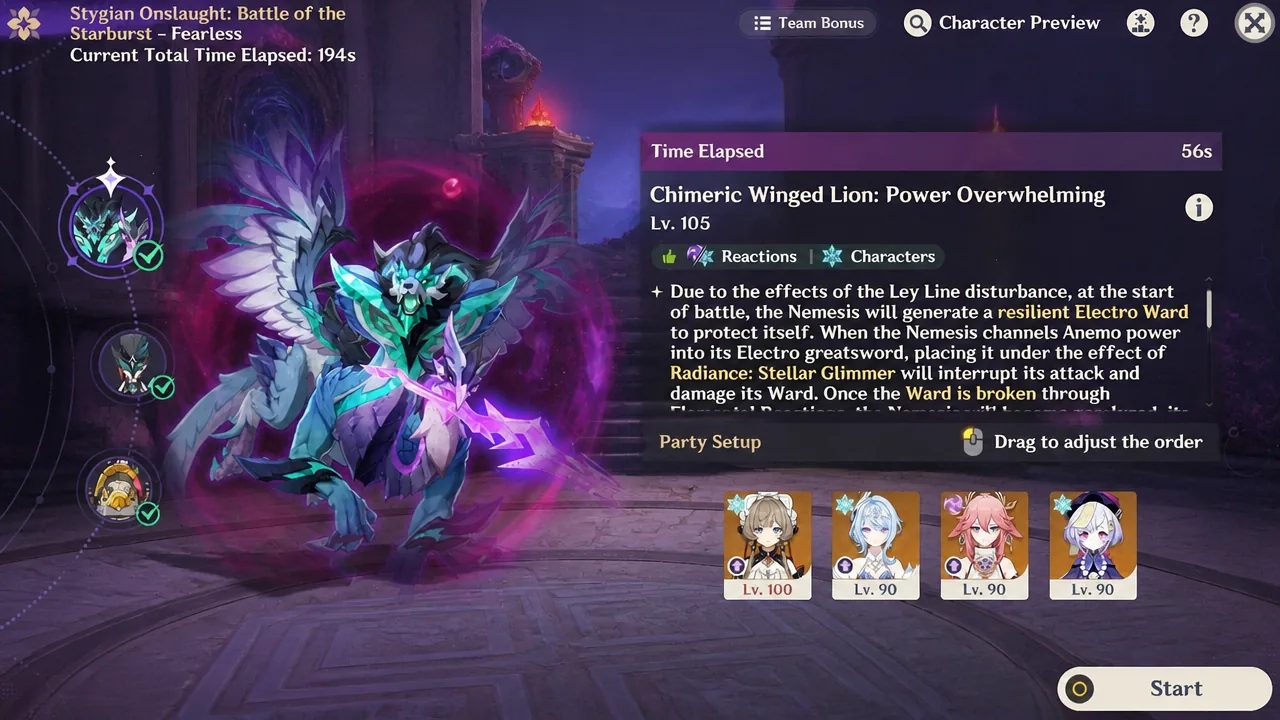
Chimeric Winged Lion: Stellar teams for the Electro shield
The Lion throws up an Electro shield the moment the fight starts, and it melts under Stellar Glimmer reactions. Because the boss supplies the Electro aura itself, Stellar-Conduct is the path of least resistance, though Stellar Swirl works too. Ignore the health bar until the shield is gone, then unload during the paralysis.
| Team | Why it works |
|---|---|
| Sandrone, Odette, Yae Miko, Qiqi | Sandrone’s premium Stellar-Conduct setup; the fastest shield break in the rotation. Swap Qiqi for C6 Alyosha if you have him. |
| Cryo Traveler, Odette, Yae Miko, Alyosha | Cryo Traveler’s best lineup runs the same Stellar-Conduct plan without needing Sandrone. |
| Mizuki, Odette, Cryo Traveler, Faruzan | A Stellar Swirl variant. The shield is weak to it, so you break first and settle into normal rotations after. |

If any of those four are missing, the slots are flexible. Cyno, Wriothesley, and Mizuki can stand in as the Stellar-Conduct driver; Fischl, Beidou, and Alyosha cover the off-field Electro; Qiqi, Diona, Escoffier, or Cryo Traveler handle Cryo; and Nicole or Bennett fill the buff slot.
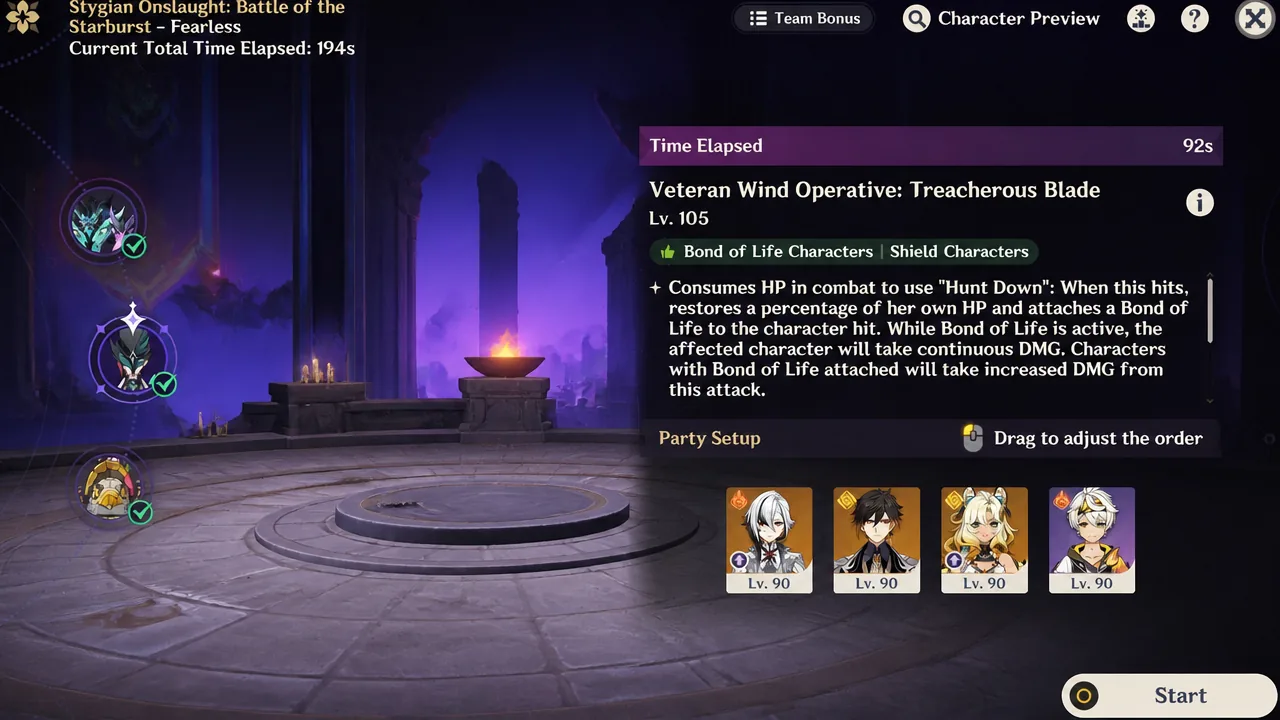
Veteran Wind Operative: Bond of Life turns a debuff into damage
This one behaves much like the Cryo Operative from an earlier cycle. It applies Bond of Life to your active character, which sounds bad until you bring someone who feeds on it. Its shield has no element attached, so it only cares about how much damage you throw at it.
Everything you deal while the shield holds gets reflected back into the boss when the shield finally cracks, and it then stays shieldless for a long stretch before the pattern repeats. Dodge its Anemo attacks, because any that connect heal it.

| Team | Why it works |
|---|---|
| Arlecchino, Fischl, Chevreuse, Nicole | The strongest answer here. Arlecchino converts the boss’s own Bond of Life into damage, and Overload chews through the shield. |
| Arlecchino, Xilonen, Citlali, Bennett | A Melt version for players short on Overload pieces. Hold Citlali’s Skill and Burst until after the shield breaks so Melt keeps firing. |
| Mavuika, Ororon, Iansan, Chevreuse | No Bond of Life payoff, but Overload after the break still clears the stage comfortably. |
Clorinde is the other name worth remembering. She wants Bond of Life for the same reason Arlecchino does, and a Clorinde, Furina, Fischl, and Mona team covers this battlefield if Arlecchino is already committed elsewhere.

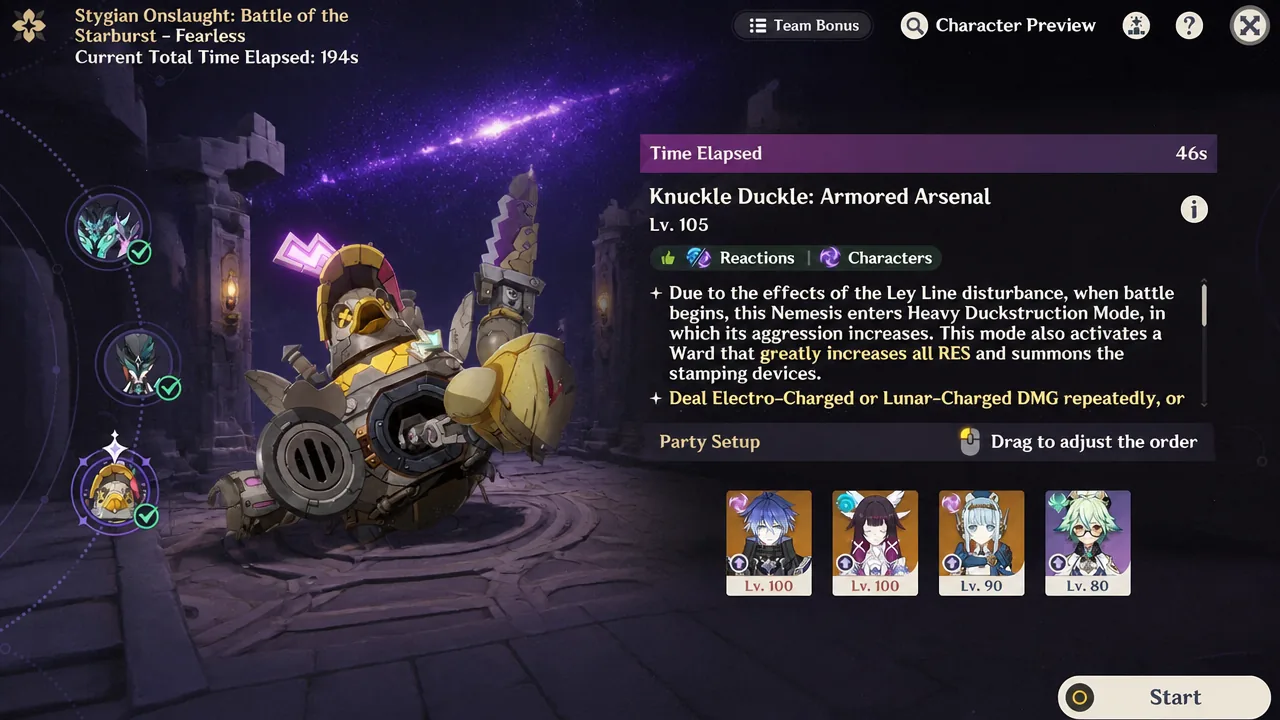
Knuckle Duckle: clear the Stamping Devices first
The Knuckle Duckle is back and behaves the way it always has. It is weak to Lunar-Charged and Electro-Charged, and for part of the fight its Electro RES drops, which makes Electro carries the obvious pick. Other well-built Lunar teams still work, they just take longer.
At the start of the fight it spawns Stamping Devices. Destroy all of them and the boss eats a large hit and gets paralyzed. That stun is your damage phase, so save your rotation for it rather than burning cooldowns on the summons.
| Team | Why it works |
|---|---|
| Flins, Ineffa, Columbina, Sucrose | Flins’ premium Lunar-Charged team. Wipes the Stamping Devices fast and has the damage to finish during the stun. |
| Zibai, Linnea, Columbina, Illuga | Not a Lunar-Charged team, but strong enough to clear the summons quickly and paralyze the boss anyway. |
| Nefer, Lauma, Columbina, Nahida | Lunar-Bloom with Nefer carrying. Prioritize the summons, then run Nefer’s normal rotation once the boss is stunned. |
Raiden Shogun and Varesa are reasonable Electro stand-ins for Flins, while Xingqiu or Iansan can take the fourth slot if Sucrose is needed on another battlefield.

Sorting out the units all three teams want
A few characters show up in the recommended lineups more than once, and from Menacing IV you have to pick a home for each of them. Odette anchors most of the Stellar options, Columbina sits in every Knuckle Duckle team, and Fischl and Chevreuse are pulled toward both the Operative and the Duckle.
The cleanest split is to keep Odette and Yae Miko on the Lion, keep Columbina on the Duckle, and build the Operative team around whichever Bond of Life carry you did not otherwise need. If Cryo Traveler is your Lion driver, that frees Sandrone entirely, and Escoffier or Diona can cover the Cryo slot instead.
Rewards, the 180-second Dire clear, and Disturbance Outbreak
Clearing Normal, Advancing, and Hard each pays 150 Primogems along with Mora and Hero’s Wit. Menacing and Fearless each hand over a Dust of Enlightenment, with Fearless requiring a solo run. Dire drops a weapon skin, and finishing all three bosses on Dire within a combined 180 seconds upgrades it to the five-star version with an extra glow. These skins expire at the end of the patch.
Disturbance Outbreak runs for the first ten days of the cycle. During that window, at Hard III or above, you can spend Resin to pull artifacts from any Domain set you choose. Every 120 Dire Prestige earns an extra five-star artifact, and spending 1,200 Resin total nets one more Dust of Enlightenment. Original Resin gives 20 Prestige, Condensed gives 40, and Fragile or Transient gives 60.

You will know each battlefield went right when the shield collapses and the boss visibly locks in place. If that never happens, it is almost always a reaction problem rather than a damage problem, whether that means missing Stellar-Conduct on the Lion, letting the Wind Operative heal off its Anemo hits, or leaving one Stamping Device standing. Fix the reaction, and the rest of the fight takes care of itself.





