War of Genesis: Idle Loot runs as a transparent overlay in the corner of your desktop, with a 3D hero that fights and picks up loot on its own. There are no combat controls. The real early-game work is turning what the idle loop drops into a stronger character, and that comes down to a handful of menus you should touch every time you log in.
Quick answer: Pick one class and stick with it, combine six same-grade items at the Equipment Forge (turn on Auto Combine), keep every one of your 14 slots filled, and claim a Diamond every four hours to spend at the Altar.

Pick one class and commit to it
The in-game menu names three classes: Swordsman, Archer, and Mage. Some community tools relabel them Knight, Ranger, and Wizard. Combat is automatic, but the class still locks your weapons and skill tree, and early Training and Ability Unlock progress stays tied to whichever character you feed. Switching later is possible, but it wastes the resources you already poured in.
| Class | Menu name | Strength |
|---|---|---|
| Knight | Swordsman | Tanky, lightning AOE, safest single-character pick |
| Wizard | Mage | High elemental burst and wide AOE, low defense |
| Ranger | Archer | Long range and fast DPS, farms well once evasion is stacked |
Opinions split on the strongest starter. The Knight is the low-risk pick because a single character can clear stages and survive on its own. The Ranger hits fast and is a strong farmer thanks to its DPS, but it leans on stacked evasion to come online. If you want a smooth curve with the least babysitting, start Knight; if fast clears are your priority, start Ranger and level skills like Rapid Fire and Quick Step.
A new character in your class line unlocks roughly every 10 levels and adds a real stat jump. Unlock each one as you meet its requirement so your hero keeps pace with the stages.
Use the Equipment Forge to combine gear
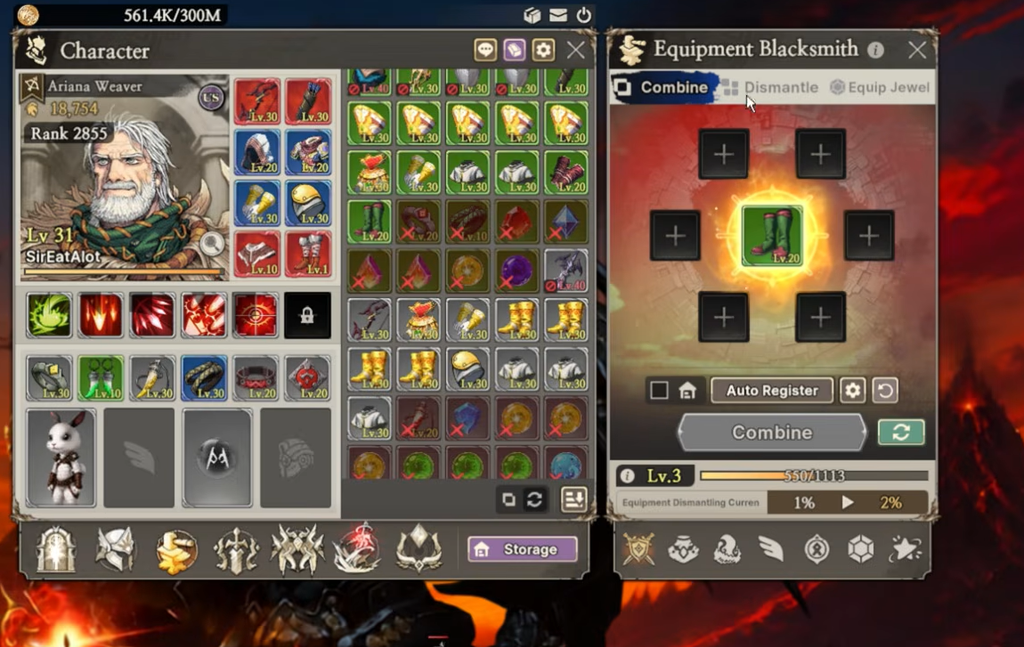
Higher-rarity gear rarely drops on its own. The Equipment Forge (the Blacksmith, third button on the bottom bar) is where you make it. Its Combine tab states the rule in plain text: combine items of the same grade to get an item of the next grade up. You need six of the same grade to fill the circle, and it works on weapons, armor, and accessories alike.
Because this is an idle game, automate the whole thing. Click the green recycle icon next to the Combine button to open Auto Combine, set which grades and item levels to merge, then press Start. From then on the game combines every batch of six matching drops for you while it runs in the background. The settings also let you fine-tune the loot grades and levels it will touch.
Combine success rates and any pity system are not published. Ignore any guide quoting an exact percentage.
Keep all 14 slots filled and manage bag space
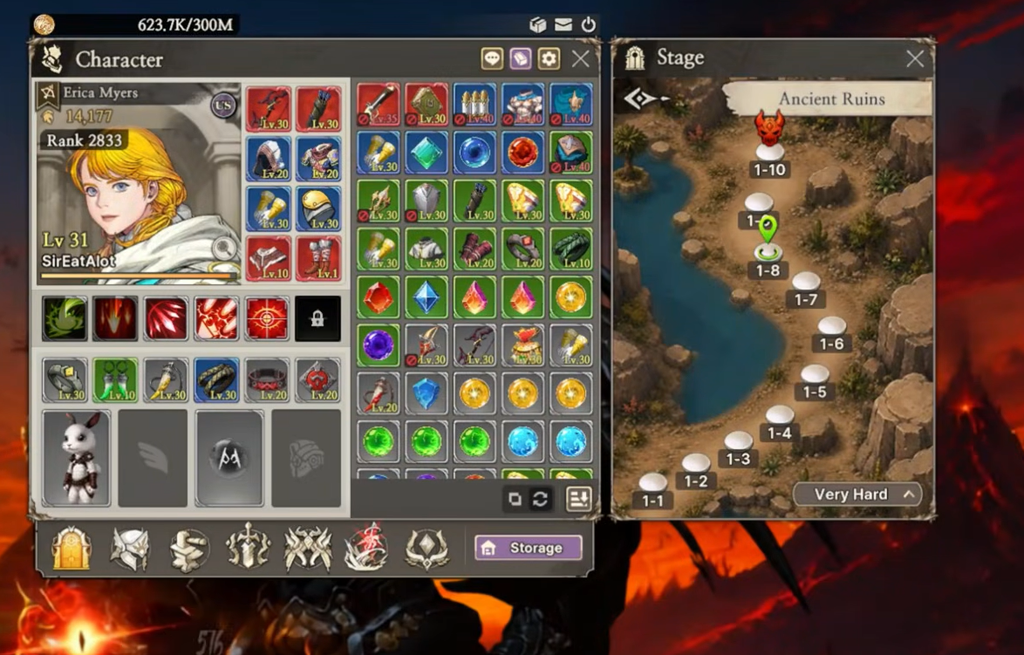
There are 14 equipment slots covering weapons, armor, accessories, plus jewels, pets, wings, runes, and magitech gear as they drop. An empty slot contributes zero, so equip anything into a bare slot first and optimise the piece later. There is no “perfect item” to wait for, since same-grade pieces differ only by rolled options.
Bag space is the silent progress killer. When the inventory fills, the client prints Not enough bag space and your AFK combat stalls until you clear room. Auto Combine and Dismantle are your two recycling paths, so keep at least one running. If you plan to rebuild a different class later, stash class-specific weapons and unused gems in storage — just accept that hoarding costs you the gold and fragments you would have earned by dismantling.
Convert loot into usable currency at the Refinery
Gold Bars and Diamond Pouches do nothing sitting in your bag. Take them to the Refinery Blacksmith, which has two slots: drop the item on the left and the right slot shows the yield. Gold Bars become Gold Coins, the main currency, and Diamond Pouches become Diamonds, the premium currency.
Claim Diamonds and spend them at the Altar
The Altar (Growth) produces one Diamond every four hours, and each Diamond buys a permanent, stacking stat boost that scales your power the whole time you play. The catch is a production cap of five, which works out to 20 hours of storage. Anything beyond the cap is wasted, so log in roughly once a day, claim, and spend.
Set your Training priorities
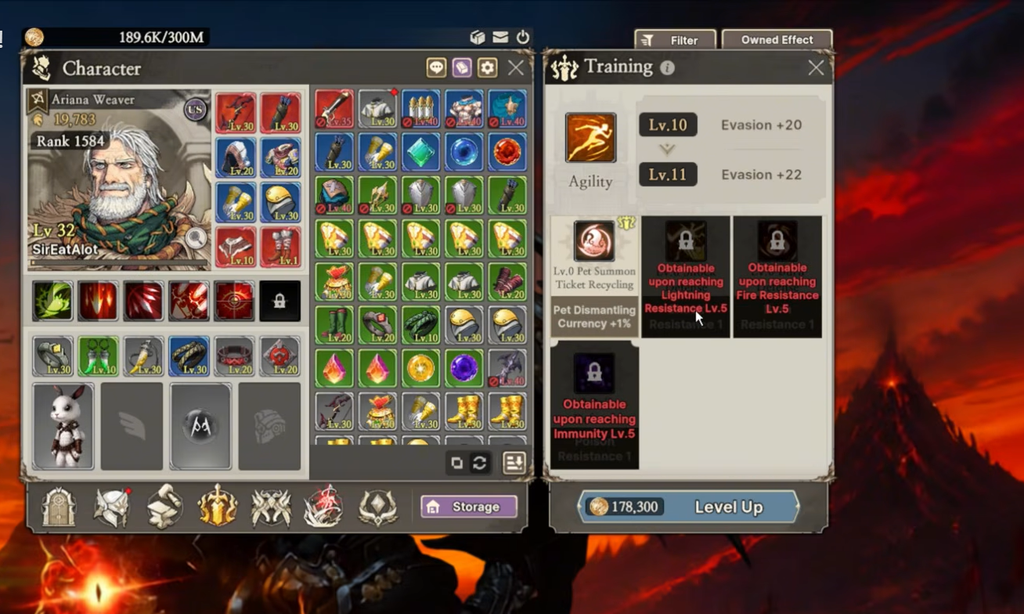
The Training menu is where you hit walls or push through them. Progression stalls when enemies deal too much damage or apply status effects, and the fix is resistances. Raise your resistance skills to level 5 as early as possible — some later nodes are gated behind them, so falling behind blocks the whole tree.
- Subjugation (PvE) Attack Power for stage clearing
- Agility and Evasion for survivability, especially on Ranger
- Max Gold Storage so long idle sessions do not overflow
- Resistances such as Lightning to unlock advanced stats
The Training Ground also rolls stats with RNG, and you can lock the high-tier stats you want. Aim to keep S-rank rolls when they appear, since locking gets expensive fast.
Sell loot on the Marketplace, but batch your listings
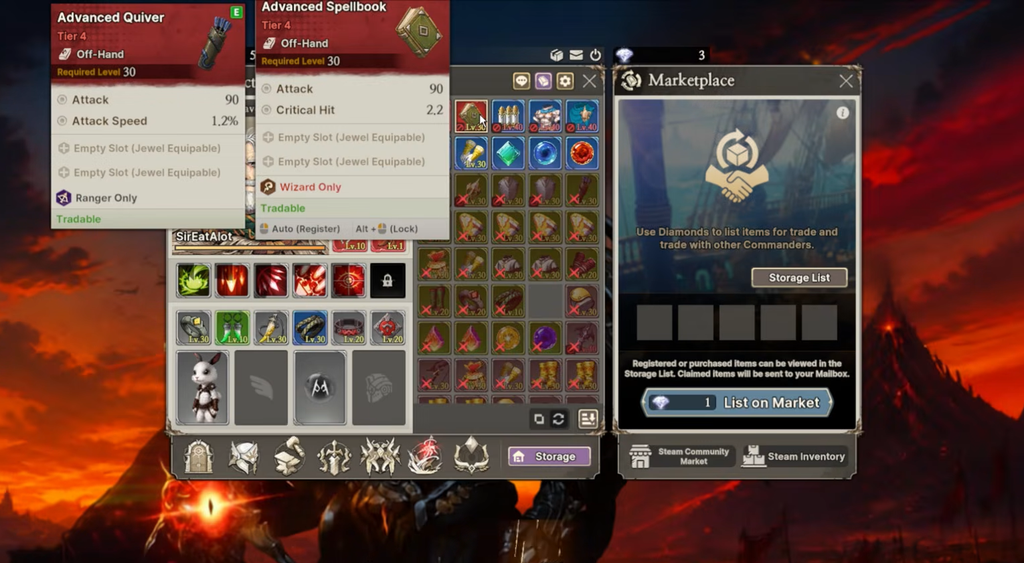
The in-game Marketplace connects directly to the Steam Community Market, so looted gear can be sold to other players and turned into Steam Wallet funds. Open it from your inventory, set a price after checking comparable listings on Steam, and confirm through Steam Guard.
Each listing costs one Diamond, so list as many items as you can in a single batch. Posting one item at a time burns Diamonds for almost no return.
Once an item is listed on the Market it cannot be retrieved or delisted, and Steam still charges its own fees. Only list what you are certain you want to part with.
Join an Alliance for passive buffs
Joining an Alliance is a one-time achievement and a genuine early boost. Open it from the top right of your character profile and pick a region to represent. As you level your Combat Power Ranking, you earn limited-time buffs to defense, damage, and attack speed. You will not reach the top spots as a new player, but the buffs handed to the top 50% are reachable early. Alliances are also what gate Alliance Raids and World Boss content later.
Drop back a stage when you stall
Stages start in Ancient Ruins on Normal and run through chapters like Tropical Rainforest, Underground Prison, and Ice Castle, with Despair and Apocalypse difficulties behind Normal. If you keep failing a boss or wave, step back one stage rather than grinding against a wall. A stage you can clear farms more experience and drops the loot you need to combine your way back up. Sitting on a fight you cannot win only starves your progression.
With a class chosen, Auto Combine running, resistances leveled, and a Diamond claimed every few hours, you can leave the overlay running in the corner while it does the farming. War of Genesis: Idle Loot is a free-to-play Early Access title on Windows, and you can start it from its Steam store page.