Control Resonant: How to Get the Large Resource Crate in Central 6
The exact route to the R&C Storage crate by the Field Office, the clearance it needs, and the Power Upgrade Point it hands over.
The exact route to the R&C Storage crate by the Field Office, the clearance it needs, and the Power Upgrade Point it hands over.
by AllThingsHow Staff
Image: Remedy Entertainment
Large Resource Crates in Control Resonant are the containers worth detouring for. Ordinary Resource Crates drop Source and low-tier materials, but the large ones hold a permanent stat upgrade for Dylan. The Central 6 crate sits a few seconds from the Field Office, behind a locked storage door that stops most players from grabbing it on their first pass through the zone.
Quick answer: Head to the R&C Storage unit beside the Field Office in Central 6, unlock the door with Clearance Level 02, and open the crate in the padded back room for a Power Upgrade Point.
Requirements before you go
There is no combat gate and no puzzle on this one. The only thing standing between you and the crate is a keycard reader.
Clearance Level 02 on your security keycard, which the door panel checks before it slides open.
Access to Central, unlocked during the main mission flow that sends you to the Central checkpoint.
Nothing else — the crate does not require a Threshold, a mold ability, or a charge puzzle.
If the reader still shows a red lock when you interact with it, your keycard has not been upgraded yet. Keep pushing the main missions until the clearance level rises, then come back.
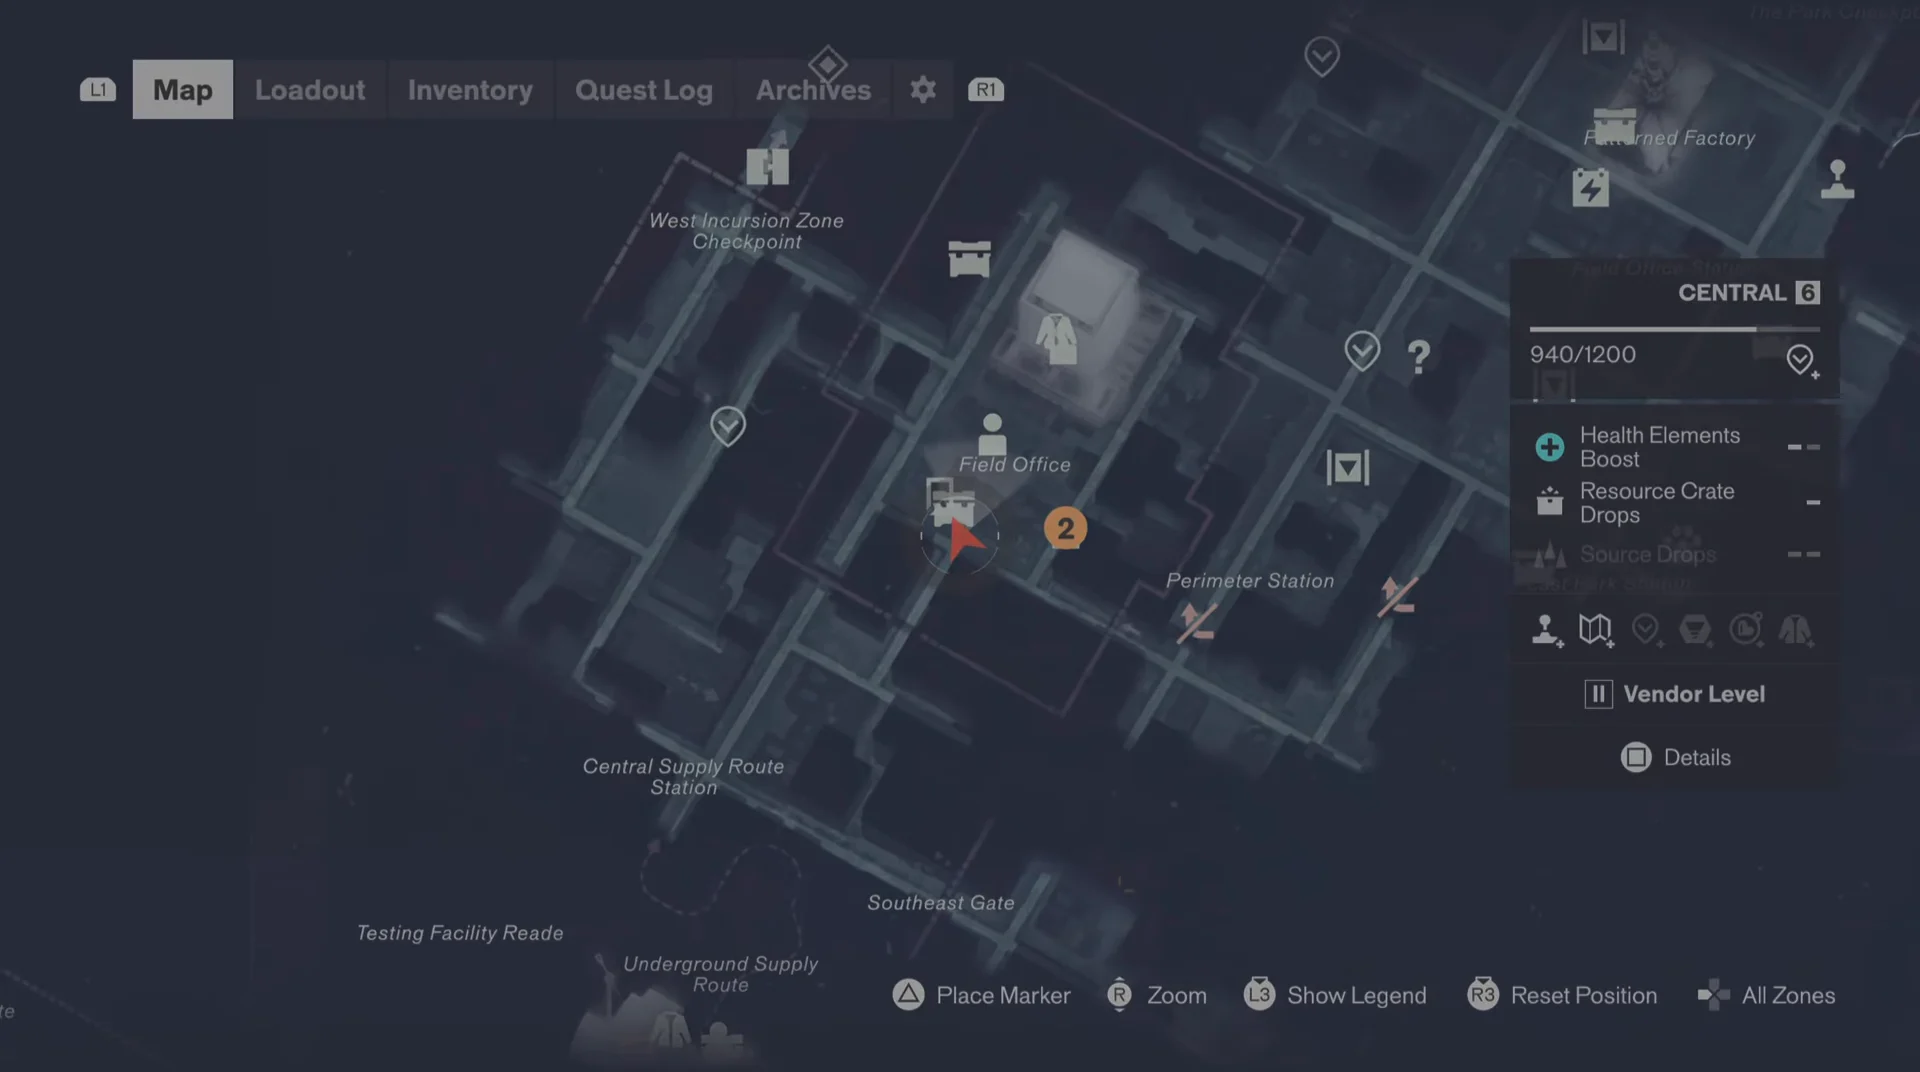
Open the map and switch to the Central 6 view. The Large Resource Crate icon sits right next to the Field Office marker, with the crate description reading “A large crate holding a particularly valuable reward. 0/1”. Place a marker on it if you want the waypoint on your HUD.
00:04Map overviewThe Central 6 map, with the Large Resource Crate pinned next to the Field Office. Shown at 00:04 in Ditech Gaming’s video. Image: Remedy Entertainment
Leave the map screen and enter the courtyard by the Field Office. Take the broad outside staircase, pass the armed guard stationed at its top, and turn left once you reach the landing.
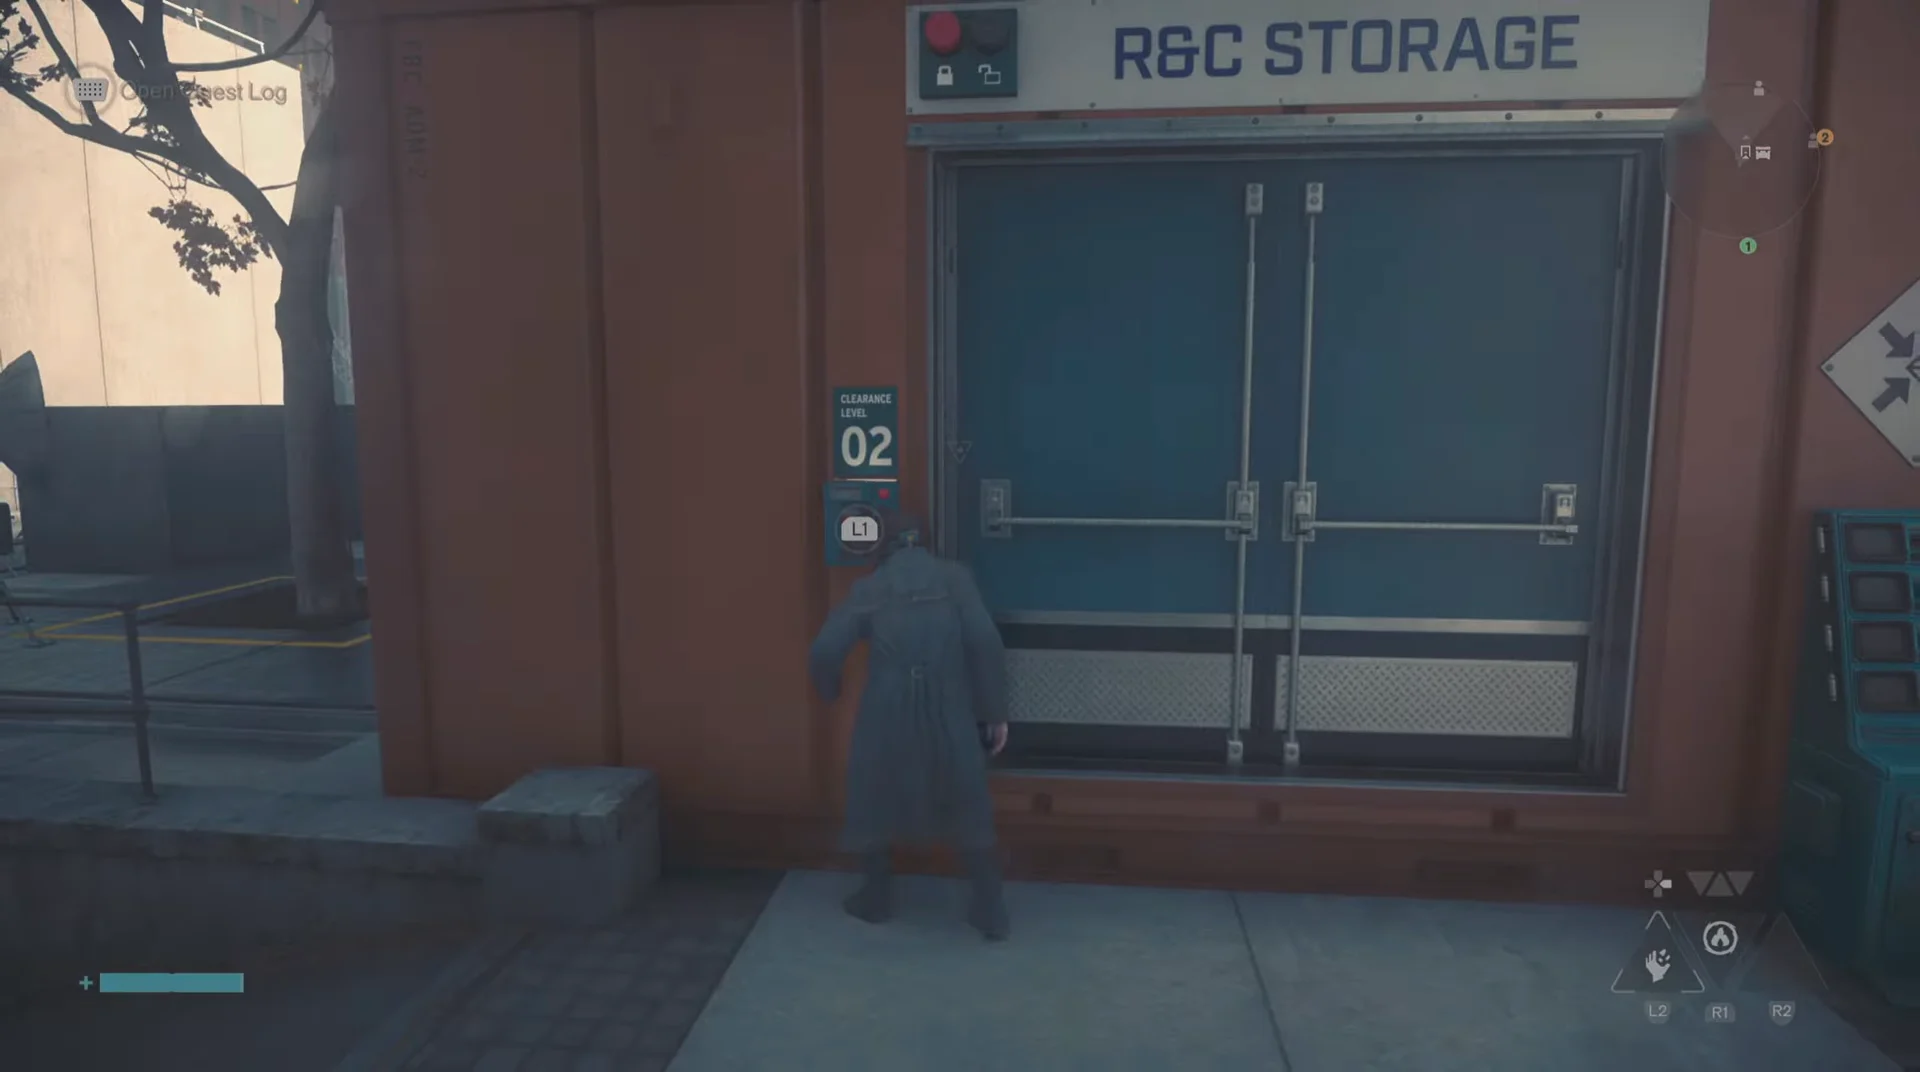
Follow the path that loops around the red shipping container structure and into the narrow side alley behind it. The door you want is set into the container module and marked R&C STORAGE in white lettering.
Interact with the keycard panel next to the door. It reads CLEARANCE LEVEL 02, and holding the interact button (L1 on PlayStation) runs the unlock and slides the door open.
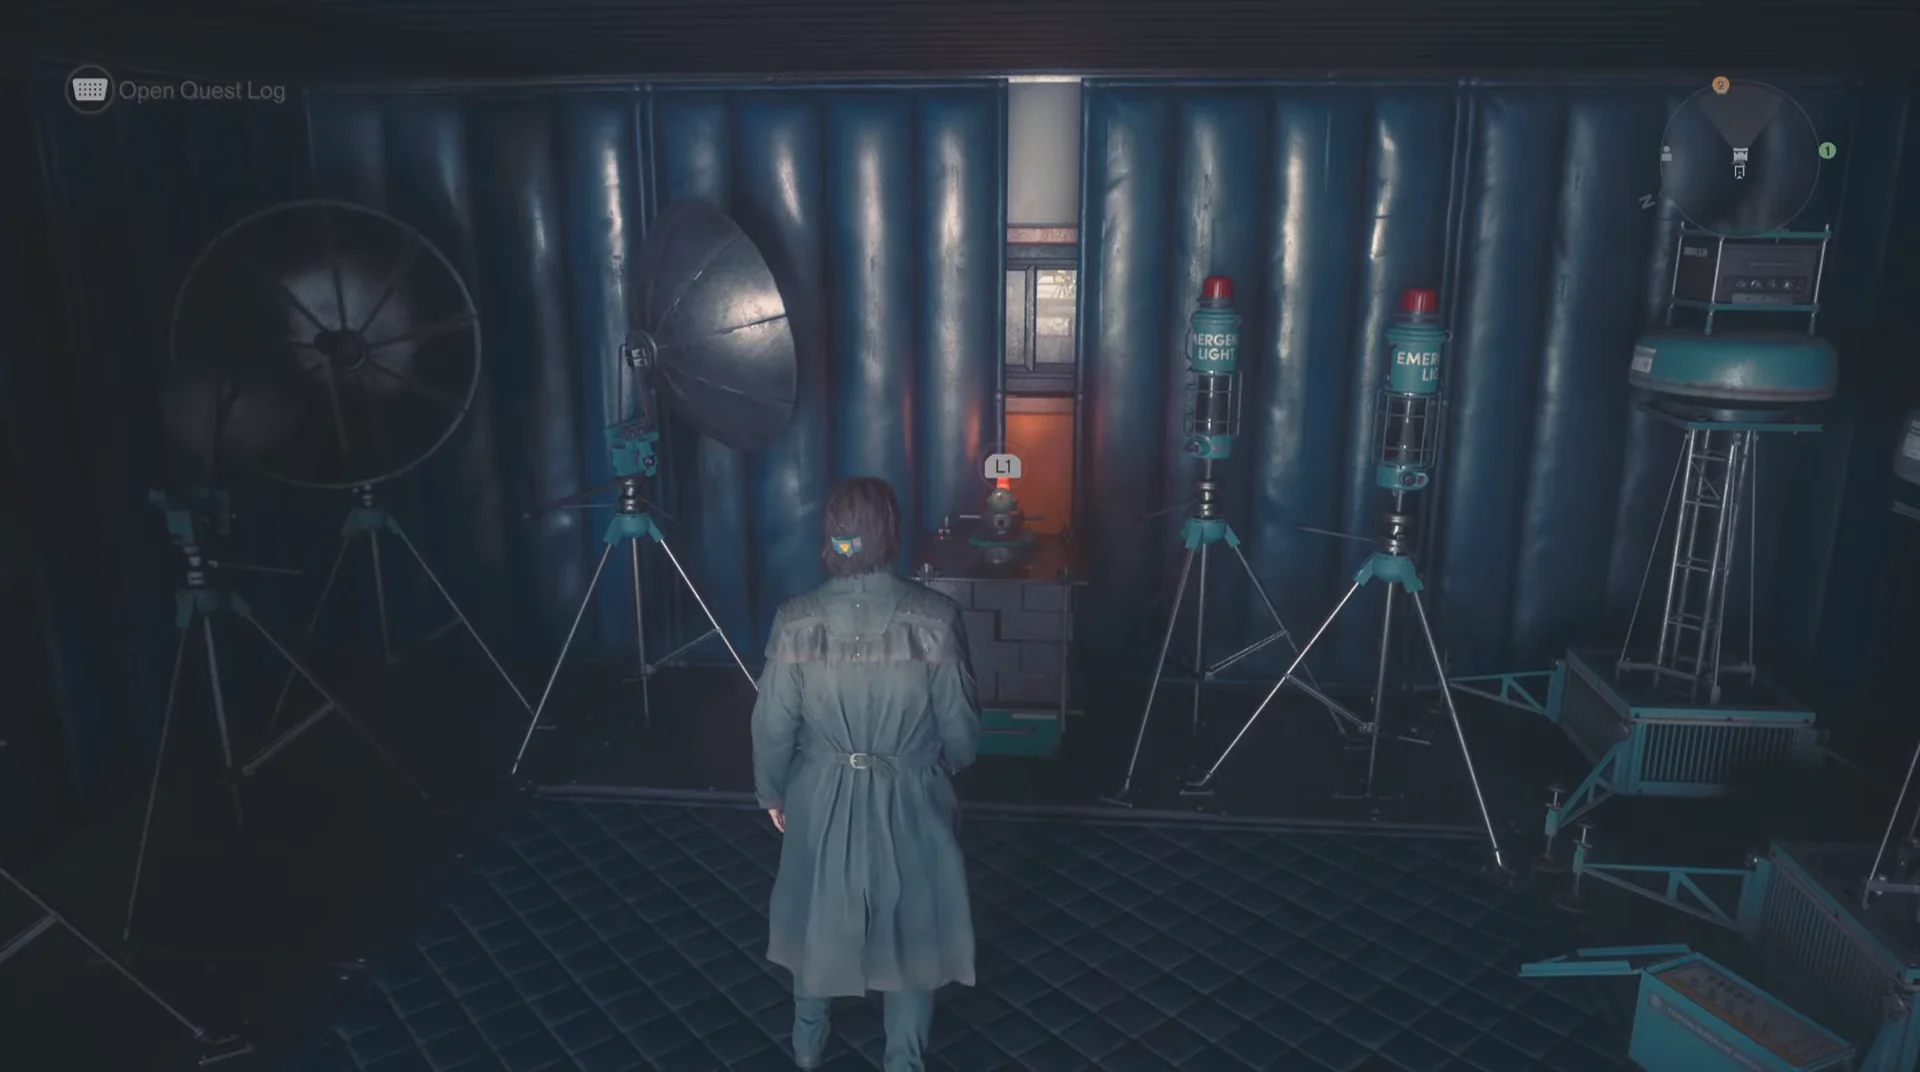
Walk through the front office and into the padded back room. The crate is the glowing container sitting between the emergency lighting rigs, and a yellow directional arrow painted on the floor points straight at it. Open it to claim the reward.
What the crate gives you and how to confirm the pickup
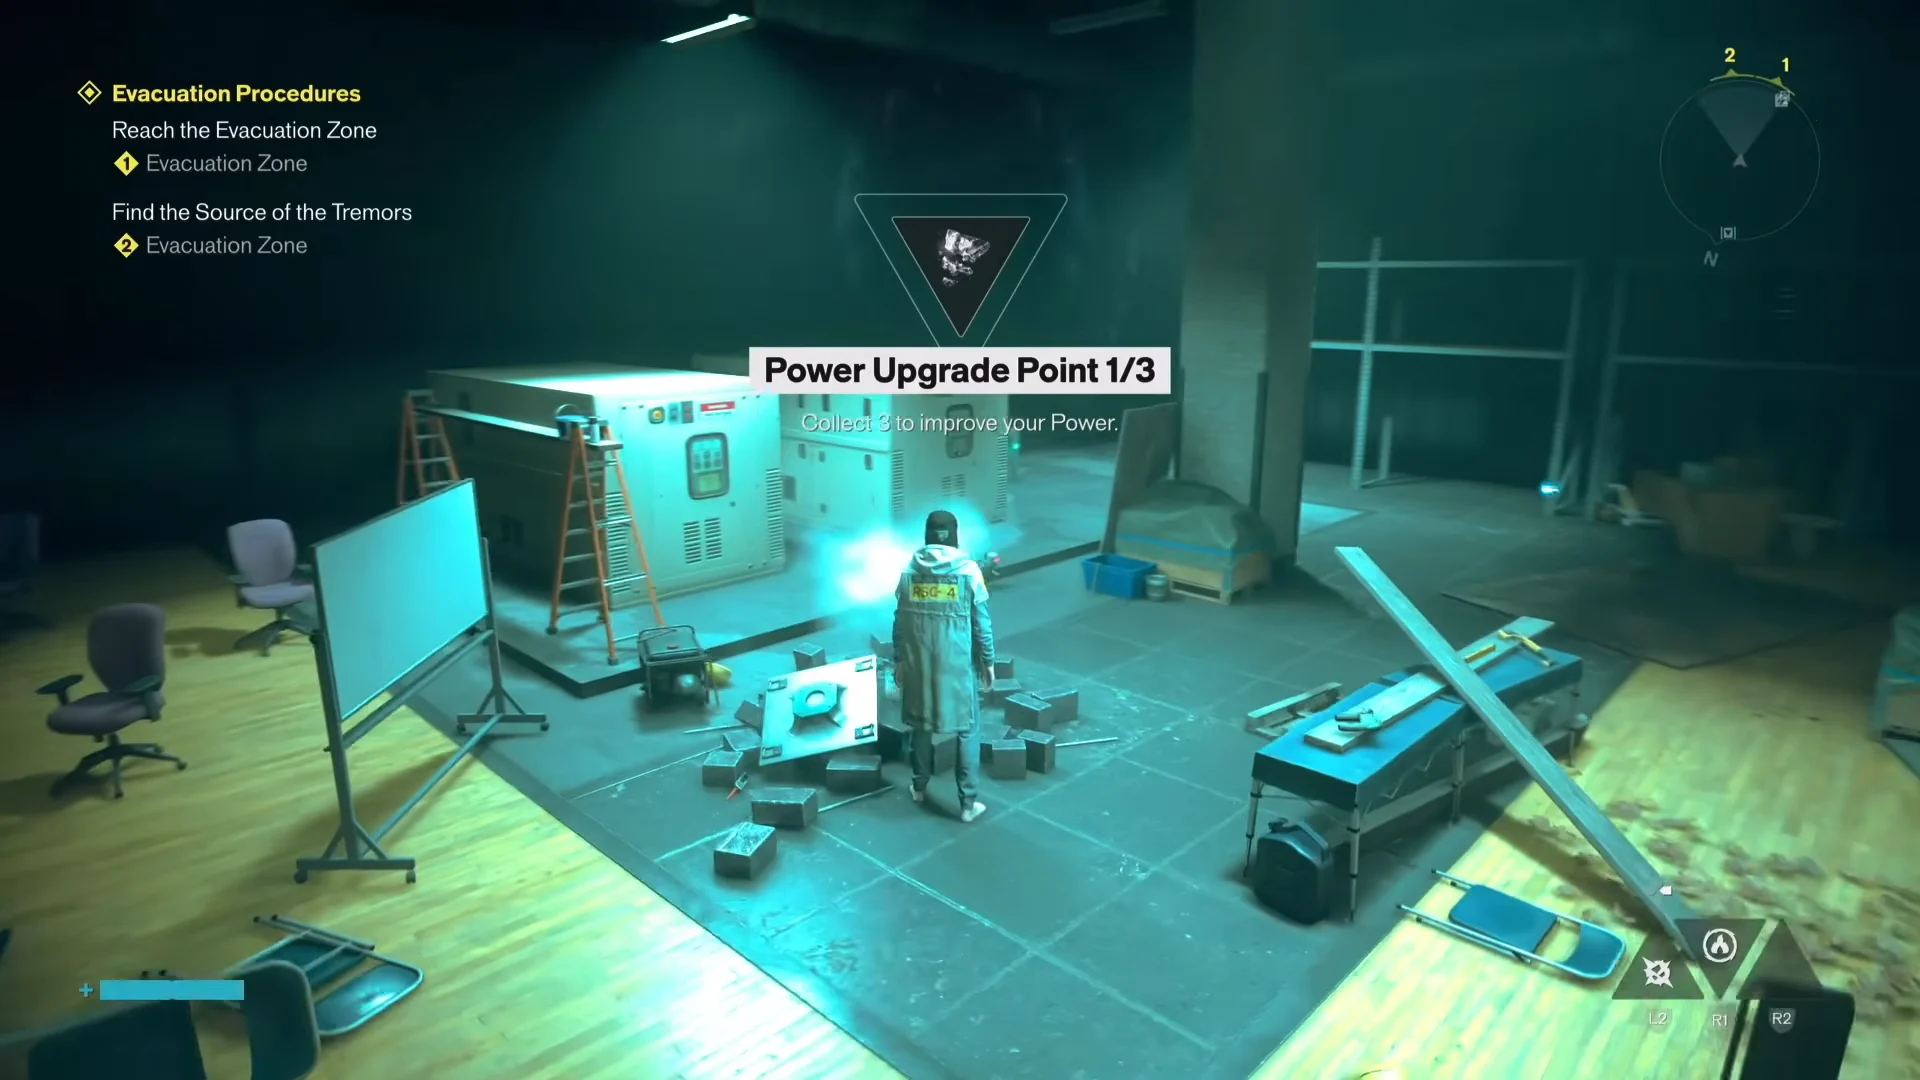
The reward is a Power Upgrade Point. The loot banner names the item and shows your running tally alongside the line “Collect 3 to improve your Power”, so a full set of three is what converts into an actual Power increase. Not every Large Resource Crate holds the same thing — the ones scattered around Downtown hand over Health Upgrade Points instead.
You know it worked when the banner fires on pickup and the map entry for that crate flips from 0/1 to collected. If you walked out without seeing the banner, you opened a different container — the standard Resource Crates in the same area only drop Source and materials like Aberrant Splinters.
Once you have all three points, travel to the dark chamber filled with stone monoliths to actually spend them. Collecting the points alone does not raise your Power Level.
Central’s second Large Resource Crate: The Patterned Factory
Central holds another Large Resource Crate inside the Patterned Factory, and it is a far longer job. Instead of a keycard, it is locked behind a charge-carrying puzzle that needs shortcut doors opened first. Here is how the two compare.
From inside the factory, take the ground-level door out to the exterior alley. Jump up the yellow-edged industrial lift platforms bolted to the brick wall to reach the rooftop.
Make your way over the rooftop pipes to the boarded entrance set into the upper brick wall, then break apart the wooden boards. Use the unlit stairwell to descend into the factory.
Use the raised catwalks over the locked sector to reach the floor below. From inside, open the red double doors; proceed along the corridor and release the outside doors leading to the street. You will need both shortcuts shortly.
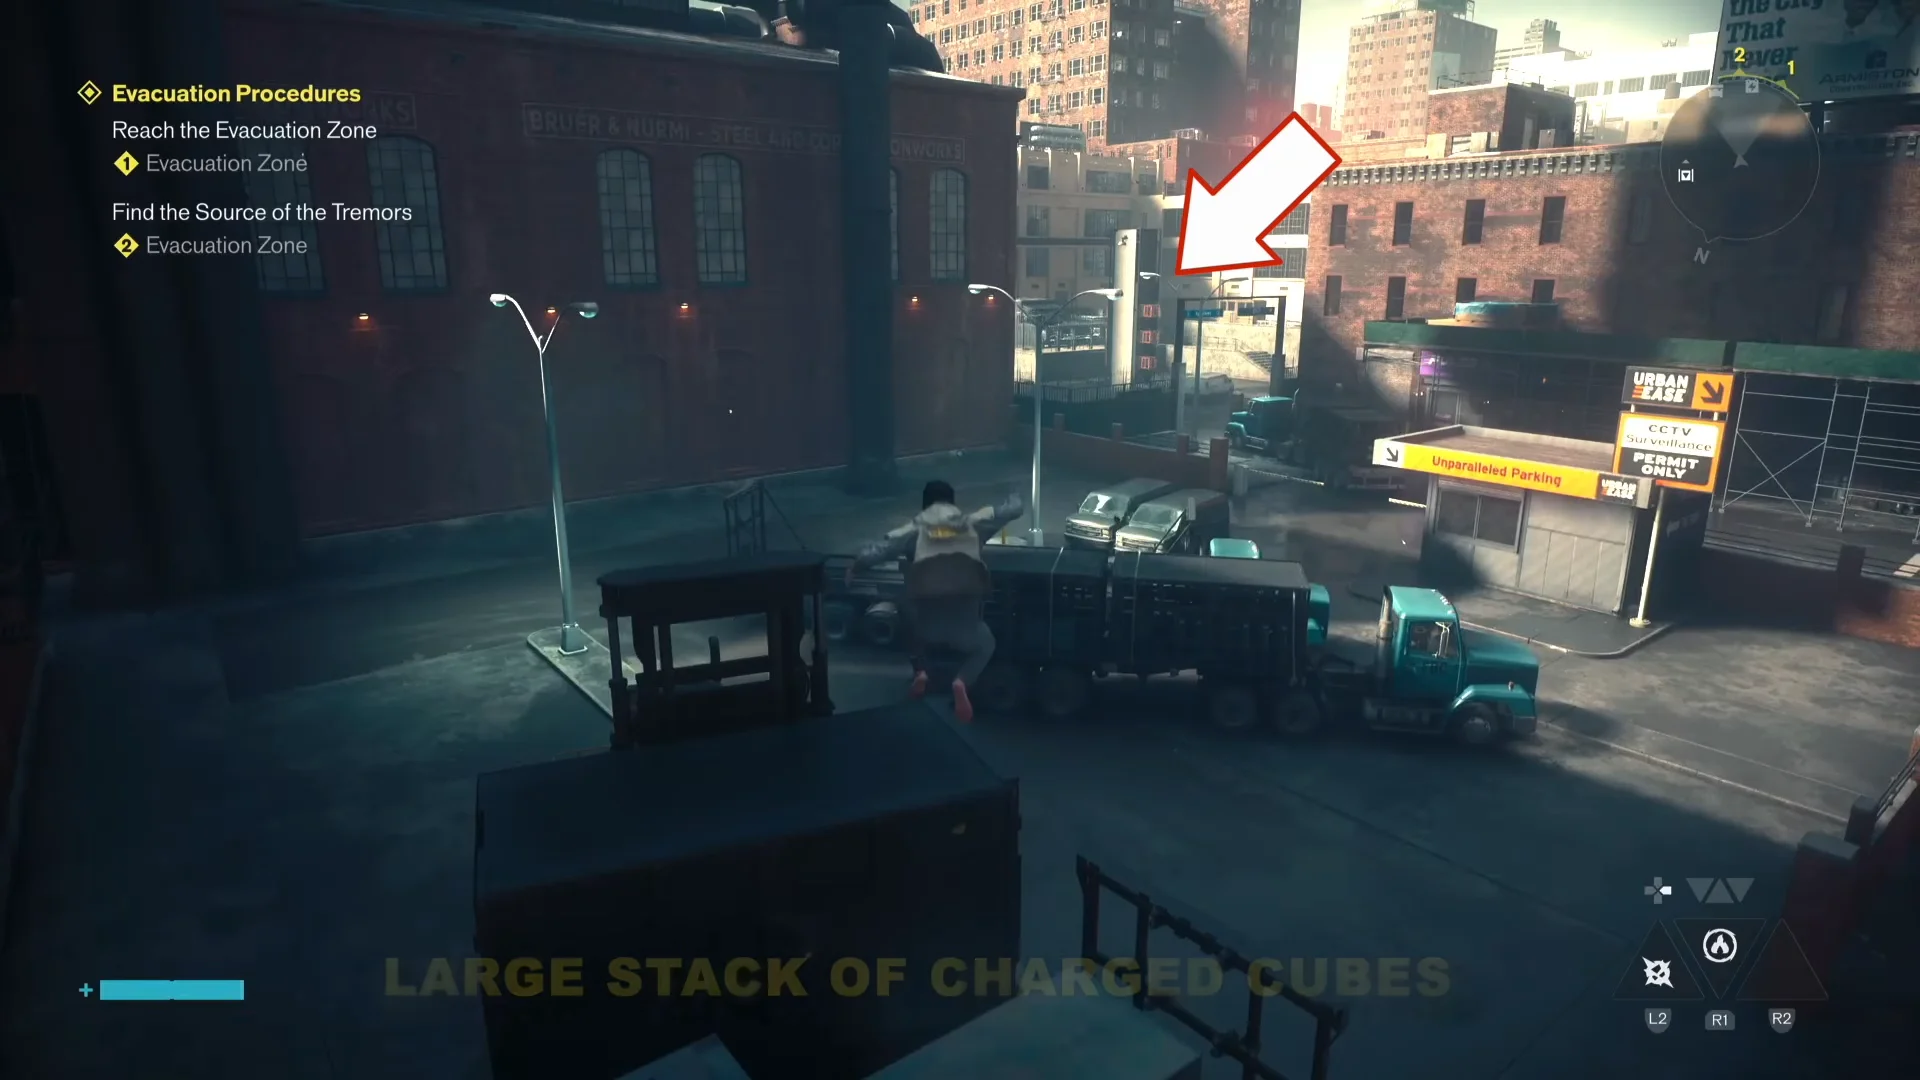
Note the empty cube socket on the interior wall, then head out through the street exit. Look across the intersection to find the large stack of charged cubes.
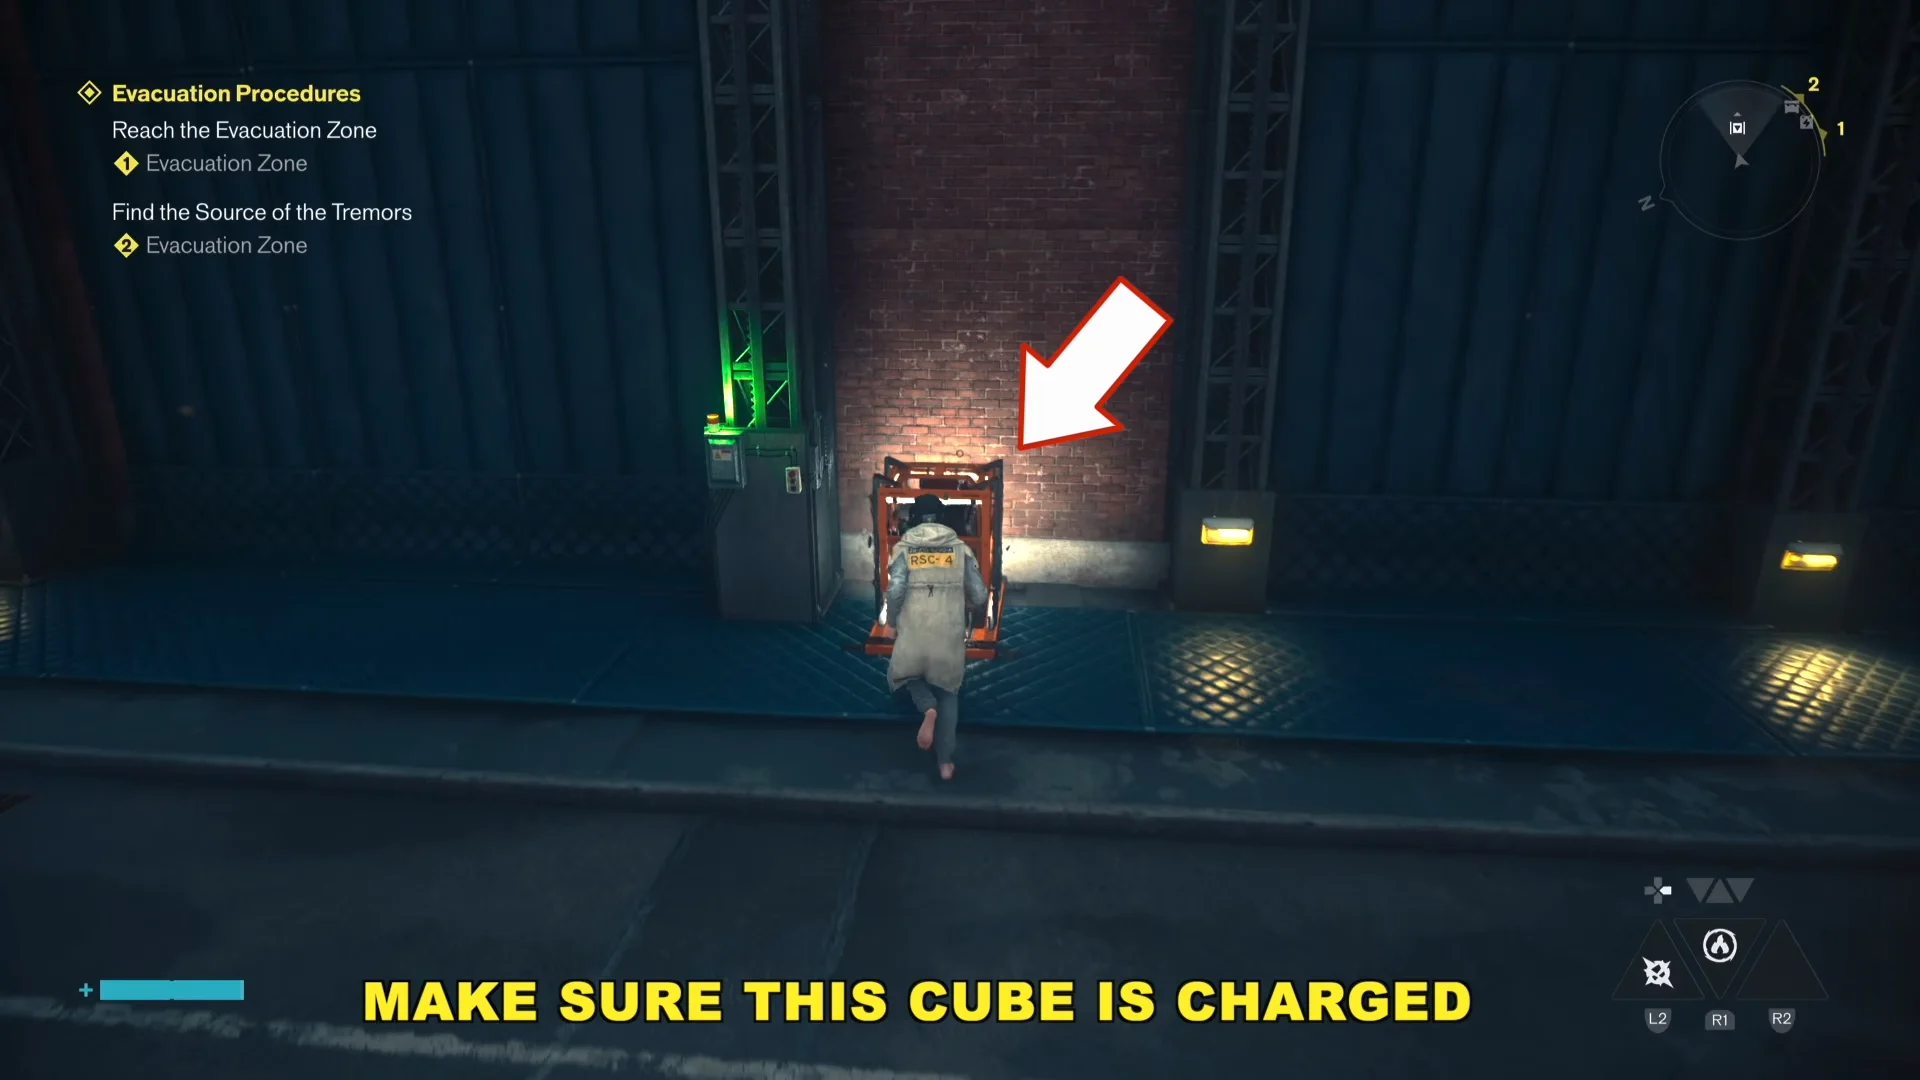
Activate the cube socket beside the wall at street level until it glows. Remove the charge, take it through the doors you unlocked, and return it to the socket on the indoor wall.
Pull the charge back out of the indoor socket, sprint through the shortcut doors and up the stairs, and feed it into the socket outside the windowed office. The glass door opens.
Step into the office and interact with the glowing crate on the desk for another Power Upgrade Point. There is a second, ordinary container tucked behind the generators nearby holding Aberrant Slivers.
Clearing both Central crates puts you two thirds of the way to a Power increase in a single trip through the zone, and the Field Office one is quick enough to fold into any visit there. If your keycard is still short of Clearance Level 02, leave a map marker on the R&C Storage door so it is waiting for you the next time you pass through.