Gaming Guide

Skipping Stones Level 1 Puzzle Solutions in Order of the Sinking Star (All 13 Screens)

Exact stone pushes, lily pad timing, and both hidden treasures for every screen in the south world's first level.

Exact stone pushes, lily pad timing, and both hidden treasures for every screen in the south world’s first level.

Image: Thekla, Inc.

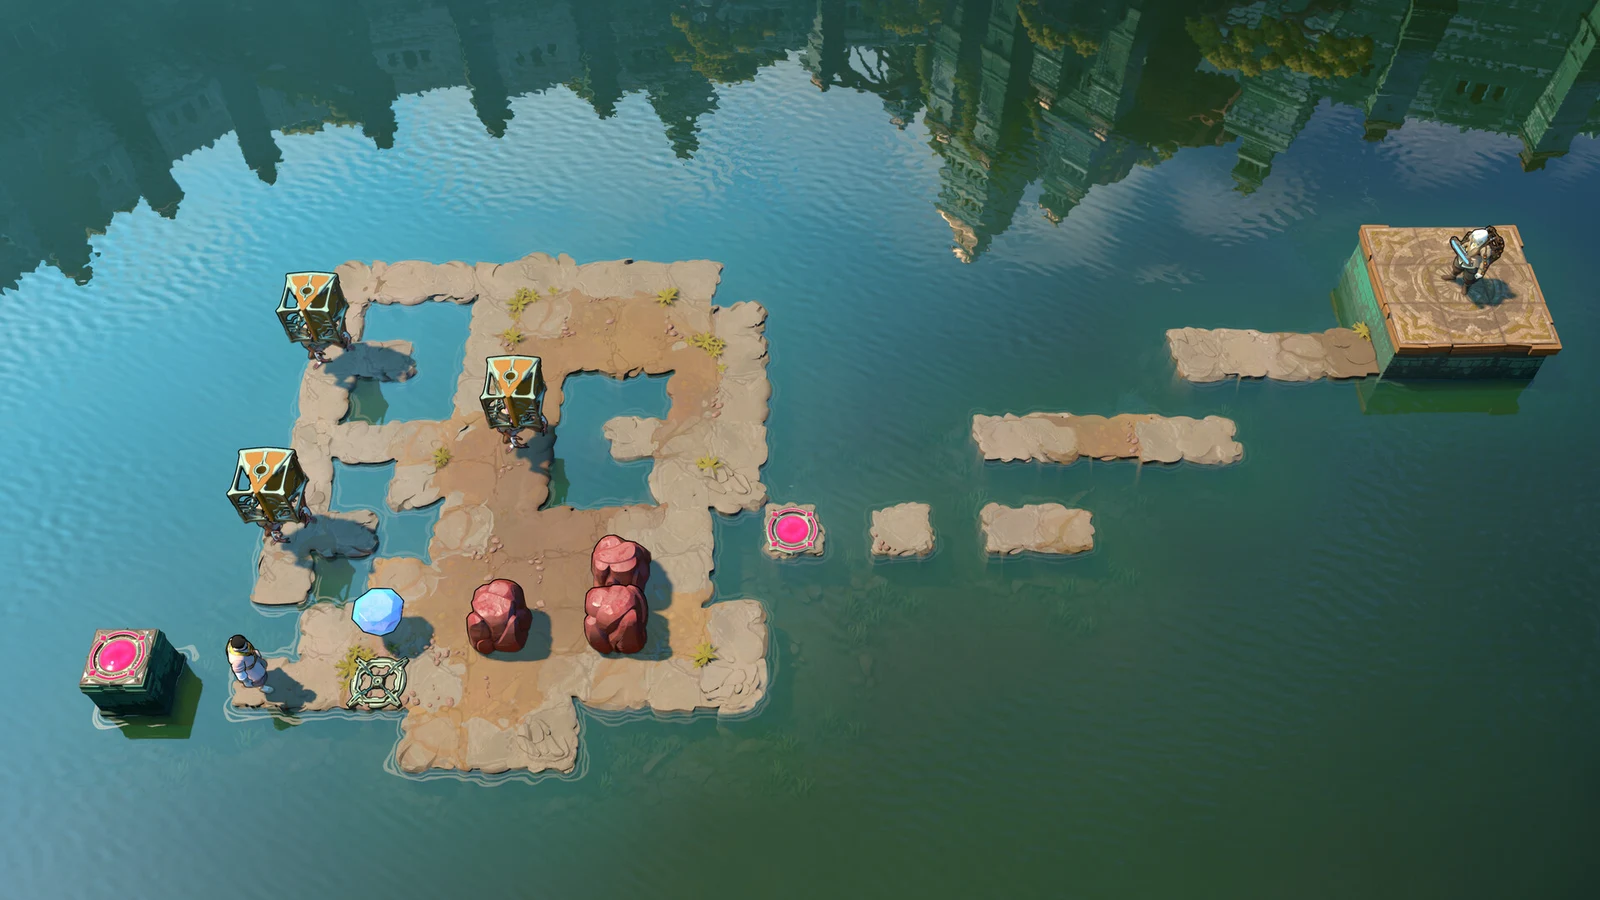
In Order of the Sinking Star, Skipping Stones to Lonely Homes occupies the southern world. Its opening level contains 13 puzzle screens. On each one, move stones to form routes you can walk, steer lily pads into currents, or redirect the water. Solve the screens in order; the last one brings you back to your starting point.

Quick answer: Push stones to build paths, launch lily pads, and redirect currents across all 13 screens, touching each checkpoint in turn. The level ends when Screen 10 carries you back to Screen 1.

Image credit: Arc Games, Gamirror Games via YouTube/@100% Guides

How to read the movement instructions

The directions below use a consistent shorthand. Read it once and every step becomes a precise sequence of pushes.

  • A plain direction (“move left”) means move one square that way.
  • A direction with a multiplier (“left x3”) means move that many squares.
  • “All the way” means keep moving until a barrier stops you.
  • Hold RT/Ctrl to slow time for tight lily pad timing; hold Alt/L2 to speed it up.

Screens 1 to 6: Reaching the first treasure

Screen 1

Move the stone on the left three squares north after shifting it west. The left lily pad will then enter the current flowing right.
Move the right-hand stone up, then shift it left three times. Send it right and up twice to set the second lily pad moving with the current.
Ride the lily pads across to the checkpoint and grab the map.
Image credit: Arc Games, Gamirror Games via YouTube/@100% Guides

Screen 2

Push the stone left, down x2, then right into the top lily pad. The bottom lily pad drops into the current.
Shove the stone east off the lily pad, then make your way across the pads to the checkpoint.
Send the upper stone two squares south and four east into the top lily pad; this puts the lower pad into the current.
Move the other stone three squares north, then three east after pushing it east. The pad carrying it will fall into the current.
Make your way over the pads while moving the stone east, then continue to the next checkpoint.
Image credit: Arc Games, Gamirror Games via YouTube/@100% Guides

Screen 3

Move the stone on the left two squares east; the left lily pad will enter the current.
Push the other stone left, then down into the right lily pad, sending it into the current.
Cross the pads to the checkpoint.
Send the right-hand stone south over the water, then move it four squares east to Screen 4.

Screen 4

Raise the stone on the right to send the upper lily pad east.
Move one of the stones left to right above the bottom lily pad, then shove it east to send the pad downward.
Move the final stone onto the row directly above the upper lily pad; shove it right to make the pad drop.
Cross the pads to the checkpoint.
Move the lower stone three squares south, then east into the column containing the bottom-right checkpoint. Push it onto the checkpoint.
Route the other stone into that column by going north, east, south twice, then east. Push it straight down afterward to make a path to the checkpoint.
Send the stone three more squares south to reach Screen 5.
Image credit: Arc Games, Gamirror Games via YouTube/@100% Guides

Screen 5

Push the stone that was already on Screen 5 right, then down across the water.
Move the other stone into the same column, then push it downward until it meets the first stone and links the landmasses with a bridge.
Move the first stone two squares south, four west, then north into the lily pad’s row. Push it west to carry the pad to the left landmass.
Move the remaining stone three squares east, then south. Push it west over the water into the first stone’s column, then south to form a route to the next checkpoint.
Raise the stone until it is one square below the lily pad, then move it four squares west to reach Screen 6.
Image credit: Arc Games, Gamirror Games via YouTube/@100% Guides

Screen 6

Move the left stone east into the lily pad’s column, then push it south to send the pad downward.
Take the middle stone right, up, then left five times to place it in the column on the lily pad’s left. Push it down into the water, making the pad travel right.
Push the stone from Screen 5 into the lily pad column (up x2, left, up x2, left x7), then down into the water and into the pad.
Follow the route you made, and push the stone riding the lily pad south to extend the path to the checkpoint.
Push the left stone north across the water, then west and south until it reaches the bottom landmass’s left edge. From there, move it west over the one-square water gap.
Send the other stone west all the way until it meets the stone you moved, forming a bridge to the next screen.
Move the stone west to reach Screen 7.
Image credit: Arc Games, Gamirror Games via YouTube/@100% Guides

Treasure 1 and Screen 7

Grab the first treasure from the Screen 7 area before solving the screen itself. You will need one of the treasure-room stones to complete Screen 7, so do not leave it behind.

First treasure

Push the final stone from Screen 6 into the row with the top brown rock in the bottom-right water.
Push that stone left onto the brown rock.
Push the Screen 7 stone onto the land just left of the previous stone (down x3, right x2, down, left, down), then right to complete the path in the bottom-right corner.
Cross over, then walk onto the treasure square, two squares right of the stone.
Move the stone beside the treasure north along the route you took to reach this area. You will need it in Screen 7.
Image credit: Arc Games, Gamirror Games via YouTube/@100% Guides

Screen 7

Move the stone brought from the treasure area east, west four times, then east again. It now occupies the column containing the land tile that juts toward the lily pad; stand on the stone’s west side.
Push the stone up onto that protruding land square.
Place the other stone southeast of the first by moving north four, west four, north six, then west.
Shove that stone west into the lily pad to send the pad left.
After the lily pad travels three squares, shove the other stone west. Time the move so the pad lands to the right of the first pad. Hold RT/Ctrl to slow time and widen the timing window.
Follow the pad route to the checkpoint, then touch the brown orb.
Move the stone beside the checkpoint east, then push it straight down to send the pad into the current.
Board the lily pad as it passes on your left; ride it to the next screen and checkpoint.
Image credit: Arc Games, Gamirror Games via YouTube/@100% Guides

Screens 8 and 9

Screen 8

Push the first stone right, then all the way down into the water, pushing the bottom lily pad into the left current.
As that pad moves along the current, ride it to the top-left landmass.
Push the upper stone east to the end, sending its lily pad into the current.
Move the remaining stone west, then push it south to the end; the last lily pad will head right into the current.
While the pad is moving, board it and get off at the first landmass, pushing the stone south as you disembark.
Move the stone east, north, then east all the way to send it to the upper-right landmass.
Cross the lily pads to that landmass.
Push the bottom stone down to the bottom-right landmass.
Put the remaining stone in that column, then push it over the water to form a route leading to the bottom-right landmass.
Send the stone downward to transfer it to Screen 9.
Image credit: Arc Games, Gamirror Games via YouTube/@100% Guides

Screen 9

Move the stone onto the row above the upper lily pad, then shove it left to the far end, dropping the pad into the current.
Ride that pad to the top-right landmass and checkpoint.
Push the bottom stone into the column left of the left lily pad, then down to send the pad right into the current. Time the push so both pads sit next to each other in the current.
Move the last stone down to the landmass’s lowest row, then push it onto the front pad.
Get onto the back pad. While within the vertical current on the left, push the stone down to send the bottom pad right.
Step off in the bottom-right corner, then make your way to the checkpoint.
Image credit: Arc Games, Gamirror Games via YouTube/@100% Guides

Screen 10 detour and Screen 11

At Screen 10, push the stone down; this sends the lily pad right and into the current. Ride the pad to Screen 11, then return to Screen 10 later to finish the level.

Screen 11

Push the bottom stone up x2, right, up across the water into the stone above, diverting the current.
Move the remaining stone right, then down twice until it reaches the edge of the column beneath the lily pad. Push it left to send the pad upward into the current.
Take the pad across to the landmass on the right, where the next checkpoint is.

Second treasure

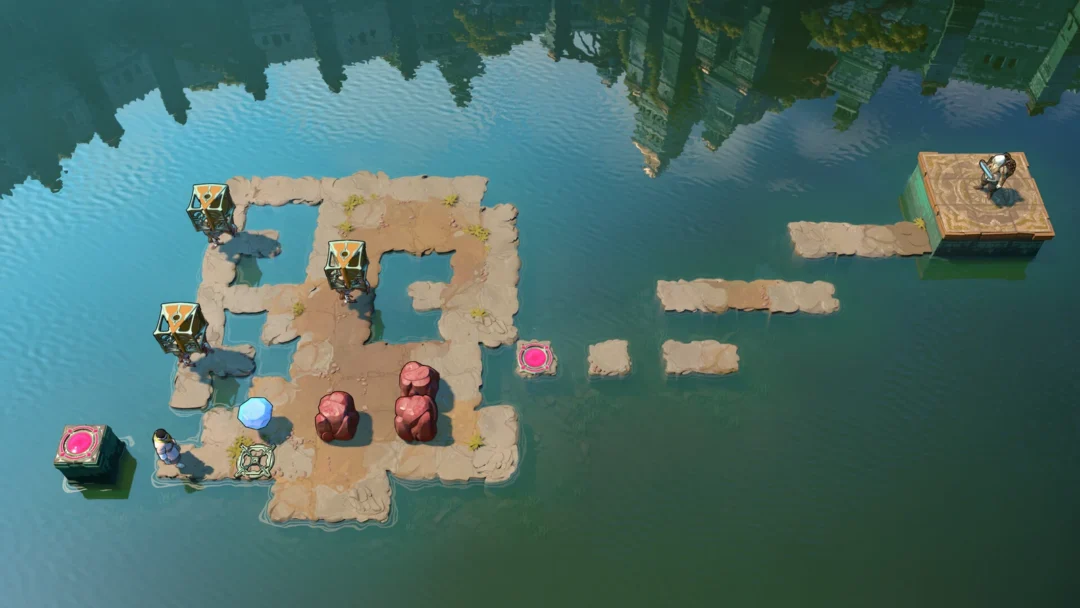
Push the left stone right x3 onto a brown stone in the water.
Drive the remaining stone against the first one; this forms a route onward to another screen.
Push the left stone left, down x2, and push the right stone right, down.
Send the right stone downward, followed by the left one, to set both lily pads moving right into the current.
Cross to the right landmass on the first pad, collect the treasure quickly, then take the second pad back.
On the way back toward Screen 11, you’ll pass two stones. Move the upper one left and the lower one up; while crossing the brown rock path, shove the stone left.
Push the stone down to build a path to the bottom-right landmass and the next checkpoint.
Push the last stone downward to transfer it to Screen 12.
Image credit: Arc Games, Gamirror Games via YouTube/@100% Guides

Screens 12 and 13

Screen 12

Send the stone at the extreme left downward over the water.
Shift the middle stone left twice, then down until it strikes the earlier stone and redirects the current.
Move the right-hand stone onto the row above the upper lily pad. Push it left through the water to drop the pad into the current, then move it right again.
Position the right stone on the row below the lower lily pad, then push it left through the water to send that pad upward into the current.
Cross to the central landmass using the pads.
Move the stone on the left down three times, placing it in the checkpoint’s row.
Push the top-right stone left x2, down x2, left into the first stone.
Push the first stone left x2 onto the checkpoint.
Push the remaining stone right over the water; then move it up and left to place it at a new spot on the central landmass.
Push that stone up, left, down x2 into the checkpoint row, then all the way left to build a path to the checkpoint.
Move the stone left four times to transfer it to Screen 13.
Image credit: Arc Games, Gamirror Games via YouTube/@100% Guides

Screen 13

Push the second stone right, up across the water square to the small landmass.
Move the third stone left, then up twice; this opens a route to that landmass.
Stand on the stone you pushed into the water, then push the stone above you up x2, right, left, down x5, left, up x2. It now sits on the left side of the small landmass.
Move that stone over the water by pushing it left.
Push the left stone on the first landmass right, up x2 to the left side of the small landmass, then left across the water into the previous stone, diverting the current.
Push the remaining stone into the column right of the bottom lily pad, then all the way down to send the pad left into the current. Ride it to the next checkpoint.
Image credit: Arc Games, Gamirror Games via YouTube/@100% Guides

Finishing on Screen 10

You come back to Screen 10 to close out the level. This is the final sequence, and clearing it returns you to Screen 1.

Push the stone up, right, down, left x3. It now sits in the column right of the lily pad.
Head up, make your way across the lily pad, then follow the route around until you reach the space beneath the stone.
Push the stone up to send the lily pad left. Quickly run left and up to catch the pad and reach the ruin.
Get back on the lily pad to reach the current, which carries you back to Screen 1.\
Image credit: Arc Games, Gamirror Games via YouTube/@100% Guides

Returning to Screen 1 confirms the first level is complete, both treasures in hand. From here, the path continues into Skipping Stones Level 2, where a second character joins the puzzles.