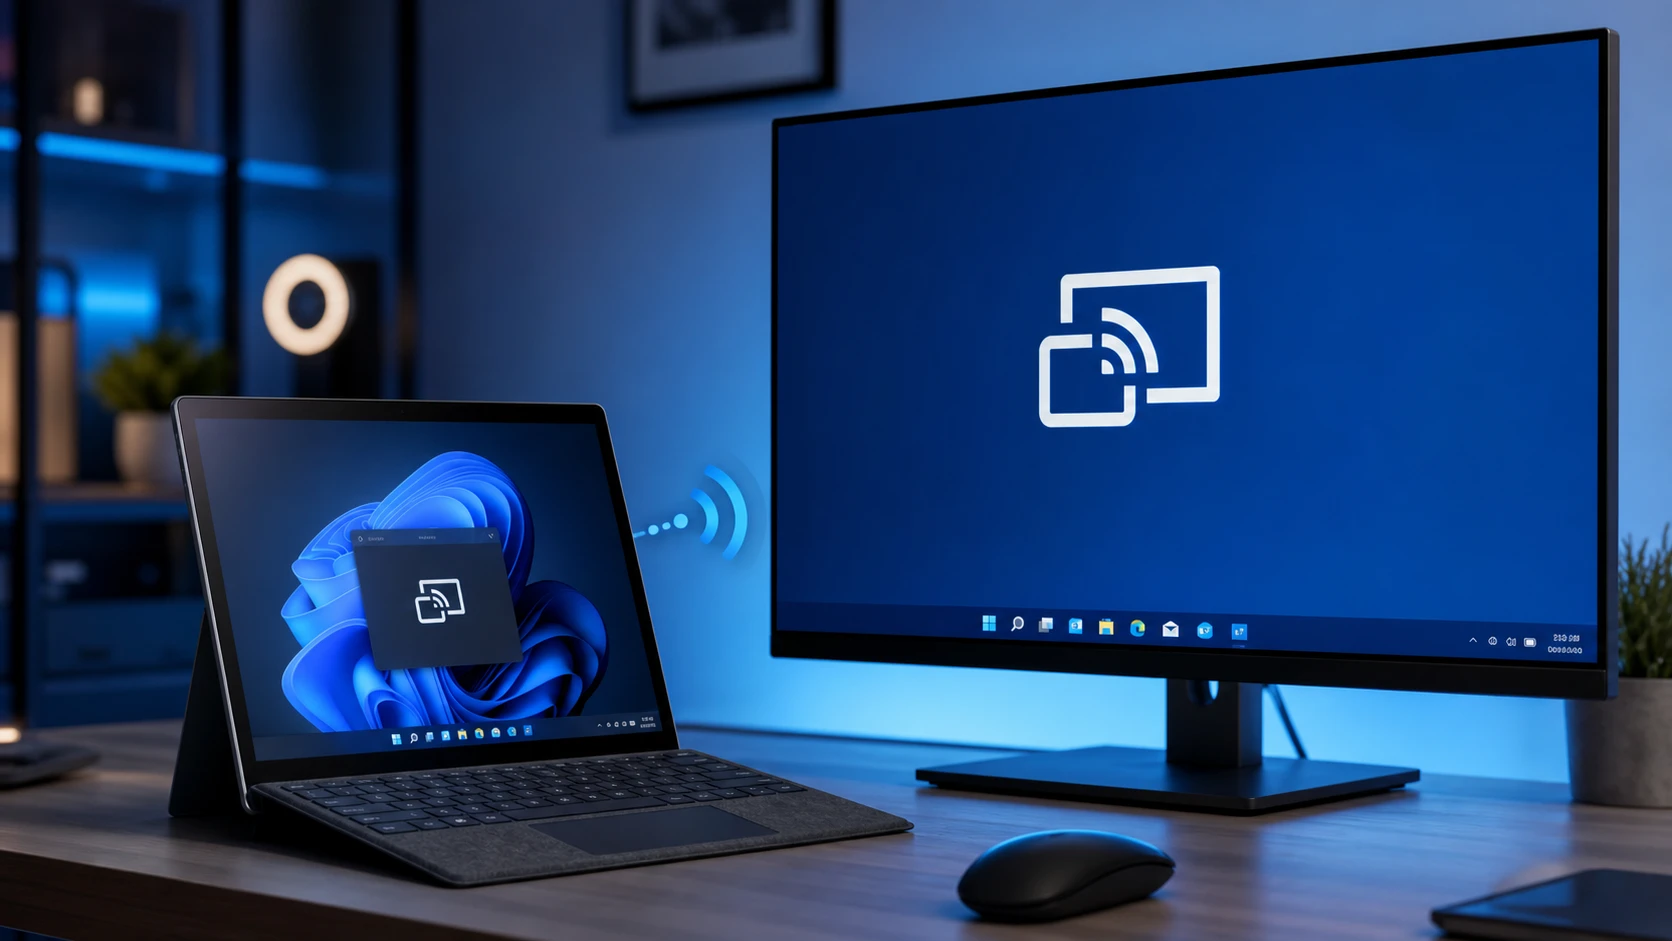
Wireless screen mirroring stops cold when Windows 11 reports that Miracast is not supported by the graphics driver. Miracast works like HDMI over Wi-Fi, sending your screen to a TV or projector over Wi-Fi Direct without a cable. The message almost always points to a missing Wireless Display feature or an outdated graphics driver rather than hardware that truly cannot do it.
Quick answer: Install the optional Wireless Display feature, then update your graphics driver from the GPU maker. Reopen the DirectX Diagnostic Tool (run dxdiag), save the report, and confirm the Miracast line reads Supported.
What triggers the Miracast graphics driver error
Two causes account for nearly every case. The first is a missing Wireless Display feature, which Windows 11 no longer installs by default. The second is a generic or outdated graphics driver, common right after a fresh install, that does not meet the Windows Display Driver Model (WDDM) requirement for Miracast. Only rarely does the message mean the PC genuinely cannot support Miracast.
Drivers delivered through Windows Update often provide minimum functionality. They add resolutions and basic hardware acceleration but can leave out features like Miracast. Installing the official driver from Intel, NVIDIA, or AMD restores that capability.
Confirm your PC supports Miracast
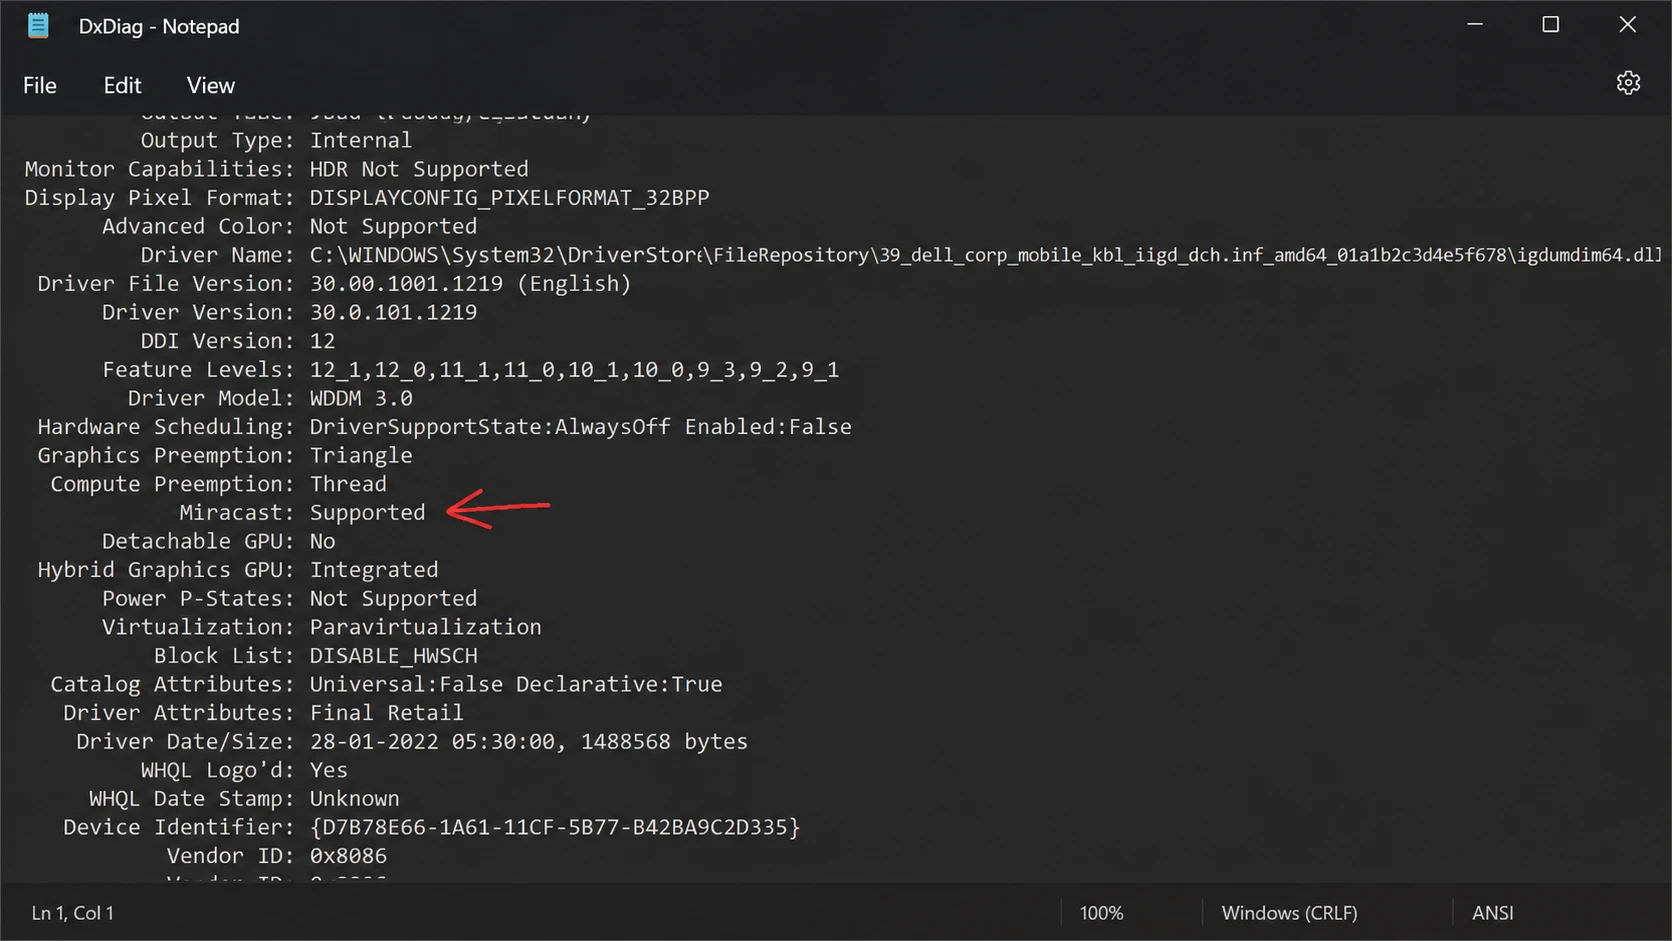
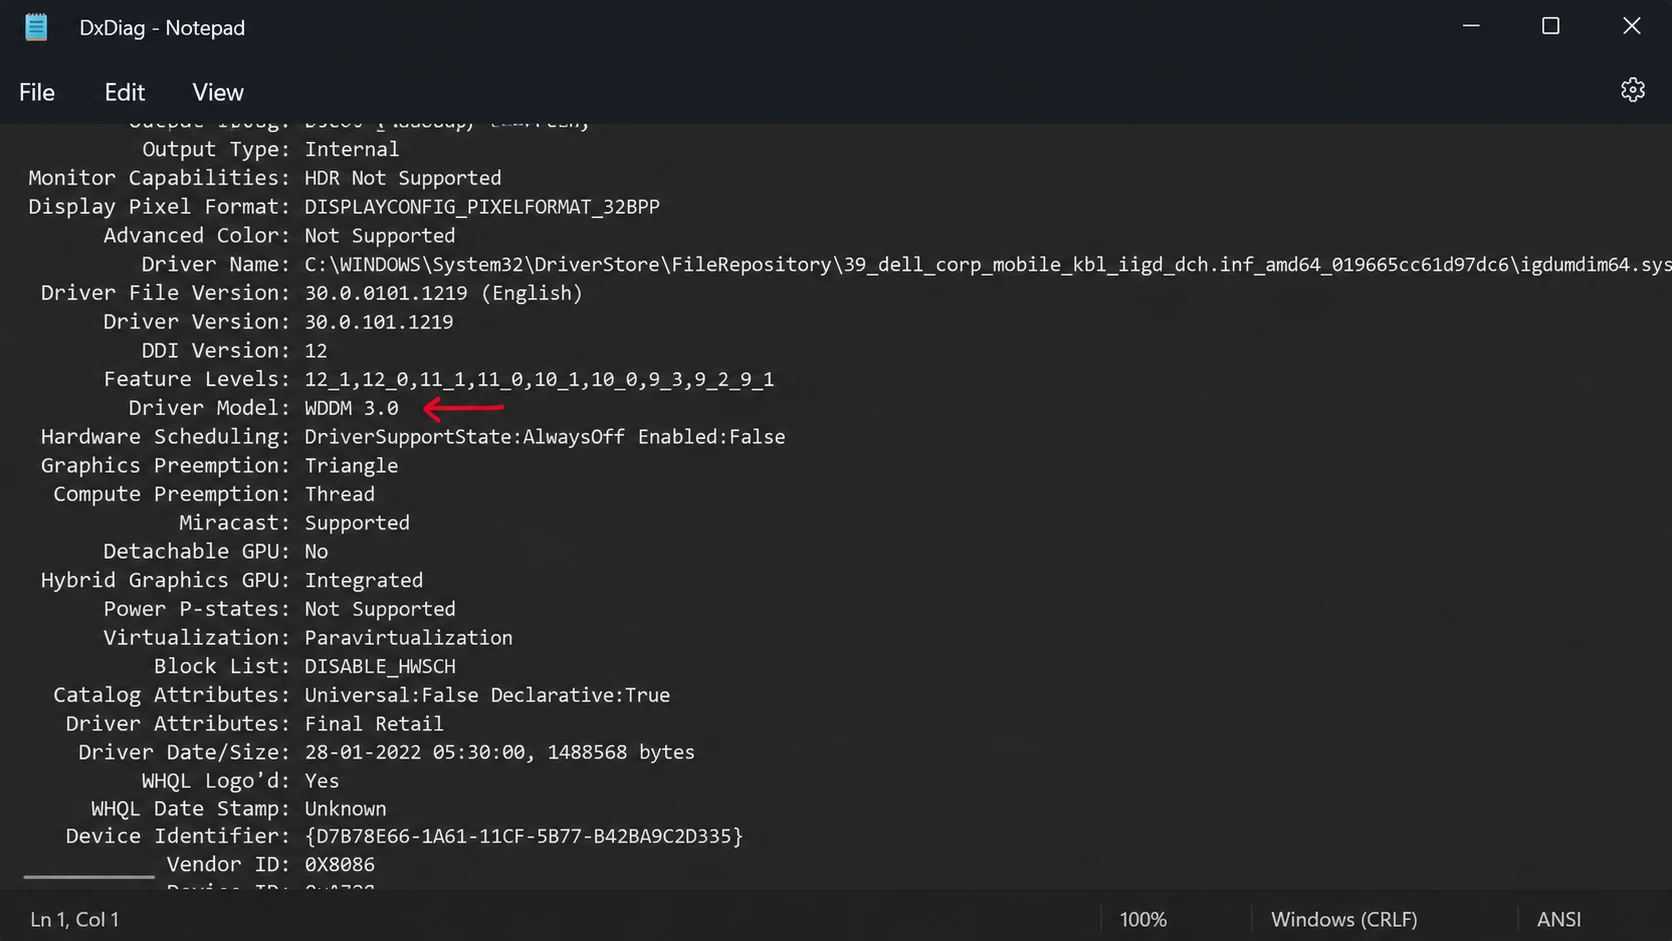
Before changing drivers, check what your system reports. The DirectX Diagnostic Tool exports a text file that lists Miracast status and the driver model in plain language.
You can also confirm Wi-Fi readiness from a terminal. Run netsh wlan show drivers in Command Prompt and look for the Wireless Display Supported line. A result showing Yes (Graphics Driver: Yes, Wi-Fi Driver: Yes) means both halves are ready. Miracast also needs NDIS 6.30 or higher, which you can verify in PowerShell with Get-netadapter | select Name, ndisversion.
Install the Wireless Display feature
The Wireless Display feature adds the casting capability (formerly the Connect app) back to Windows 11. Installing it resolves the error on most machines that otherwise meet the requirements.
If Settings throws a “Wireless Display couldn’t install” error, the Command Prompt method is more reliable. Open Command Prompt as administrator and run the capability command below, then wait for the progress bar to reach 100 percent and restart.
DISM /Online /Add-Capability /CapabilityName:App.WirelessDisplay.Connect~~~~0.0.1.0Verify the WDDM driver model and update your graphics driver
Miracast requires a graphics driver built on WDDM 1.3 or higher with Miracast support. Open the dxdiag text file again and find the Driver Model entry. A value of 1.3 or lower means you need a newer driver to clear the error.
| GPU vendor | Where to get the driver |
|---|---|
| NVIDIA | GeForce Experience or the NVIDIA driver download page |
| AMD | AMD Radeon Software |
| Intel | Intel download center for processor graphics |
| Any vendor | Settings > Windows Update > Download & install updates |
On a fresh installation, the system usually runs a generic display driver. Pull the latest one directly from the chip maker rather than relying only on Device Manager, which often fails to find the newest version. Restart after installing so the new driver model takes effect, then recheck the Miracast line in dxdiag.
Tip: On some laptops, Windows Update may later replace a vendor driver with its own version and break Miracast again. The Microsoft Show or Hide Updates tool can block a specific driver update so your working version stays in place.
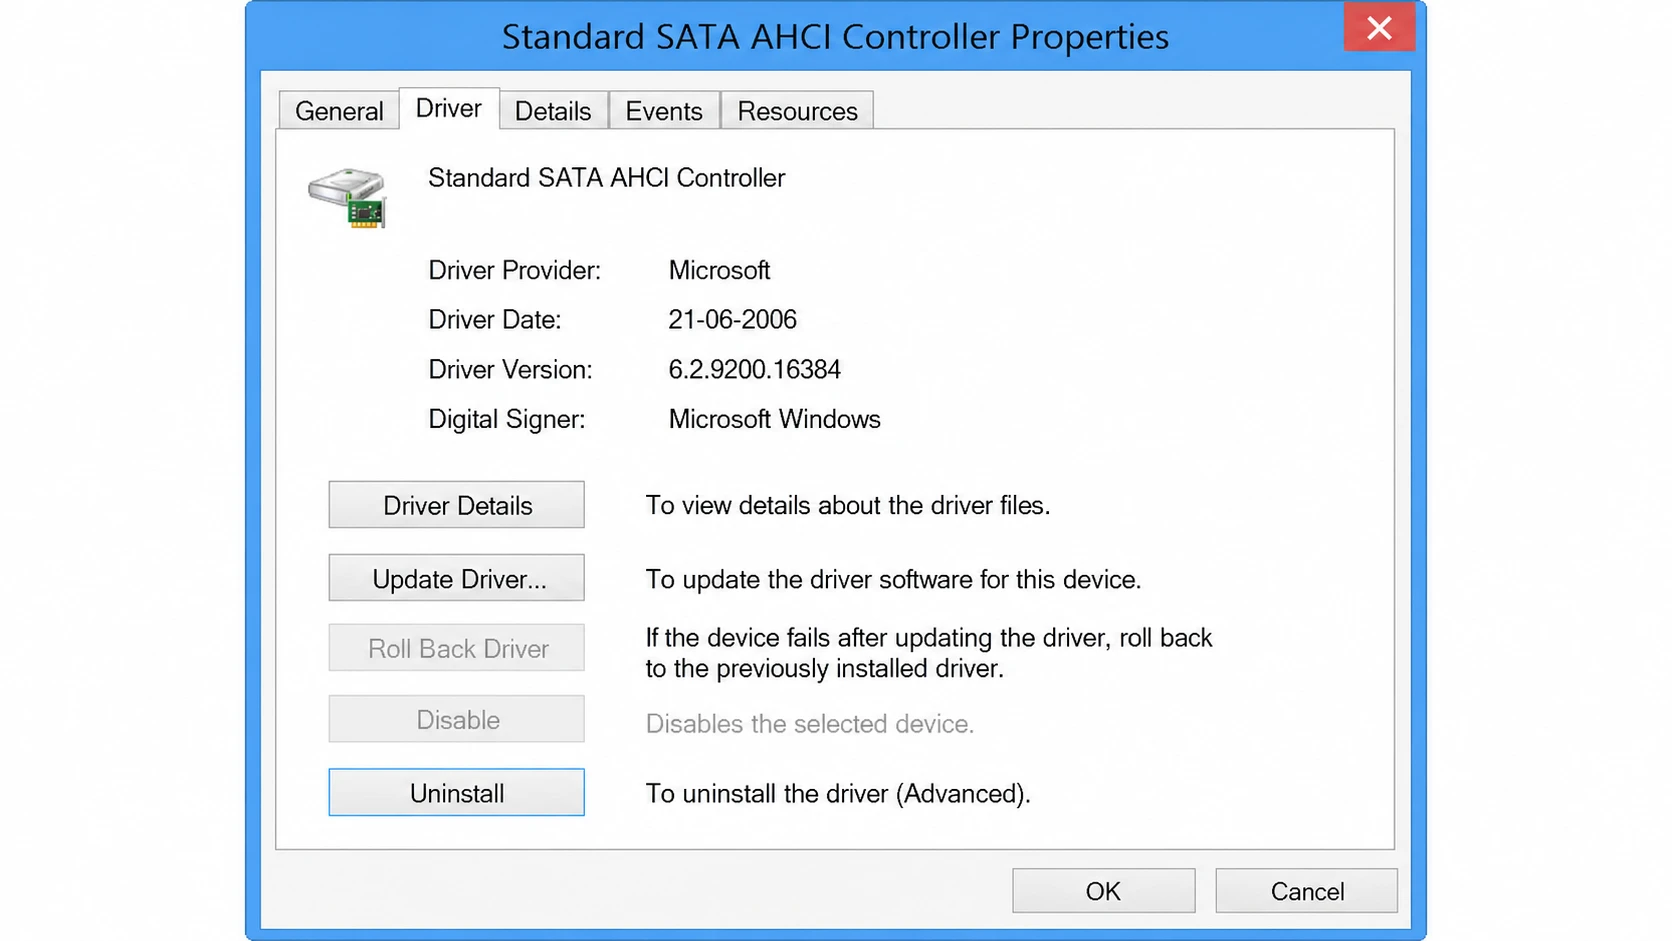
Roll back the driver if a recent update broke Miracast
If Miracast worked until a recent driver update, a newer build may have introduced the problem. Rolling back restores the previous driver that supported casting.
How to confirm the fix worked
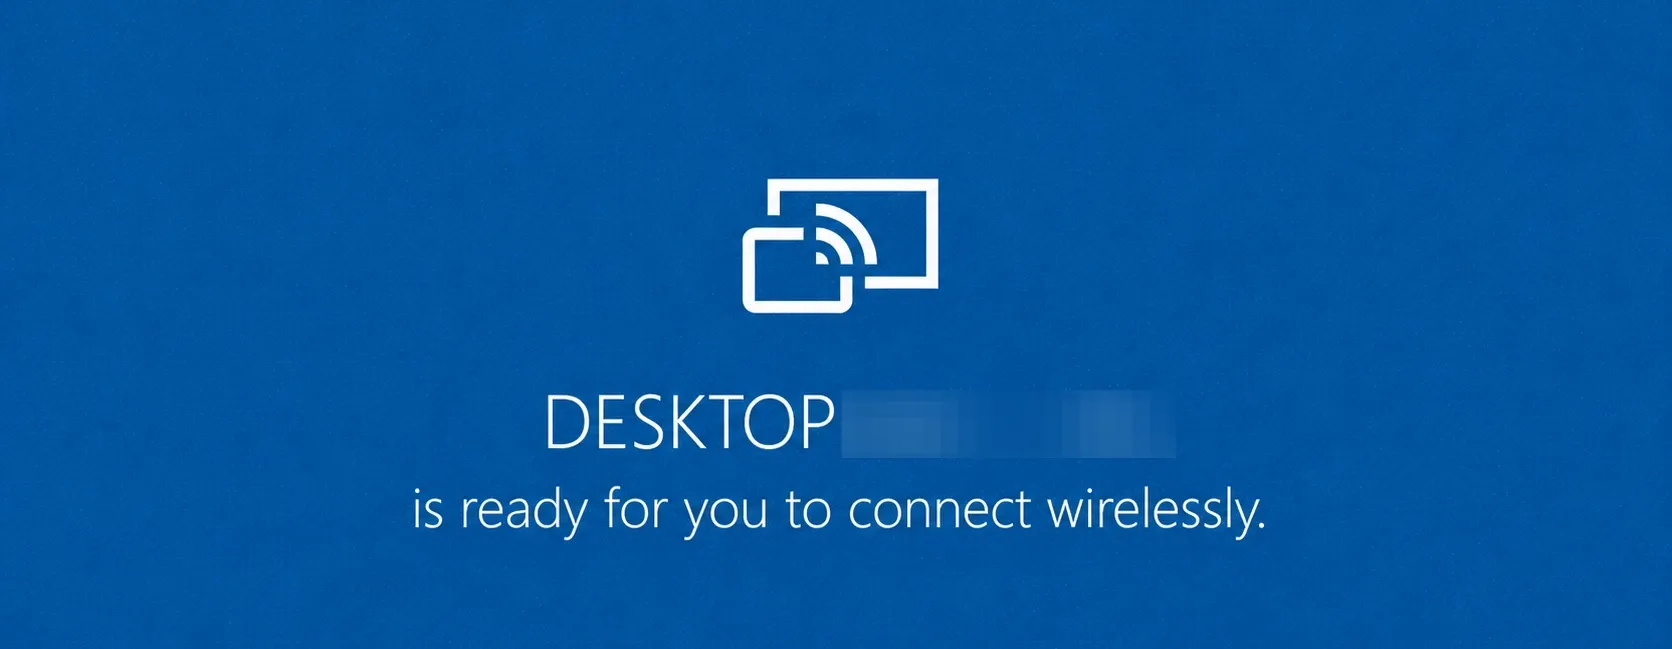
Run dxdiag once more, save the report, and open it. The Miracast line should now read Supported instead of Not Supported by Graphics driver. You can then press Win + K to open the Cast panel, which should begin scanning for available wireless displays. If it finds your TV or second PC, casting is restored.
A few setups still fall outside this. Many laptops and some all-in-one PCs cannot act as a receiving display because of how their panel and hardware are integrated, even with the Wireless Display feature installed. Older Wi-Fi adapters that lack Wi-Fi Direct also cannot support Miracast on either a laptop or desktop. In those cases, a wireless HDMI dongle that plugs into the TV is the practical workaround. For everyone else, installing the Wireless Display feature and a current vendor driver clears the error and brings wireless mirroring back.