
Turning a photo or object into a silhouette in PowerPoint streamlines visual presentations by focusing on shape and outline rather than detail. This approach is especially useful for emphasizing form, anonymizing subjects, or creating bold, graphic slides without external software. PowerPoint’s built-in tools, particularly the Remove Background feature and formatting options, make this process straightforward.
Method 1: Creating a Silhouette Using Remove Background and Formatting Tools
Insert the image you want to convert into a silhouette. On a blank slide, go to the
Insert tab, select Pictures, and choose your file. For best results, pick an image with clear outlines and a simple background, as this simplifies the background removal process.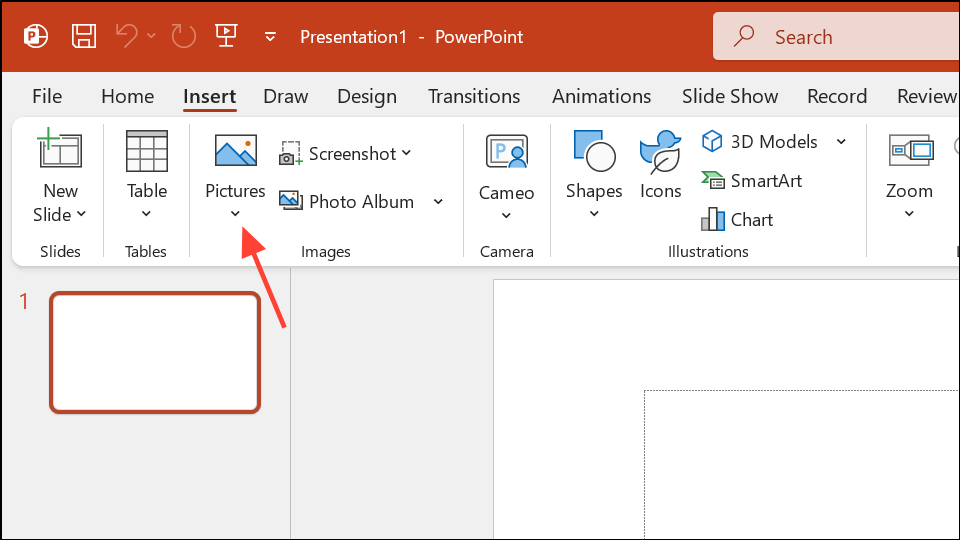
Select the inserted image, then navigate to the
Picture Format tab. Click on Remove Background in the Adjust group. PowerPoint automatically tries to detect and mark the background for removal, highlighting it in magenta.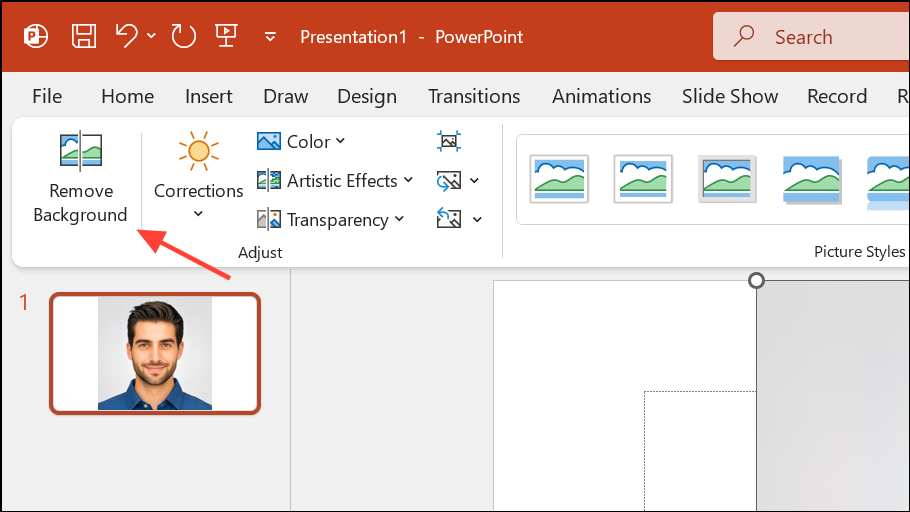
Adjust the selection box by dragging the handles so that it closely fits around the subject you want to keep. If PowerPoint removes part of the subject or leaves some unwanted background, use
Mark Areas to Keep and Mark Areas to Remove to fine-tune the mask. Click directly on areas to keep or remove; PowerPoint updates the preview as you go. Use Ctrl+Z to undo if you make a mistake.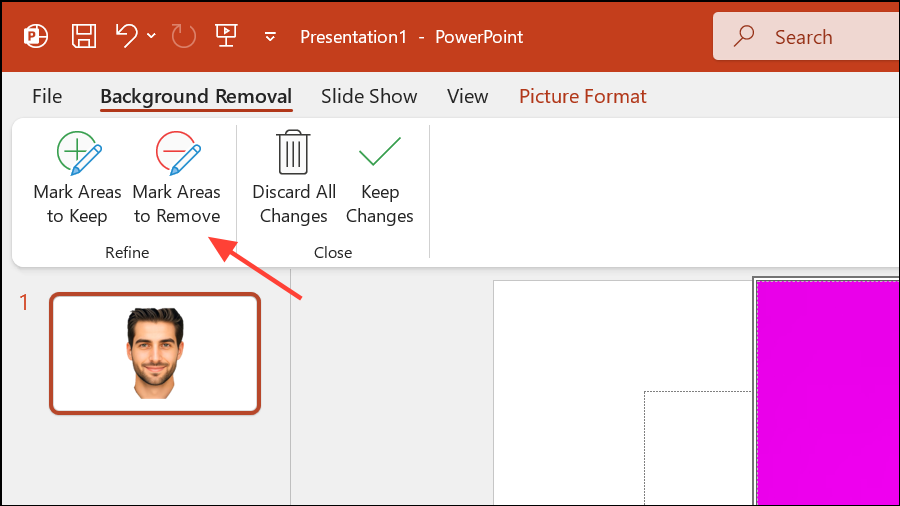
Once satisfied with the selection, click
Keep Changes. This removes the background, leaving only your desired object or person.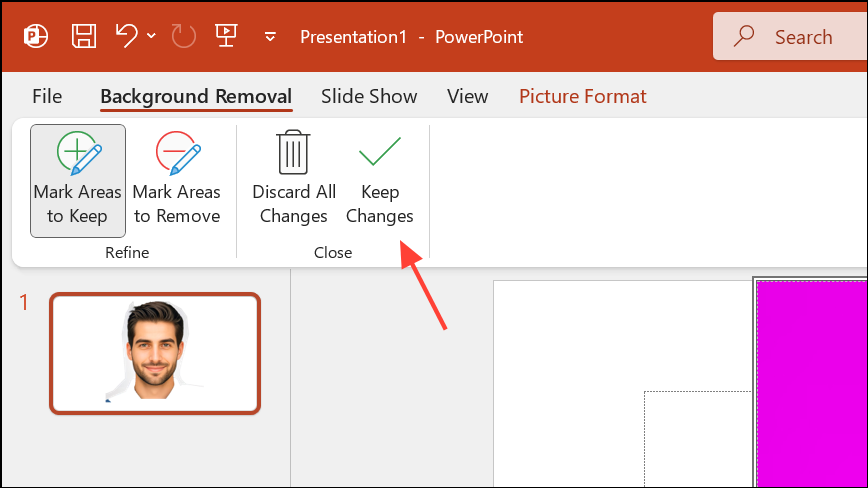
To convert the isolated object into a silhouette, right-click the image and select
Format Picture. In the Format Picture pane, go to Picture Corrections or Picture Color. Set the Brightness to -100. This turns the object completely black, creating a classic silhouette effect. If the result is too dark or loses definition, try adjusting contrast or recolor settings to refine the outline.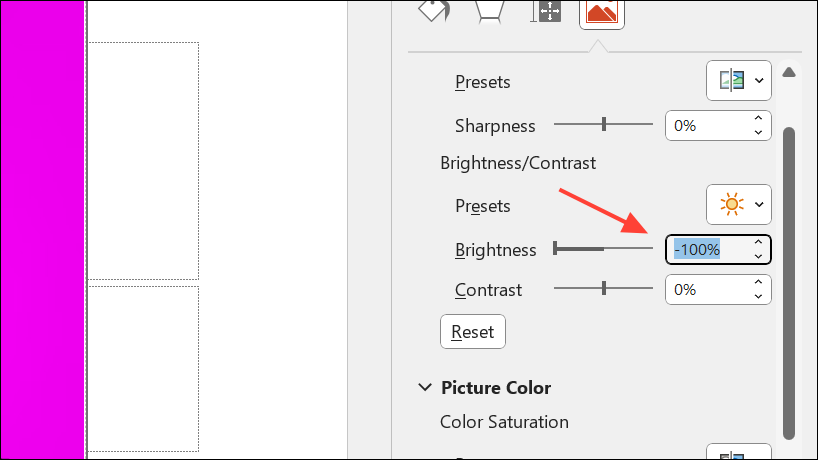
For a cleaner look, crop the image to shape. Select the silhouette, go to
Crop > Crop to Shape, and pick a rectangle or custom shape. You can further adjust the shape’s corners using the yellow adjustment handles to achieve rounded edges or other effects.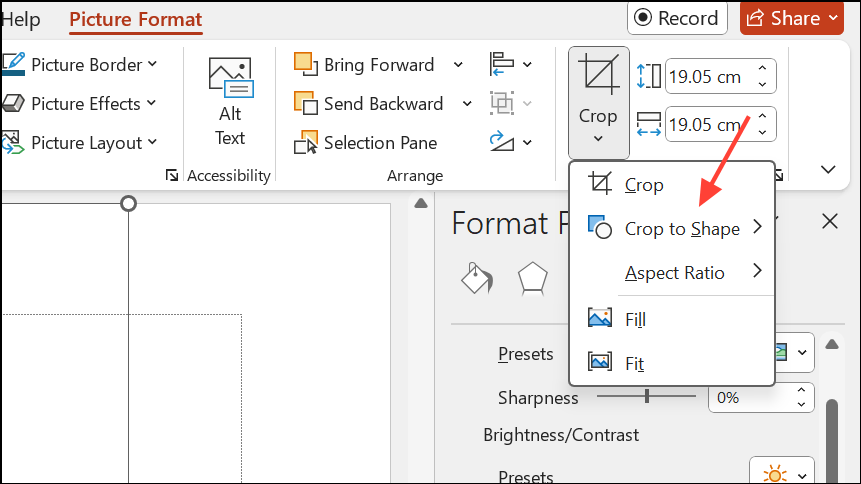
Place the finished silhouette over your desired background. For more visual impact, fill the slide background with a gradient or solid color using the
Design > Format Background options.
Method 2: Creating a Silhouette from PowerPoint Slides or Multiple Images
Save your slides or images as PNG or JPG files. In the
File menu, select Export or Save As, then choose the image format. You can export a single slide or the entire deck.
Insert each image back into a new slide. Use
Insert > Pictures to place the exported slides or images.Apply 3D rotation or skew effects to create a layered or angled silhouette display. Select each image, go to
Picture Format, and look for 3D Rotation options. Adjust the angle to create a dynamic, stacked effect.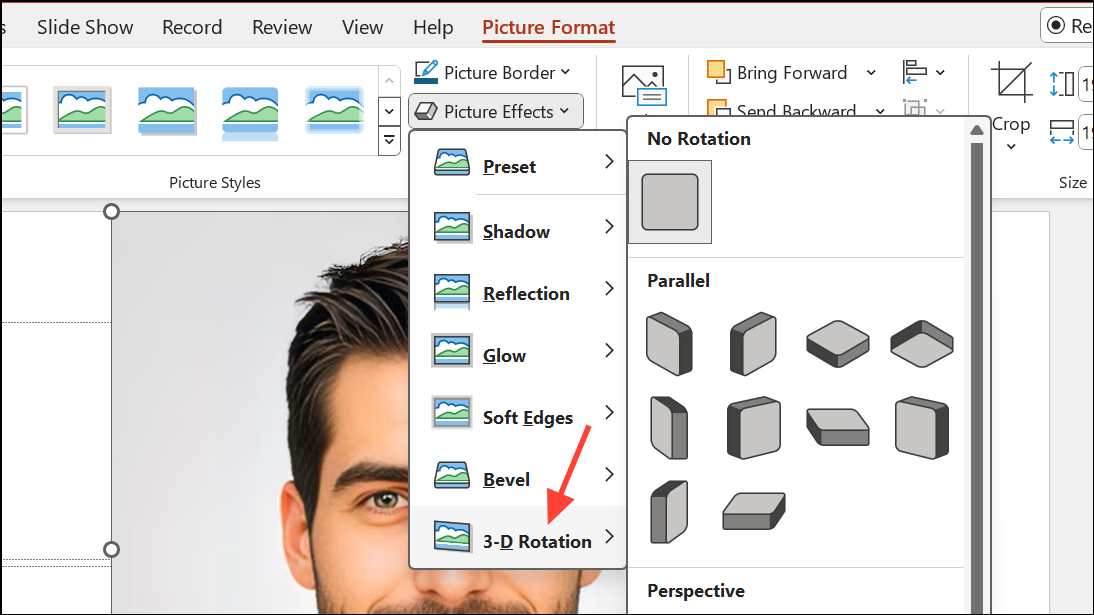
Add drop shadows and align the images for depth. Use the
Picture Effects menu to apply Shadow and adjust its blur, distance, and transparency. Align images by dragging or using the Align tools in the Arrange group.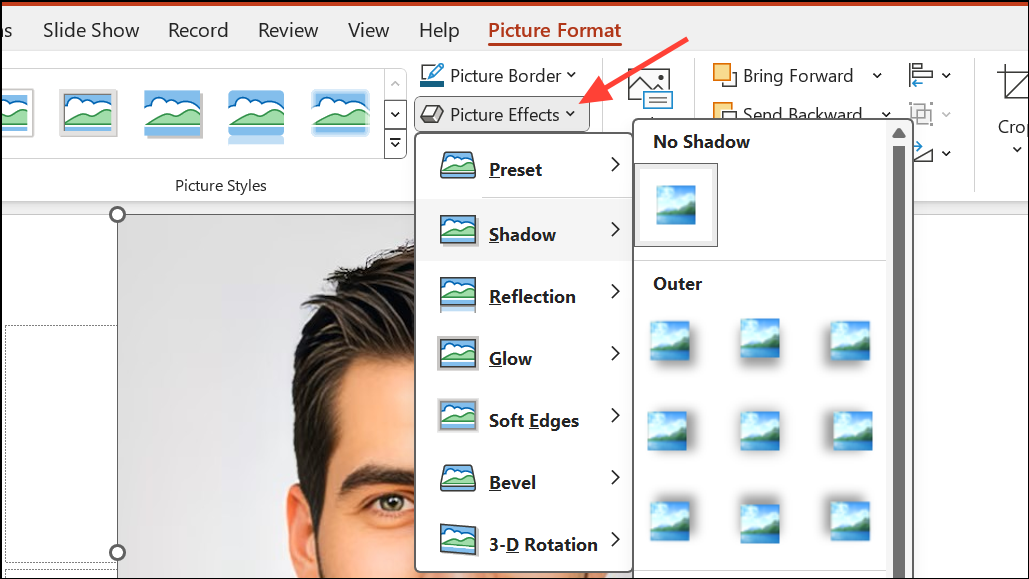
Fill the slide background with a gradient for a polished look. Go to
Design > Format Background, and select Gradient Fill. Choose your colors and adjust the direction and transparency to complement your silhouettes.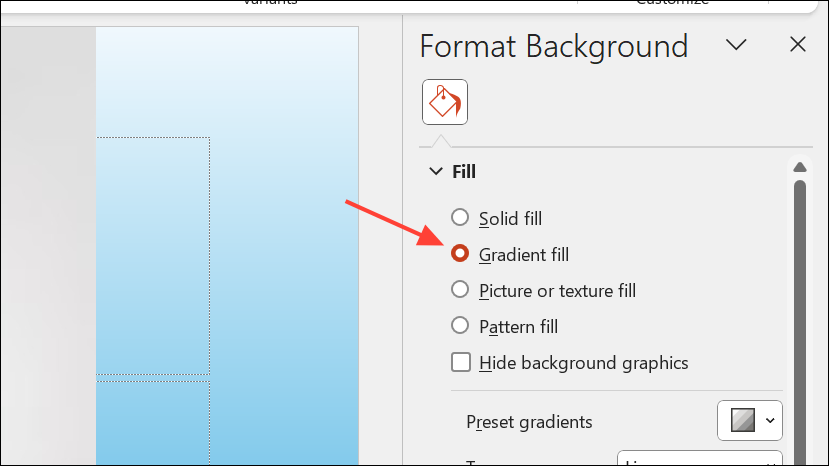
Method 3: Using SVG or Vector Images for Silhouettes
Insert an SVG image with a transparent background using
Insert > Pictures > This Device. SVGs are scalable and often provide cleaner edges for silhouettes.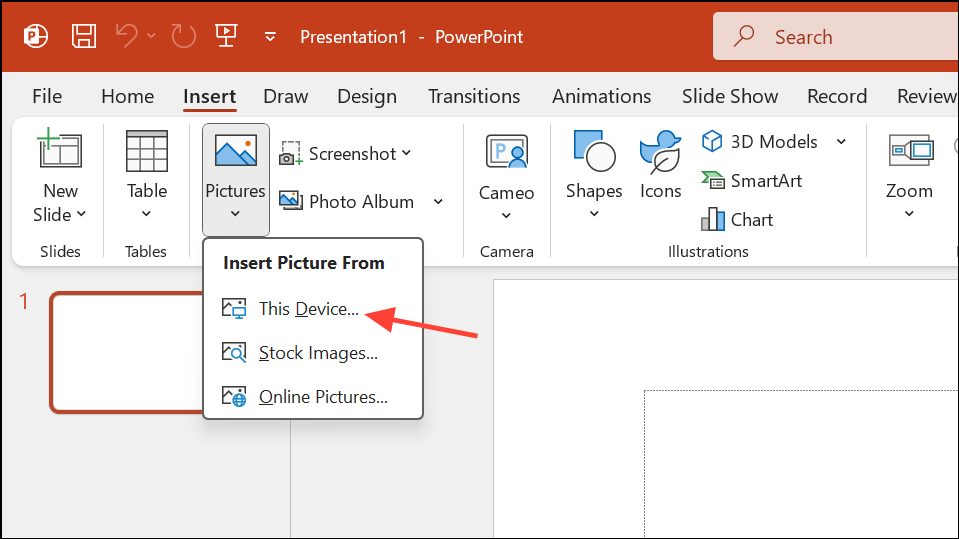
Right-click the SVG and choose
Convert to Shape. If the background unexpectedly fills with black or another color, this may be due to how PowerPoint handles SVG transparency. To avoid this, pre-edit the SVG in a vector editor like Inkscape or Illustrator to ensure the background is fully transparent.Once the SVG is converted to a shape, you can recolor it using the
Shape Fill option. Set the fill color to black for a classic silhouette look.If you encounter issues with certain SVGs, try exporting them as PNGs with transparent backgrounds and use the Remove Background tool as in Method 1.
Creating silhouettes in PowerPoint simplifies complex visuals and brings focus to your message. Experiment with different images and formatting tools to find the best approach for your project.