Easily configure automatic email replies when you're unavailable using Outlook.
Easily configure automatic email replies when you’re unavailable using Outlook.
by Pallav Pathak
Setting an Out of Office message in Outlook ensures your contacts know you’re unavailable and helps manage expectations regarding your response time. Whether you’re on vacation, attending a conference, or simply away from your inbox, Outlook provides straightforward ways to set up automatic replies. Follow the steps below based on the version of Outlook you’re using.
Method 1: Set Out of Office Message in Outlook Classic (Desktop)
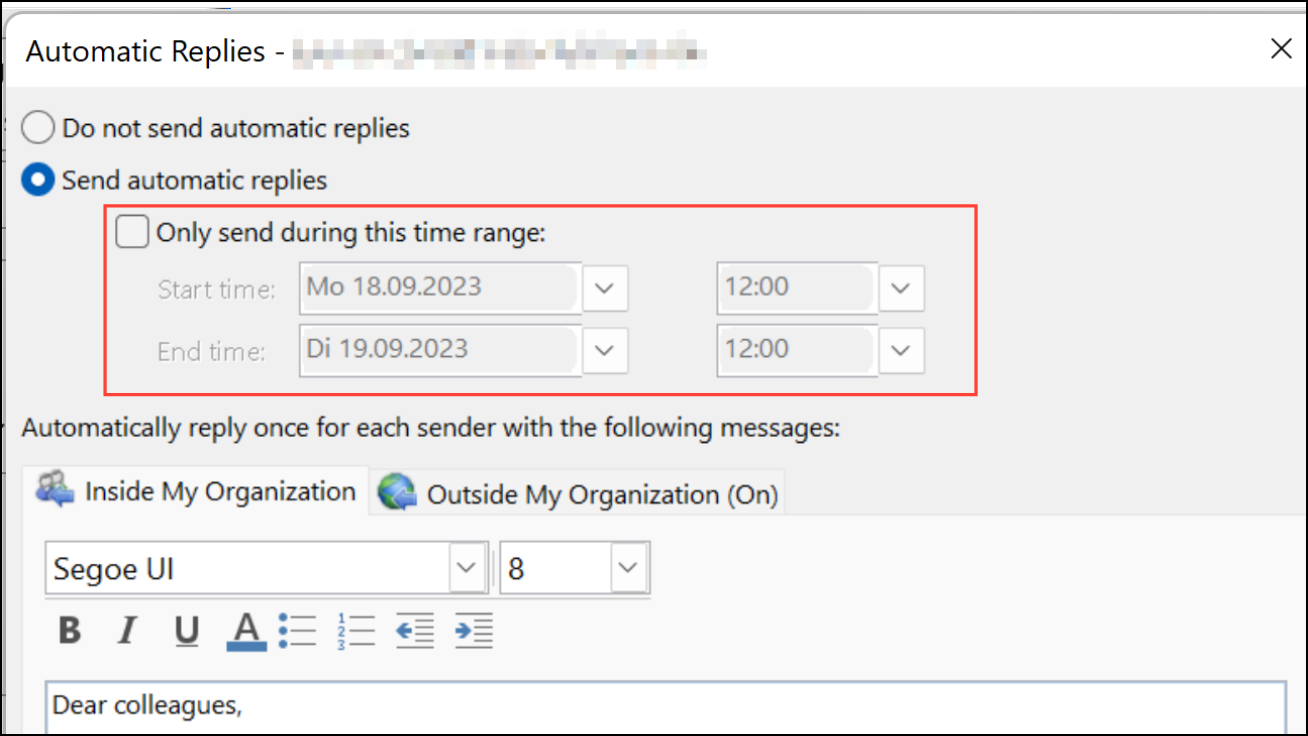
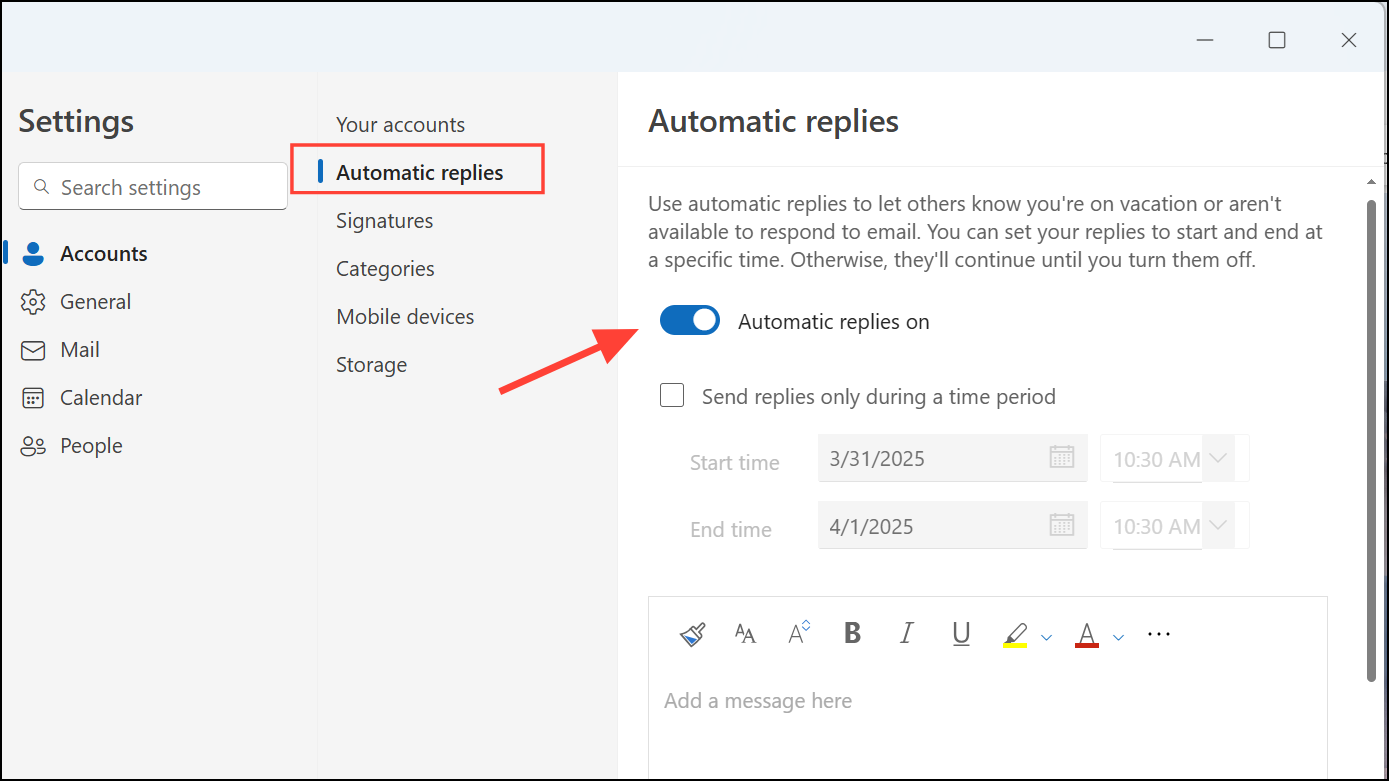
In the “Info” section, click on “Automatic Replies (Out of Office)”. If you don’t see this option, your Outlook account type may not support automatic replies. In that case, you can use rules instead (see Method 3).
Select the option “Send automatic replies”. You can specify a time range by checking the box labeled “Only send during this time range” and then setting your start and end dates and times. If you leave this unchecked, you’ll need to manually turn off automatic replies later.
In the text box under the “Inside My Organization” tab, type the message you want your colleagues to receive. Clearly state your dates of absence and provide alternative contact information for urgent queries.
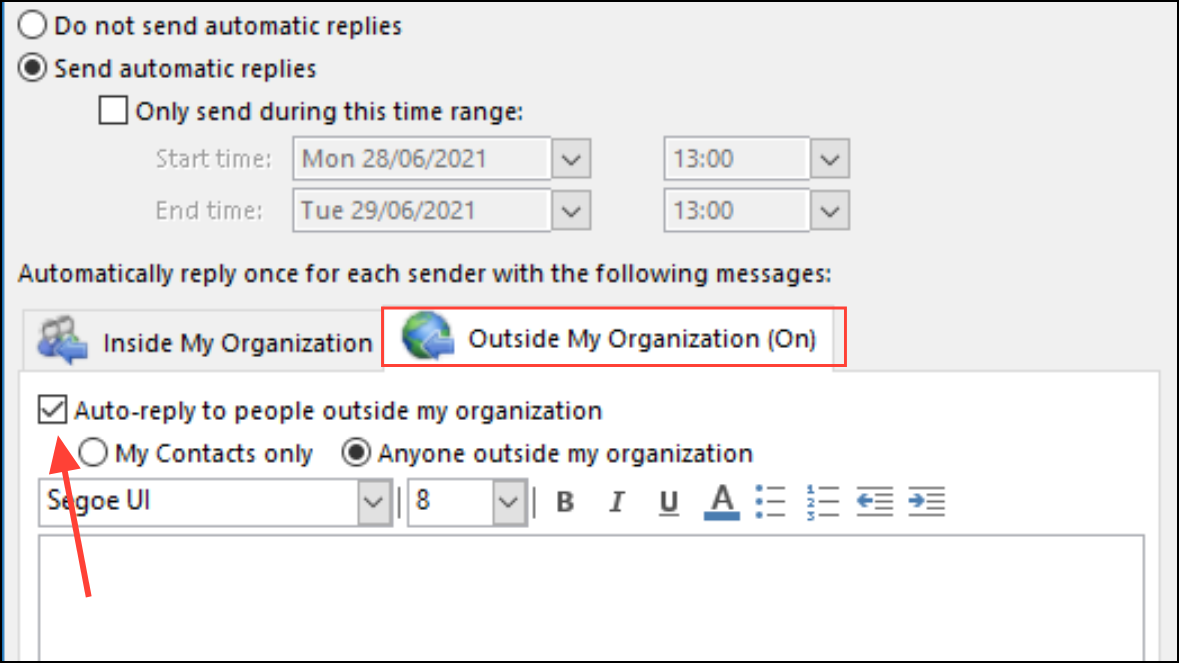
If you want to send automatic replies to people outside your organization, click the “Outside My Organization” tab. Check the box “Auto-reply to people outside my organization”. You can further specify whether to send replies only to your contacts or to everyone who emails you. Write a brief, professional message suitable for external contacts.
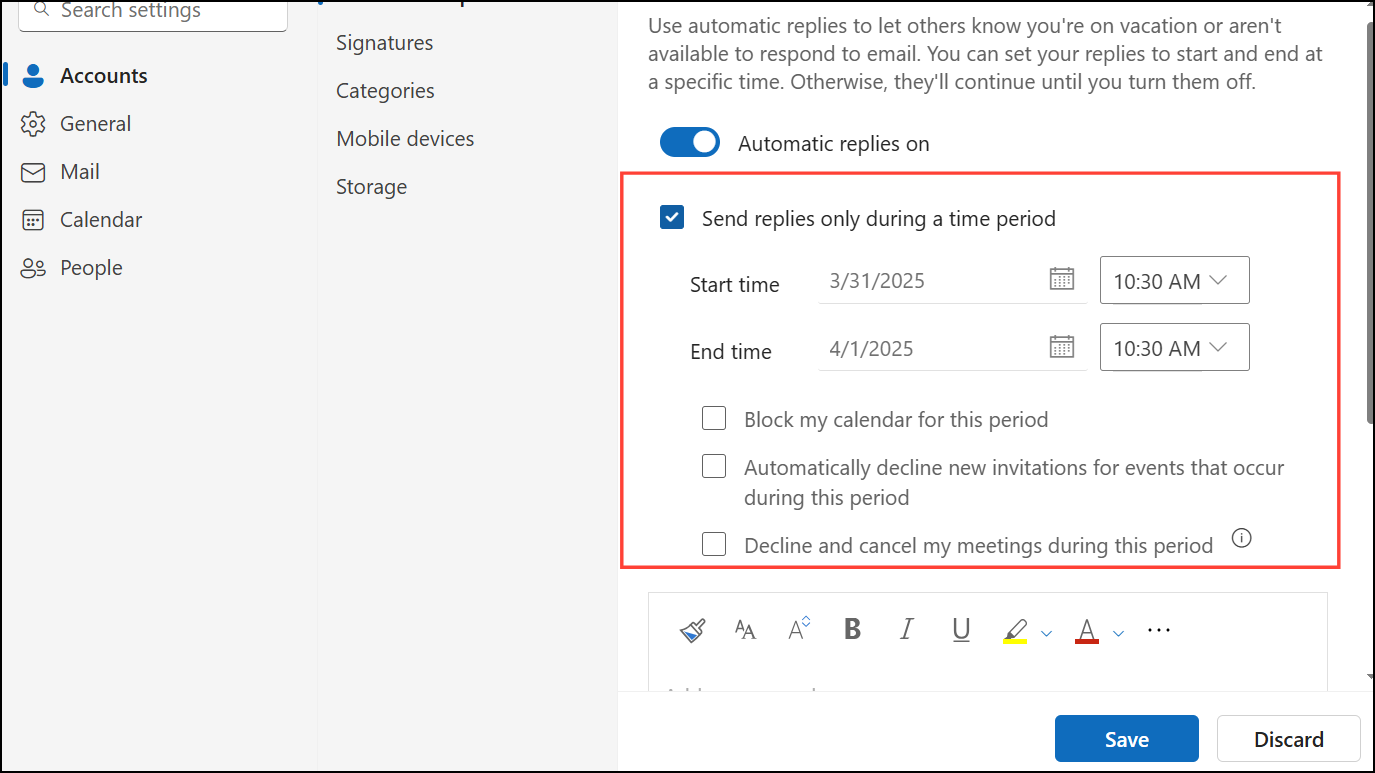
Type your custom message in the provided text box. You can also specify the exact time period by checking the box “Send replies only during a time period” and setting your preferred dates and times.
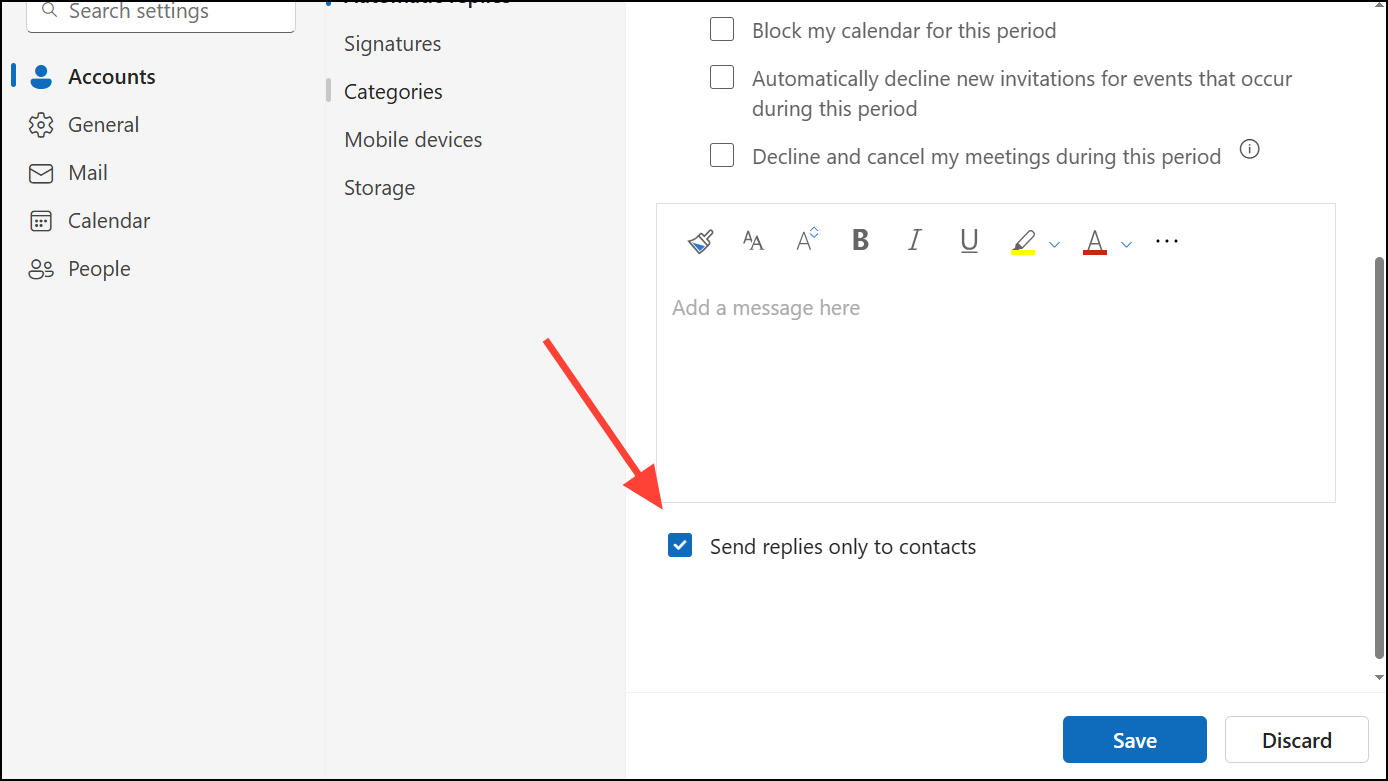
To avoid sending your reply to unknown senders, check the box labeled “Send replies only to contacts”. This ensures your automatic reply goes only to people in your contacts list.
Begin by creating a new email message. Click “New Email” and type your desired Out of Office message in the body. Include information about your absence and alternative contacts.
Click on “File” and select “Save As”. Alternatively, click on the three dots on the right and select “Save As”. Choose “Outlook Template (*.oft)” as the file type and save this template to your computer.
Check the box labeled “reply using a specific template”. Click the link labeled “a specific template” located in the lower pane. Select “User Templates in File System”, choose the template you just created, and click “Open”.
Click “Next” to set exceptions if needed, or simply click “Next” again to skip. Finally, name your rule (e.g., “Out of Office”) and enable it by checking “Turn on this rule”. Click “Finish” and your Out of Office replies will be active.
Remember that Outlook must remain running for this rule-based method to work. Keep your computer and Outlook application running during your absence.
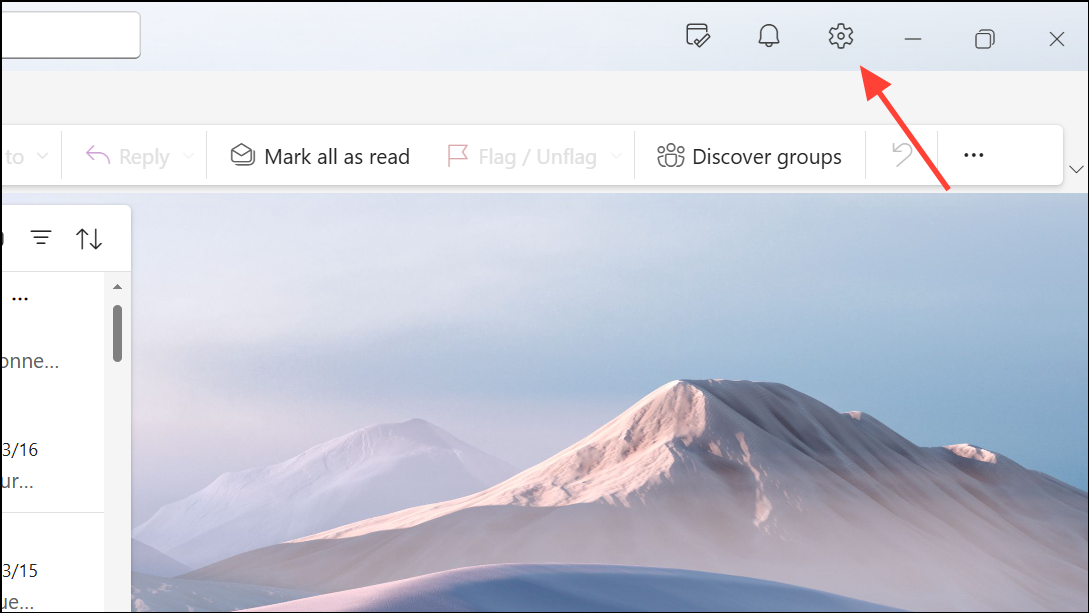
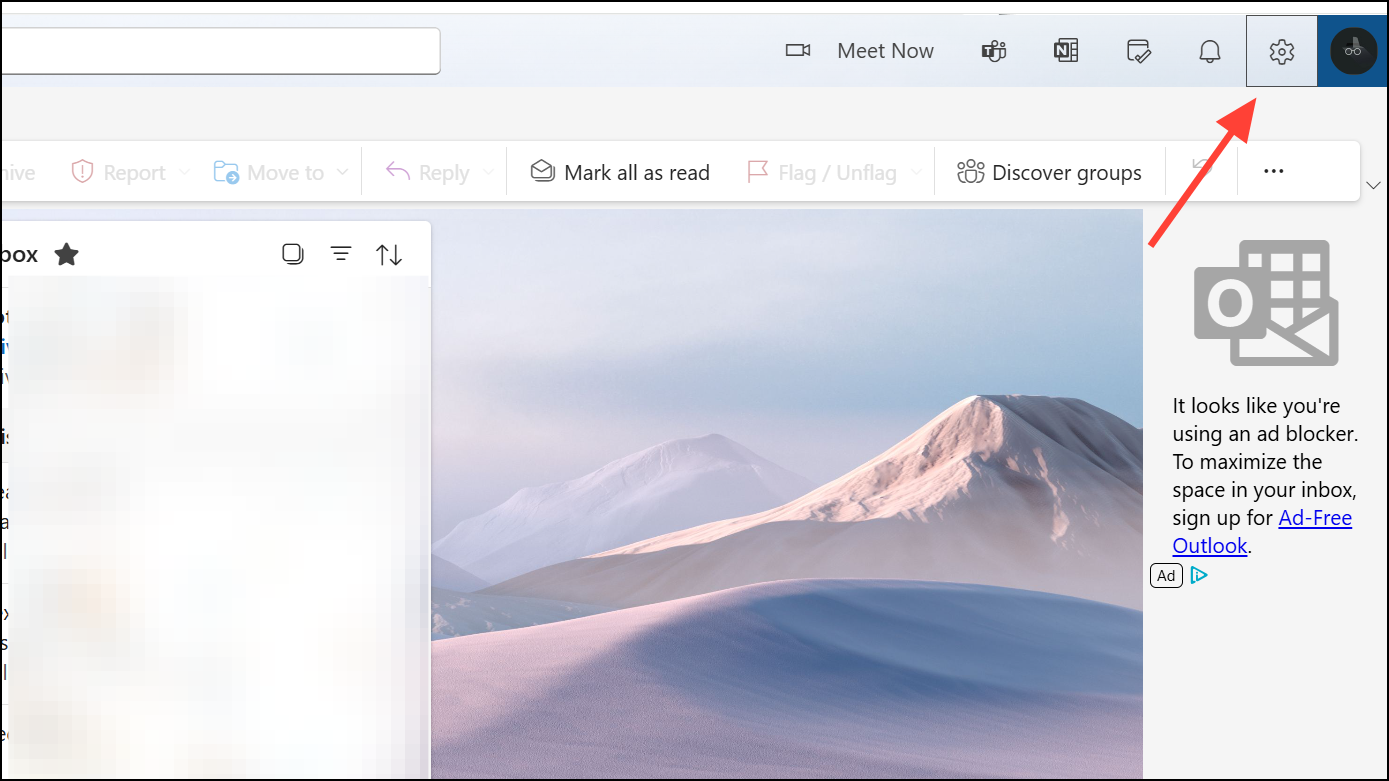
Method 4: Set Out of Office Message in Outlook Web
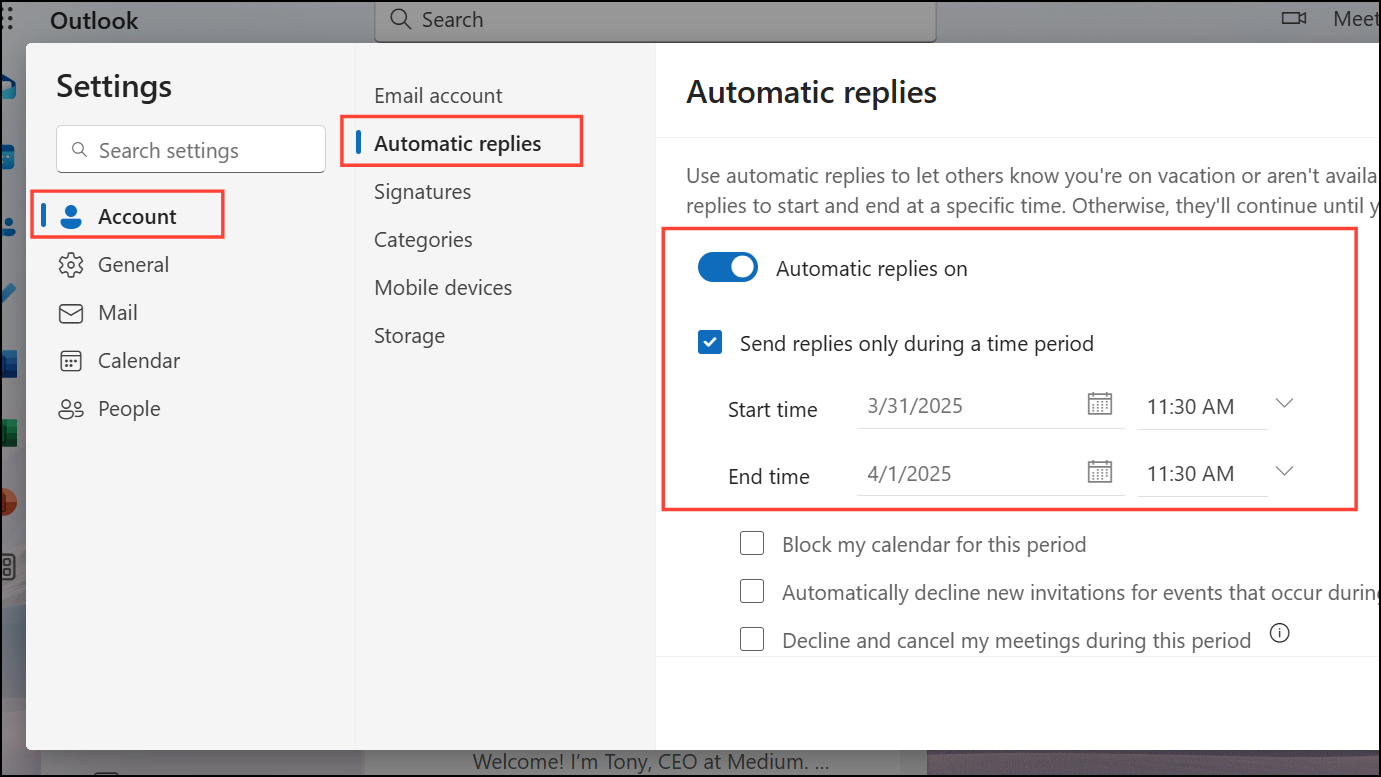
Toggle on the “Automatic replies on” switch. Enter your message content and specify the time period if desired by checking “Send replies only during a time period”.
If your account allows, you can also choose to block your calendar or decline meetings automatically during this period. Select “Send replies outside your organization” if you need replies sent externally.
Click “Save” to finalize your settings. Your automatic replies are now set and will activate as configured.
Setting up automatic replies in Outlook is a straightforward way to keep your contacts informed when you’re unavailable. Make sure to turn off automatic replies when you return if you haven’t set a specific end date.