Minecraft ships with only about 2GB of memory set aside for the game, which is fine for a plain survival world but falls apart the moment you load a heavy modpack, crank up render distance, or turn on shaders. When that memory runs out, you get stutter, missing chunks, or a full “Out of Memory” crash. The fix is to raise the maximum heap size the game is allowed to use, and every Java Edition launcher exposes that setting somewhere.
Quick answer: In the official Minecraft Launcher, open Installations, click the three dots on your installation and choose Edit, then More Options, and change -Xmx2G to your target (for example -Xmx6G) before saving. In CurseForge and most other launchers, drag the allocated memory slider instead.
How much RAM to allocate to Minecraft
More is not automatically better. Java’s garbage collection starts causing pauses if you hand it far more than it needs, and your operating system still requires headroom to run everything else. Two rules hold in every case: never give Minecraft more than half of your total system RAM, and never push the client past 12GB.
| Setup | Recommended allocation |
|---|---|
| Vanilla Minecraft | 2–4GB |
| Light mods or shaders | 4–6GB |
| Heavy modpacks (100+ mods) | 6–10GB |
Match those numbers to your hardware. On an 8GB machine, keep 2–3GB free for the system and stay around 3–4GB for the game. On 16GB or more, 6–8GB is safe. Macs need extra overhead, so leave at least 4GB for macOS. Anything above 12GB rarely helps unless you are running the largest kitchen-sink packs.
Check your total system RAM first
Trying to allocate more memory than your computer physically has will crash Minecraft on startup with a Java heap error, so confirm the total before you change anything. On Windows, press Ctrl+Shift+Esc, open the Performance tab, and read the total under Memory. On macOS, click the Apple menu and open About This Mac, where the total appears next to Memory.
Allocate RAM in the official Minecraft Launcher
This method edits the raw Java argument directly, so type carefully. The value is case-sensitive and there must be no space between the number and the G.
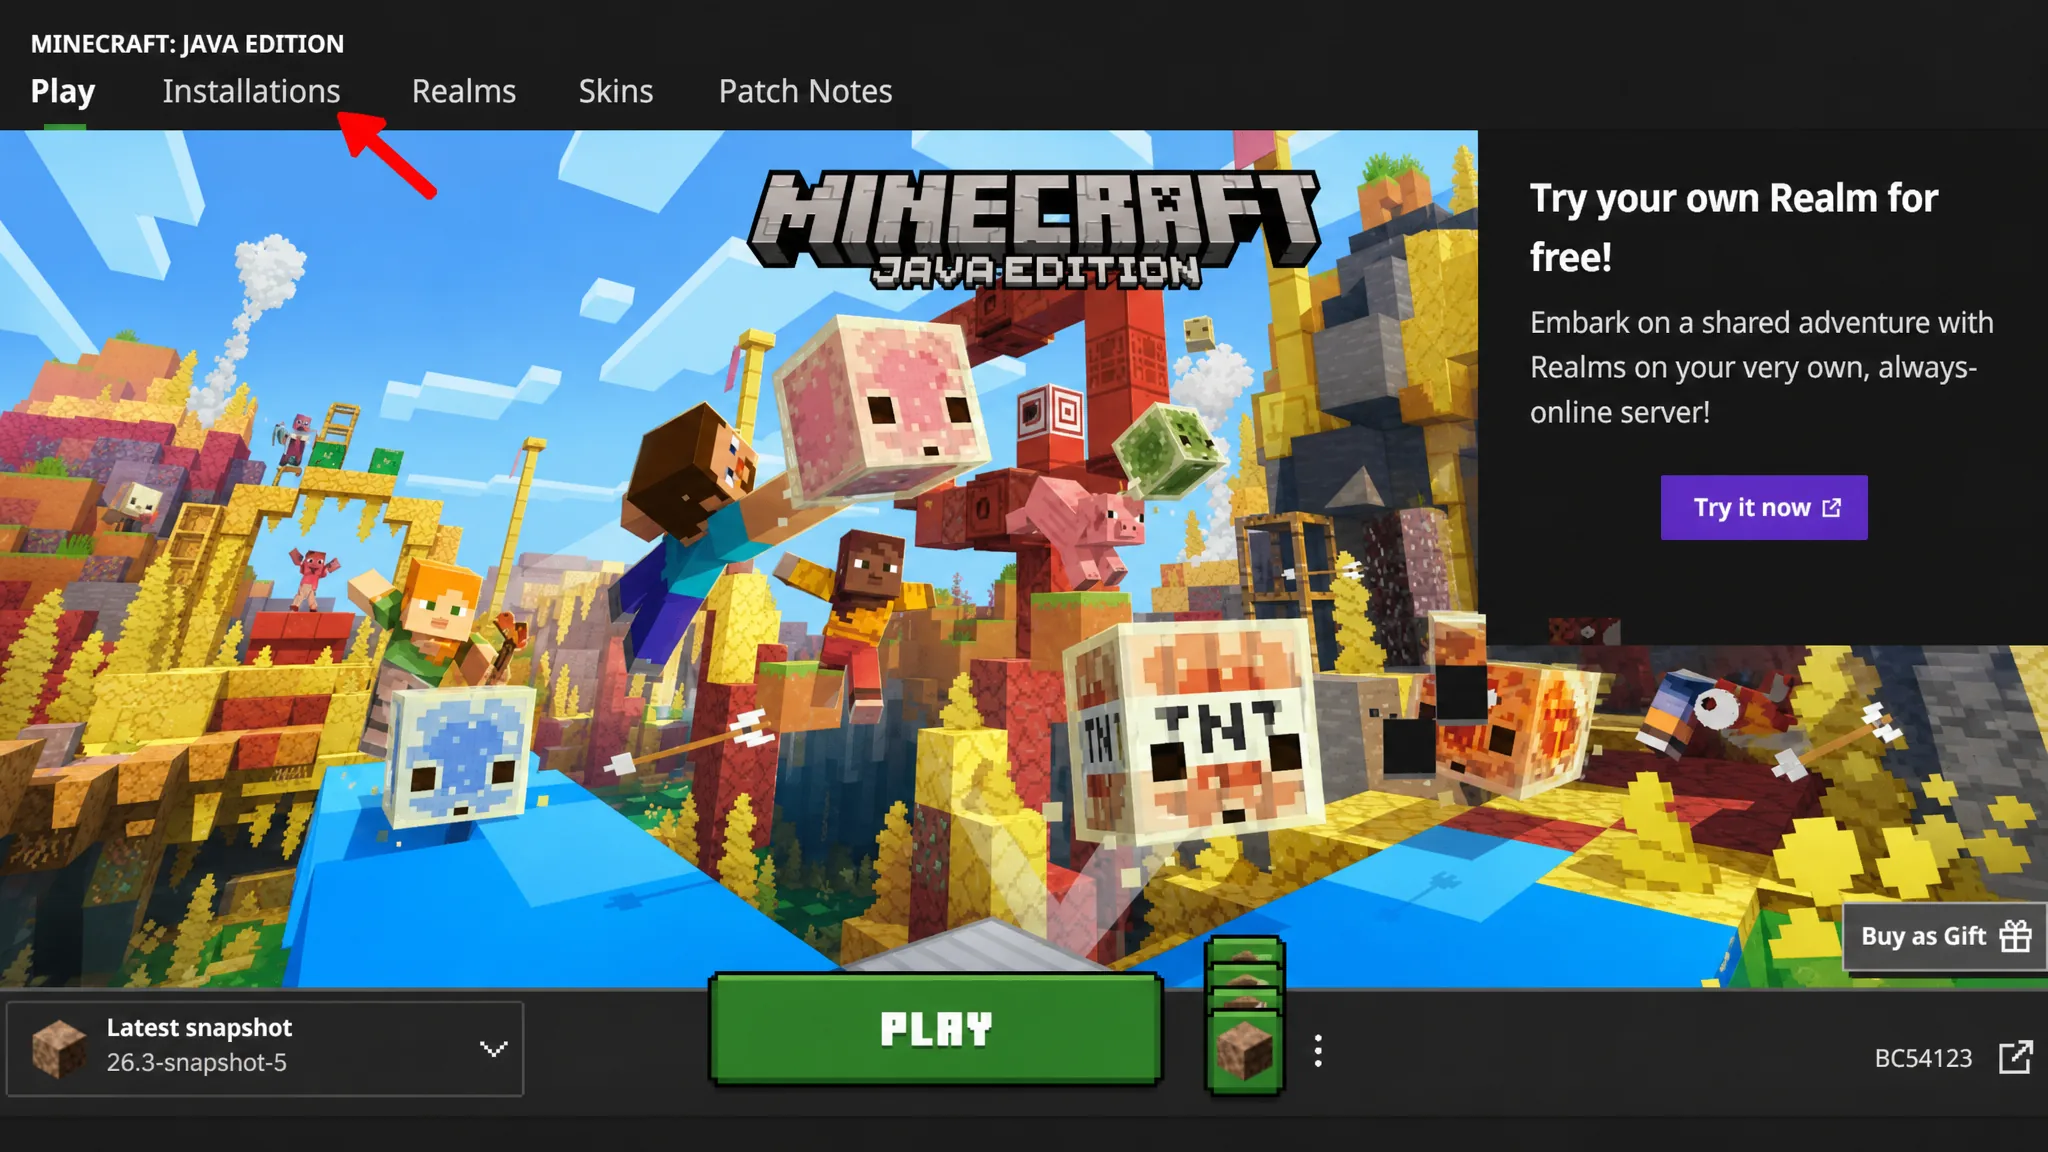
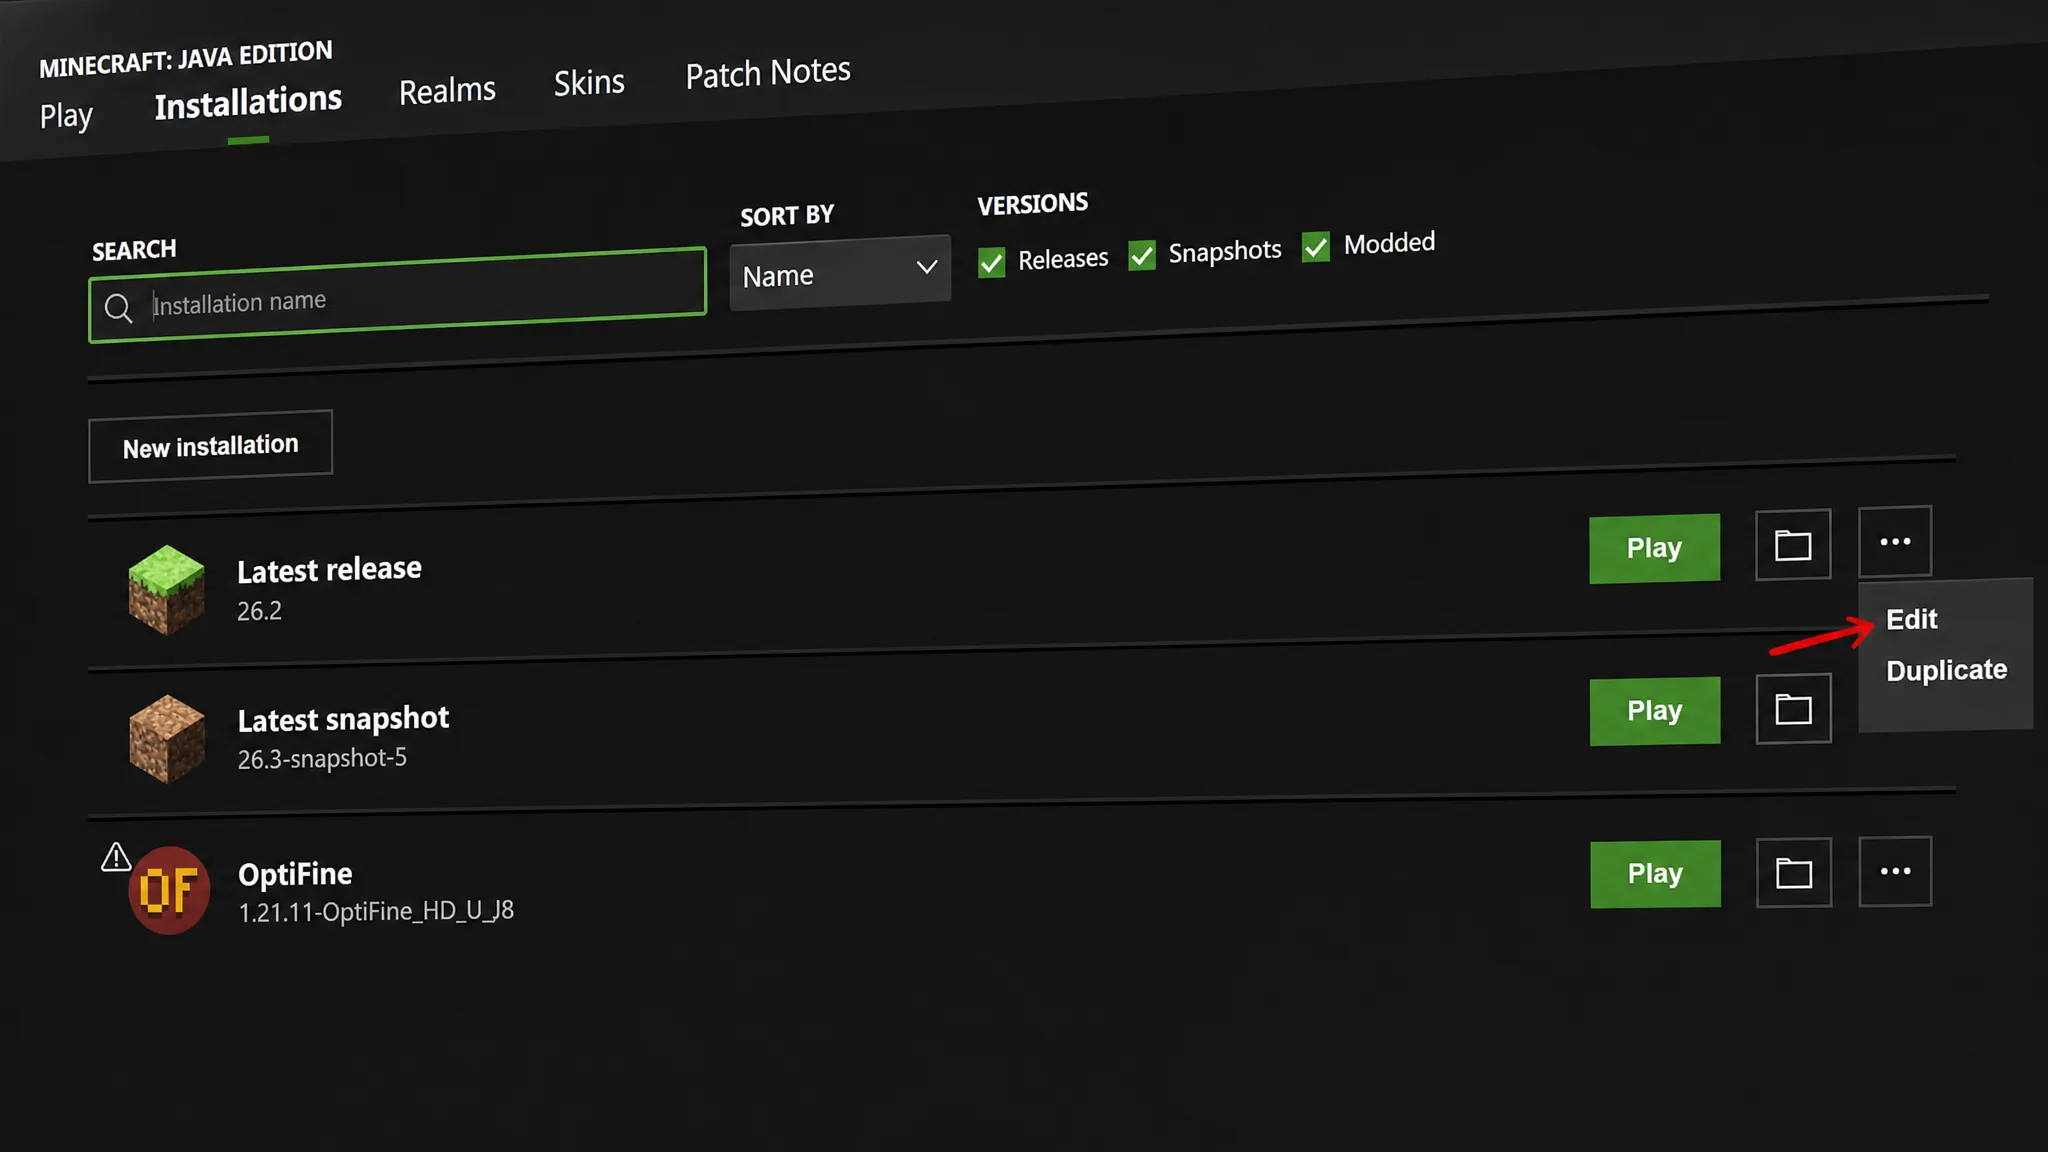
-Xmx2G and change the number, for example -Xmx4G for 4GB. You can also edit the -Xms value to set the minimum. Leave every other argument alone, then click Save and launch.Allocate RAM in the CurseForge app
CurseForge uses a slider instead of raw arguments, and you can set it globally or per modpack. Both slider values are in megabytes, so remember that 1GB is roughly 1024MB and 4GB is 4096MB.
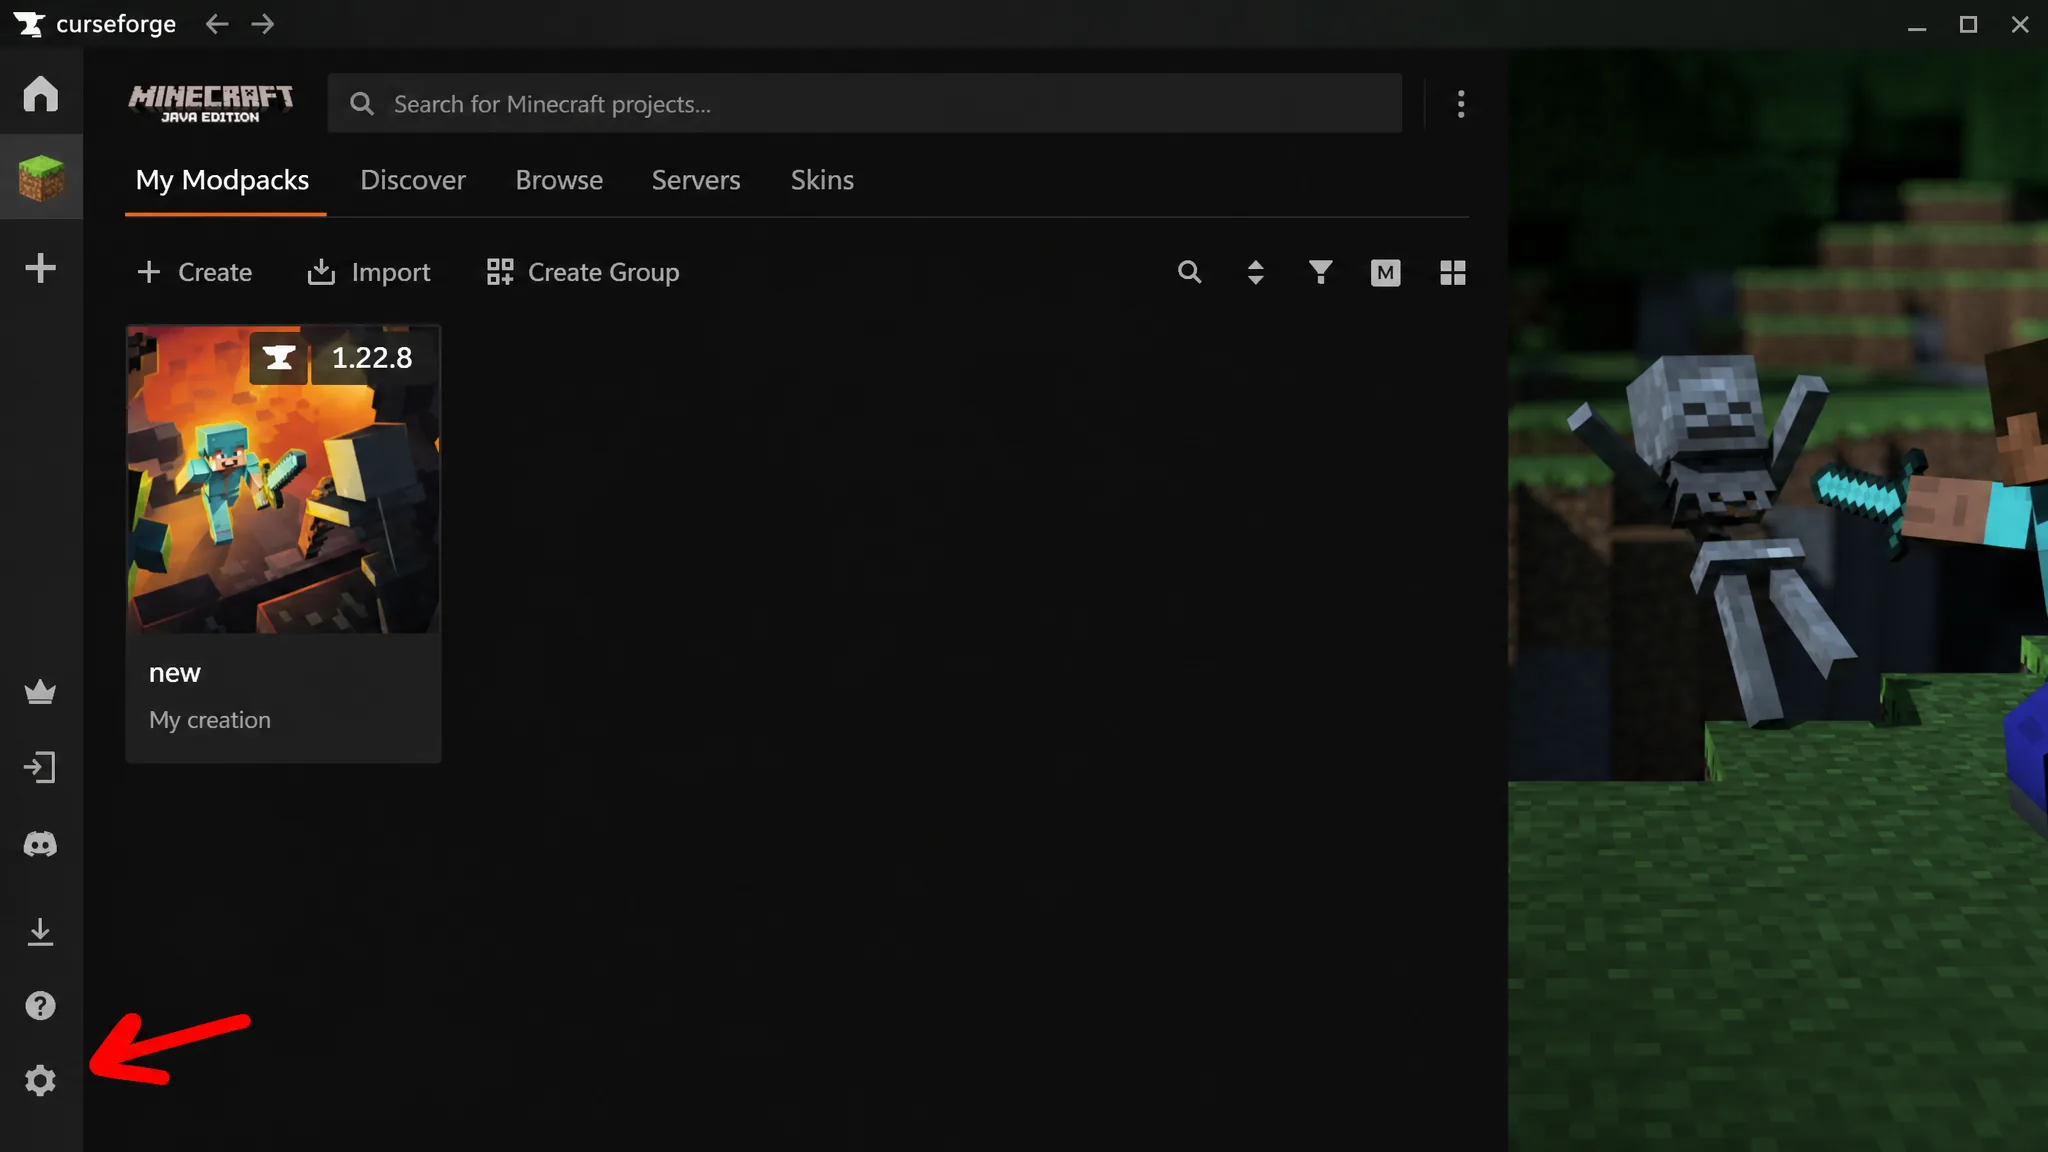
Where the memory setting lives in other launchers
Third-party launchers almost all use a slider or dropdown rather than JVM arguments. The setting sits in a Java or memory area, either globally or per instance.
| Launcher | Where to change RAM |
|---|---|
| ATLauncher | Settings > Java/Minecraft > Maximum Memory/Ram (in MB). Per instance under the instance’s Java/Minecraft Settings tab. |
| Modrinth | Select a profile > Options > enable Override Global Memory Settings > adjust the slider. |
| Prism Launcher | Select instance > Edit > Settings > check Memory > set Maximum Memory Allocation. |
| MultiMC | Right-click instance > Edit Instance > Settings > check Memory > set Maximum Memory Allocation. |
| Technic | Launcher Options > Java Settings > Memory dropdown. |
| FTB App | Library > open the instance > Settings > drag the memory slider. |
| Lunar Client | Settings (bottom left) > adjust the allocated memory slider. |
| Badlion Client | Settings > memory slider at the top of the page. |
| Void Launcher | Options (top right) > Memory Size to Allocate To Minecraft dropdown. |
Confirm the new allocation worked
Launch a world and press F3 to open the debug screen. In the top-right you will see a memory readout like Mem: 1200/6144MB. The first number is what Minecraft is currently using, and the second is the maximum it can claim. If that second number matches what you set, the change took effect. The game will not always fill the full amount unless it needs to.
Common problems and when more RAM won’t help
If the game refuses to launch after your change, you most likely allocated too much. Keep Minecraft under about 75% of your total RAM, lower the value, and try again.
If the game won’t go above 2GB no matter what you enter, you are almost certainly running 32-bit Java, which is hard-capped near that level. Modern versions also need the right runtime, since Minecraft 1.18 and newer require Java 17 or later and recent packs need Java 21. Official launchers bundle the correct Java automatically, so this mainly affects manual or third-party setups. For those, install a 64-bit build such as Temurin from Adoptium, restart your computer, and relaunch.
Note: extra memory does not raise your frame rate. It removes the ceiling that causes crashes and stutter, but rendering speed depends on your CPU and GPU. If lag persists after a comfortable allocation, the bottleneck is elsewhere, and performance mods like Sodium, lower render distance, or reduced graphics settings will do more than adding memory. And none of this applies to Bedrock Edition, which manages memory automatically and offers no manual setting.