
The Circulatory System is the cyberware slot that decides whether you survive a bad fight or reload a save. Nothing in it adds armor or crit chance, so it tends to get filled with cheap junk and forgotten. That is a mistake. Everything here is health, stamina, and the panic buttons that fire the instant your health bar hits zero.
Quick answer: For most builds, run Second Heart, Blood Pump, and Heal-on-Kill. That is 55 Cyberware Capacity for a full revive, an instant heal with no drinking animation, and passive sustain on every kill. Before level 30 you cannot equip Second Heart, so the early-game version is Blood Pump, Heal-on-Kill, and Clutch Padding for 37 capacity.
Every Circulatory System implant and effect
Twelve implants sit in this category as of Update 2.0 and Phantom Liberty. Two of them, Electromag Recycler and Isometric Stabilizer, are iconic and only exist in the expansion. Capacity cost is the number that actually matters, since you only ever get three slots to spend it across.
| Implant | Capacity | Attribute | Effect (Tier 1 → Tier 5) |
|---|---|---|---|
| Threatevac | 5 | Intelligence | +5% → +25% movement speed at low health |
| Heal-on-Kill | 10 | Intelligence | Restore +3% → +7% health per kill |
| Clutch Padding | 12 | Body | -7% → -18% stamina cost for shooting |
| Microrotors | 12 | Reflexes | +10% → +23% melee attack speed (2/sec cap) |
| Adrenaline Booster | 14 | Reflexes | Restore 10% → 23% stamina after a melee kill |
| Biomonitor | 14 | Technical Ability | Auto-heals below 35% HP; +2% → +14% health item effect |
| Feedback Circuit | 14 | Technical Ability | Restore 1.5% → 3% health on charged Tech hit (Tier 3+) |
| Blood Pump | 15 | Technical Ability | Instantly restores 45 → 85 HP, then 9 → 17 HP/sec for 6s (Tier 2+) |
| Black Mamba | 16 | Reflexes | -90% poison damage; +10% → +18% other damage vs poisoned (Tier 3+) |
| Second Heart | 30 | Body | Revives you at 0 HP (Tier 4+) |
| Electromag Recycler | 40 | Technical Ability | Restore 2.5% → 4% health and stamina on charged Tech hit (Iconic) |
| Isometric Stabilizer | 40 | Reflexes | -13% → -20% stamina cost for all attacks (Iconic) |
How the three slots, capacity, and tiers work
You get three Circulatory slots for the whole playthrough. Unlike Face or Skeleton, there is no perk or quest that unlocks a fourth. Every implant you slot draws from your shared Cyberware Capacity, so a Threatevac at 5 and an Electromag Recycler at 40 are eight times apart in budget for effects that live in the same three-slot pool.
Which tiers a Ripperdoc stocks depends on your character level, not your attributes. Tier 1 is available from level 1, Tier 2 at 10, Tier 3 at 20, Tier 4 at 30, and Tier 5 at 40. You can also pay to upgrade an implant you already own using crafting components. Some pieces have a higher base tier, which is why Blood Pump never appears below Tier 2, Black Mamba starts at Tier 3, and Second Heart does not show up until Tier 4.
Each implant carries a secondary bonus tied to one attribute, and those bonuses are rolled at the shop rather than fixed. If you care which one you get, the Chipware Connoisseur perk in Technical Ability lets you reroll. There is also an achievement angle: filling every cyberware slot type with at least one implant unlocks Full Body Conversion, and Circulatory is one of those types, so even a 5-capacity Threatevac earns its place on a completionist run.
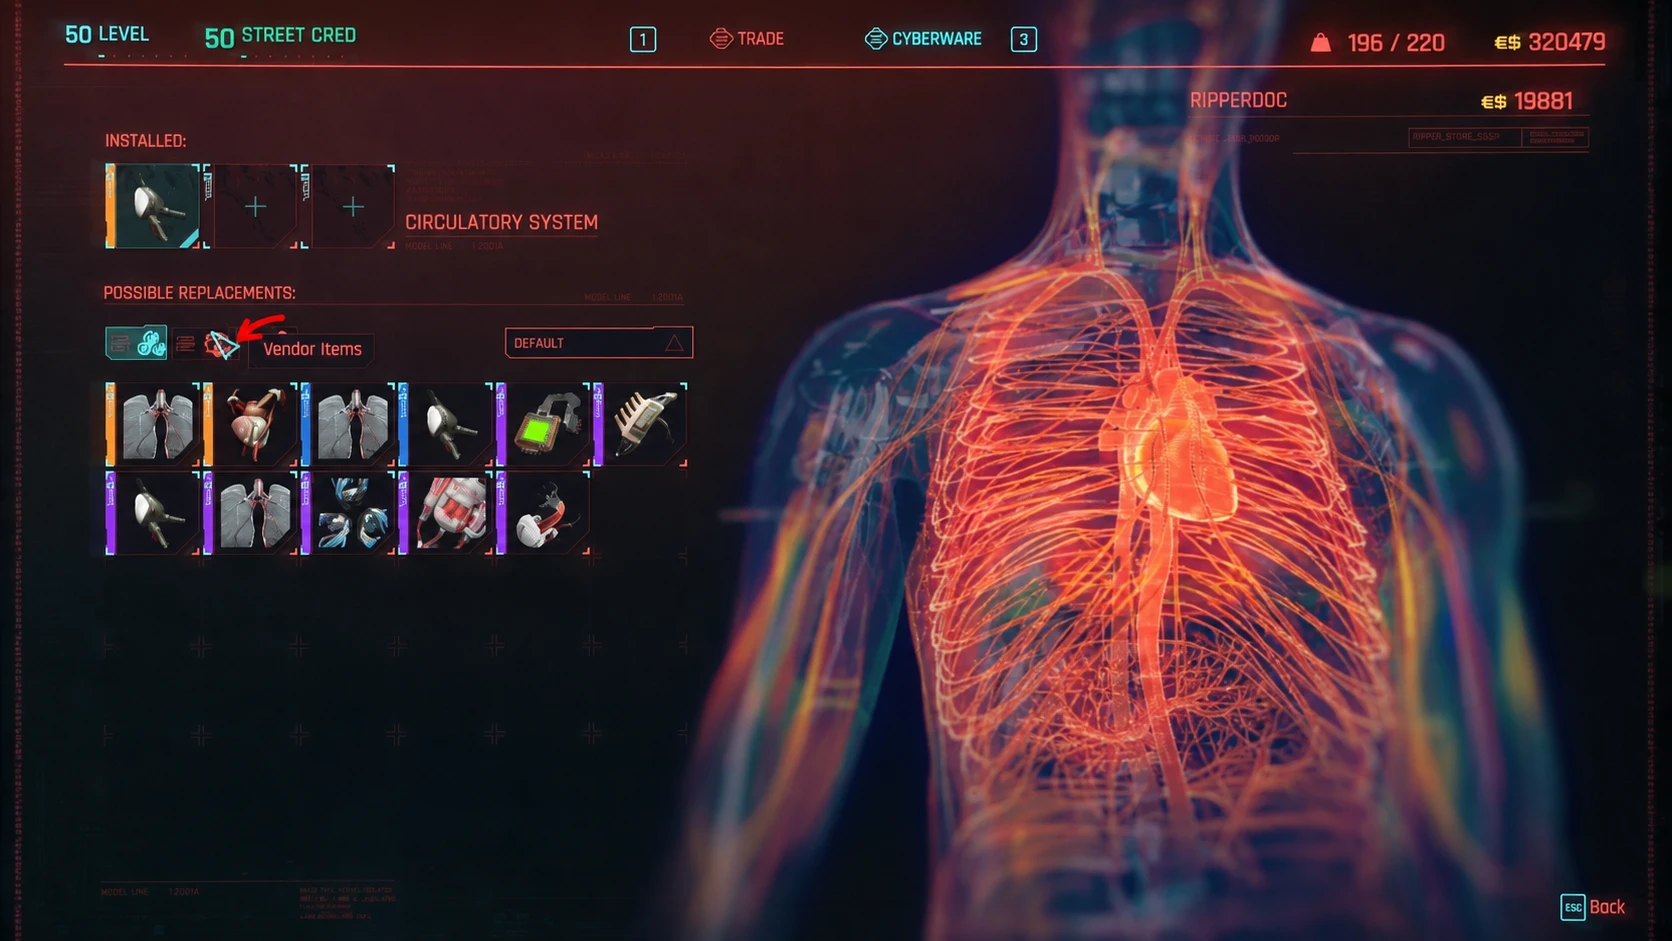
The survival core: Second Heart, Blood Pump, Biomonitor, Heal-on-Kill
Second Heart is the single most valuable piece in the category. It revives you at full health the moment you hit zero, and it costs accordingly at 30 capacity with a Tier 4 minimum, so nothing before level 30. The cooldown runs around four to five minutes depending on tier, and it scales off Body.
Blood Pump works as a health item that hits harder than anything you can buy. At Tier 5 it dumps 85 health instantly, then regenerates another 17 per second for six seconds on a three-minute cooldown. The lack of a drinking animation matters as much as the raw numbers, and every health-item perk in the Technical Ability tree applies to it.
Biomonitor automatically uses your equipped health item when you drop below 35% health and raises health item effectiveness by up to 14%. On its own it is unremarkable. Paired with Blood Pump it acts like a second automatic Second Heart, which is why the two get slotted together so often.
Heal-on-Kill restores 3% health per kill at Tier 1, rising to 7% at Tier 5, for only 10 capacity. It does nothing in a boss fight and everything in a room full of Scavs. For any build that kills quickly, it is the cheapest sustain in the game, and it scales off Intelligence.
Stamina implants for gun and melee builds
Clutch Padding cuts the stamina cost of shooting by 7% at Tier 1 and 18% at Tier 5, for 12 capacity. It is unglamorous and cheap, and it quietly fixes the out-of-stamina mid-firefight problem that plagues shotgun and LMG builds. Isometric Stabilizer is the iconic upgrade of the same idea, except the reduction applies to every attack rather than just shooting and it scales further with Reflexes. The catch is 40 capacity, which is more than Second Heart, and it is Phantom Liberty only, sold by Dogtown Ripperdocs or pulled from airdrops.
Adrenaline Booster returns stamina when you neutralize an enemy with a melee weapon, up to 23% at Tier 5. It is melee-exclusive, so it is dead weight on a gun build. That is 14 capacity, scaling off Reflexes.
Weapon-specific options for melee and Tech builds
Microrotors adds up to 23% melee attack speed at Tier 5 for 12 capacity, with a hard ceiling of two attacks per second. That cap matters. Fast weapons like katanas bump into it quickly, while slow blunt weapons get the full benefit. It scales off Reflexes.
Feedback Circuit restores health when you land a fully charged Tech weapon shot, 1.5% at Tier 3 up to 3% at Tier 5. It is strong if you live behind a Nekomata and useless otherwise, at 14 capacity and Technical scaling. Electromag Recycler is the iconic version, giving back both health and stamina, up to 4% each at Tier 5, on charged Tech hits. It costs 40 capacity and well over 100,000 eddies at Tier 5, which is a lot to pay for an effect that only fires on one weapon archetype. Find it at Dogtown Ripperdocs and airdrops in Phantom Liberty.
Situational picks: Black Mamba and Threatevac
Black Mamba cuts your poison damage by 90% and raises all your other damage against poisoned enemies by up to 18%. It is a straight trade, and whether it pays off depends entirely on how much of your damage is actually poison. If you are not running Toxic arms cyberware or poison-heavy quickhacks, you give up very little for a real damage bump. That is 16 capacity, Tier 3 minimum, Reflexes.
Threatevac hands you movement speed when your health falls to 25%, scaling higher as you drop further. At 5 capacity it is the cheapest thing in the category, which is the honest case for it. It is a slot filler for the achievement or for builds with capacity to spare. The argument against is simple: if you are already at 25% health, running faster is not the outcome you want.
Recommended loadouts by build
| Build | Three slots | Total capacity |
|---|---|---|
| General (level 30+) | Second Heart, Blood Pump, Heal-on-Kill | 55 |
| Early game (before 30) | Blood Pump, Heal-on-Kill, Clutch Padding | 37 |
| Melee | Second Heart, Blood Pump, Microrotors | 57 |
| Heavy weapons | Second Heart, Blood Pump, Clutch Padding | 57 |
The general setup works whether you are swinging a katana or sniping from a rooftop, which is why it is the default. Melee builds should weigh swapping Heal-on-Kill for Microrotors, since you will be killing fast enough that the attack speed compounds. Gun builds leaning on heavy weapons want Clutch Padding in that third slot instead, and the early-game trio stays affordable at almost any point before Second Heart unlocks at level 30.