Credits gate almost everything worth chasing in Survive Zombie Arena, from top-tier weapons to Legendary classes and gear upgrades. The gap between someone one-shotting brutes on Nightmare and someone stuck with starter pistols comes down to how quickly they build an economy. The good news is that the game hands you several stacking multipliers, and one lobby feature can convert a single five-minute run into millions.
Quick answer: Farm Void Shards on Nightmare with a high-damage loadout, collect them manually as they drop, then spend them at the Galactic Crate in the lobby (50 shards per spin). Roll enough shards and the credit and multiplier payouts scale into the millions in minutes.

Stack your credit multipliers first
Before you touch any advanced loop, lock in the bonuses that multiply every kill. Difficulty sets your base credits per zombie, and the Horde Rush modifier adds a flat bonus on top. Higher difficulty pays more per kill, but only run the hardest tier your build can actually survive, since wipes erase potential earnings.
| Multiplier | Effect |
|---|---|
| Hardcore difficulty | 7.5 credits per kill (about 50% more than Normal) |
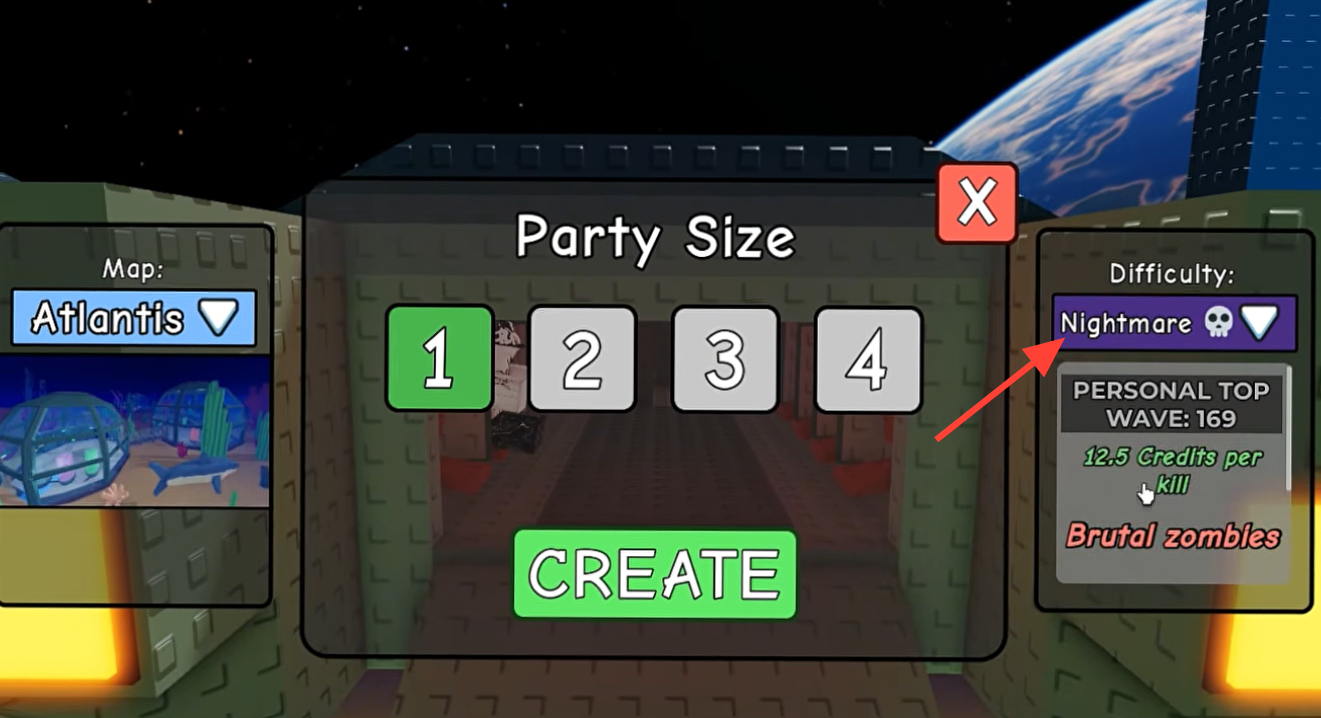
| Nightmare difficulty | 12.5 credits per kill, brutal zombies |
| Horde Rush modifier | +25% credits to match earnings |
| VIP gamepass (649 Robux) | +50% credits permanently, stacks with Double Credits |
| Double Credits gamepass (449 Robux) | 2x credits permanently, stacks with VIP |
Two free boosts belong in your first minute. Redeem the working code zombie from the codes menu for a small starting injection, and use the friend invite system, which pays around 1,000 credits per successful invite. Neither requires grinding waves, and both compound into your first real weapon upgrade.

The Void Shard method: millions per run
This is the fastest route to serious wealth. Instead of grinding raw wave payouts, you collect Void Shards dropped by zombies and gamble them at the lobby’s Galactic Crate, where each spin costs 50 shards and can land on large credit prizes or luck multipliers. A single stack of a few hundred shards can convert into millions once multiplier and duplicate-conversion outcomes chain together. You need a strong loadout, ideally a Mythic like the World Ender or a maxed Arctic Striker, plus drones for cover.
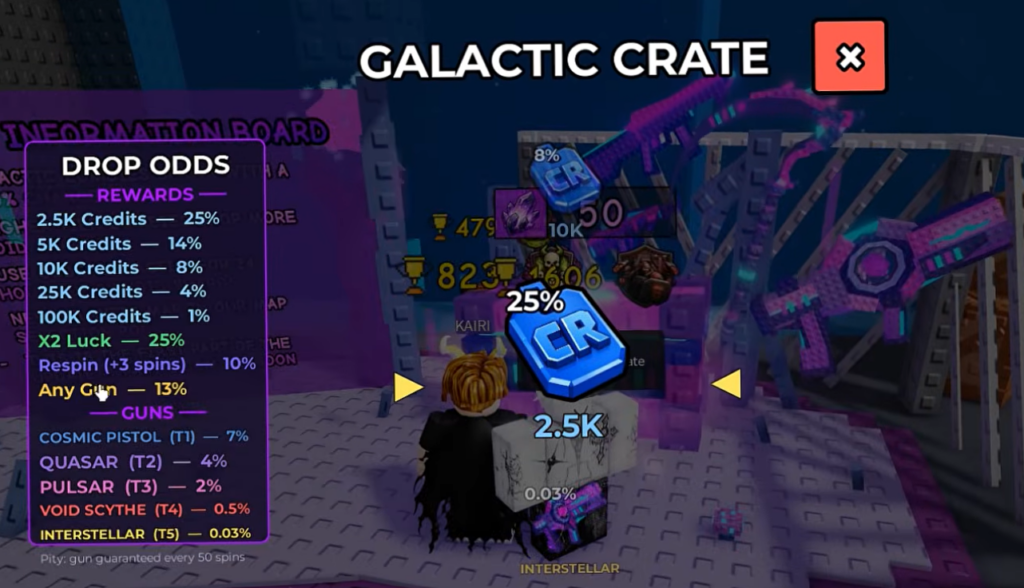
A single five-minute Nightmare run can yield over 5,000 shards, and rolling that many can push a balance into the tens of millions when high-multiplier spins line up.
Loadout that clears waves fast
Fast credits come from fast kills, so your build should prioritize crowd clear and survivability over cosmetics. The classes and weapons below are the ones that carry farming runs deep into the wave count.
| Pick | Why it works |
|---|---|
| Necromancer (class) | Collects souls and spawns friendly zombies to fight for you |
| Bastion (class) | Shelter, laser turret, and drones for strong area control |
| Arctic Striker (weapon) | Freezes enemies; frozen zombies take 1.5x damage from all sources |
| World Ender (weapon) | Mythic burst damage for shard farming on Nightmare |
| Flamethrower (weapon) | Best beginner pick; max it for heavy area damage on cheap waves |
| Plasma Gun (weapon) | Reliable sustained fire for controlled safe-spot farming |
Spend credits in a strict order. Upgrade your primary weapon damage first, then fire rate or ammo economy, then health and survivability, and leave cosmetics for last. Splitting currency across five underpowered guns slows everything down. If you are new, saving toward the Arctic Striker turns farming into near-autopilot once it is unlocked. You can open the game directly from its official Roblox experience page.
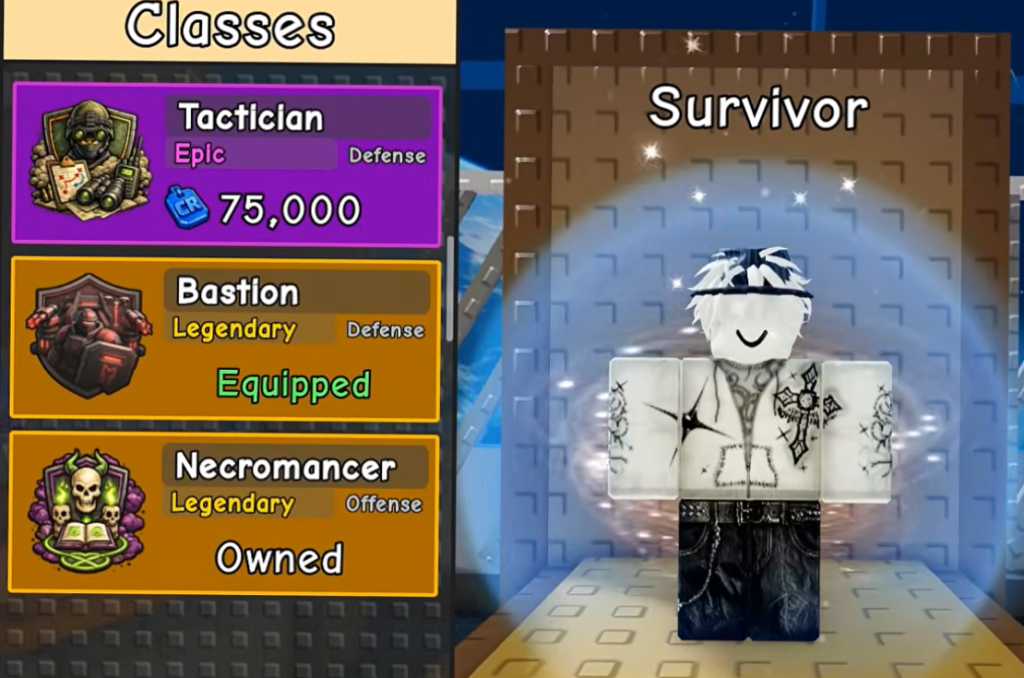
Image credit: Roblox / Dqrkz
Safe-spot and AFK farming (and the risk)
Some players use map positions where zombie pathing breaks down, letting them shoot into a stuck horde with little danger. On the Prison Yard map, running to the outdoor gym and standing on the weight benches keeps ground zombies below you while you fire down and deploy drones. Pair this with Hardcore plus Horde Rush for the credit bonus.
A fully passive variant exists on the Abandoned Farm map, where players clip beneath the terrain near the hay bales using shift-lock, aim upward, and leave an auto-clicker running. A five-minute session set up this way has produced around 50,000 credits. The fuse box safe spot on other maps works on the same idea of denying zombies a clean attack angle.
Warning: Methods that clip into map geometry, run unattended automation, or rely on auto-clicker tools can conflict with platform and game rules, and they can be patched without notice. Review the Roblox Community Standards before deciding, and keep exploit-style routes off any account you care about. Manual high-efficiency loops keep your progress safe from rollbacks and survive updates better.

Measure credits per hour, not per wave
The metric that matters is net credits divided by minutes, including the time lost to resets. A high per-wave payout is worthless if you wipe early or spend ages in menus between runs. Record your starting and ending credit totals, note the wave you reached and how long the run lasted, and keep your class, weapon, and mode constant so the numbers actually compare.
Track a 15-minute window and watch the trend. If your credits per 15 minutes drops, your difficulty is too high for your current power, or you are dying and restarting too often. Step down a tier, stabilize your run, then push difficulty again once your damage can handle it. Between Void Shard rolls for the big jumps and stable Hardcore or Nightmare farming for steady income, the fastest economy is the one you can repeat without wiping.