
Aniimo hides most of its depth behind menus you can ignore for the first twenty hours. Potential grades, held items, regional branch upgrades, weather notifications, and the Nurture system all quietly decide how strong your roster gets, and the wrong early spend can cost you weeks of farming. Here is how experienced players handle each of those systems on PC and mobile.
Quick answer: Lock your trained Aniimo with a Favorite or mark before bulk releasing, appraise Potential at an outpost before investing, and save Capafruit and Sparkling Cubes for Perfect-grade keepers.
Lock your trained Aniimo before using bulk release
The fastest way to lose progress in Aniimo is the bulk release option that appears when you upload new captures. It clears every creature of a chosen rarity in one press, and it will happily sweep up low-rarity special forms and evolution material you meant to keep.
Two protections exist, and you want both. In the Aniimo Management screen you can mark a creature as Favorited, and you can assign symbols or stars from the mark palette so trained creatures stand out at a glance. Moving keepers into a locked storage box adds a second layer. The release toggles for Sparkling, Prismana, and Alpha rarities should be switched off before you ever run a cleanup.
Evolved creatures and special-form variants with strong Homeland traits are worth keeping even if you never battle with them, since they can be assigned to work at your Homeland.
Check Potential at an outpost before spending resources
Every capture gets a Common, Good, Elite, or Perfect rating, but the grade alone tells you very little. Appraise the creature at an outpost to see how its six major stats are distributed. A Perfect Aniimo with attack concentrated where your build needs it beats a Perfect with its Potential scattered across stats you will never use.
Two separate systems feed the eventual stat ceiling. Innate Potential is fixed at capture. Acquired Potential grows through training and Capability Awakening. Because the two stack, a better starting creature always has a shorter path to a maxed build, which is why comparing several Perfect candidates of the same species is worth the time rather than committing to the first one you find.
Personality is decided at capture too, and it adds combat bonuses on top of stats. Offensive traits suit a DPS creature, regeneration traits suit a sustain role, and some evolutions have personality requirements attached. Psyche Fruits can reroll a personality later, but they are limited enough that you should treat a good roll as a reason to keep a creature.
Capafruit: Save it for Perfect-grade Aniimo
Capafruit raises innate Potential attributes from the training interface, and feeding enough of it to an Elite creature can push its status up to Perfect. That sounds like a reason to use it immediately. It usually is not.
Capafruit is a limited resource, and dumping it into whatever is currently your strongest creature leaves you empty when a naturally strong Perfect walks past an hour later. Spend it on something you have already decided to carry into the endgame. If you are still cycling through captures of the same species, hold the fruit.
Build three battle parties and a dedicated traversal party
You can configure up to three battle parties, and there is no reason to leave the second and third slots empty. Combat roles split into DPS, Break, Support, and Heal, and Break matters more than new players expect because Break-specialized creatures stagger bosses and open damage windows that raw attack power cannot force.
Keep a separate party built purely for movement. Traversal skills run from tier 1 to tier 3 and cover climbing, flying, and swimming, and through Twining you take direct control of the creature to use them. A party that can glide, scale a wall, and cross water without swapping members turns long overland trips into short ones.
The Mode Switch talent is a small unlock with an outsized effect. It lets you flip between Catch, Attack, and Defense modes so your Aniimo stops killing the rare spawn you were trying to capture. Gravity Pool and Quick Twine are the other exploration talents worth picking up early.
Enhance core skills with Form Contracts and held items
Skill customization is where two identical creatures stop being identical. Form Contracts bond an exclusive held item to an Aniimo, and that bond upgrades a core skill rather than just adding flat stats. Ferocious Fang is the item tied to Pawney, and it targets Shadow Cut.
| Skill | Element | EP cost | Power |
|---|---|---|---|
| Shadow Cut |  Dark Dark | 20 | 85 |
| Everything Must Go |  Water Water | 40 | 124 |
| Elemental Shot | — | 0 | 0 |
Shadow Cut is a 1-second cooldown Dark skill that has the creature curl into a ball and spin with a blade extended. Its enhanced form extends the blades, spins continuously, grants greatly increased interruption resistance, and lets the user move while spinning. That interruption resistance is the real prize, because it stops the attack from being knocked out of you mid-animation.

The pattern repeats elsewhere. Everything Must Go is a Water barrage that spits bubbles at a target and counts as basic attack damage, and its duration runs 4 seconds in one form and 5 seconds in the other. Elemental Shot costs no EP, deals no damage, and exists purely as a Weaken tool on a 15-second cooldown, which makes it a capture setup skill rather than a combat one.
Breezy Plains Branch: Spend Lumin Amber to lift level gates
Lumin Amber is scattered across every region and stays marked on the map, so anything you walked past is recoverable. Zoom into the area you think you missed and check again. Some are tucked behind environmental obstacles and need a specific traversal ability to reach.
Infusing that energy into a region’s Branch menu is what actually moves you forward. Higher Branch progression lifts level gates, unlocks Alpha challenges, adds Nurture functionality, increases Prismana energy buildup, and improves movement options. The Breezy Plains Branch and its Earthquake Revelation also open underground areas sealed behind Prismatic Vine energy, which hold higher-level encounters you cannot otherwise reach.
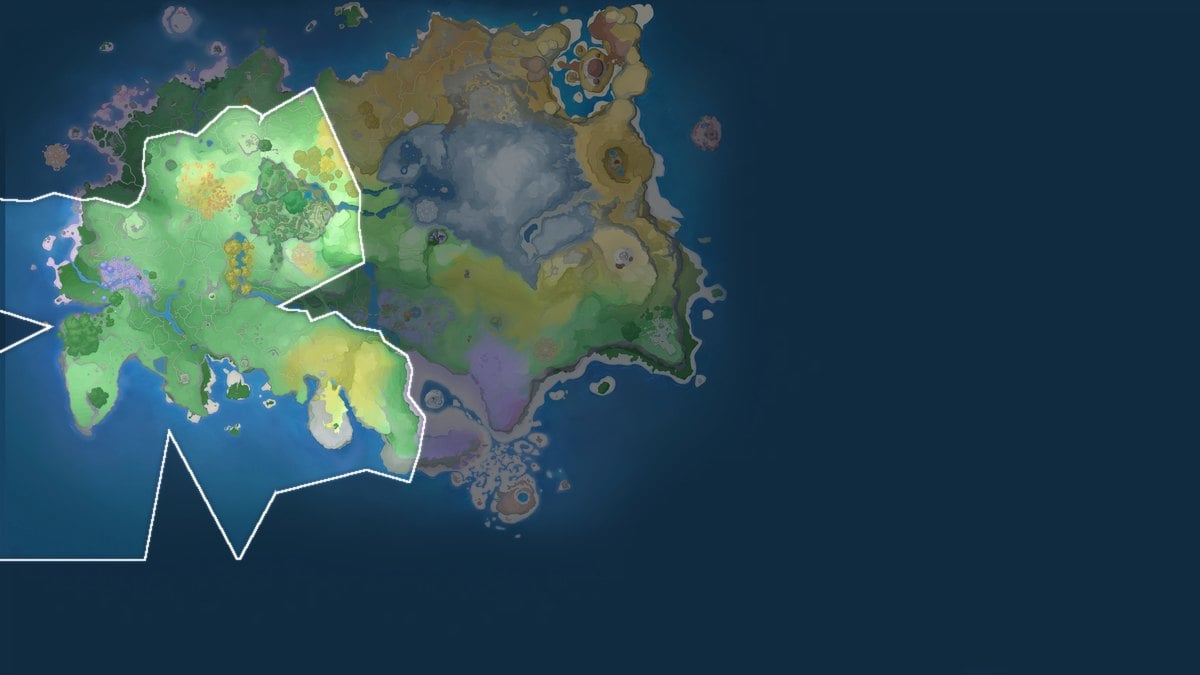
Unlocking teleport points early pays for itself. Regional completion also becomes a meaningful progression source once character leveling slows down at higher ranks.
Map settings and weather alerts for special forms
The map does far more than show terrain. Open the map settings menu and turn on chest markers so collectibles stop disappearing into the background. Clicking a region reveals spawn conditions for individual Aniimo, including the ones locked behind a specific weather event, and clicking an Alpha icon shows the best creatures and elements to bring against it.
Weather is the part most players underuse. Conditions vary by zone, and you can set automated notifications so the game pings you when the right one rolls in:
- Thunder, which produces thunderstorm variants of certain species
- Rainy
- Snowy
Forms also shift with location, time of day, and quest progress, and some carry different elemental properties than the standard version. If you are filling out a collection, do not assume the first version of a species you meet is the only one. Umbrell creatures are worth stopping for whenever you spot the effect, since concentrated Vein energy gives them Perfect Innate Potential. The Umbrell look can vanish after evolution, so judge the creature by its Potential rather than its glow.
How to get Sparkling Aniimo: Cubes, Sigils, and Bloom
Sparkling Cubes guarantee a capture and guarantee the result is a Sparkling creature with Perfect Innate Potential, which makes them the single most wasteful item to throw at an ordinary spawn. They also work on Prismana creatures. Stock them by collecting Sparkling Crystals from Elite Training and Holo-Battle Sim completions, then trading the crystals at outpost vendors, where Anipod Ultras are sold as well.
There are four routes to a Sparkling Aniimo:
- Find one in the wild
- Apply a Sparkling Cube to a Prismana Egg
- Throw a Cube directly at a nurtured spawn
- Craft one using 10 Sparkling Sigils
A Sparkling Sigil is an oddly luminous mark containing the power for an Aniimo’s Sparkling mutation. Collect ten to transform an Aniimo you already own, rather than relying on a random spawn.

Bloom is the system that manufactures these encounters. It unlocks at 40 percent area completion, after which you feed elemental shards to fill Prismatic Energy and capture the Prismana form it summons, ideally with a Sparkling Cube in hand. Nurture also grants free daily charges that do not consume Vein Essence, and skipping them for a week is a straightforward loss, especially during events that improve rare outcomes.
Save Anipod Ultra for Alpha captures
To earn regional badges, you must catch creatures that appear only in Alpha form. Standard pods consume Primergy when they fail, and a missed capture can end the encounter. For an Alpha required for a badge or collection completion, use an Anipod Ultra immediately instead of lowering the odds with cheaper items.
For everything else, weaken the target first. Low health, the Break status, sleep, and stealth approaches all raise catch rates, and a few extra seconds in the fight is cheaper than another Ultra.
Fastest EXP sources in Aniimo
Leveling slows noticeably at higher ranks, and at that point the main story stops being the whole answer. The reliable sources are the ones attached to menus rather than to the open world.
- Advance the main story questline, which remains the largest single block of EXP
- Clear Daily Activities in the Institute Guide every day
- Complete Core Courses in the Elite Training tab
- Run Alpha Challenges once your Branch progression has unlocked them
- Work through active story quests listed on the Log screen
Check the Event tab for anything carrying a notification badge, since time-limited rewards expire quietly and there is no way to claim them afterwards. Egg hatching deserves the same attention late on, because eggs are a reliable route to Sparkling, Alpha, and Perfect results and a backlog of unhatched ones is dead progress sitting in storage.
The common thread across all of this is patience with resources. Aniimo hands you Capafruit, Sparkling Cubes, and Psyche Fruits slowly enough that every early impulse spend shows up later as a gap, and the players with the strongest endgame rosters are usually the ones who appraised first and committed second.