Microsoft Defender Antivirus runs as a background process called Antimalware Service Executable, with the binary MsMpEng.exe living in C:\ProgramData\Microsoft\Windows Defender\Platform\. When it spikes CPU to 30–60 percent, balloons memory into the tens of gigabytes, or pins the disk, the cause is almost always real-time scanning, a scheduled full scan, or a buggy platform update, not malware pretending to be Defender.
Confirm MsMpEng.exe is the actual cause
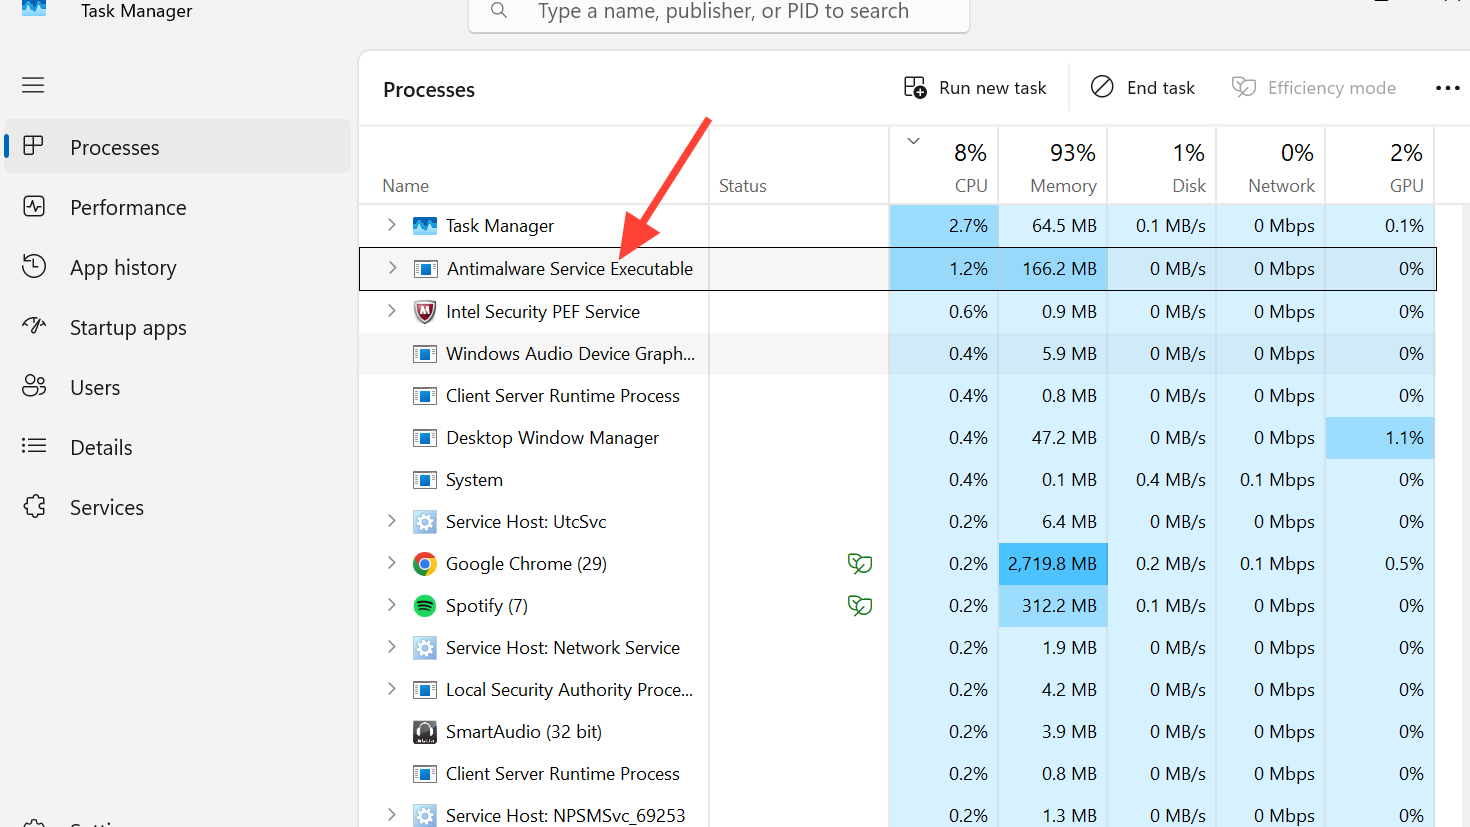
Open Task Manager with Ctrl + Shift + Esc and look for Antimalware Service Executable on the Processes tab, or MsMpEng.exe on the Details tab. Right-click the entry and choose Open file location. The legitimate file sits under C:\ProgramData\Microsoft\Windows Defender\Platform\. Anything claiming the name from another path should be treated as suspicious and scanned with a second-opinion tool.
Spikes that line up with boot, software installs, file downloads, or Outlook attachments are normal scanning behavior. Sustained high usage that lasts hours or returns within minutes of a reboot is what needs fixing below.
Exclude Defender’s own folder and noisy workloads
Defender will, by default, scan files inside its own platform directory along with everything else. Excluding that path stops a recursive scanning pattern that is a frequent trigger for runaway CPU on both desktops and servers.
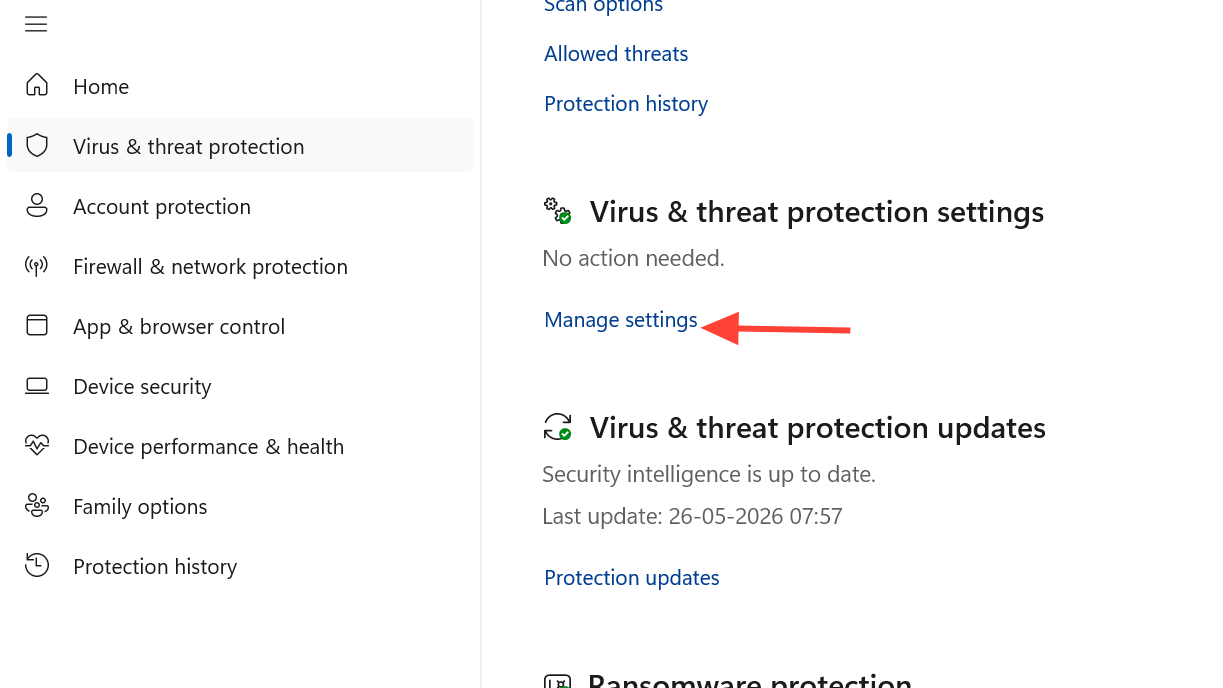
C:\Program Files\Windows Defender and C:\ProgramData\Microsoft\Windows Defender.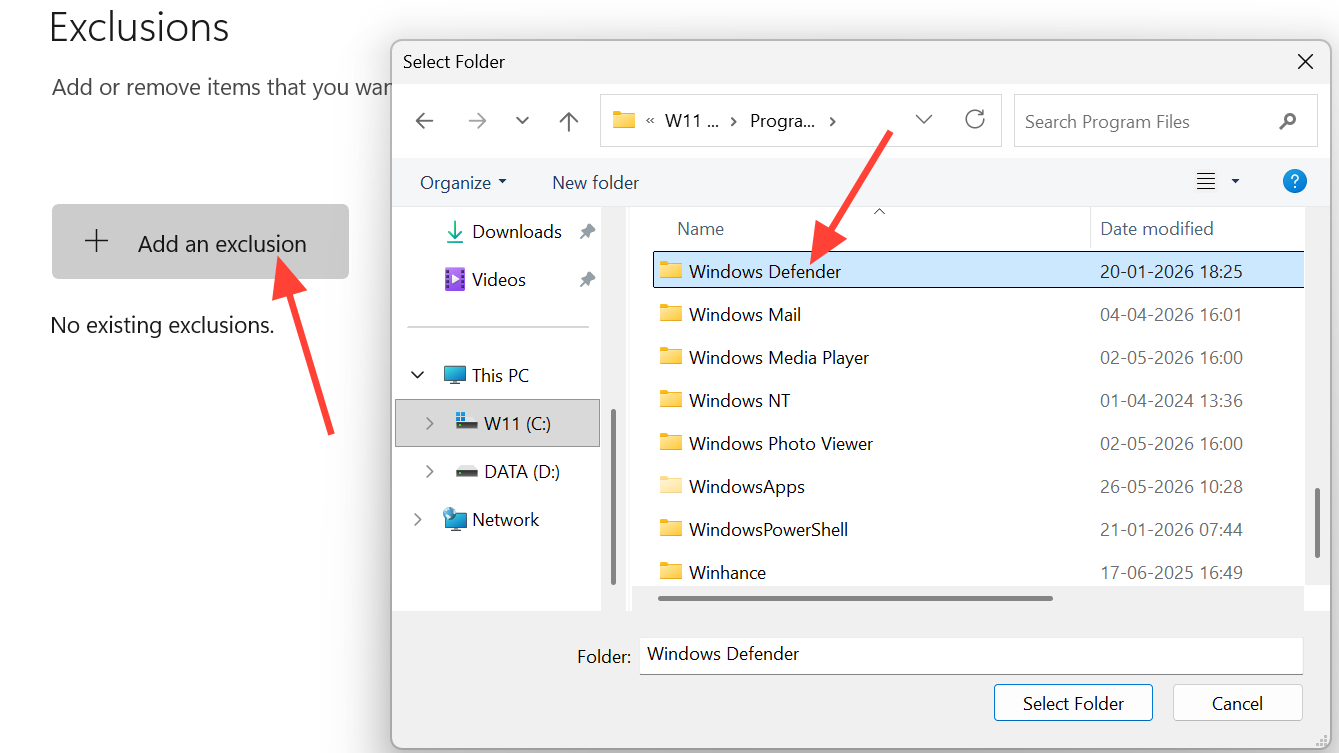
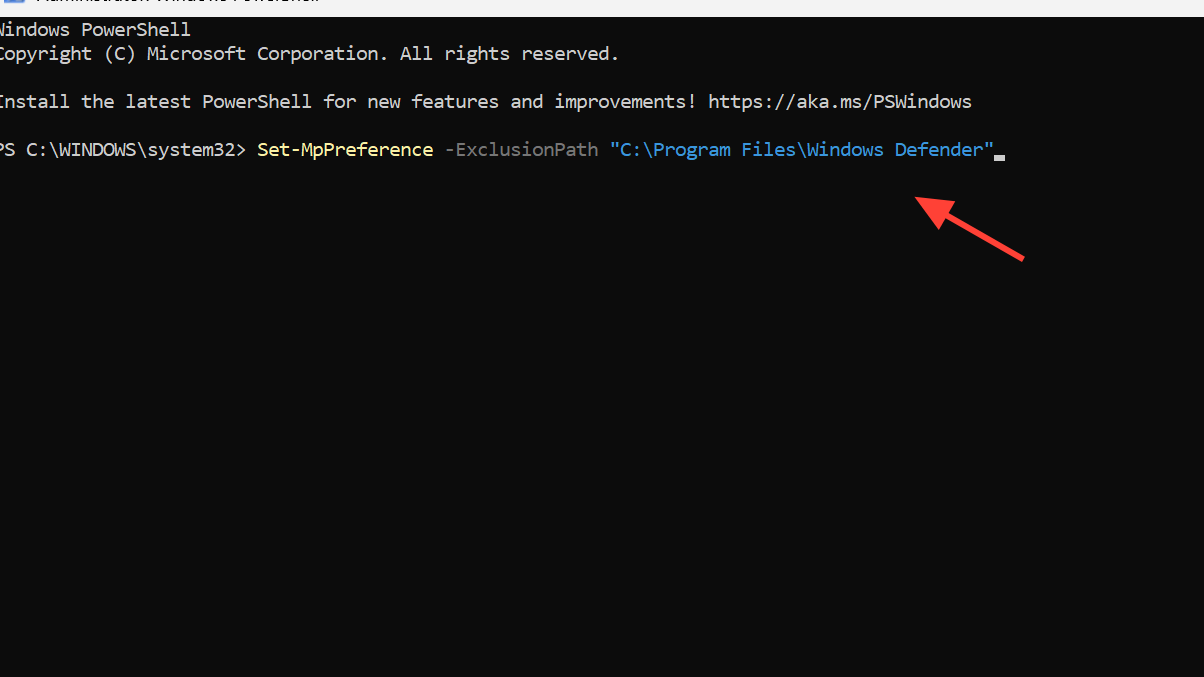
For scripted or large-fleet deployments, PowerShell handles the same job and is the only practical option on Server Core:
Set-MpPreference -ExclusionPath "C:\Program Files\Windows Defender"
Set-MpPreference -ExclusionPath "C:\ProgramData\Microsoft\Windows Defender"
Set-MpPreference -ExclusionPath "D:\SQLData","D:\SQLLogs"
Set-MpPreference -ExclusionExtension ".ldf",".mdf"
Set-MpPreference -ExclusionProcess "sqlservr.exe","w3wp.exe"
Add exclusions with PowerShell
Reschedule full scans so they stop fighting your work
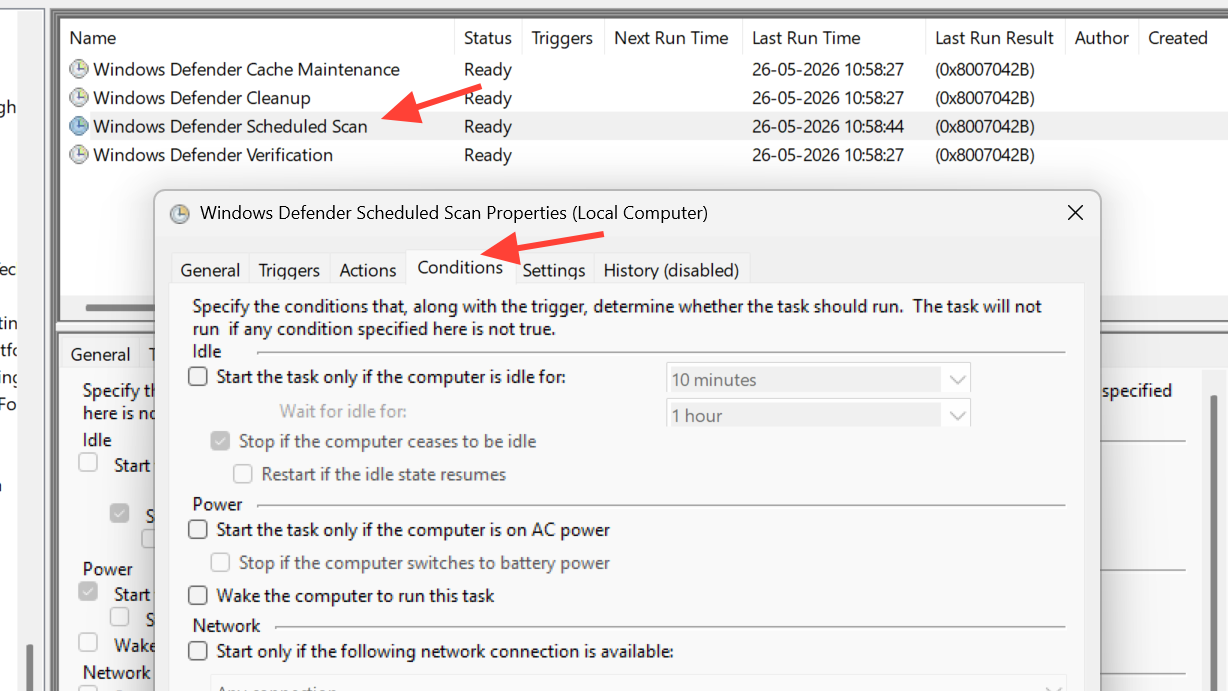
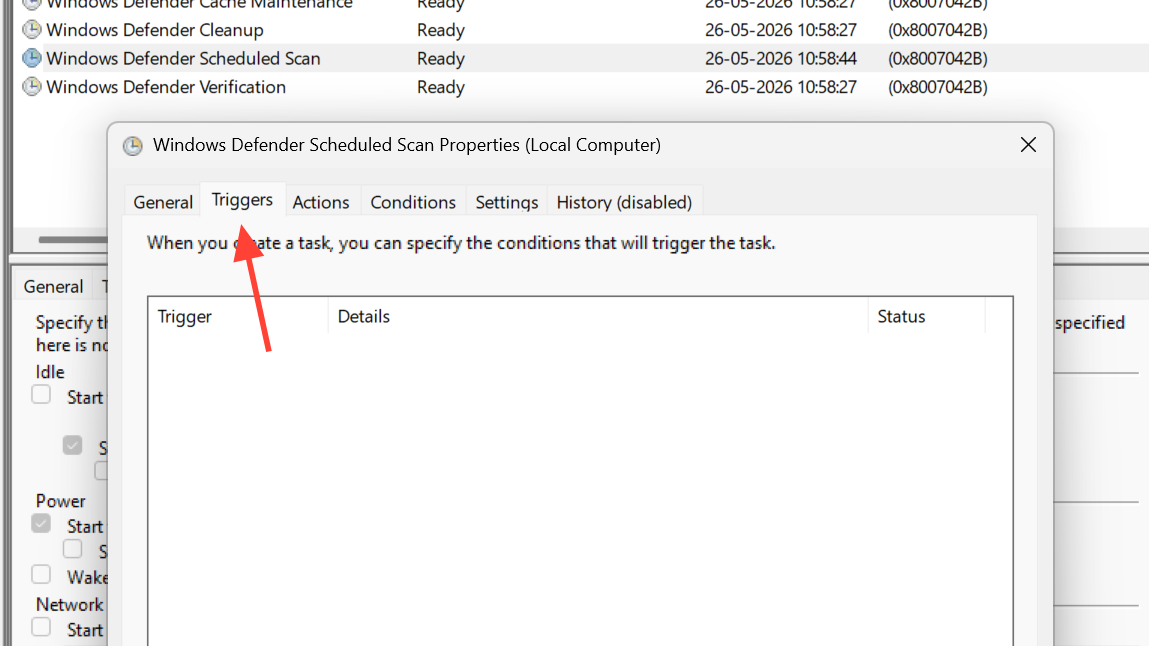
Full and quick scans run as Task Scheduler jobs and can land in the middle of the day if the machine is never idle when they expect it to be. Pushing them to a known window usually eliminates the worst sustained spikes.
Windows + R, type taskschd.msc, and press Enter. In the left pane, navigate to Task Scheduler Library > Microsoft > Windows > Windows Defender.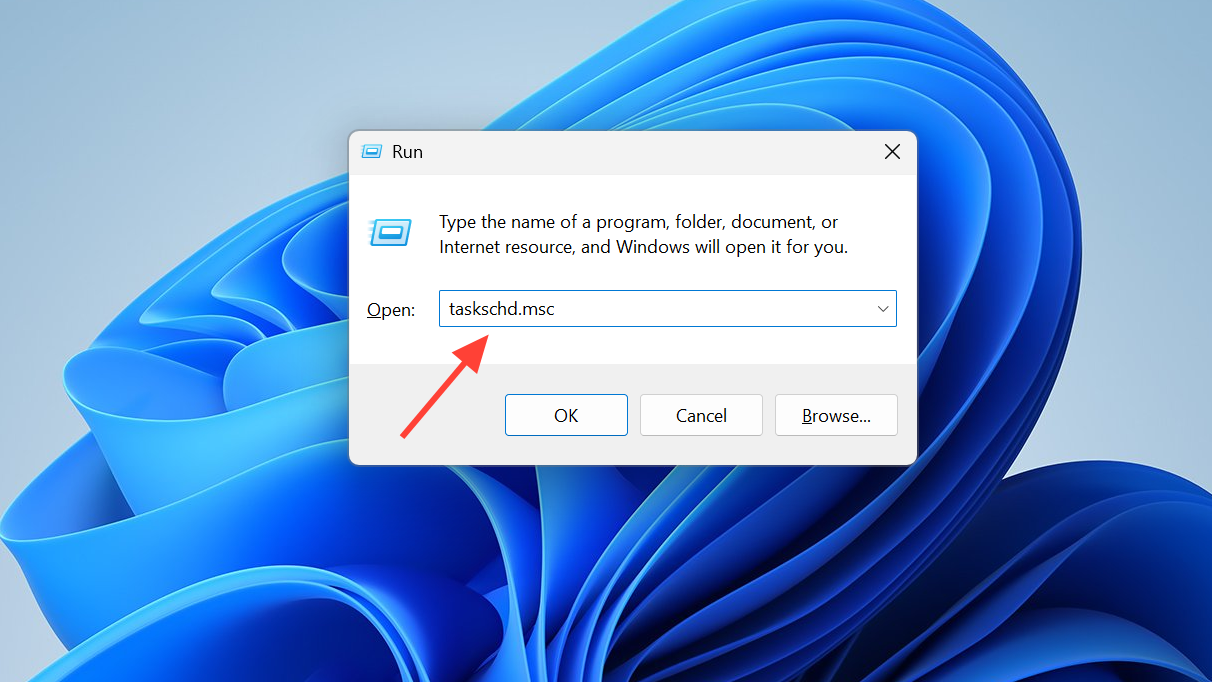
Limit how many CPU cores MsMpEng.exe can use
If scans must run while you work, capping the process to a subset of cores prevents it from saturating the CPU. This is a temporary measure that works well during one-off heavy scans.
MsMpEng.exe, right-click it, and choose Set affinity.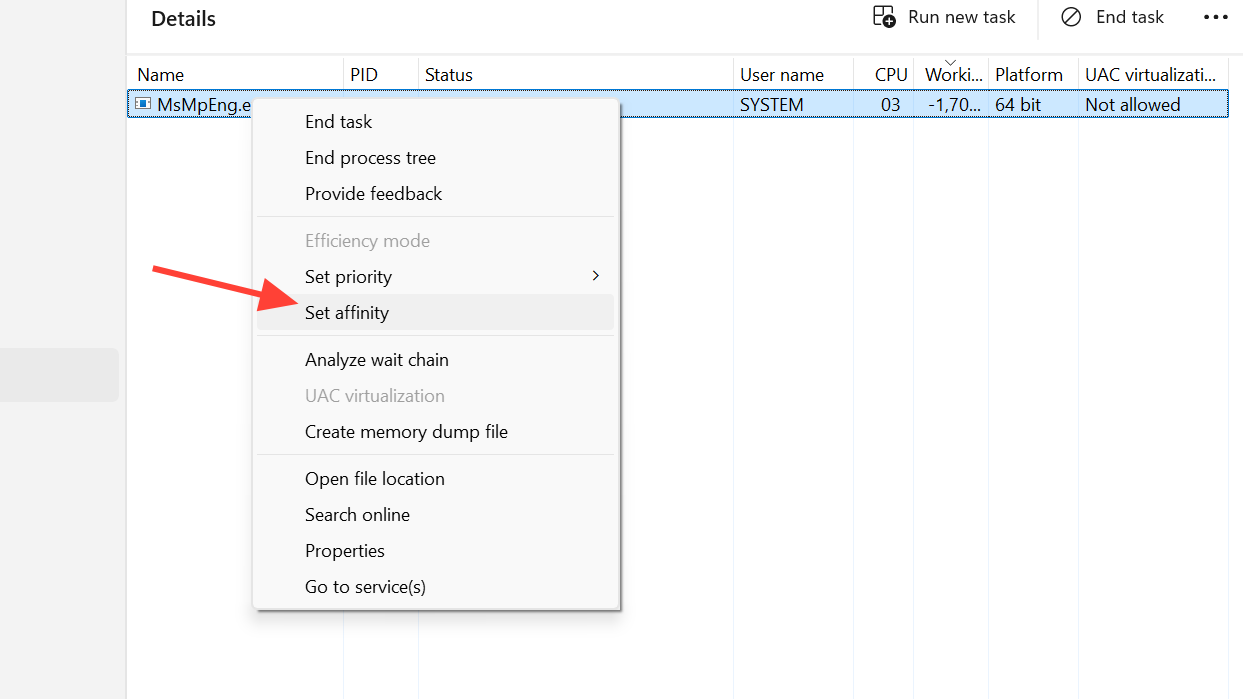
Set-MpPreference -ScanAvgCPULoadFactor 25
Cap Defender scan CPU usage
The value is a percentage ceiling for scheduled scans, with 50 as the default. Lower values reduce impact but stretch scan duration.
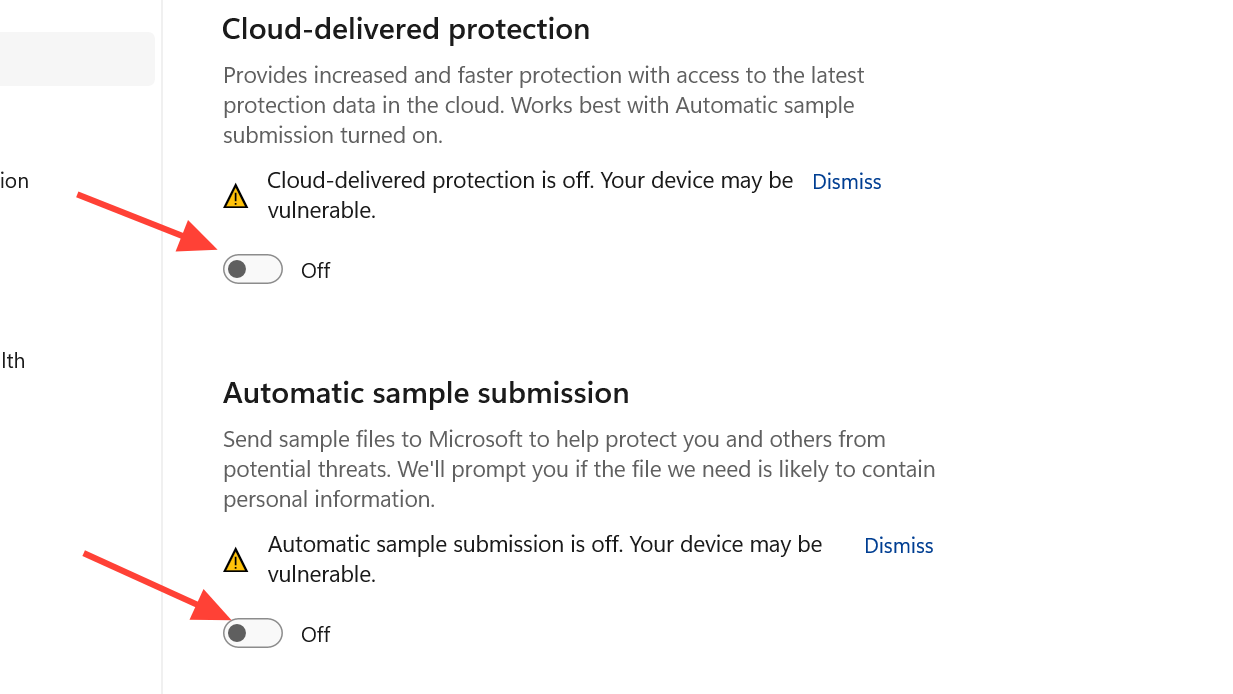
Disable cloud-delivered protection and sample submission if spikes are constant
On constrained networks or low-spec hardware, cloud lookups and automatic sample submission can amplify CPU and disk use. Turning them off keeps local signature-based protection intact.
Open Windows Security, go to Virus & threat protection, click Manage settings, and toggle off Cloud-delivered protection and Automatic sample submission. Re-enable them once the underlying cause is fixed; cloud protection materially improves detection of new threats.
Fix the Defender platform memory leak on Windows Server
A specific failure pattern on Windows Server 2016 and 2019, especially on Exchange and IIS/SQL hosts, shows MsMpEng.exe climbing until it consumes all available RAM, with CPU staying low around 3–10 percent. This is a platform-level regression, not a configuration issue, and exclusions alone will not stop it. Affected hosts run a newer Antimalware platform than known-good peers.
Check versions with PowerShell:
Get-MpComputerStatus | Select-Object AMProductVersion, AMEngineVersion, AntivirusSignatureVersion
Check Defender platform and engine version
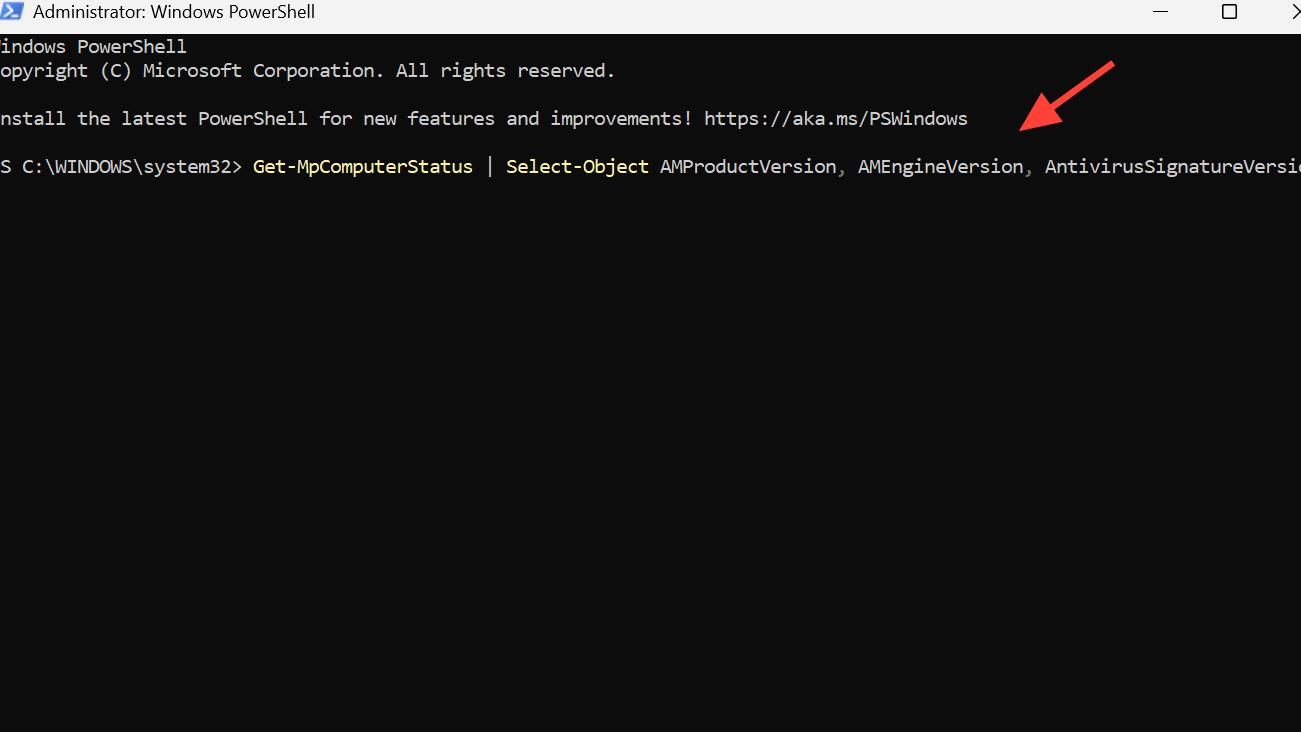
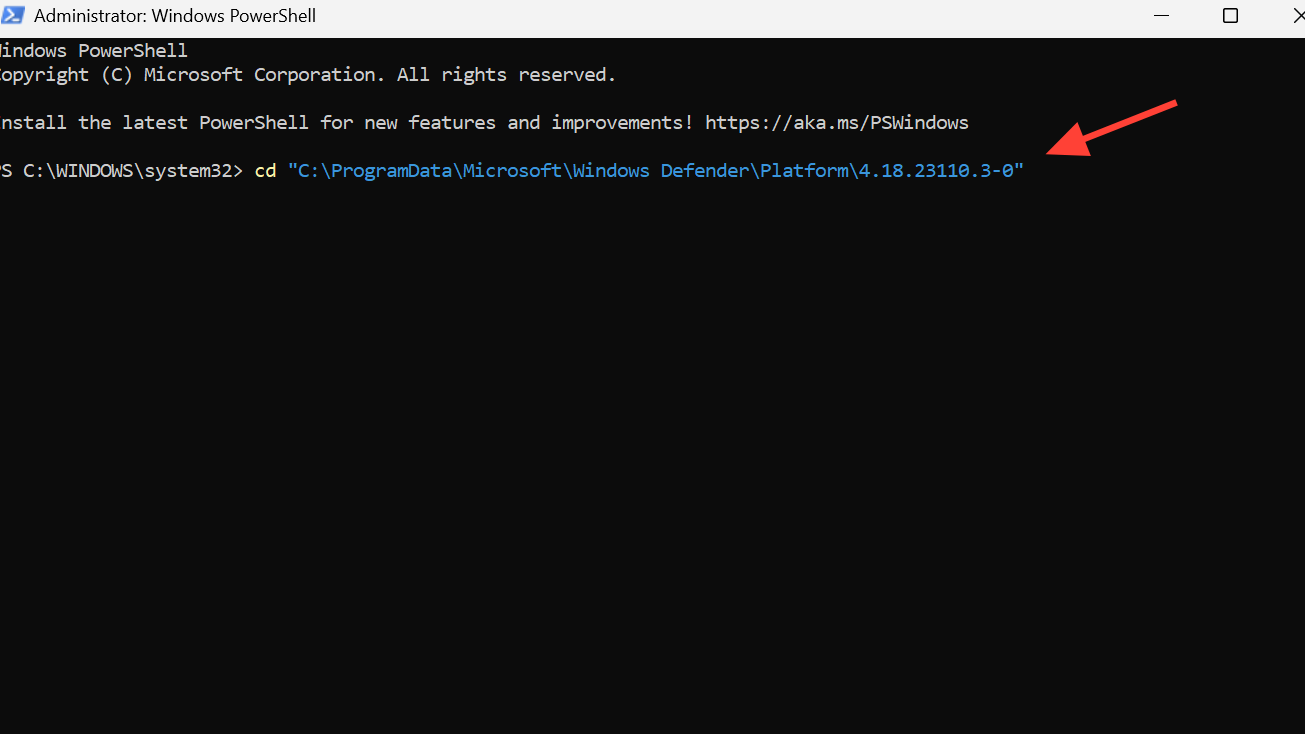
If a server is on a leaking platform build, roll it back to the previous platform and force a fresh signature update. The revert command lives inside the currently active platform folder:
cd "C:\ProgramData\Microsoft\Windows Defender\Platform\4.18.23110.3-0"
.\MpCmdRun.exe -RevertPlatform
.\MpCmdRun.exe -RemoveDefinitions -Engine
.\MpCmdRun.exe -RemoveDefinitions -All
.\MpCmdRun.exe -SignatureUpdate
Roll Defender platform back
Memory is released immediately when the revert completes. Block the problem platform update in WSUS or Configuration Manager until a fixed build is approved, and confirm the host is running a known-good platform before re-enabling automatic updates. Newer platform releases have shipped fixes for this leak, so once your fleet is on a confirmed stable version the rollback is no longer needed.
Diagnose with Microsoft’s own performance tooling
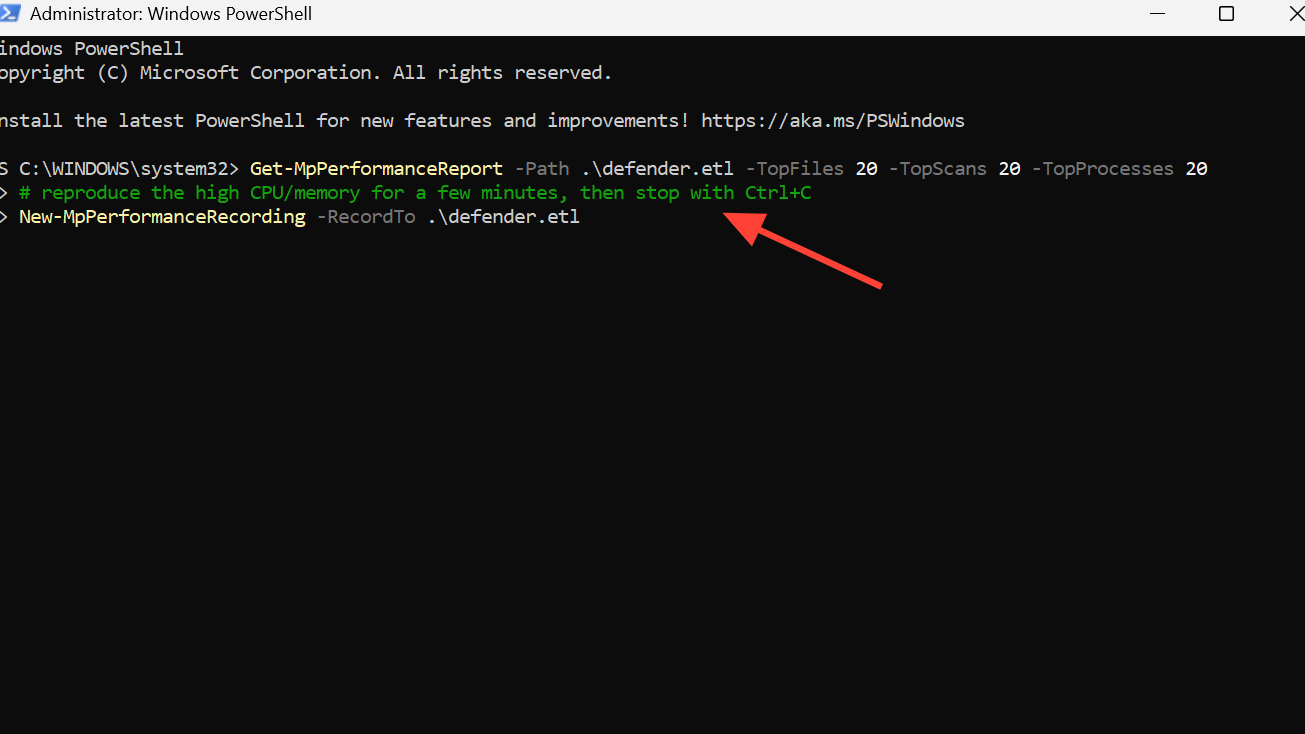
When exclusions and rescheduling do not explain the load, capture which files or processes Defender is actually scanning. The Defender Performance Analyzer ships with Windows and produces a recording you can inspect.
New-MpPerformanceRecording -RecordTo .\defender.etl
# reproduce the high CPU/memory for a few minutes, then stop with Ctrl+C
Get-MpPerformanceReport -Path .\defender.etl -TopFiles 20 -TopScans 20 -TopProcesses 20
Record and analyze Defender performance
The report ranks the files, extensions, processes, and scan reasons that consumed the most time. Use that output to add narrowly targeted exclusions instead of guessing. Process Monitor with the Process Name filter set to MsMpEng.exe gives the same kind of insight if you prefer a live trace.
When to consider disabling Microsoft Defender
Disabling Defender entirely is a last resort, not a fix, and leaves the machine reliant on whatever else is installed. It is only appropriate when a supported third-party antivirus is in place; in that case, Defender steps aside automatically and Antimalware Service Executable should already be idle.
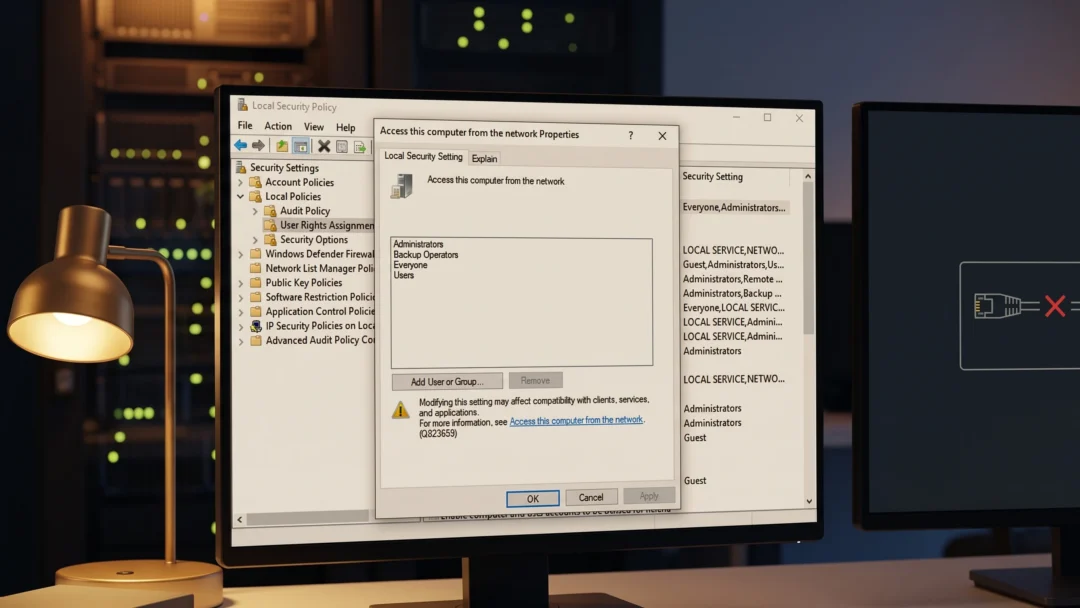
On Windows Pro and Enterprise, the Group Policy path is Computer Configuration > Administrative Templates > Windows Components > Microsoft Defender Antivirus > Turn off Microsoft Defender Antivirus, set to Enabled. Newer Windows builds enforce Tamper Protection, which blocks the legacy DisableAntiSpyware registry value, so that workaround no longer works on a stock install and should not be relied on. If Defender has to stay off temporarily on a server, the local policy toggle ends MsMpEng.exe immediately without a reboot, which is useful for buying time before a maintenance window.
Verify any fix by watching Antimalware Service Executable in Task Manager for at least one full scheduled scan cycle. CPU should idle near zero between scans, working set memory should stabilize in the low hundreds of megabytes rather than climbing without bound, and disk activity should fall off once the active scan completes.