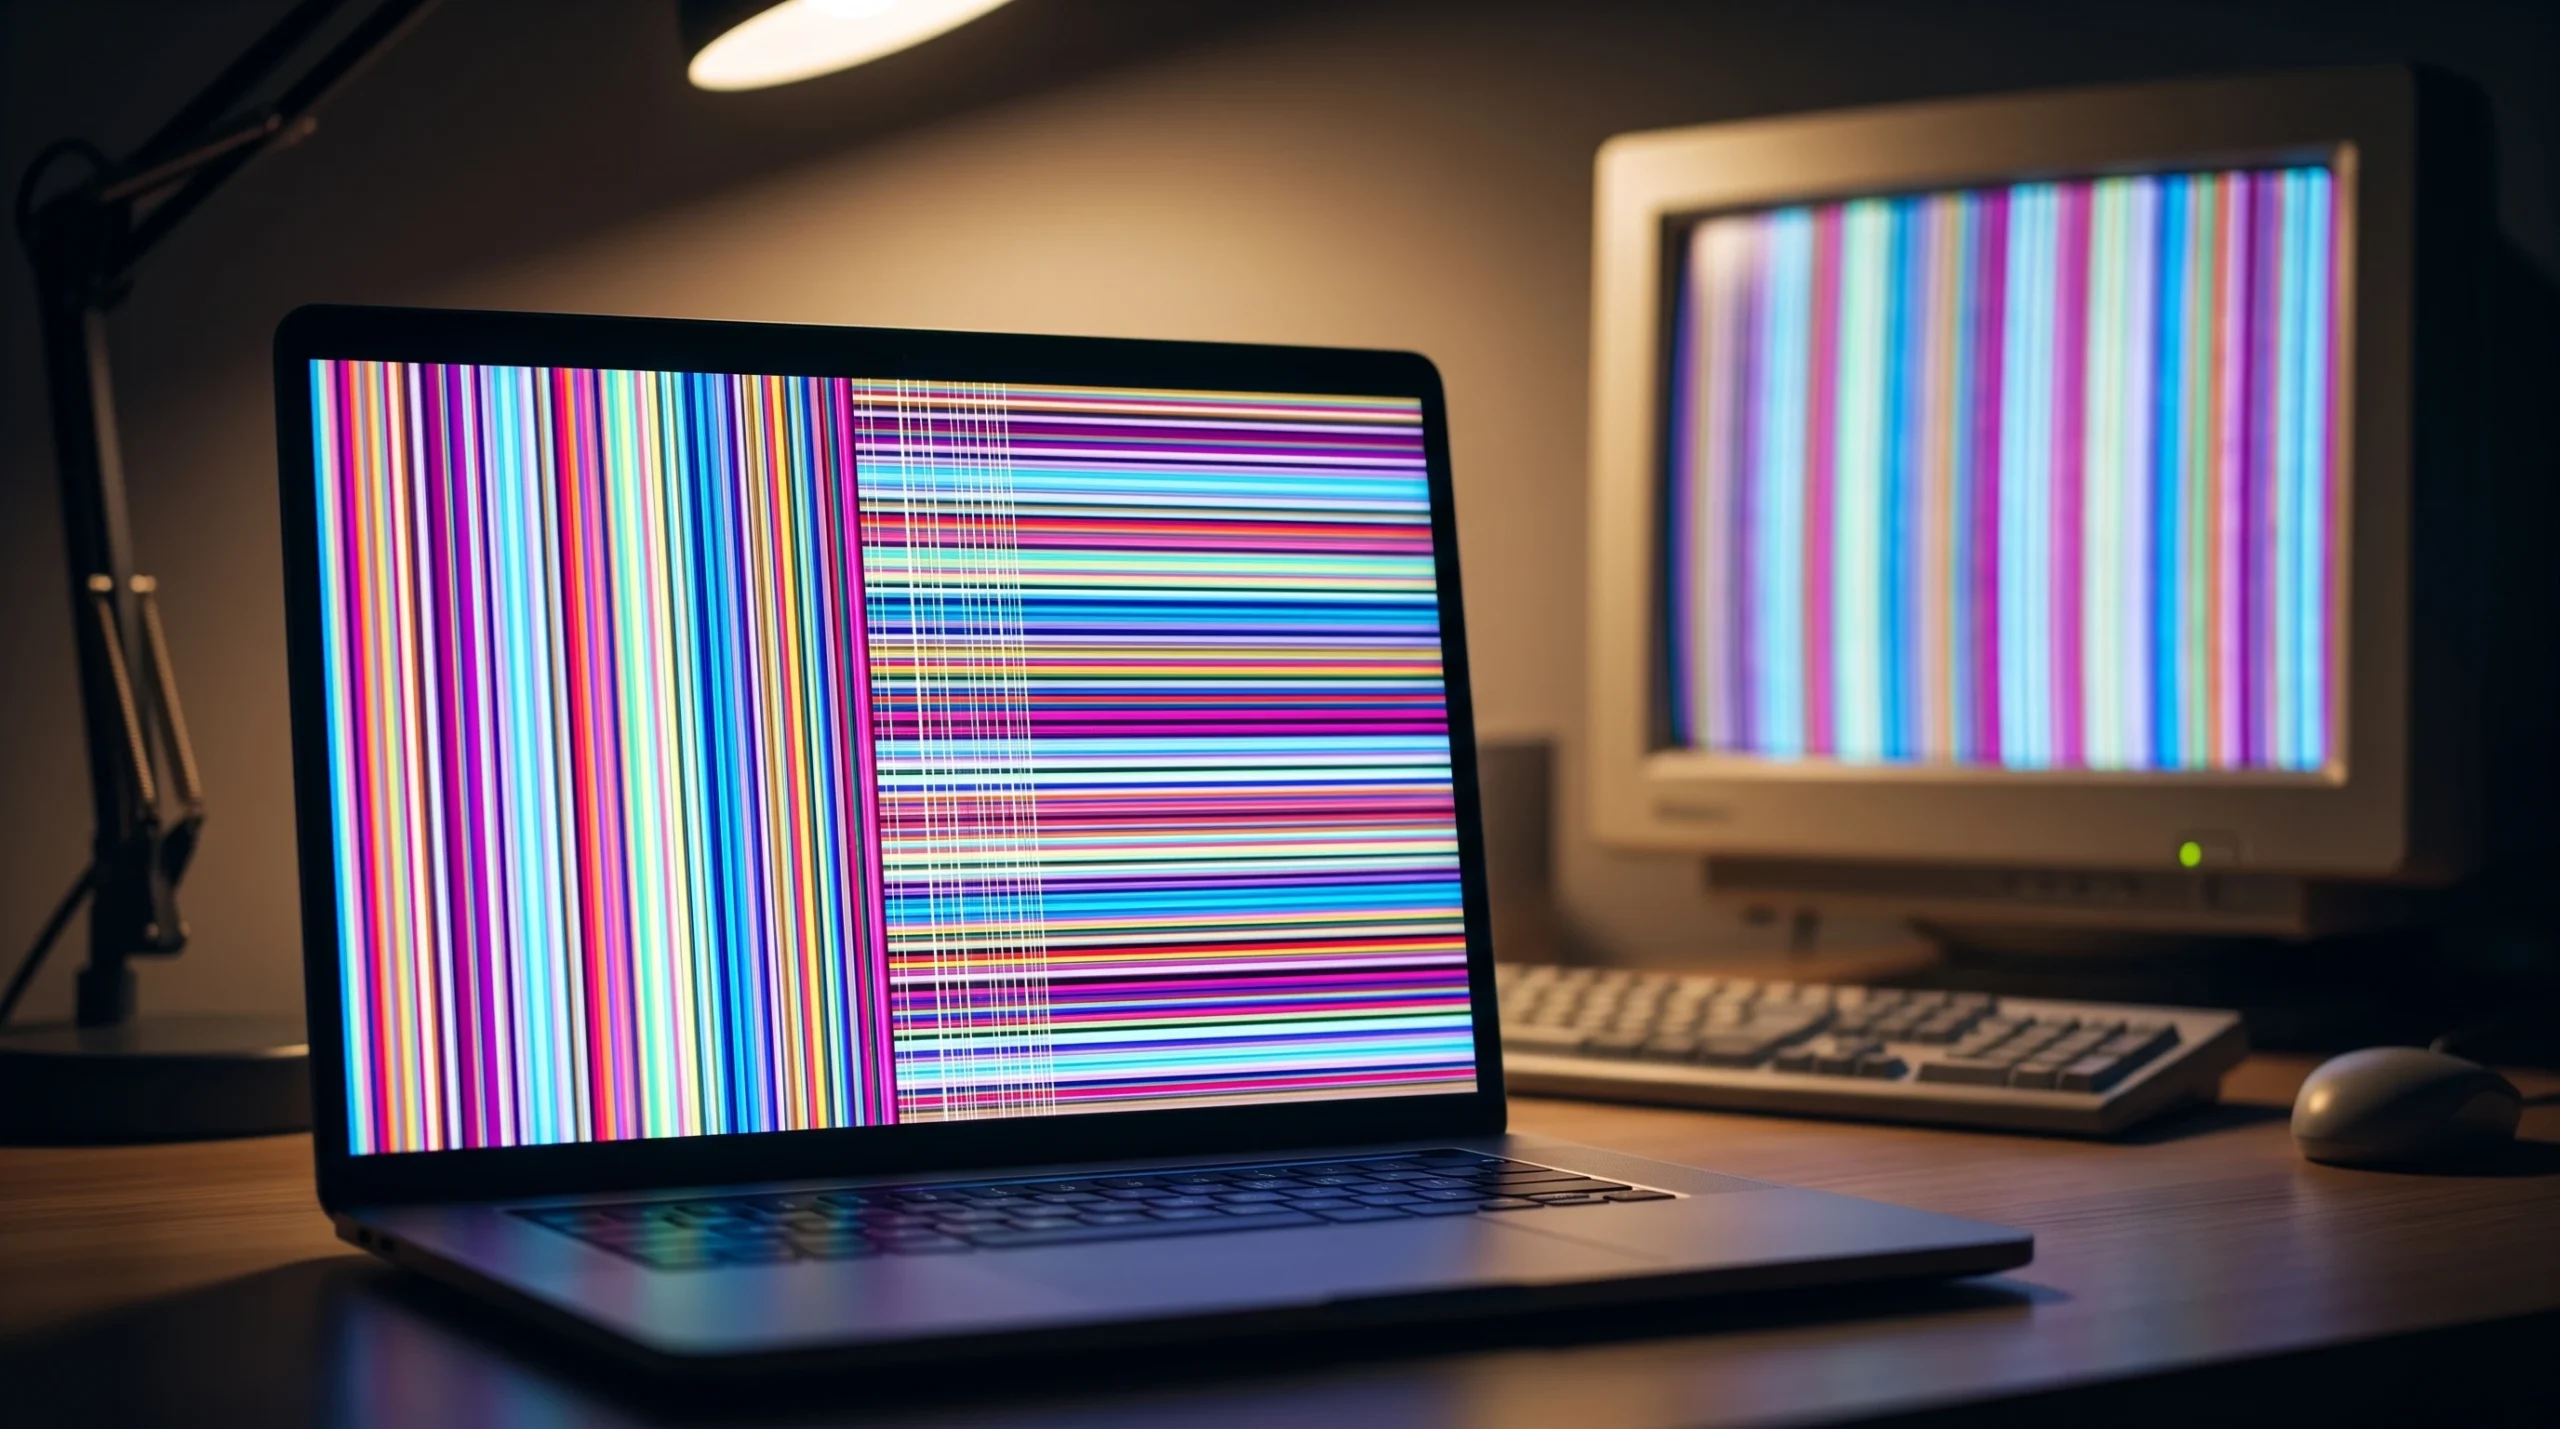
Thin colored streaks running across or down a display usually point to one of three things. Either the graphics driver is misbehaving, a video cable has come loose or failed, or the panel itself is physically damaged. The lines can appear as single rainbow-colored bands on the edges, or spread across the whole screen, and they sometimes arrive alongside flickering or crackling static.
Quick answer: Connect the laptop or PC to an external monitor. If the same lines show up on the second display, the problem is your graphics driver, GPU, or cable. If the external screen is clean, the built-in panel or its ribbon cable is the fault.
First test: hardware fault or software fault
Before changing any settings, plug the machine into a second screen over HDMI or DisplayPort. This one check saves hours because it tells you where the damage actually lives.
Software fixes for lines caused by drivers or settings
If the lines followed you onto the external monitor, or appeared right after a Windows or driver update, work through these in order. Check for pending Windows updates first and install anything waiting.
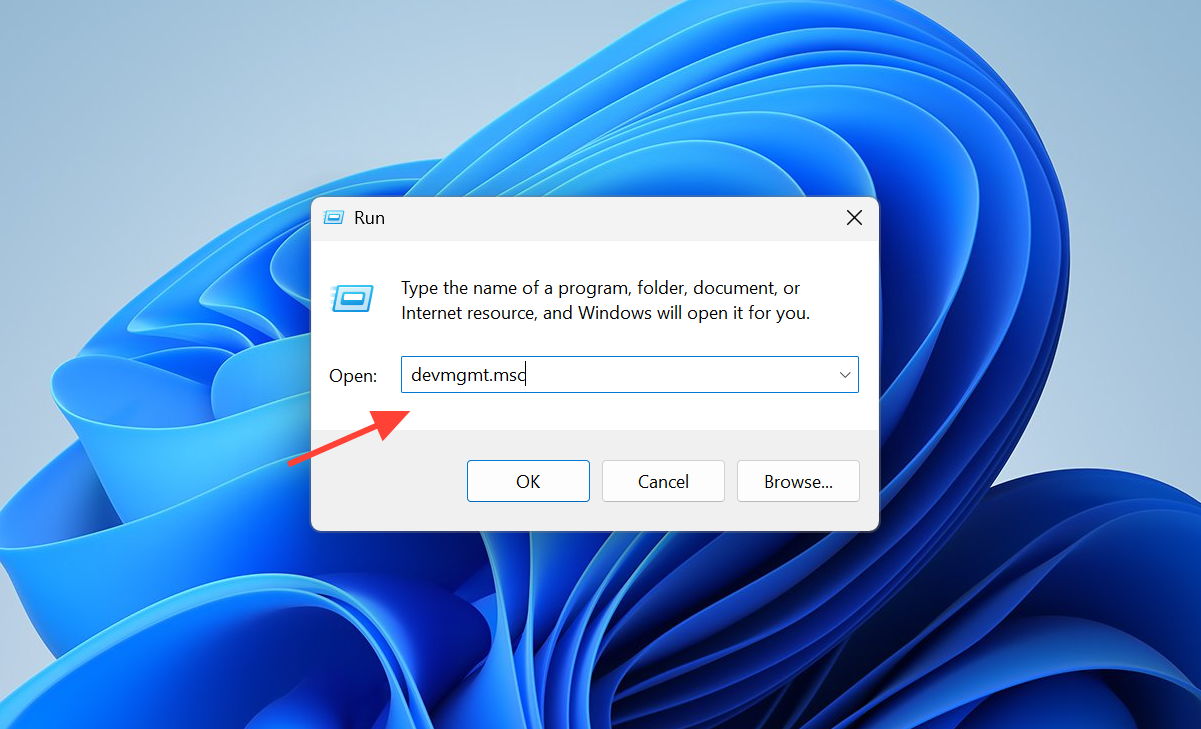
Update or reinstall the graphics driver
An outdated or corrupted display driver is one of the most common triggers for streaks and colored bands.
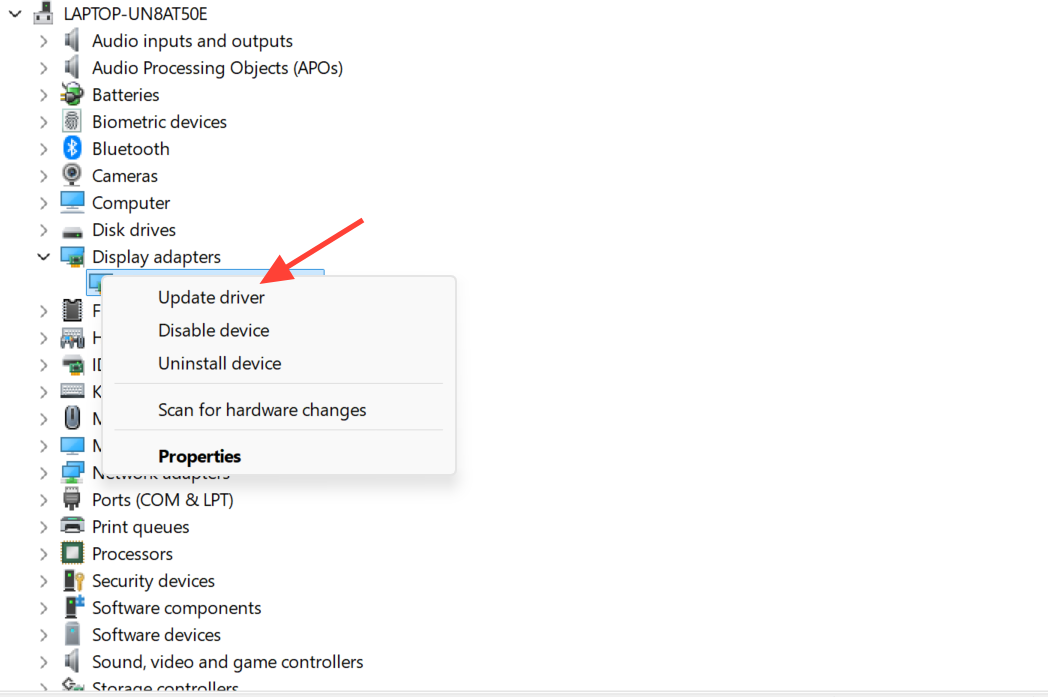
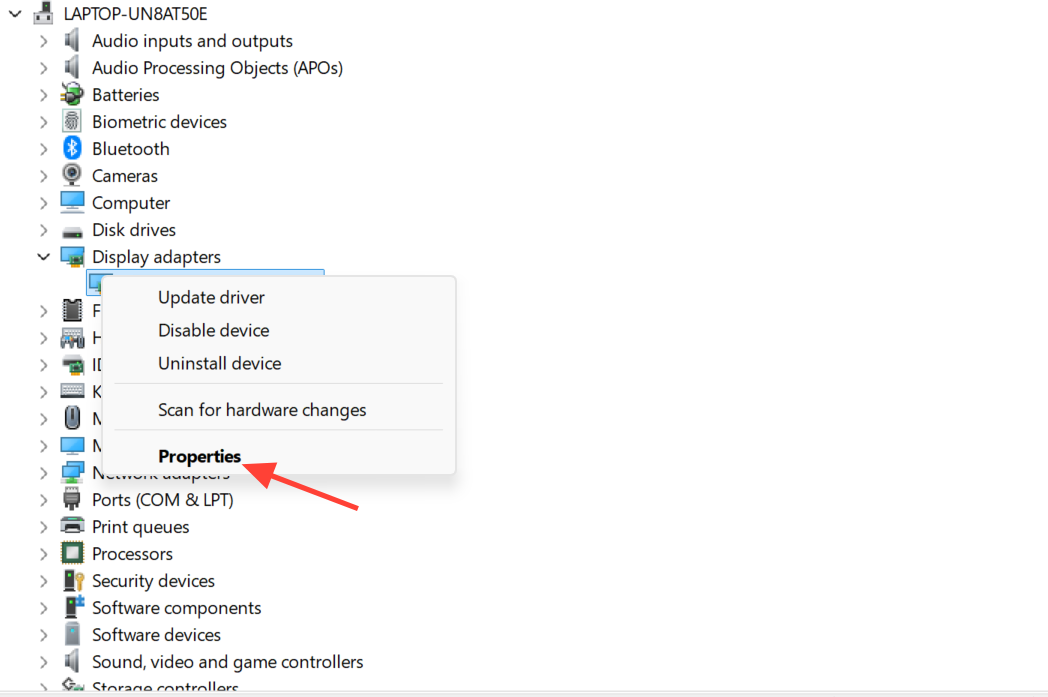
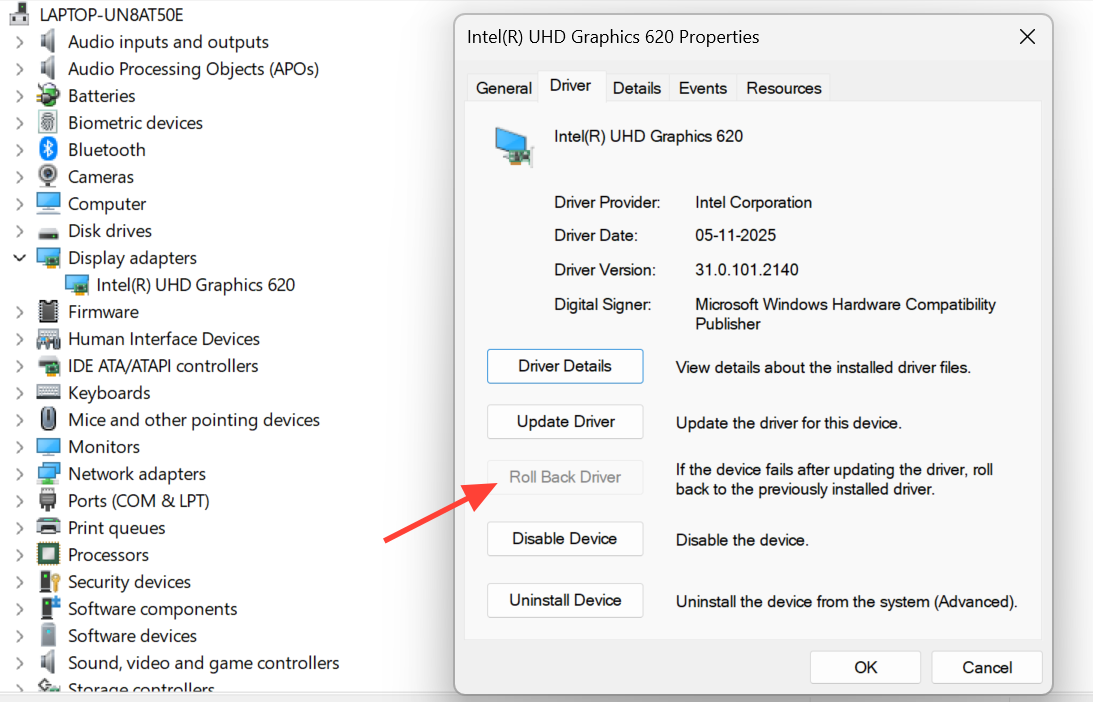
Roll back the graphics driver
If the lines started right after a driver update, reverting to the previous version often clears them.
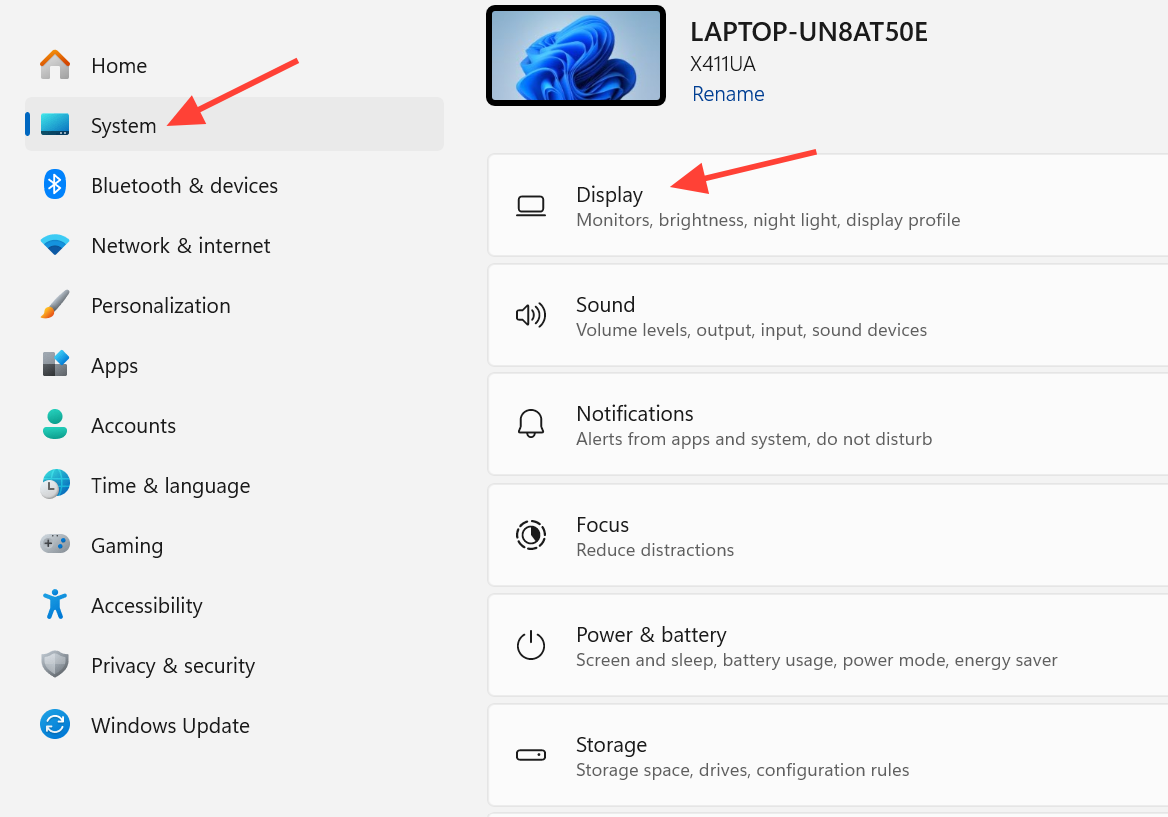
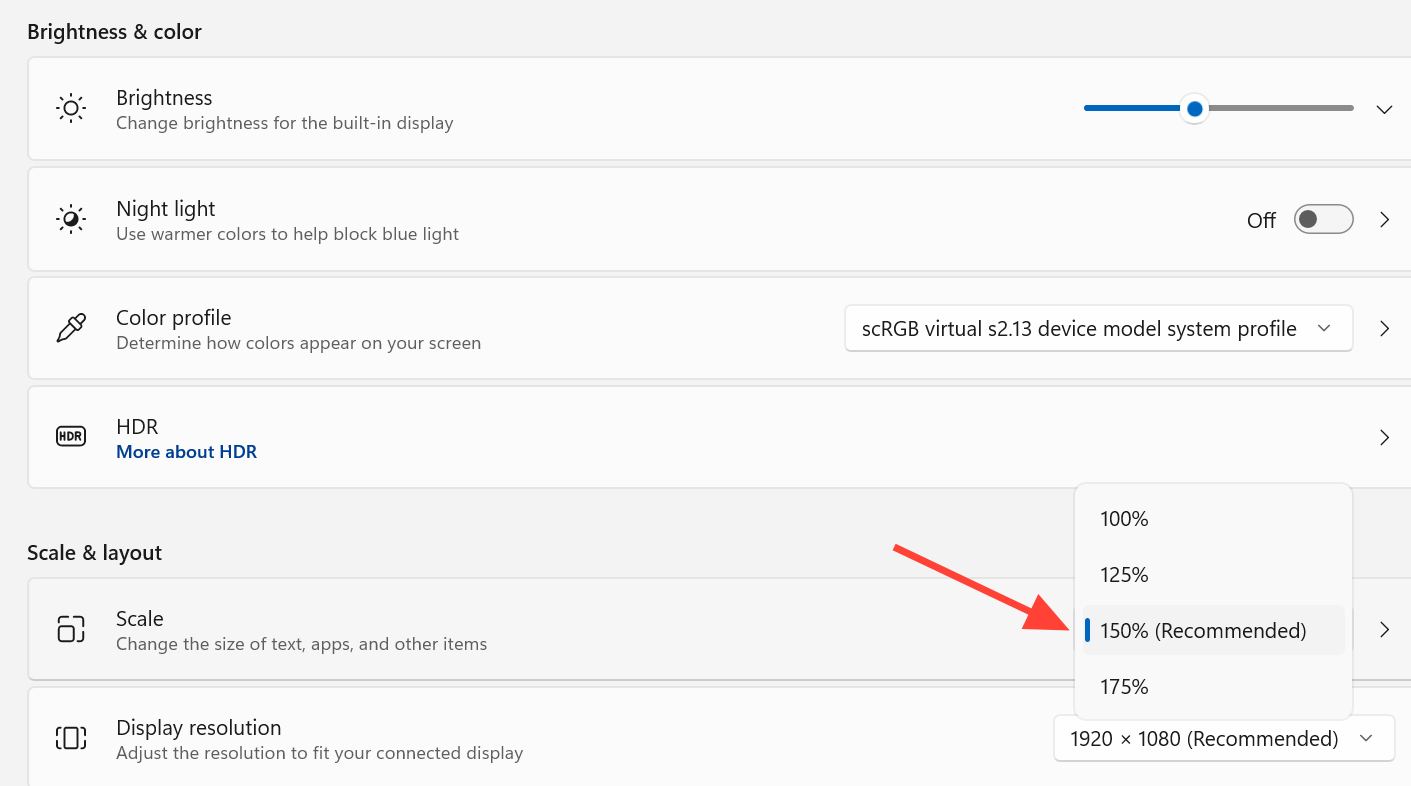
Set the correct screen resolution
A resolution that does not match the panel can produce faint horizontal or vertical lines.
Run the Display Quality troubleshooter
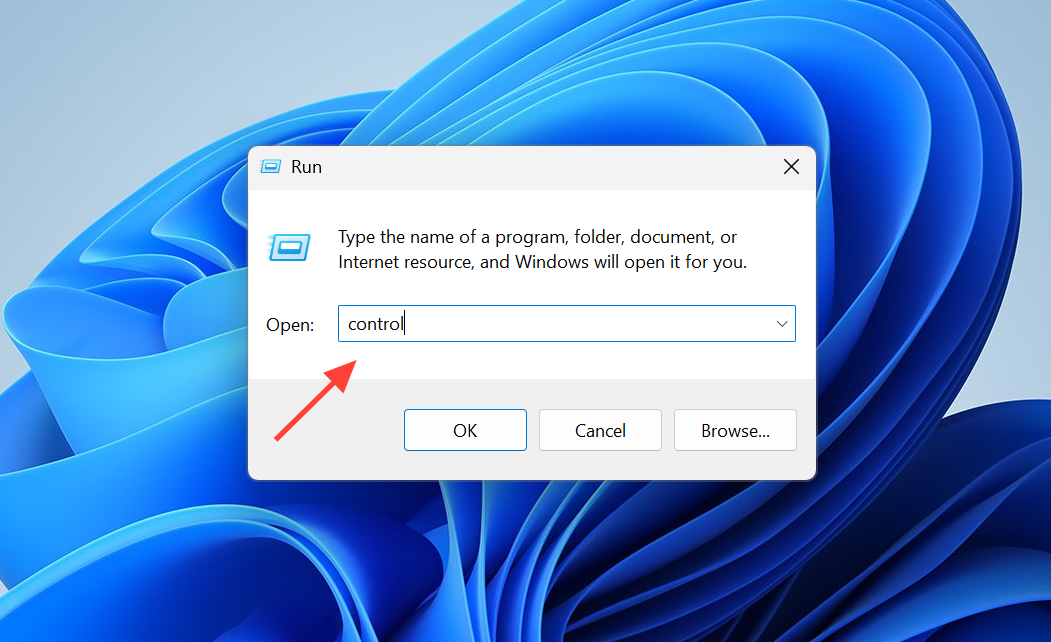
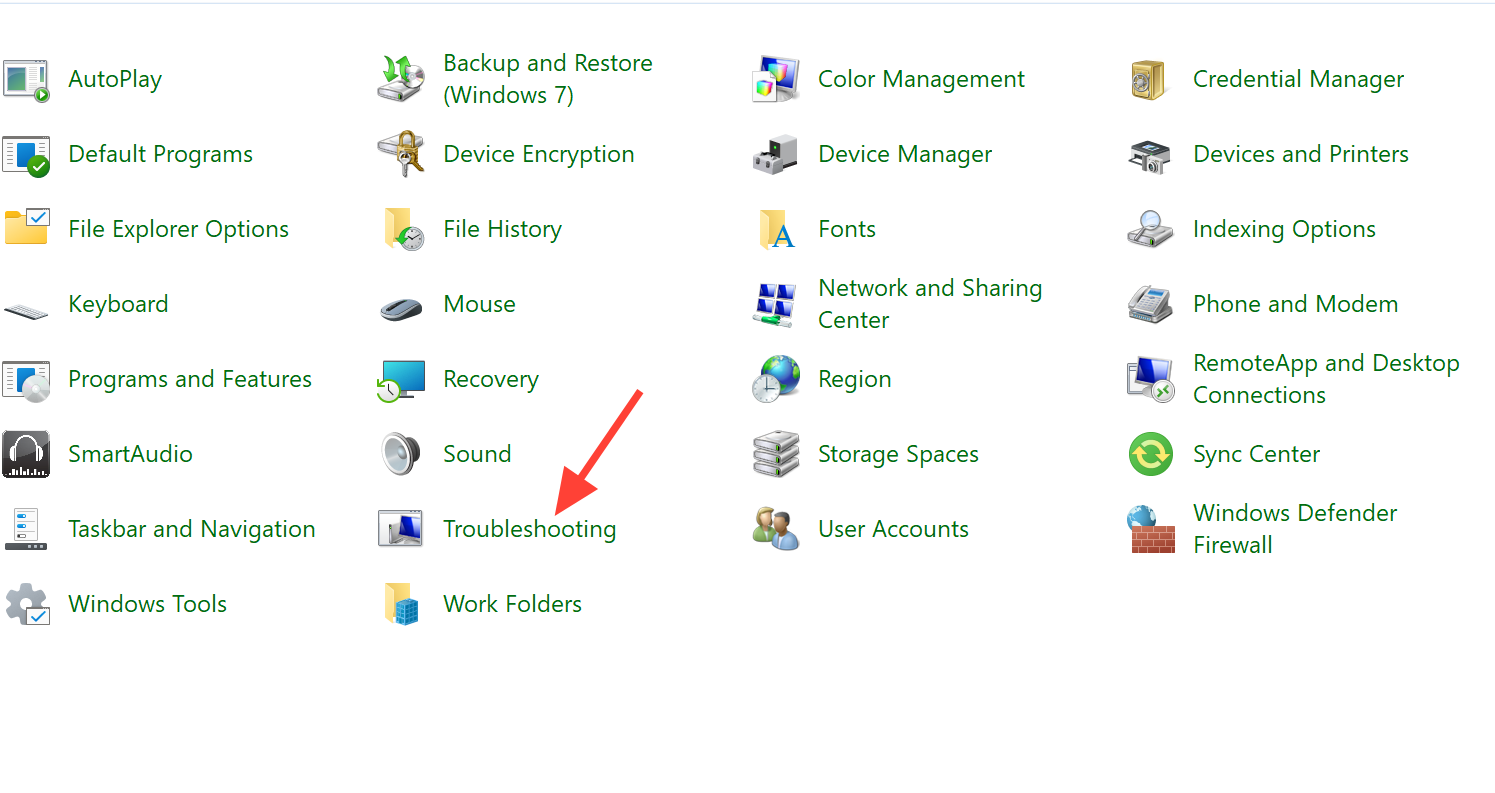
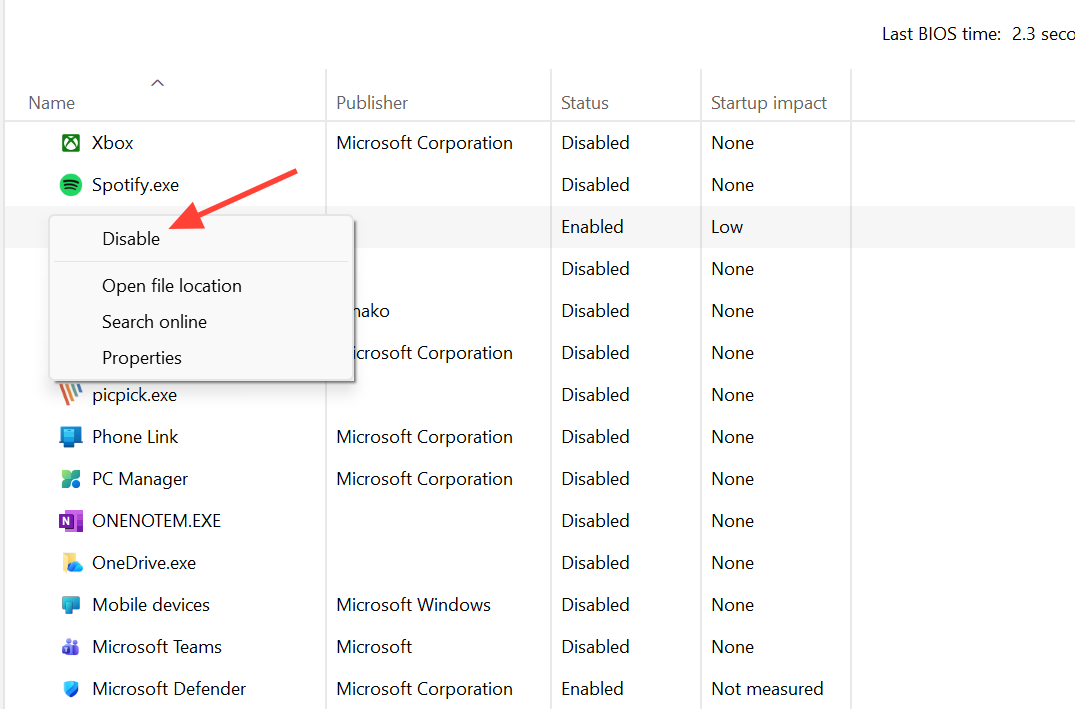
Perform a clean boot to find a conflicting program
If the display is clean during a clean boot, a background app or service is interfering.
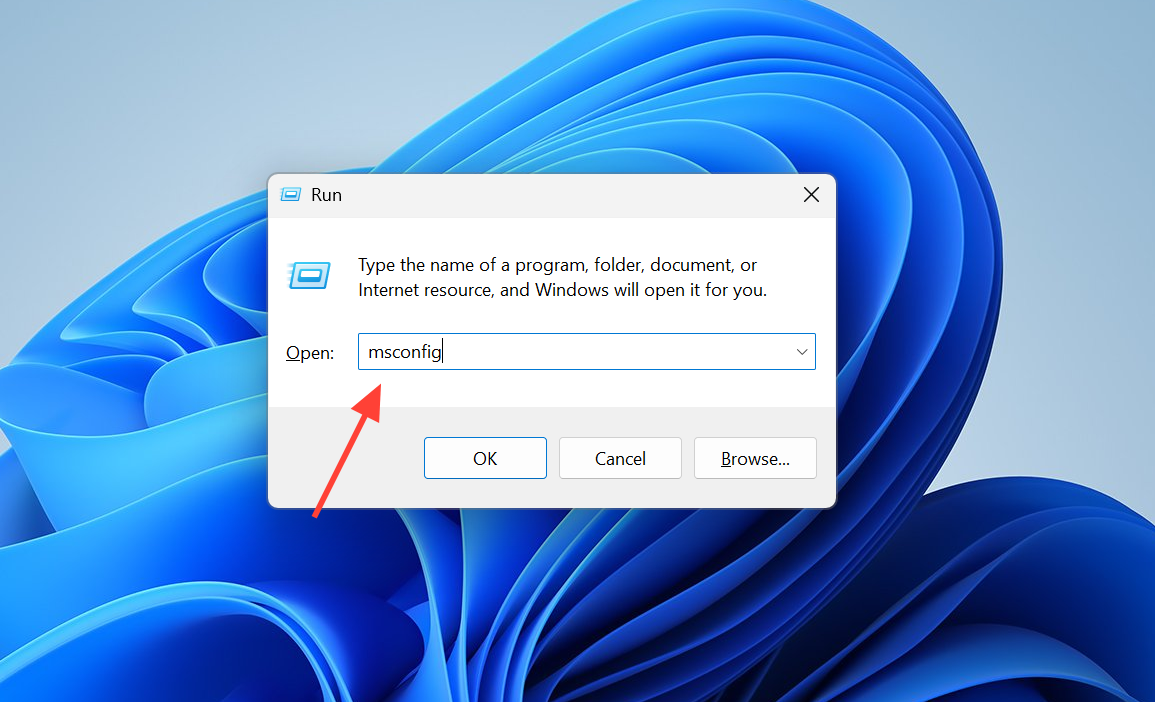
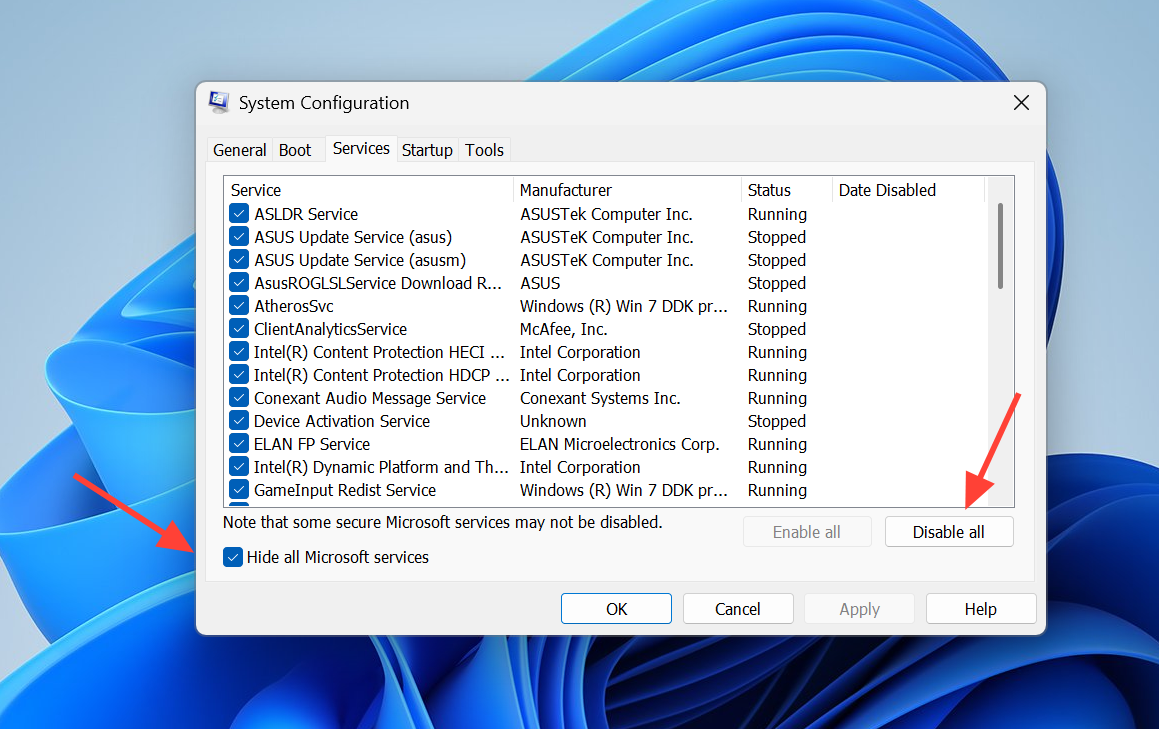
Update the BIOS
For stubborn cases, especially green horizontal or vertical lines, a BIOS update can help. Check your current BIOS version in System Information first, then install the latest version from your computer manufacturer’s official support page for your exact model.
Hardware fixes for cable and panel faults
When the external monitor stays clean, or when driver work changes nothing, the fault is physical. Start with the cheapest, least invasive steps.
If reseating, cable swaps, and cooling do not help, the panel or the internal display cable is the likely culprit. On a laptop, a defective screen needs replacement; on a desktop, a faulty graphics card can be swapped to confirm whether the GPU is producing the lines.
Typical repair costs
The price of a fix depends entirely on what is broken. A cable swap is cheap; a panel replacement is not.
| Repair | Approximate cost |
|---|---|
| Display cable replacement | $20–$50 |
| Laptop screen replacement | $100–$300, depending on model |
If the laptop is still under warranty, take it to the manufacturer’s service center rather than opening it yourself, since a covered repair may cost nothing.
How to confirm the problem is fixed
You know a software fix worked when the display shows clean, unbroken color after a restart, with no streaks during boot, on the desktop, or in full-screen video. If the lines vanished on an external monitor but return on the built-in panel, the panel is confirmed as the fault.
Hardware lines tend to get worse over time and can progress to complete screen failure, so a panel or cable issue that keeps spreading should be repaired sooner rather than later. When none of the software or reseating steps change anything, a professional diagnosis is the fastest way to pin down whether it is the panel, the internal cable, or the graphics hardware.