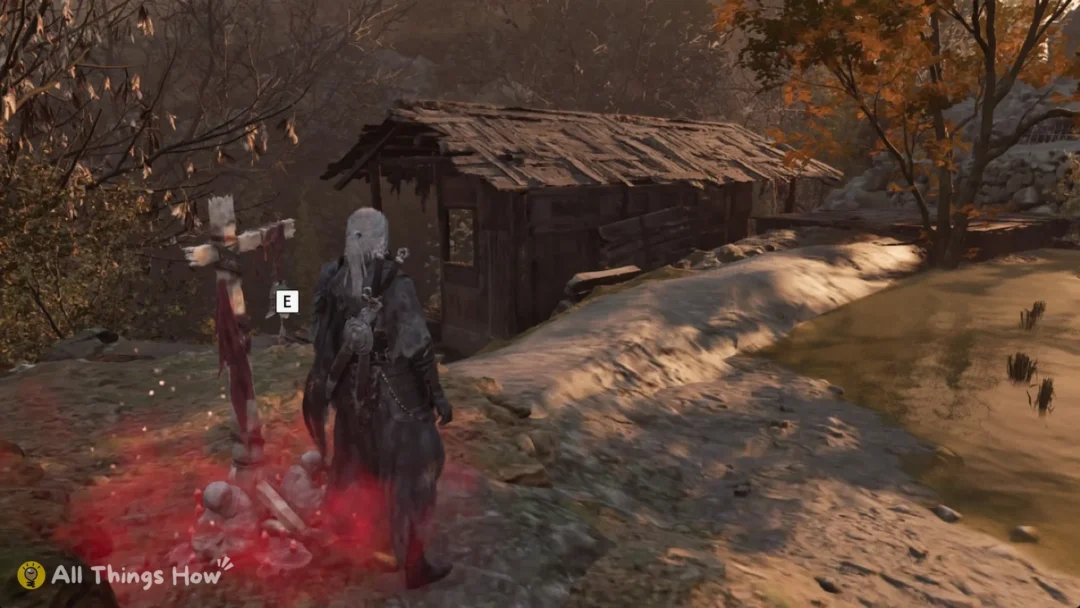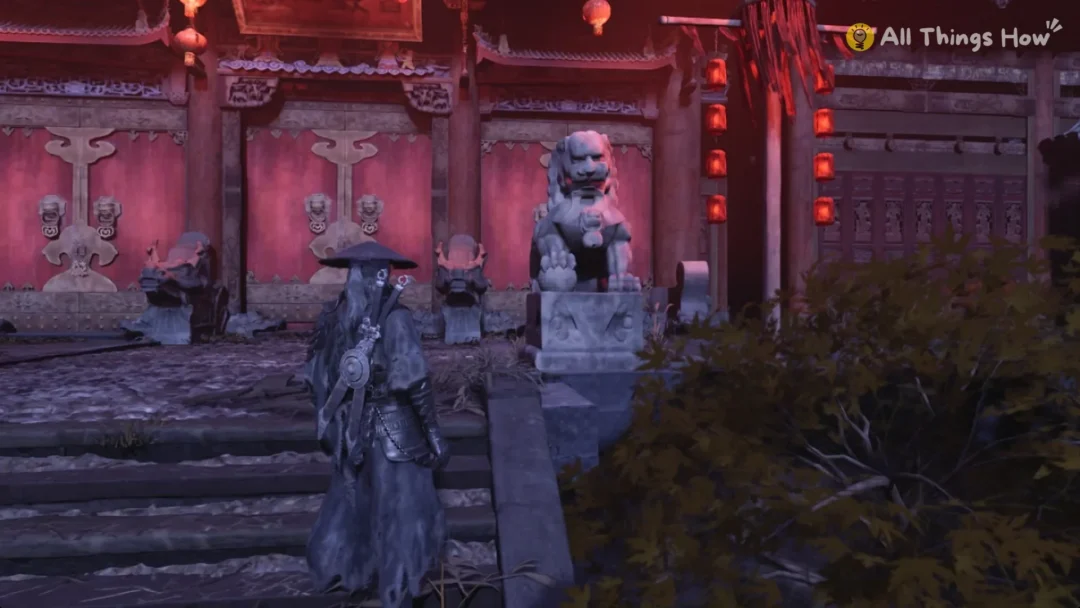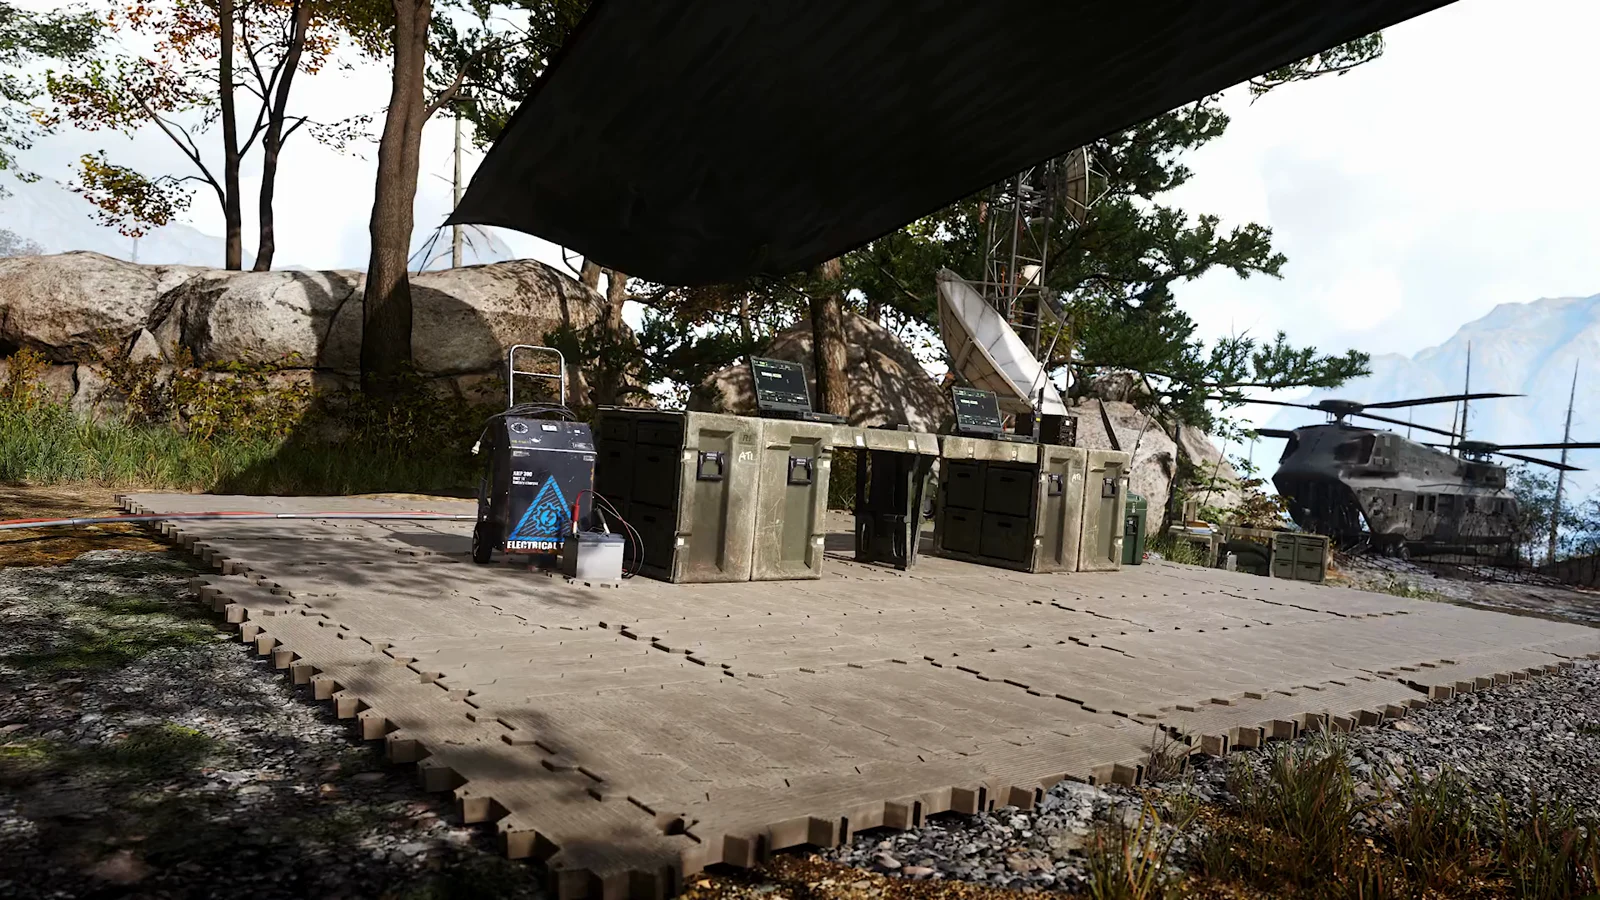
DMZ in Modern Warfare 4 doesn’t send you from a menu straight into Hajin. Between deployments you stand in the Forward Operating Base, or FOB, a walkable third-person camp that replaces most of the old menu screens with physical stations. You store loot, craft, buy weapons, level your Operators, and board the helicopter all from this one place. It’s new to the mode, and it carries most of DMZ’s long-term progression.
Quick answer: Nine stations are open from your first visit. The 3D Printer unlocks at DMZ level 2, the Boss Board after your second DMZ Order, the Vendor at level 5, the Gunsmith at level 10, and the Dog Tag Case at level 20.
FOB station unlock requirements in MW4 DMZ
Most of the camp works on day one. The stations you can use with no level or Order requirement are Operators (Active Duty), DMZ Orders, Stash/Loadout, the Firing Range, Survival Kits, the Bounty Leaderboard, DMZ Progression, Events, and Deploy. You can reach each one by walking up to it in the FOB or by picking it from the DMZ main menu.
Five stations stay locked until you’ve played a while. Four of them follow the DMZ level track. The Boss Board is the exception, because it opens from Order progress.
| Station | Unlocks at | Main job |
|---|---|---|
| 3D Printer | DMZ level 2 | Crafting and station upgrades |
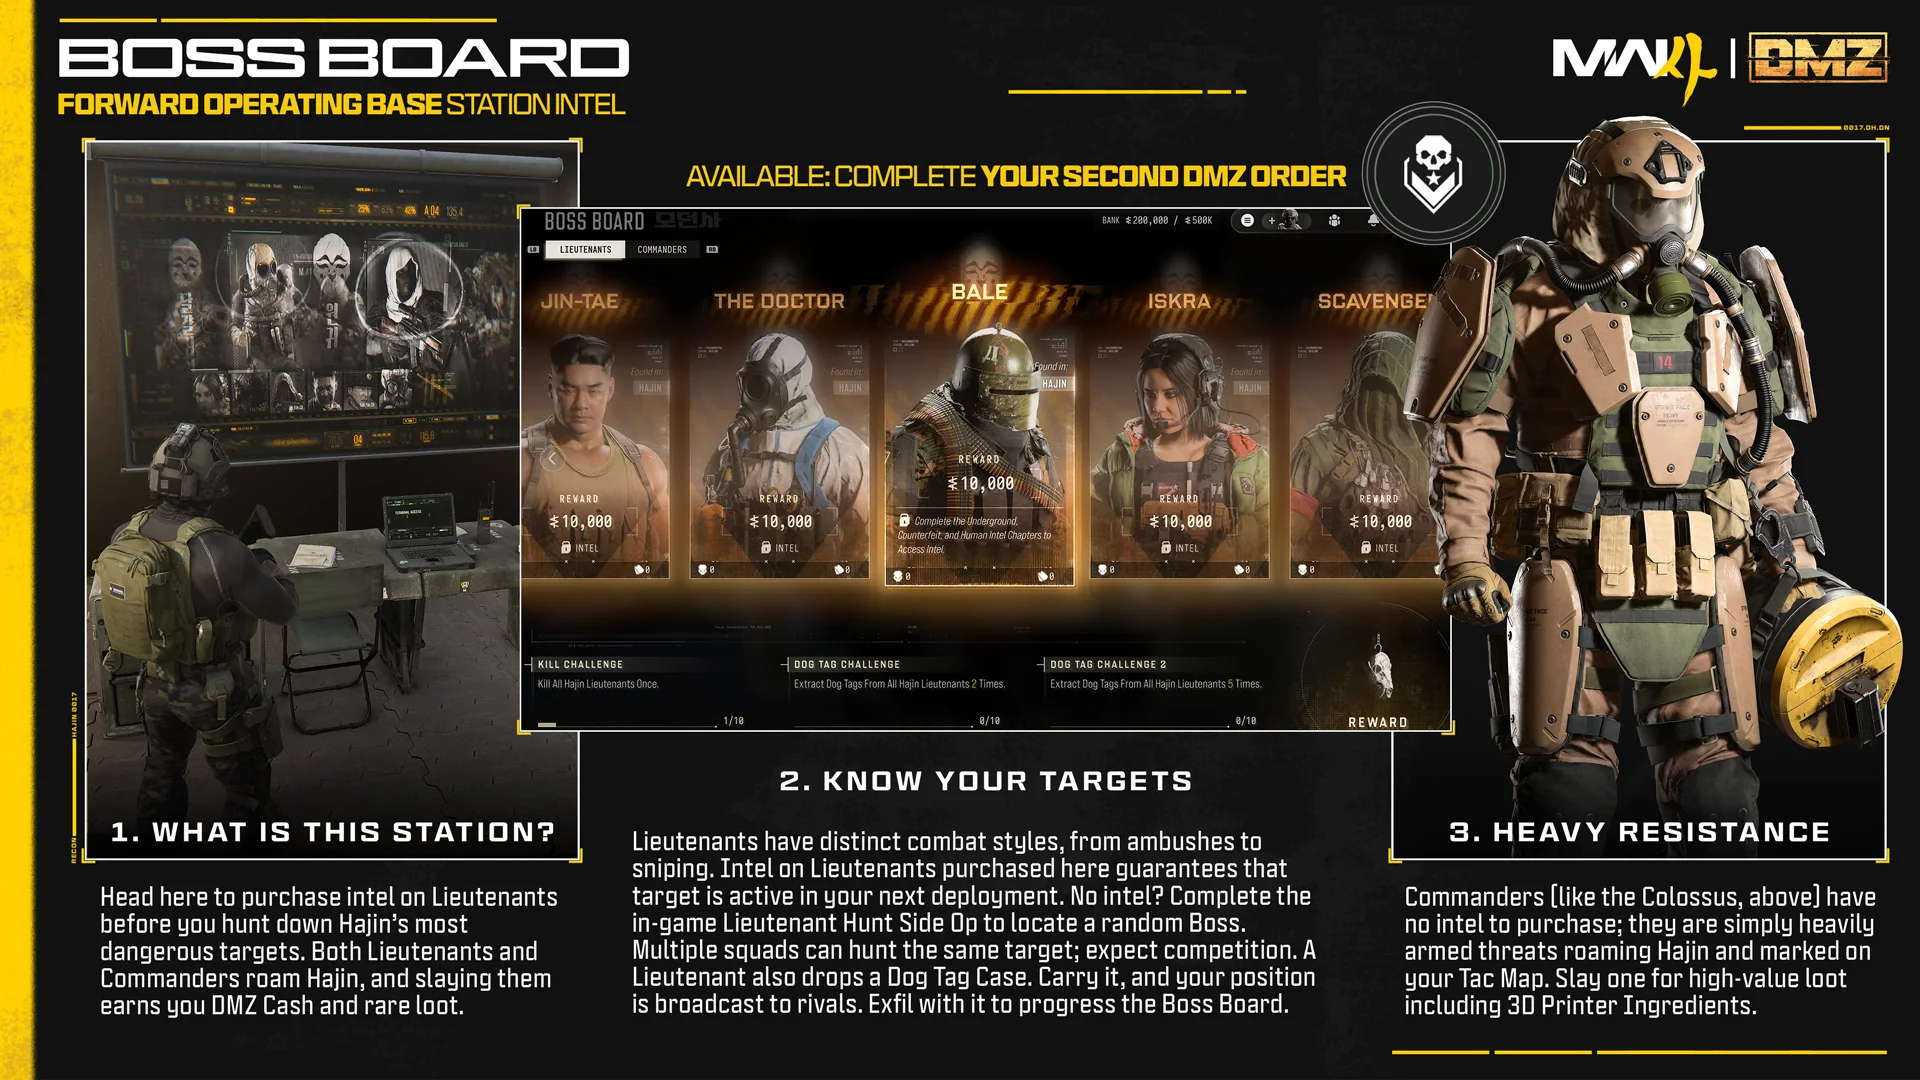
| Boss Board | Second completed DMZ Order | Boss intel and Dog Tag Case turn-ins |
| Vendor | DMZ level 5 | Rotating weapons and gear |
| Gunsmith | DMZ level 10 | Base weapons and attachments |
| Dog Tag Case | DMZ level 20 | Trophy display for player tags |
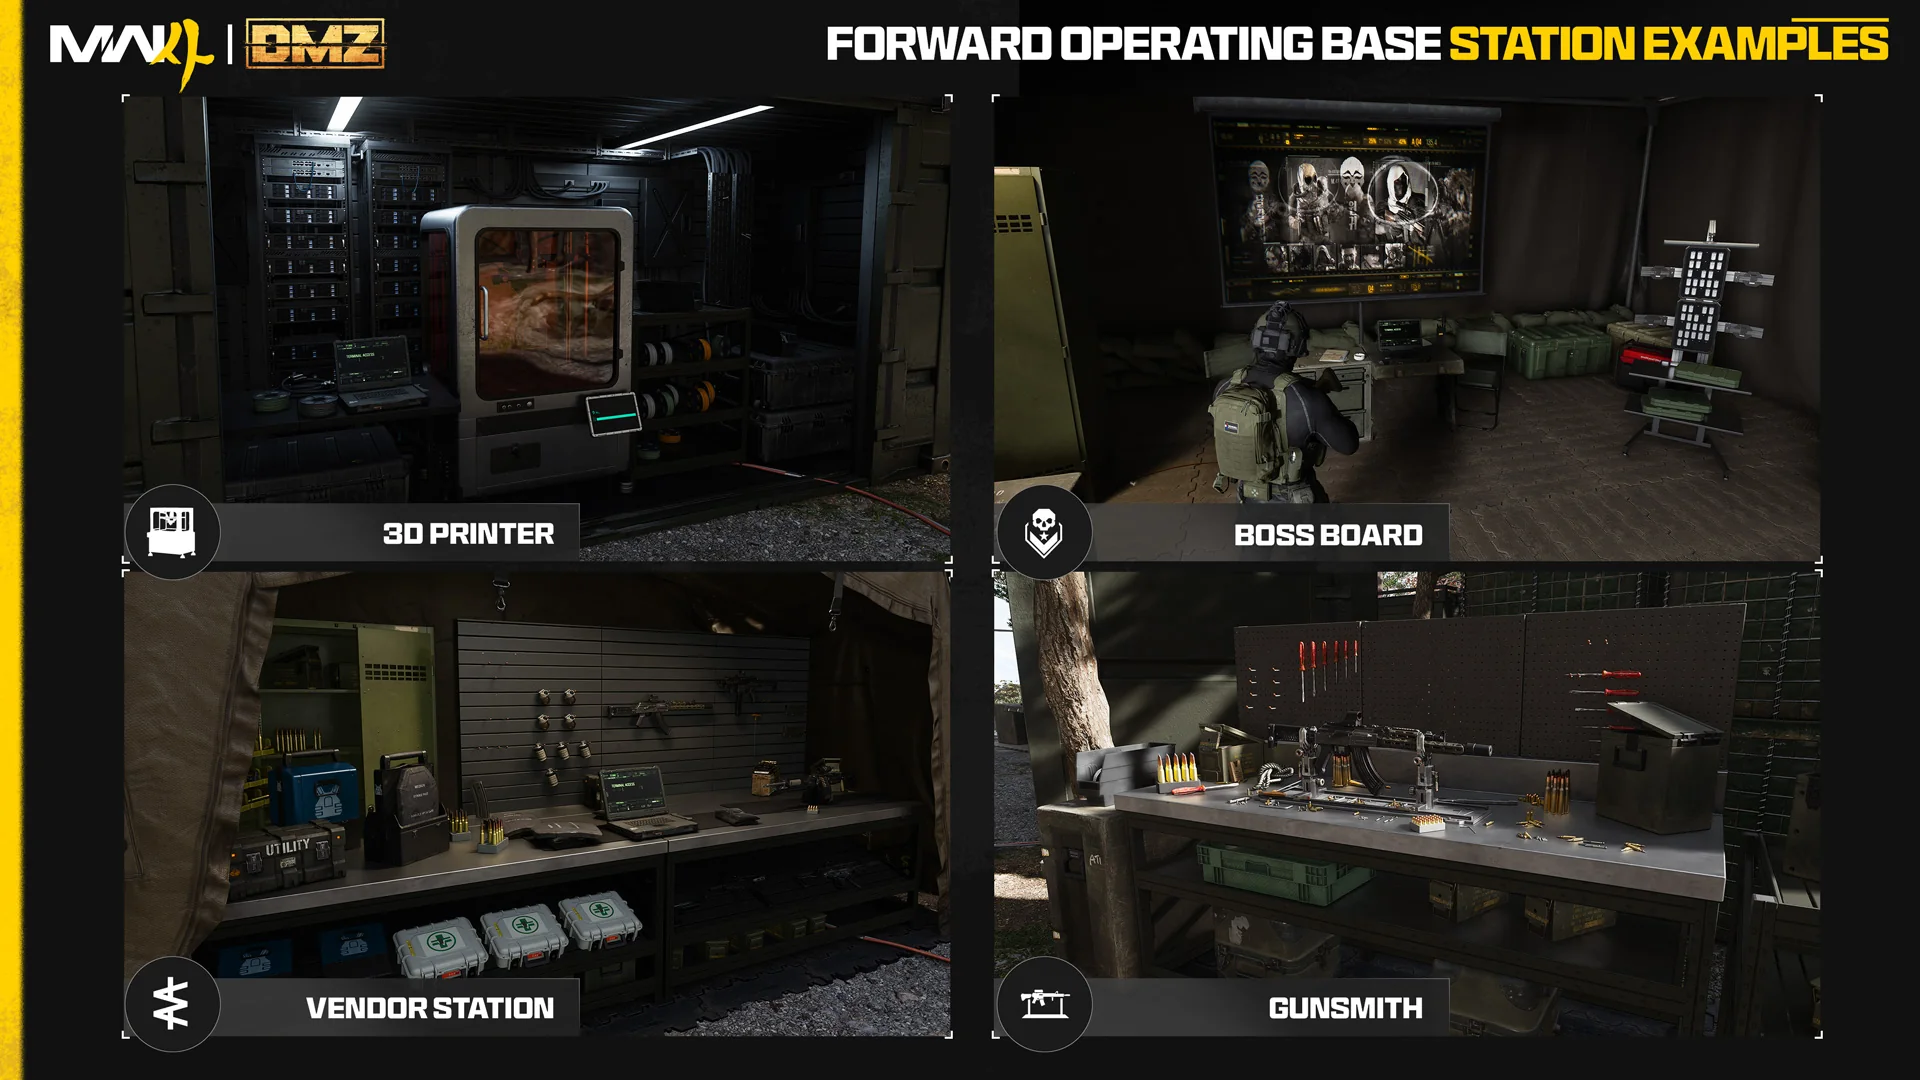
DMZ progression is a standalone track that spans 1 to 70. Your multiplayer rank and each Operator’s Dog Tag rank are tracked separately. XP earned in DMZ advances your multiplayer rank, but multiplayer XP cannot raise your DMZ level. The track also unlocks stations, printer recipes, Survival Kits, an extra Operator slot, increased stash capacity, fire support, and skins.
The full reward list sits in the Career menu under Progression, which has four tabs: DMZ Level Unlocks, MP Level Unlocks, Prestige, and Prestige Master. The first row of the “DMZ LEVEL UNLOCKS” tab pairs “3D PRINTER – STATION UNLOCKED” with recipes for the 1-Plate Armor Vest, Bandage, and Small Backpack. Once a station unlocks, its locked marker disappears in the FOB and you can interact with it.
Stash, recipes, and the 3D Printer
Stash/Loadout limits
Everything you extract ends up in the Stash/Loadout locker. All of your Active Duty Operators share it. Weapons and items are counted separately, with a starting cap of 12 weapons and 40 items, so the header reads something like “6/12 WEAPONS” and “31/40 ITEMS.” Tabs split the contents into All, Weapons, Consumables, Plate Carriers, Backpacks, Tacticals, Lethals, Field Upgrades, Fire Support, Gear, Keys, Ingredients, and Misc. Selecting a weapon gives you Equip, Gunsmith, Equip Secondary, or Sell. The Loadout panel on the right shows what your Operator will carry on the next deployment, and your bank cash sits at the top against its cap.
Loot falls into two categories. Salvage automatically converts into four resources—Synthetics, Electronics, Chemicals, and Metals—and the counters in the lower-left corner don’t take up stash space. 3D Printer Ingredients remain as individual parts. Binding Catalyst, Biomaterials, Detonators, Control Units, Rigid Synthetics, and similar items occupy backpack slots during a match, reaching the stash only if you successfully exfil. DMZ Cash follows that same process, so it is always empty on the Loadout screen before deployment. Deploy without a backpack and you receive the Basic Pack, with eight item slots; each item has its own stack limit.
Recipes and Manuals board
A monitor near the printer tracks your collection progress for crafting and weapons. It shows how many 3D Printer recipes and Gunsmith Weapon Manuals you own against the totals, for example “3D PRINTER (MAX): 25/104” and “WEAPON MANUALS (MAX): 3/28.” A fresh account starts near the bottom, with the board reading 3D PRINTER RECIPES 6/104 and GUNSMITH WEAPON MANUALS 0/28. Manuals matter because the Gunsmith won’t sell a base weapon until you have found its manual in Hajin and extracted with it.
3D Printer crafting
The printer turns resources and Ingredients into gear. Its categories are Tracked, Upgrades, Consumables, Plate Carriers, Backpacks, Tacticals, Lethals, Field Upgrades, Fire Support, Gear, Ingredients, and Development. The two starter recipes are cheap. A Bandage, which temporarily restores max health when you’re wounded, costs 15 Synthetics and 15 Chemicals. A 1-Plate Armor Vest costs 25 Synthetics and 25 Metals. Both are Uncommon.
Later recipes include Energy Drink, Pain Killers, Sedative Inhaler, Radiation Blockers, Smelling Salts, Medkit, Self-Revive Kit, and Door Breacher Charge. Plate carriers move up from the 2-Plate Armor Vest, 2-Plate Ballistic Gel Vest, and 2-Plate Helmet Armor Vest to 3-Plate versions and the Tempered Armor Vest. Each recipe page lists rarity, cost, output, a “Max Printable” limit, and how many copies you already own. “HOLD TO PRINT TO OPERATOR” puts the item straight into your loadout, “HOLD TO PRINT TO STASH” stores it, and “TRACK RECIPE” pins it to the Tracked tab. An Ingredient Locations map shows where crafting materials turn up in Hajin. You get new recipes from DMZ levels, Order rewards, or by looting one and extracting with it.
FOB station upgrades
The Upgrades tab is where the base itself improves. Each upgrade costs cash plus specific Ingredients.
| Upgrade | Effect | Cost shown |
|---|---|---|
| Stash Item Upgrade I | +18 stash item capacity | $10,000, 10 Rigid Synthetics, 10 Electronic Sensors |
| MIA Recovery Discount I | 15% cheaper MIA rescue | 3 Regional Combat Notes, 10 Control Units, 10 Rigid Synthetics |
| Uncommon Ingredient Printing | Prints higher-rarity materials | $50,000, 20 each of Biomaterials, High Tenacity Fibers, Comms Module |
| Bank Upgrade III | Bank holds up to 1 Million | $100,000, 5 Infantry Invasion Plans |
The same menu also lists Gunsmith Upgrade I, Stash Weapon Upgrade I, Vendor Item Upgrade I, Epic Ingredient Printing, and Dog Tag Case Upgrade I. That means most of the late-game improvements to other stations are built here.
Where DMZ Cash goes: Vendor, Gunsmith, and Store
Vendor. Spend bank cash here on weapons and gear. The real-world schedule changes the stock once per day, with a countdown (labelled “REFRESHES IN” or “RESETS IN”) indicating the next change. A typical selection includes guns, vests, backpacks, medical items, and a gas mask. For example, the Patriot XMR costs $42,250; the 2-Plate Helmet Armor Vest and Medium Weapon Backpack each cost $15,000; Radiation Blockers and a Defibrillator are $2,000 apiece. Another day’s stock had the Kastov 762 at $126,250, the Large Backpack at $50,000, and the Medium Scavenger Backpack and Small Secure Backpack at $25,000 each. Extra spaces in both the weapon and gear columns stay locked, marked “LVL 52” or “UNLOCKS VIA DMZ LEVEL OR PRINTED UPGRADES.” You can also upgrade the Vendor using the 3D Printer.
Gunsmith. Its station intel card reads “UNLOCKS AT DMZ LEVEL 10”, so the bench stays closed until then, while the Firing Range next to it is “AVAILABLE IMMEDIATELY”. Money alone won’t get you everything here. A base weapon only goes on sale after you extract its Weapon Manual. The attachments you can buy depend on the weapon’s level and on the attachments you’ve unlocked across its class. A build holds five attachments, or up to eight on special rare variants. You pay for each part and also for each slot you open. One sample cart charges $1,000 for the 1st Attachment Slot. Further up, the 3rd, 4th, and 5th slots cost $10,000, $25,000, and $50,000. Barrels on the Axion assault rifle range from $2,850 to $7,250, and grips run from $1,000 to $6,000. A “GUNSMITH DISCOUNT” can take a percentage off the total, and “HOLD TO PURCHASE” finalizes the order. To modify a weapon you already extracted, select it in the stash and choose Gunsmith.
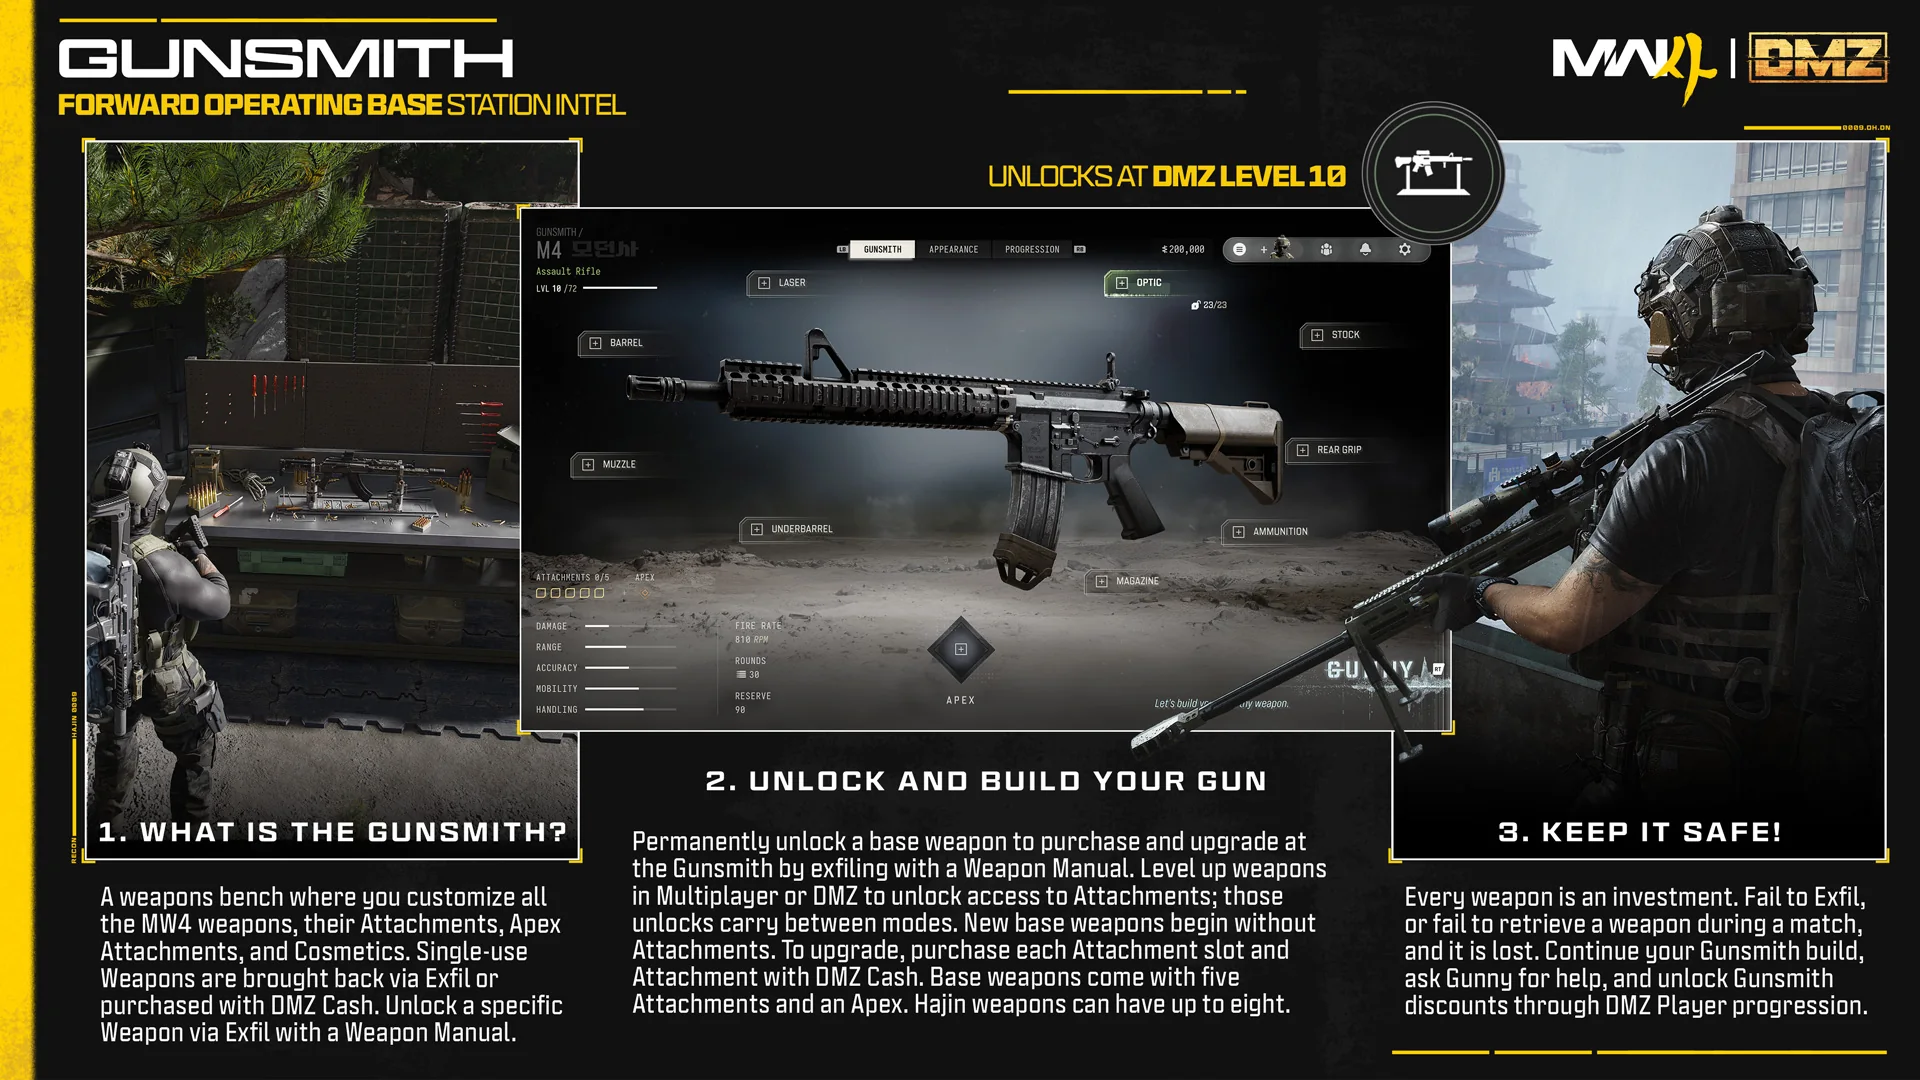
Each unlocked blueprint can be used once for free in DMZ. If that copy is lost, you can buy it again for the discounted cash amount listed on the blueprint; for example, the Beta Forged blueprint shows “BUILD COST $116,750.”
Store. A laptop terminal in the camp opens the in-game DMZ store. It is separate from the Vendor and doesn’t use bank cash.
Operators, Trait trees, and Prestige
The Operators station manages your Active Duty roster. You start with two slots, or three with the Vault Edition, and a DMZ level unlocks one more. Each Operator stays in the slot you assign, and the same character can’t fill two slots at once. To swap in a duplicate, you have to dismiss the active one first.
Every Operator levels on their own. Their Dog Tag rank climbs through 18 steps from Steel to Onyx III and grants one Trait Point per step, for 18 points in total. You spend those points across three trees (Warfighter, Scout, and Survivalist), which hold 66 traits between them. A few examples show what they do.
- Field Medic: revives allies faster.
- UAV Upgrade: longer range and duration, and UAVs become Advanced UAVs.
- Plate Pouch: two extra reserve plates, stacking with plate vests.
- Plate Speed and Strong Arm: faster plating, and longer equipment throws with a trajectory line.
- Combat Resistance and Key Cash: less explosive and tactical damage, and bonus cash from keyed locks.
Prestige lives in a fourth tree. The prestige screen requires 18 earned Trait Points, rare gear equipped in every loadout slot, and $200,000 in bank cash. Prestiging resets the Operator’s level and grants a permanent Prestige Trait. You can do it up to three times, and later prestiges let you swap permanent traits.
If an Operator dies and doesn’t make it out, they go Missing in Action. You can recover them with bank cash, priced by how many Trait Points they hold, or with an Operator Rescue Beacon. Otherwise you have to dismiss and replace them. A rescued Operator keeps their traits but loses their gear.
Orders, Boss Board, bounties, and Dog Tags
DMZ Orders are story missions in DMZ, arranged as chapters with multiple pages. For example, “CHAPTER: COUNTERFEIT 1/2” features an “EXECUTE INTEL” order whose counted objectives include hacking a UAV Tower in Downtown, killing five NK Soldiers pinged by that tower, and looting the counterfeit cash they drop. Completing each page earns a reward. For this chapter, “REWARDS FOR PG2” lists the Recon Drone recipe. You must finish the current page before the next one becomes available, and completing your second Order opens the Boss Board.
Dossiers for Hajin’s Lieutenants and Commanders are collected on the Boss Board. Its ten Lieutenants are Gorani, The Chemist, Jin-Tae, The Doctor, Bale, Iskra, Scavenger, Roze, Jang-Ui, and Warden, with $10,000 paid for each one. Intel about an active Lieutenant costs DMZ Cash; The Chemist’s intel is $25,000. Jin-Tae’s intel remains unavailable until you complete the Counterfeit and Human Intel Orders chapter. Intel for the Commanders Colossus, Deathstalker, and Main NK Battle Tank costs nothing. Lieutenants drop Dog Tag Cases, which you can hand in at this board after extracting with them. It also records extended challenges, including defeating each Lieutenant once and extracting all their tags two times, then five times.
The Bounty Leaderboard ranks players from the previous week in two tabs, “TOP 50 MOST WANTED” and “TOP 50 BOUNTY HUNTERS.” Each tab has Global and Friends views and a “NEXT REFRESH” countdown. The largest Most Wanted bounties have reached $600,000.
The Dog Tag Case opens at DMZ level 20. It displays tags taken from players you’ve eliminated, and each tag shows the player’s name, time of death, and rarity. You can favorite the tags you want to keep. 3D Printer upgrades add display slots and raise the DMZ Cash paid out by bounties.
Survival Kits, Firing Range, and Events
Survival Kits are themed bundles that you can claim for the gear or dismantle to obtain crafting materials. Their five families run from Deployment to Triage, then Armor, followed by Equipment and SERE. At low ranks, the kits include Basic Restock, Basic Triage, and Basic Armor, and they improve as your DMZ rank rises. Possible contents include Medium Backpacks, 2-Plate Armor Vests, armor and ammo boxes, and Medkits, as well as Weapon Insurance Contracts, Operator Rescue Beacons, and Fulton Drop Markers. Progression, Orders, and events are all ways to obtain kits.
The three basic kits are all Uncommon, and each one opens into this gear:
| Survival Kit | Contents |
|---|---|
| Basic Armor Kit | 2x 2-Plate Armor Vest, Armor Box |
| Basic Restock Kit | 2x Medium Backpack, Armor Box, Ammo Box |
| Basic Triage Kit | Medkit, 2x Pain Killers, 2x Radiation Blockers, 2x Bandage |
Between the Gunsmith and Vendor plots, a wooded grove serves as the Firing Range. Cross the painted yellow line and your primary weapon readies automatically. Targets shaped like circles and bottles are positioned from under 10 meters to beyond 100 meters. Nearby walls and barricades let you test crouching, going prone, and mounting before bringing a build into a match.
The Events station features limited-time challenges that can award DMZ XP, equipment, recipes, and camos. It has also shown the MW4 Boot Camp event, with challenges across Multiplayer, Campaign, and DMZ, plus mastery rewards for completing them all. In DMZ Early Access, its intel card says “AVAILABLE AFTER LAUNCH.” The full game launches October 23, but no official date has been confirmed for the first event. After events become available, you can view them through the blade menu on the screen’s left side as well.
Deploy station: Free Loadout, mission types, and infil costs
Deploy is a walk rather than a button. You follow the razor-wire path to the helicopter pad, pick Story Missions, Dynamic Operations, or Free Roam, and then choose how you enter Hajin. If you’ve lost everything, the deployment menu offers “Equip Free Loadout,” which gives you basic weapons, medical items, and random tacticals and lethals. Anything from that loadout that you extract stays in your stash for good.
| Infil | Cost |
|---|---|
| Ground | Free |
| Polaris Dagor A1 | $5,000 |
| LTV | $25,000 |
| Helicopter | $50,000 |
| Cargo Plane | $100,000 |
A ground infil puts you on foot at a random spot in Hajin. The Cargo Plane is the only option that lets you pick an exact drop point. An earlier version of the list was shorter, with an Armored Truck and a $100,000 helicopter, so treat these prices as the current ones.
Put together, the FOB shapes how DMZ progression feels. Your stash and bank decide what you can risk, the 3D Printer decides how fast those limits grow, and every station that matters later is tied to a level or an Order you’ll reach within your first few sessions.