
Permission errors frequently block access to files and folders, especially when transferring drives between systems or dealing with files created by other users. Changing ownership in Windows 11 provides a direct solution, allowing you to assign control of a file or folder to your account so you can adjust permissions, delete, or modify as needed.
Change Ownership Using File Explorer
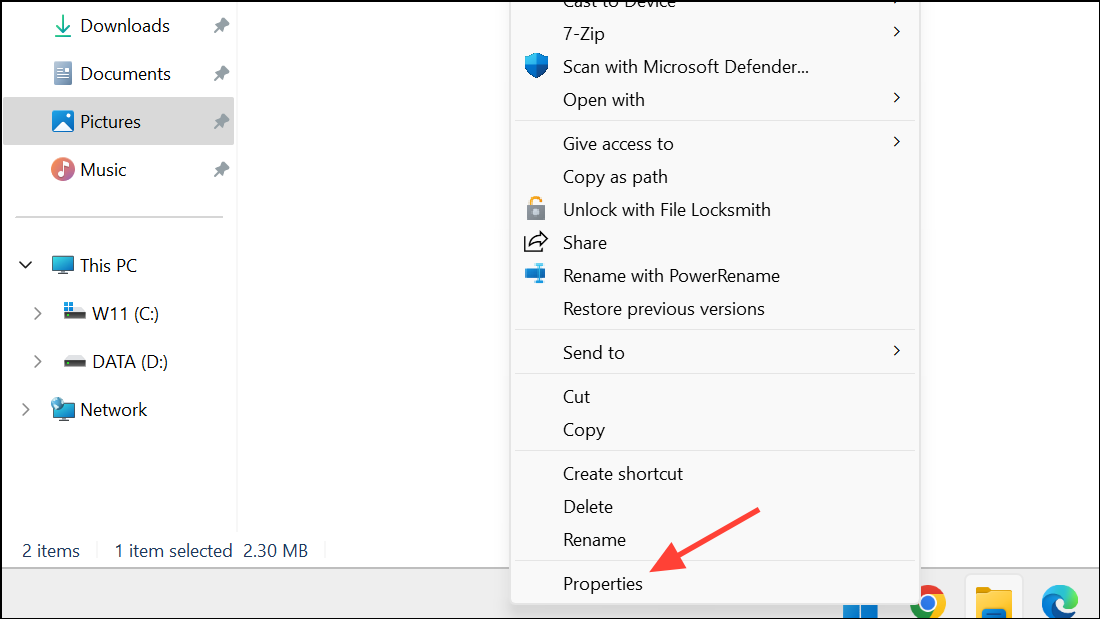
Step 1: Open File Explorer and navigate to the folder or file you want to control. Right-click the item and select Properties from the context menu. This opens a window with several tabs.
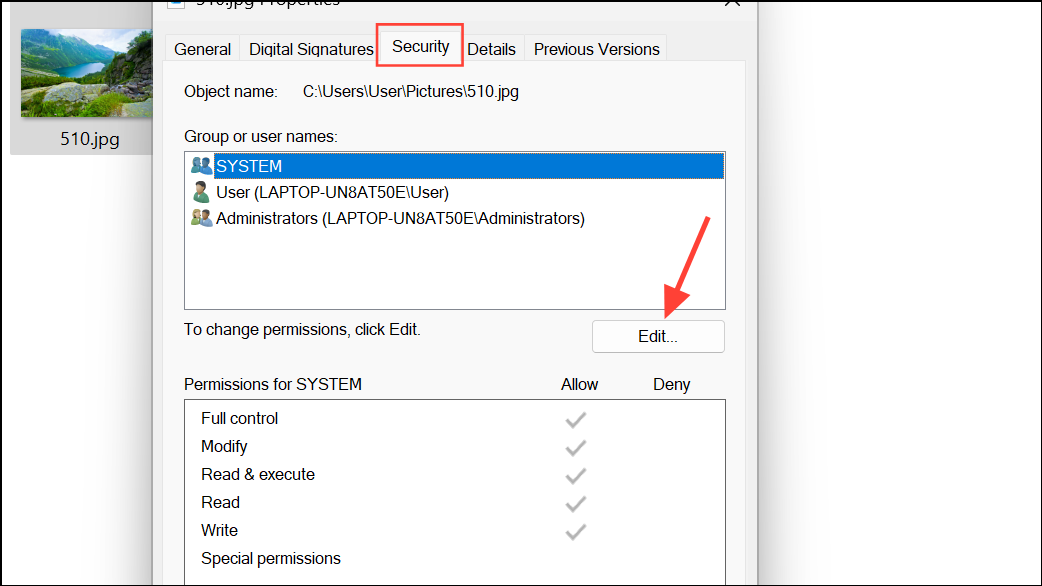
Step 2: Click the Security tab. Here you’ll see the list of users and groups with current permissions for the file or folder. If you only need to adjust permissions for an existing owner, you can use the Edit button. If you find that permission changes won’t stick or you’re denied access, proceed to change the owner.
Step 3: Click the Advanced button. At the top of the new window, you’ll see the current owner’s name. Click the Change link next to the owner’s name.

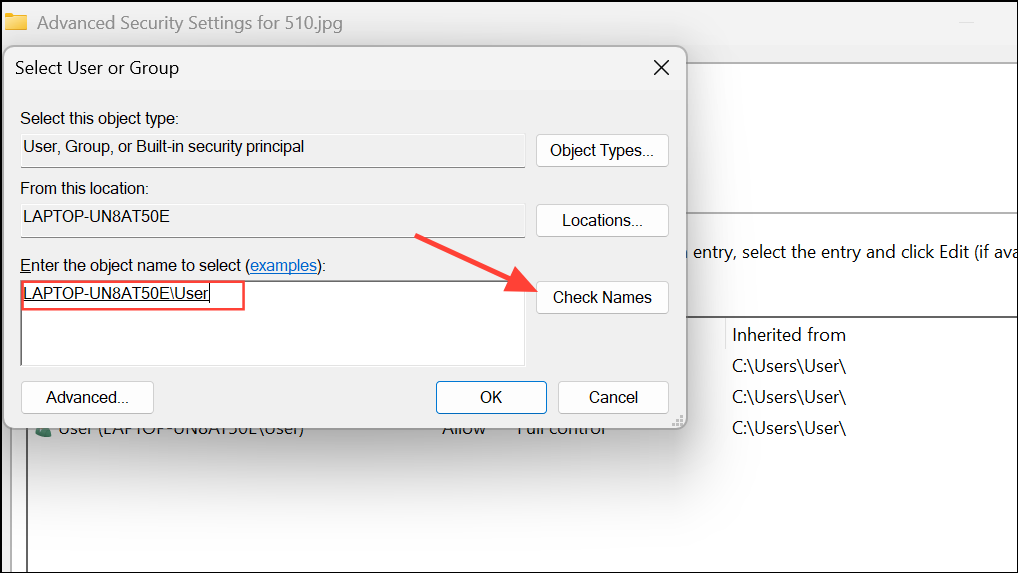
Step 4: In the “Select User or Group” window, type your Windows username in the Enter the object name to select box, then click Check Names to verify. If you’re unsure of the exact username, click Advanced and then Find Now to browse all user accounts. Select your account and click OK.
Step 5: After confirming your account as the new owner, you’ll return to the Advanced Security Settings window. For folders, check Replace owner on subcontainers and objects if you want to assign ownership to all files and subfolders within the selected directory. Click OK to apply changes.
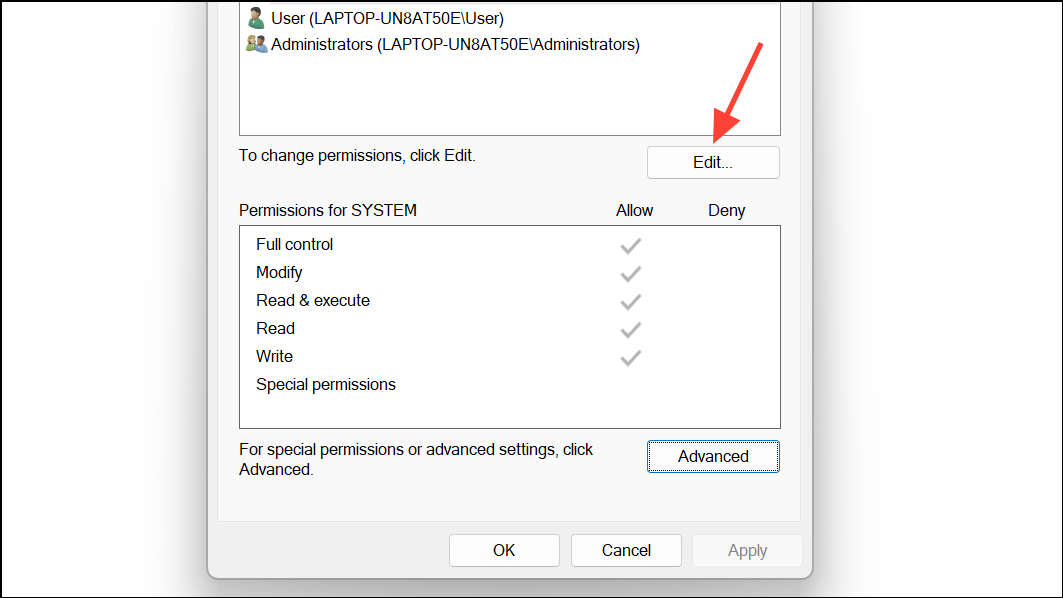
Step 6: Back in the Properties window, you can now adjust permissions freely. Click Edit under the Security tab, select your user account, and check Full Control or other permissions as needed. Click Apply and OK to finish.
Change Ownership Using Command Line Tools
For advanced users or when working with many files at once, command line tools provide a faster option. This is especially useful for external drives or directories with complex permission issues.
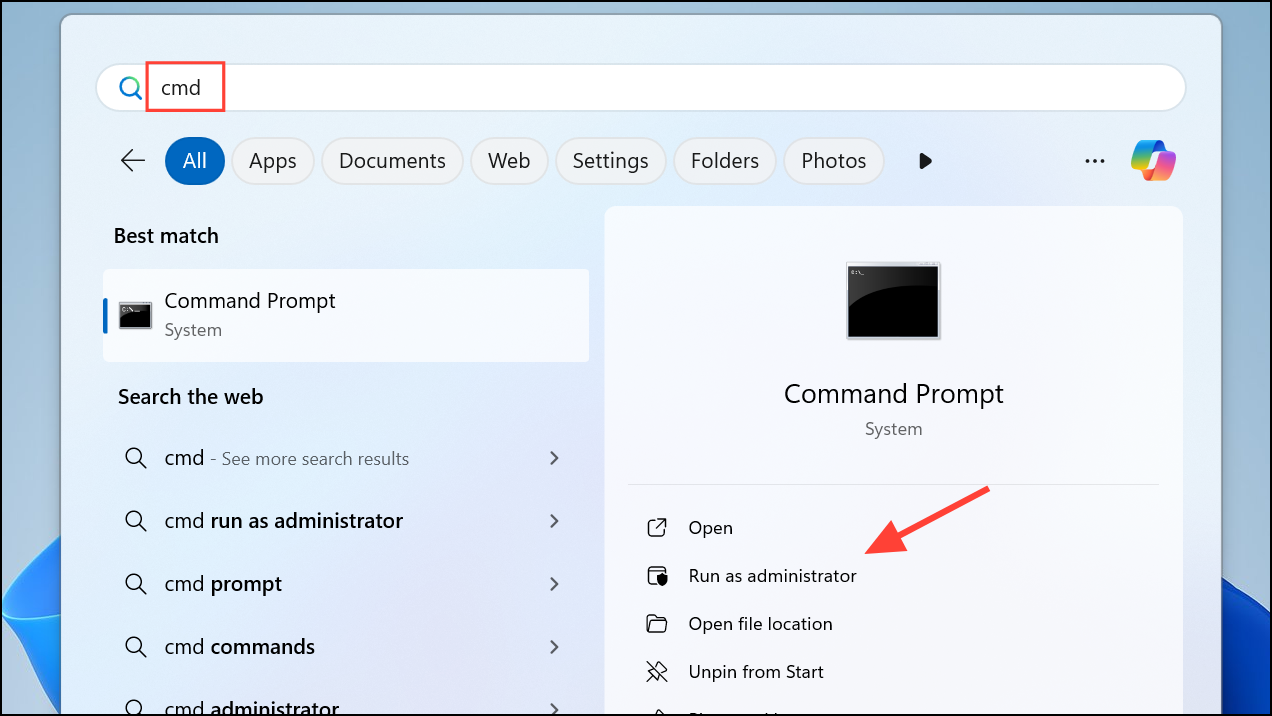
Step 1: Open Command Prompt as an administrator. You can do this by typing cmd in the Start menu, right-clicking Command Prompt, and selecting Run as administrator.
Step 2: Use the takeown command to assign ownership. For example, to take ownership of a folder and all its contents, enter:
takeown /f "D:\Path\To\YourFolder" /r /d y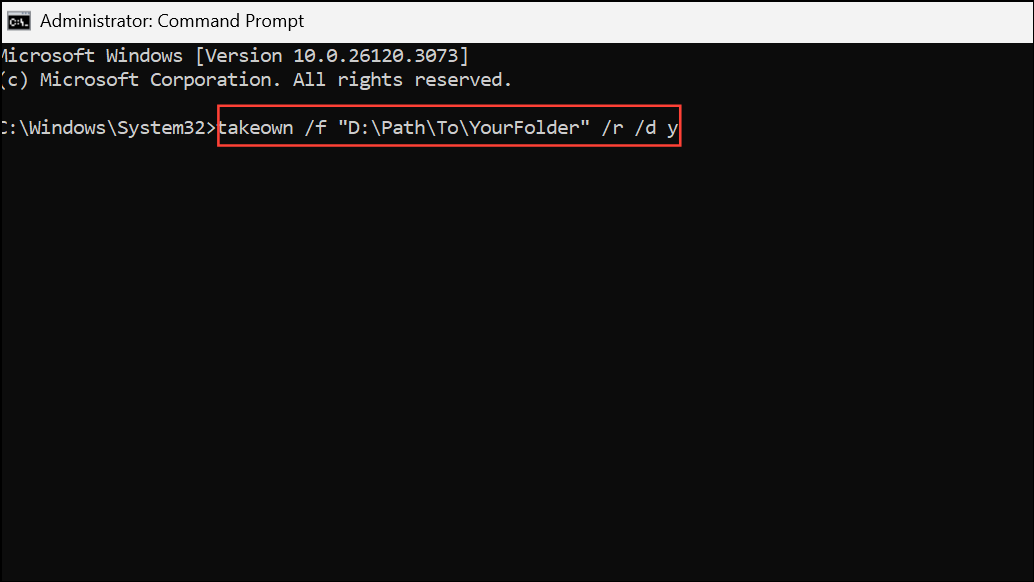
This command recursively assigns ownership of the specified folder and all sub-items to your account.
Step 3: Grant full permissions to the Administrators group using icacls:
icacls "D:\Path\To\YourFolder" /grant administrators:F /t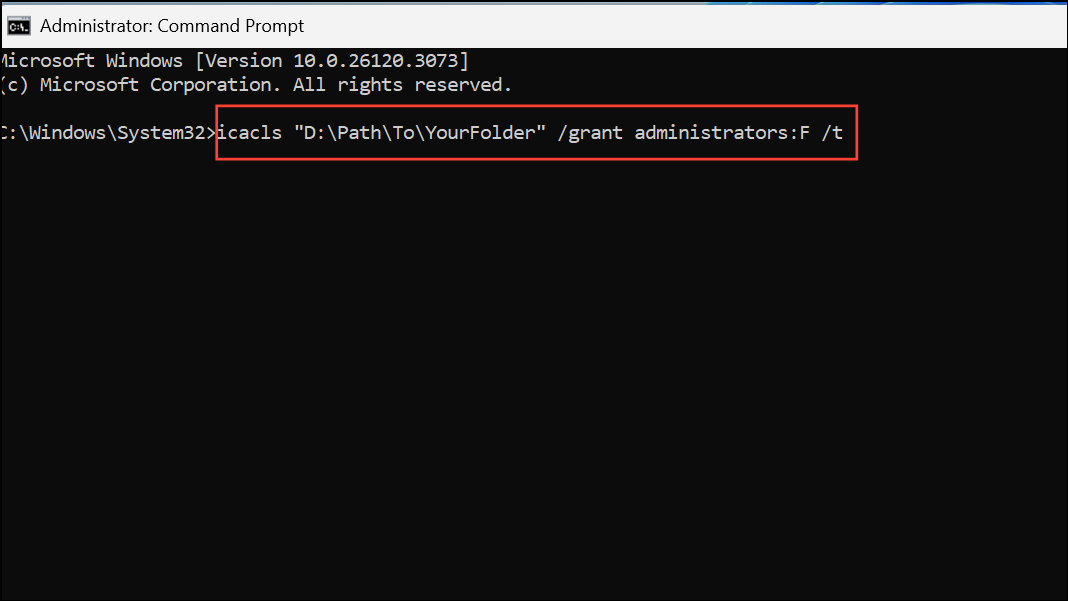
This step ensures you have full control permissions over the folder and its contents.
Adjusting Access for External Drives and User Folders
When connecting external drives from another system or accessing user folders from a different Windows installation, you may be prompted for permission or denied access. To streamline access in these cases, you can:
- Run File Explorer as an administrator by right-clicking its icon and selecting Run as administrator.
- Enable the hidden Administrator account by running
net user administrator /active:yesin Command Prompt and logging in as Administrator. - Right-click the drive, select Properties, go to the Security tab, and add your account or Administrators group with Full Control permissions.
- Adjust User Account Control (UAC) settings via Control Panel for fewer prompts, but be aware this reduces system security.
For persistent permission issues on external drives, you may need to take ownership of the entire drive, but avoid doing this on system drives as it can disrupt Windows functionality.
Cautions and Best Practices
Changing ownership grants you authority to modify permissions and access files, but it also bypasses some built-in security mechanisms. Avoid taking ownership of critical system folders (like C:\Windows or C:\Program Files) unless absolutely necessary, as this can cause system instability, break software, or corrupt features like the Recycle Bin. Always create a system restore point before making bulk ownership changes.
If you encounter files with unknown owners or permission entries from old user accounts (e.g., S-1-5-...), transfer ownership to your current account and remove the obsolete entries to regain access.
Transferring ownership in Windows 11 resolves stubborn access issues, lets you set new permissions, and simplifies file management—just be careful with system files and always back up important data before making major changes.