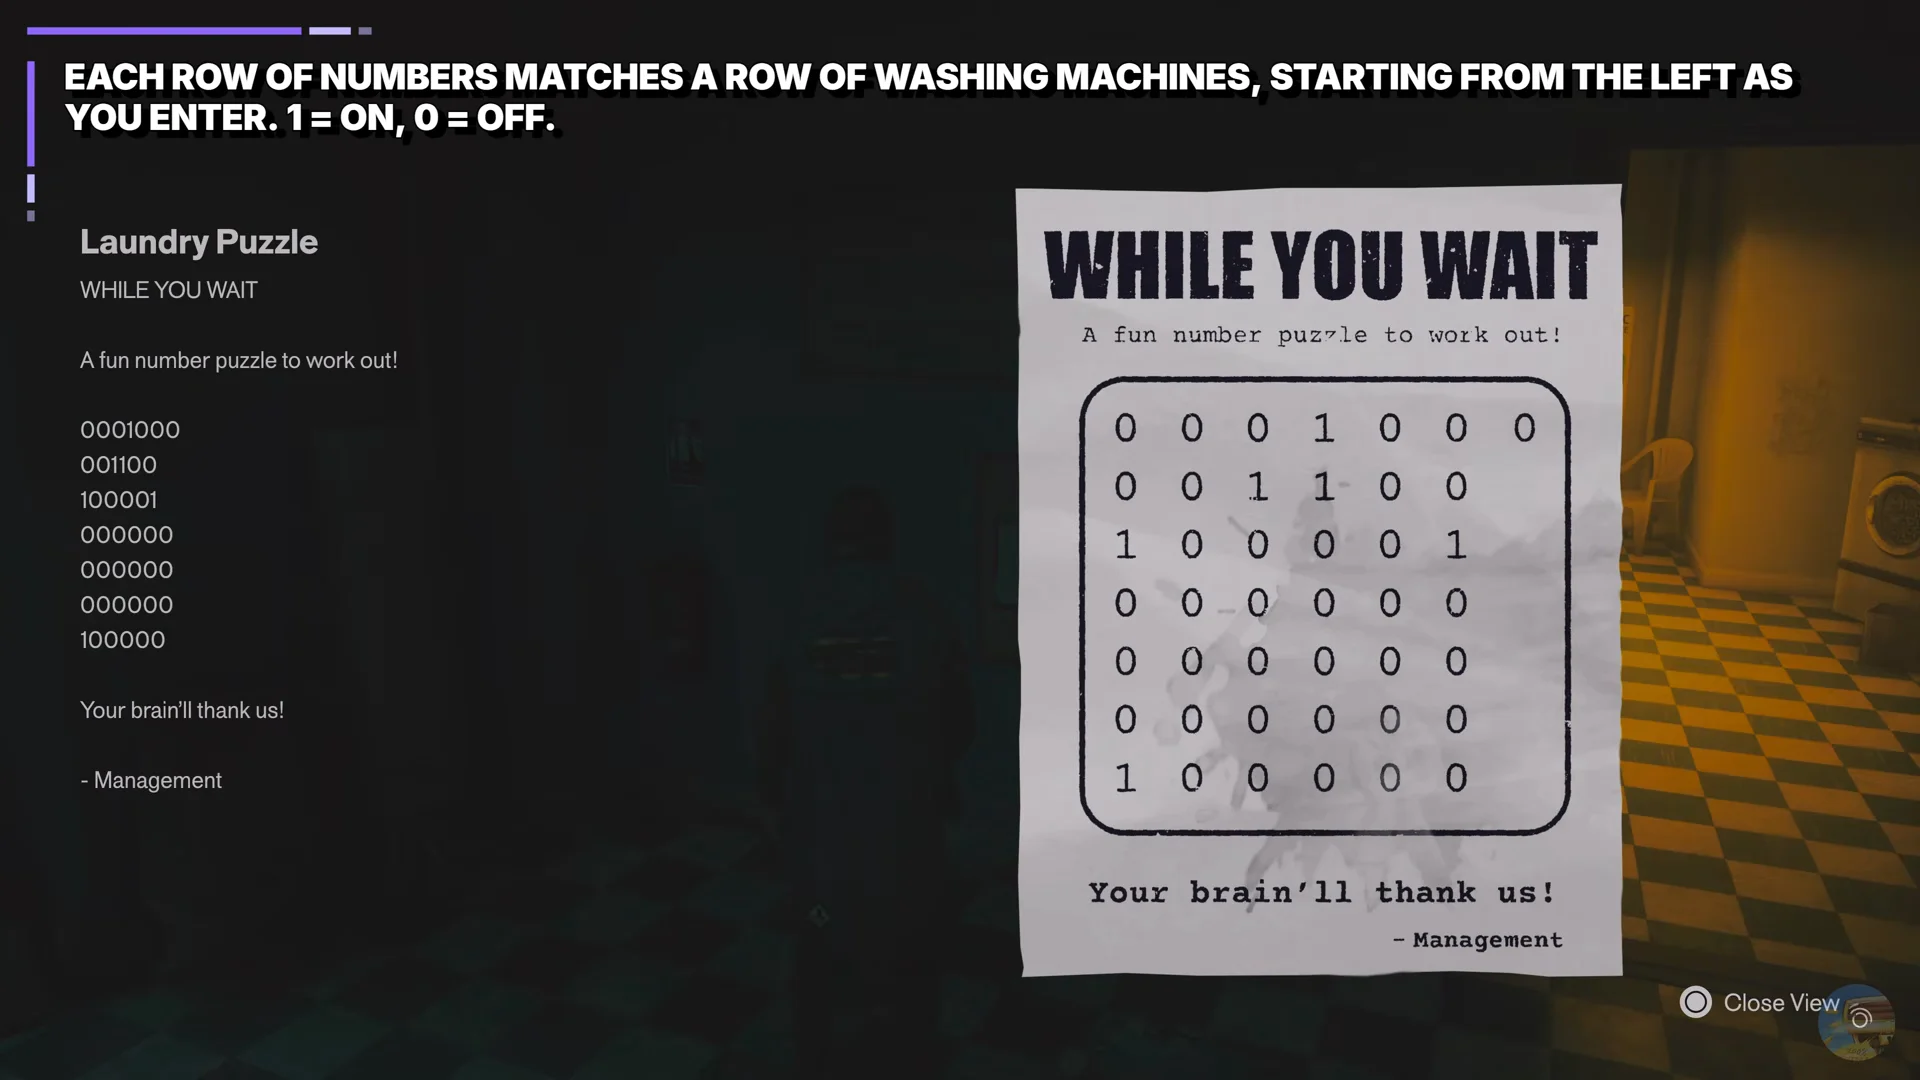
The Central district’s Wear ‘Em & Wash ‘Em laundromat contains one of Control Resonant’s six Secret Hideouts. A bank of washing machines conceals its entrance. On the notice board, a flyer gives the solution in binary, with each line corresponding to a floor row of machines. Set the indicated units running, and a door at the rear of the store slides open.
Quick answer: Work down the “While You Wait” flyer, reading each line from left to right. Set a machine running wherever the digit is 1; leave it off for 0. Rows 4, 5, and 6 stay entirely off. In all, six machines should be running.
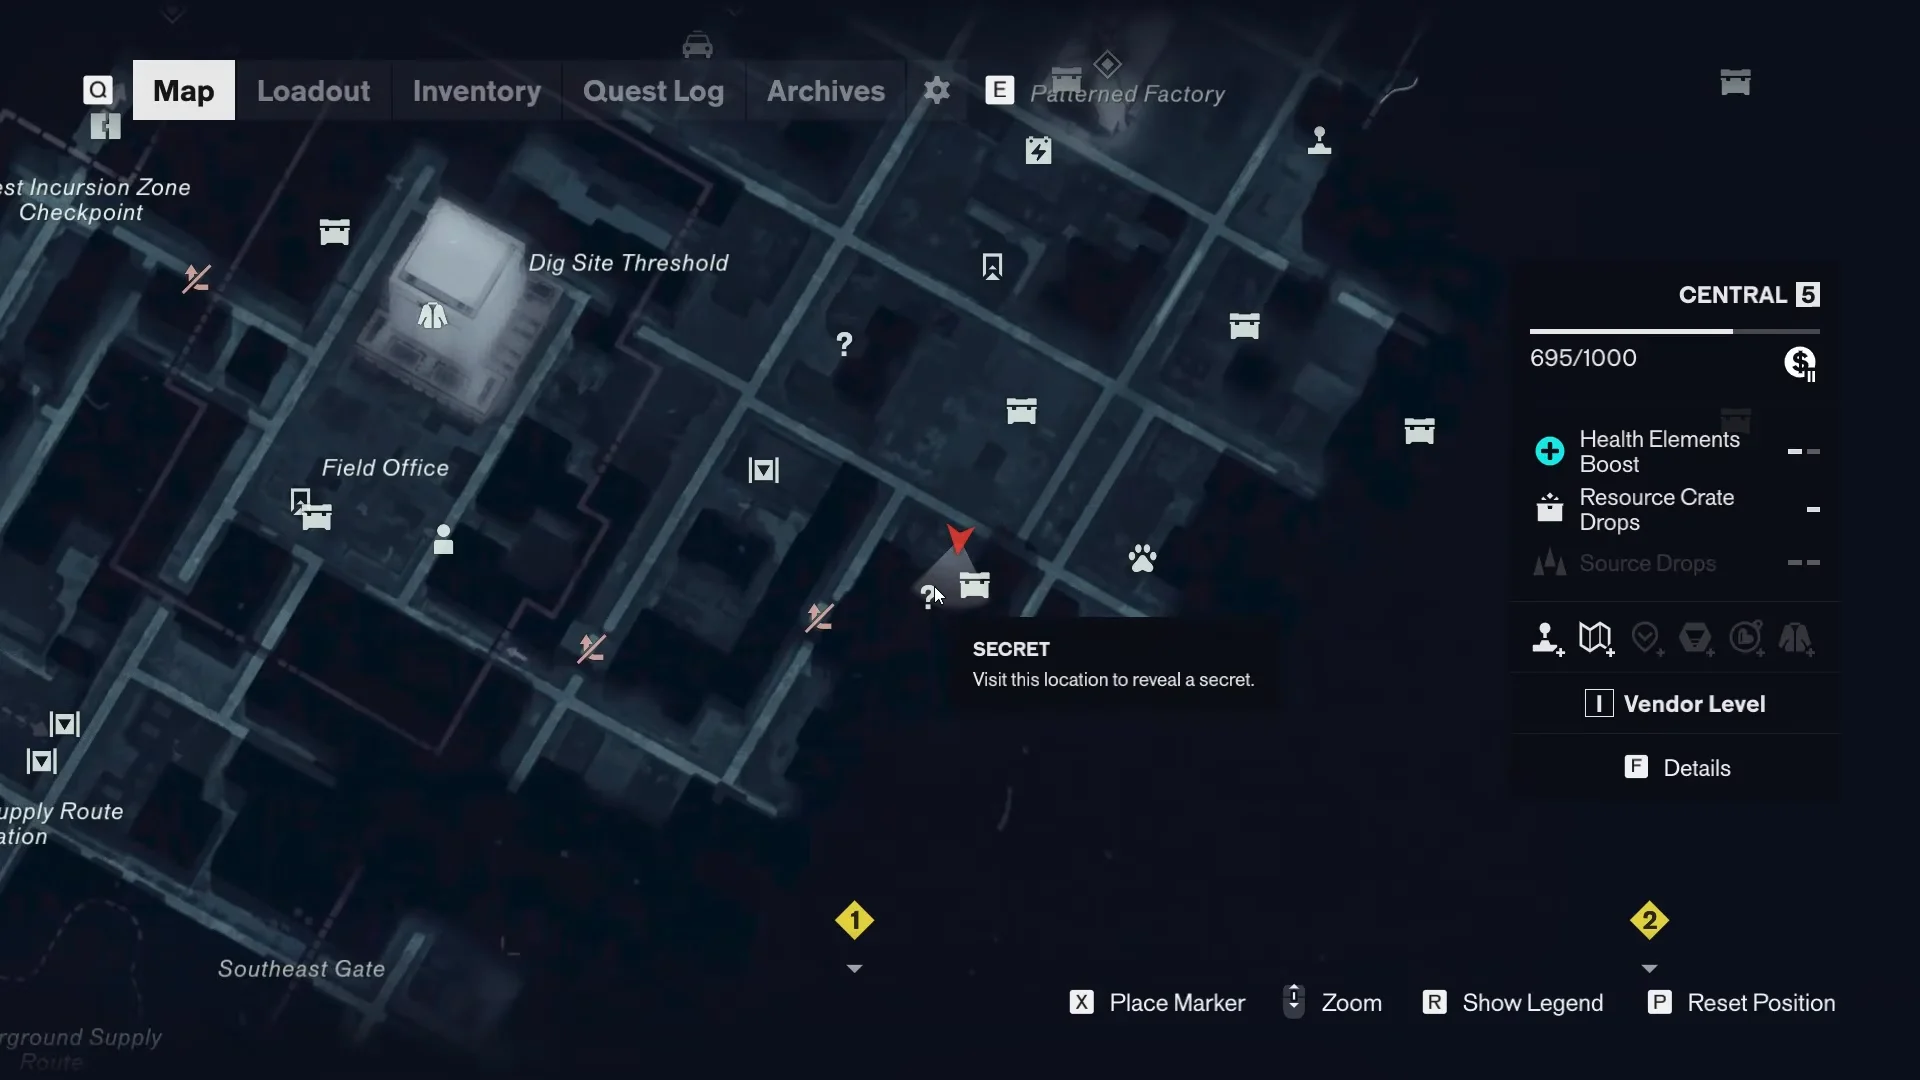
Where to find the Wear ‘Em & Wash ‘Em laundromat in Central
In Central, head north from the Field Office to find the laundromat. Look west of Last Park Station, at the intersection marked with a large resource crate icon. Its vivid blue WEAR ‘EM & WASH ‘EM sign makes it easy to recognize, and a keyhole symbol appears on an exterior wall.
The entrance is closed when you first arrive. Three crimson tendrils extend from the doorway, pulling debris around the square. Follow them to the three bulbous Hiss growths and destroy each one. Hiss enemies guard two growths, so expect a fight while clearing them. Destroying all three removes the barrier, allowing you to enter.
At Aberrant Strength 30–35, the Hiss groups near the growths are much easier to deal with.
How the binary flyer maps to the washing machines
A board beside the entrance displays two notes. The customer complaint says that no row of machines works perfectly, but it is irrelevant to the answer. Focus on the management flyer titled WHILE YOU WAIT; it contains seven lines made up of zeros and ones.
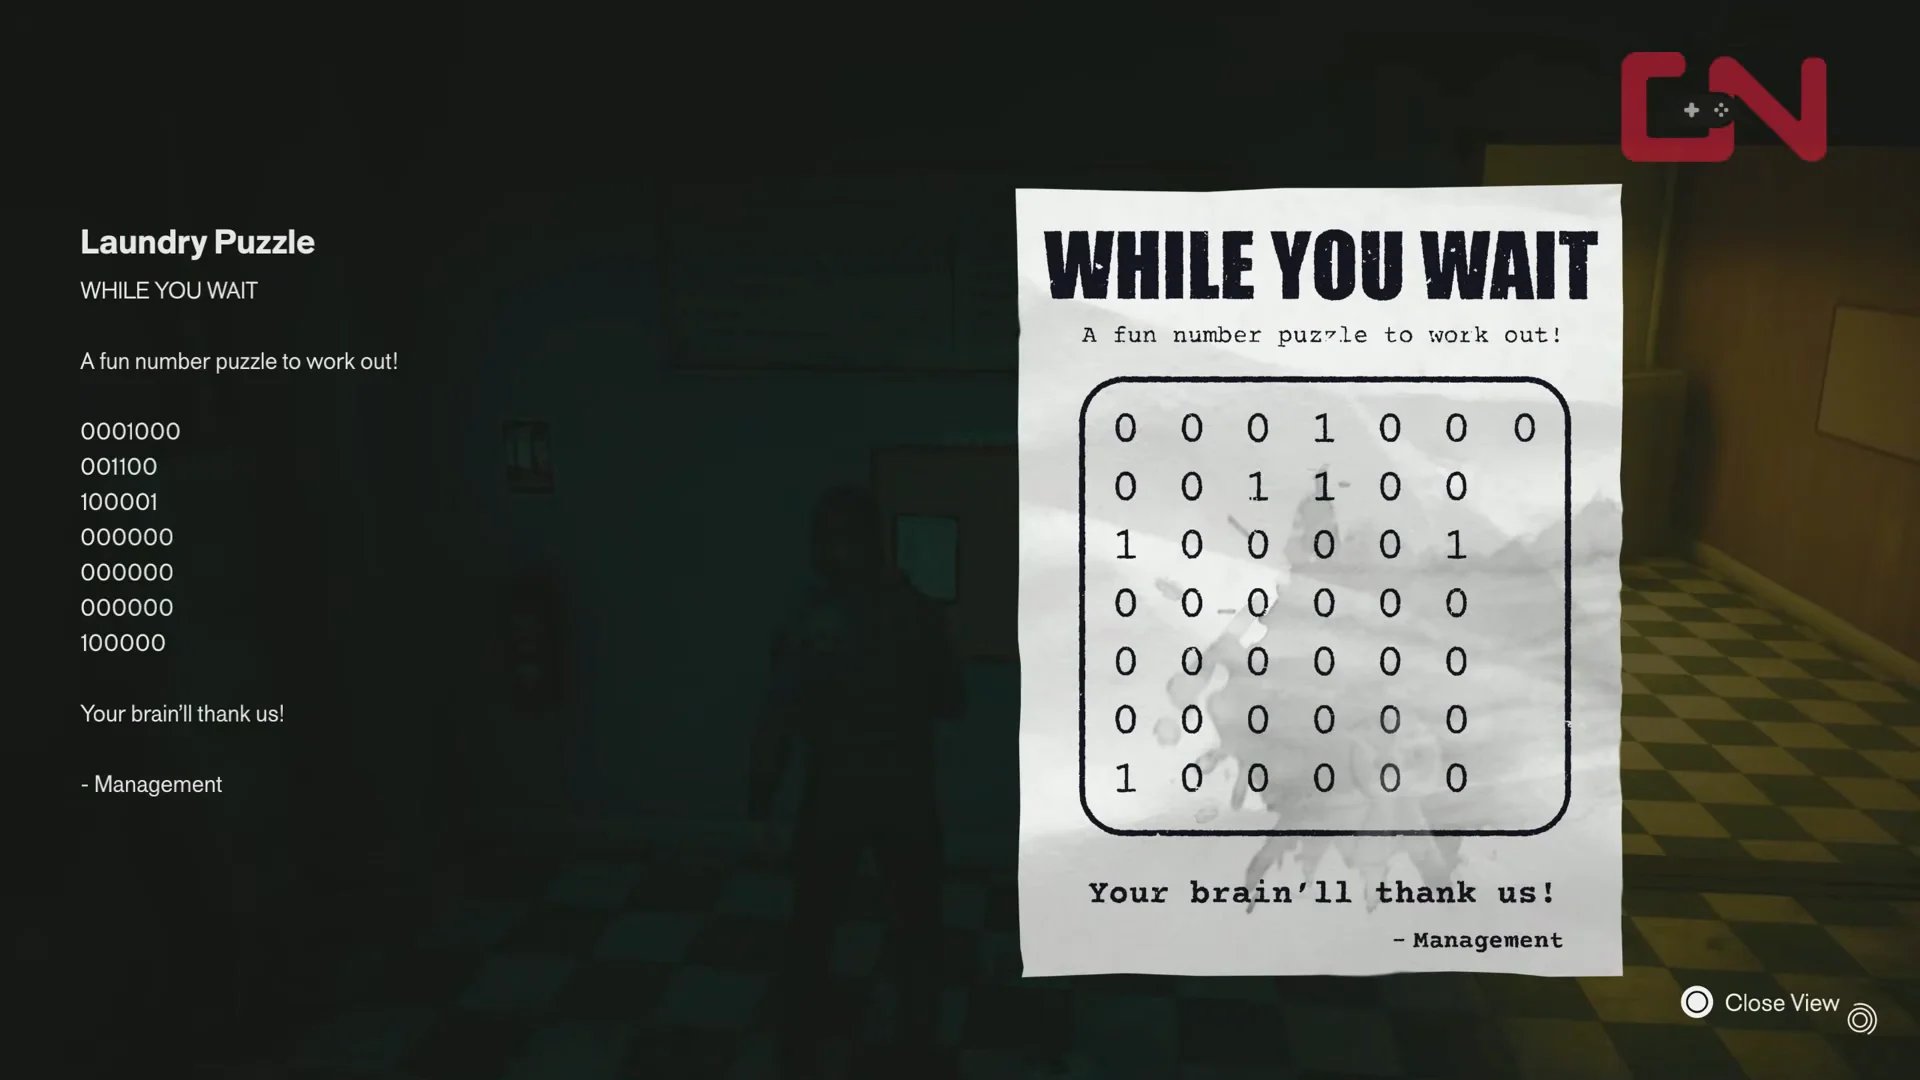
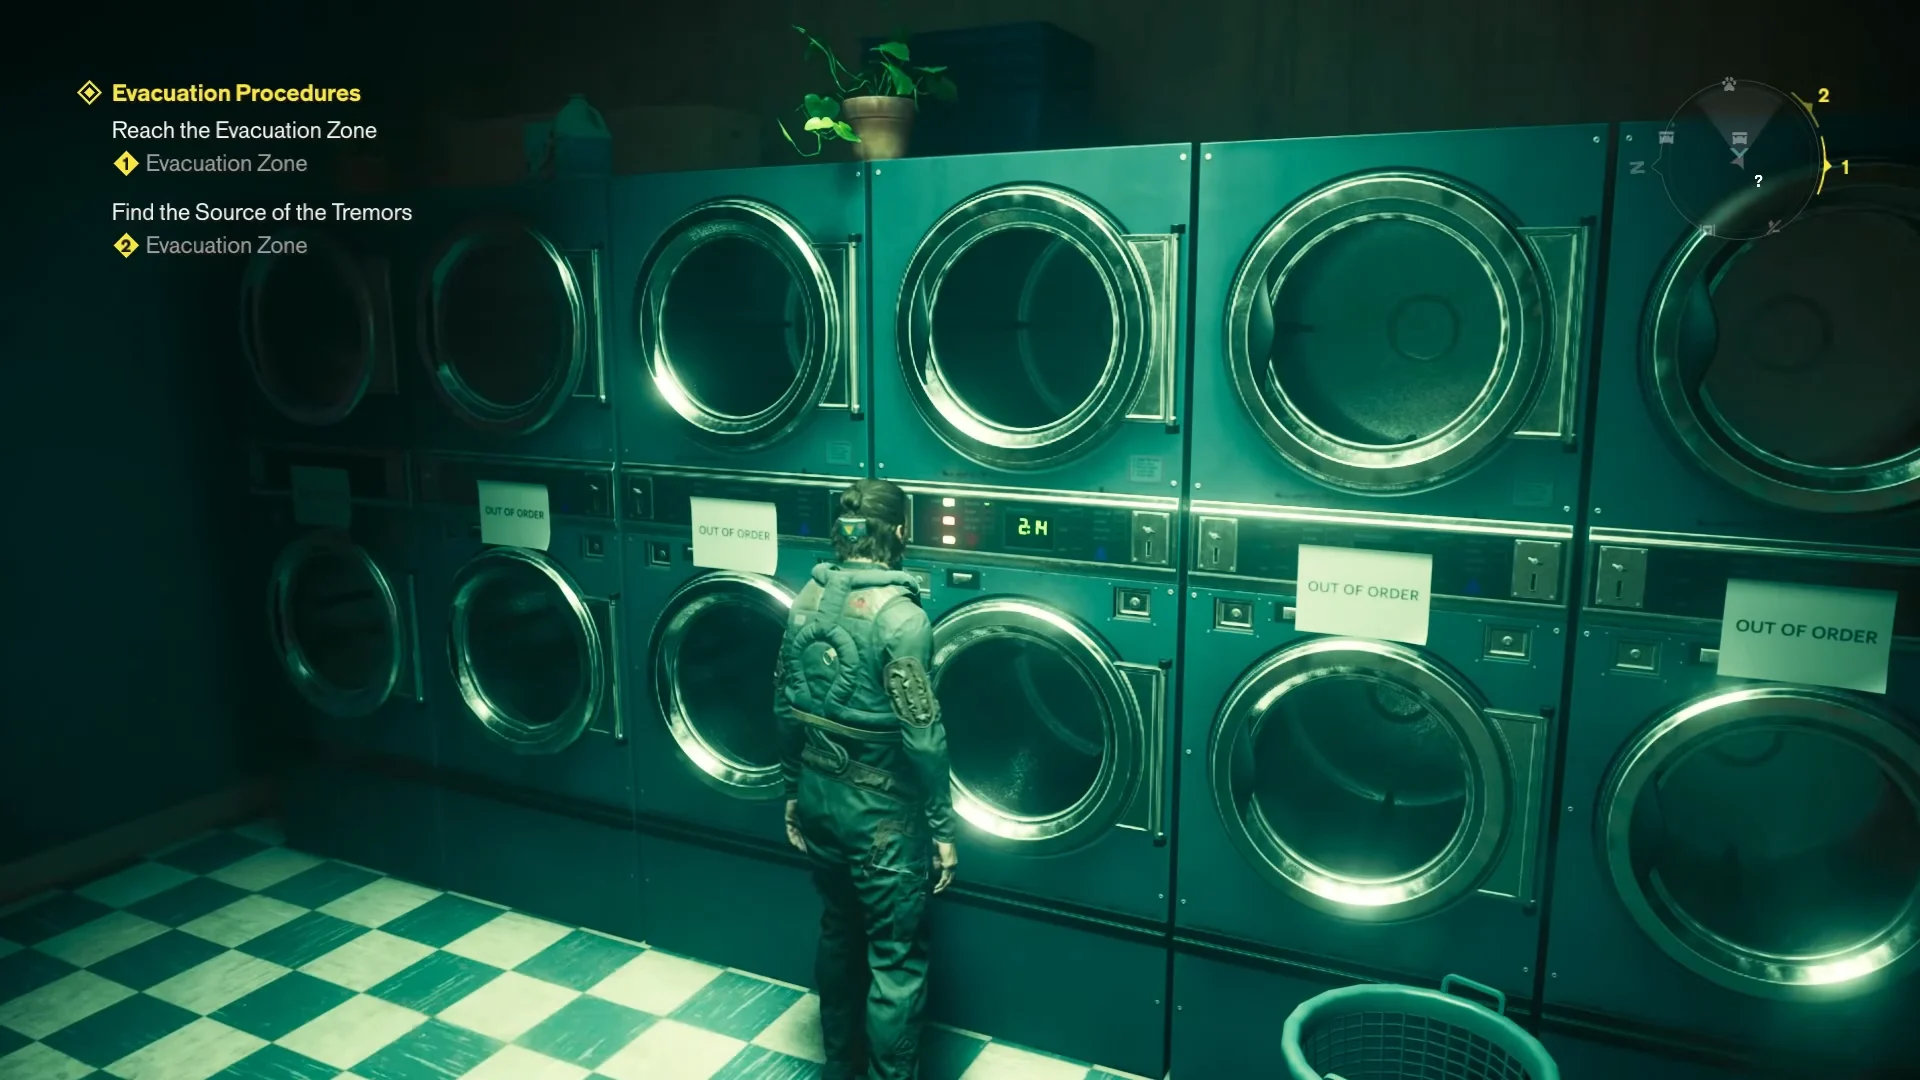
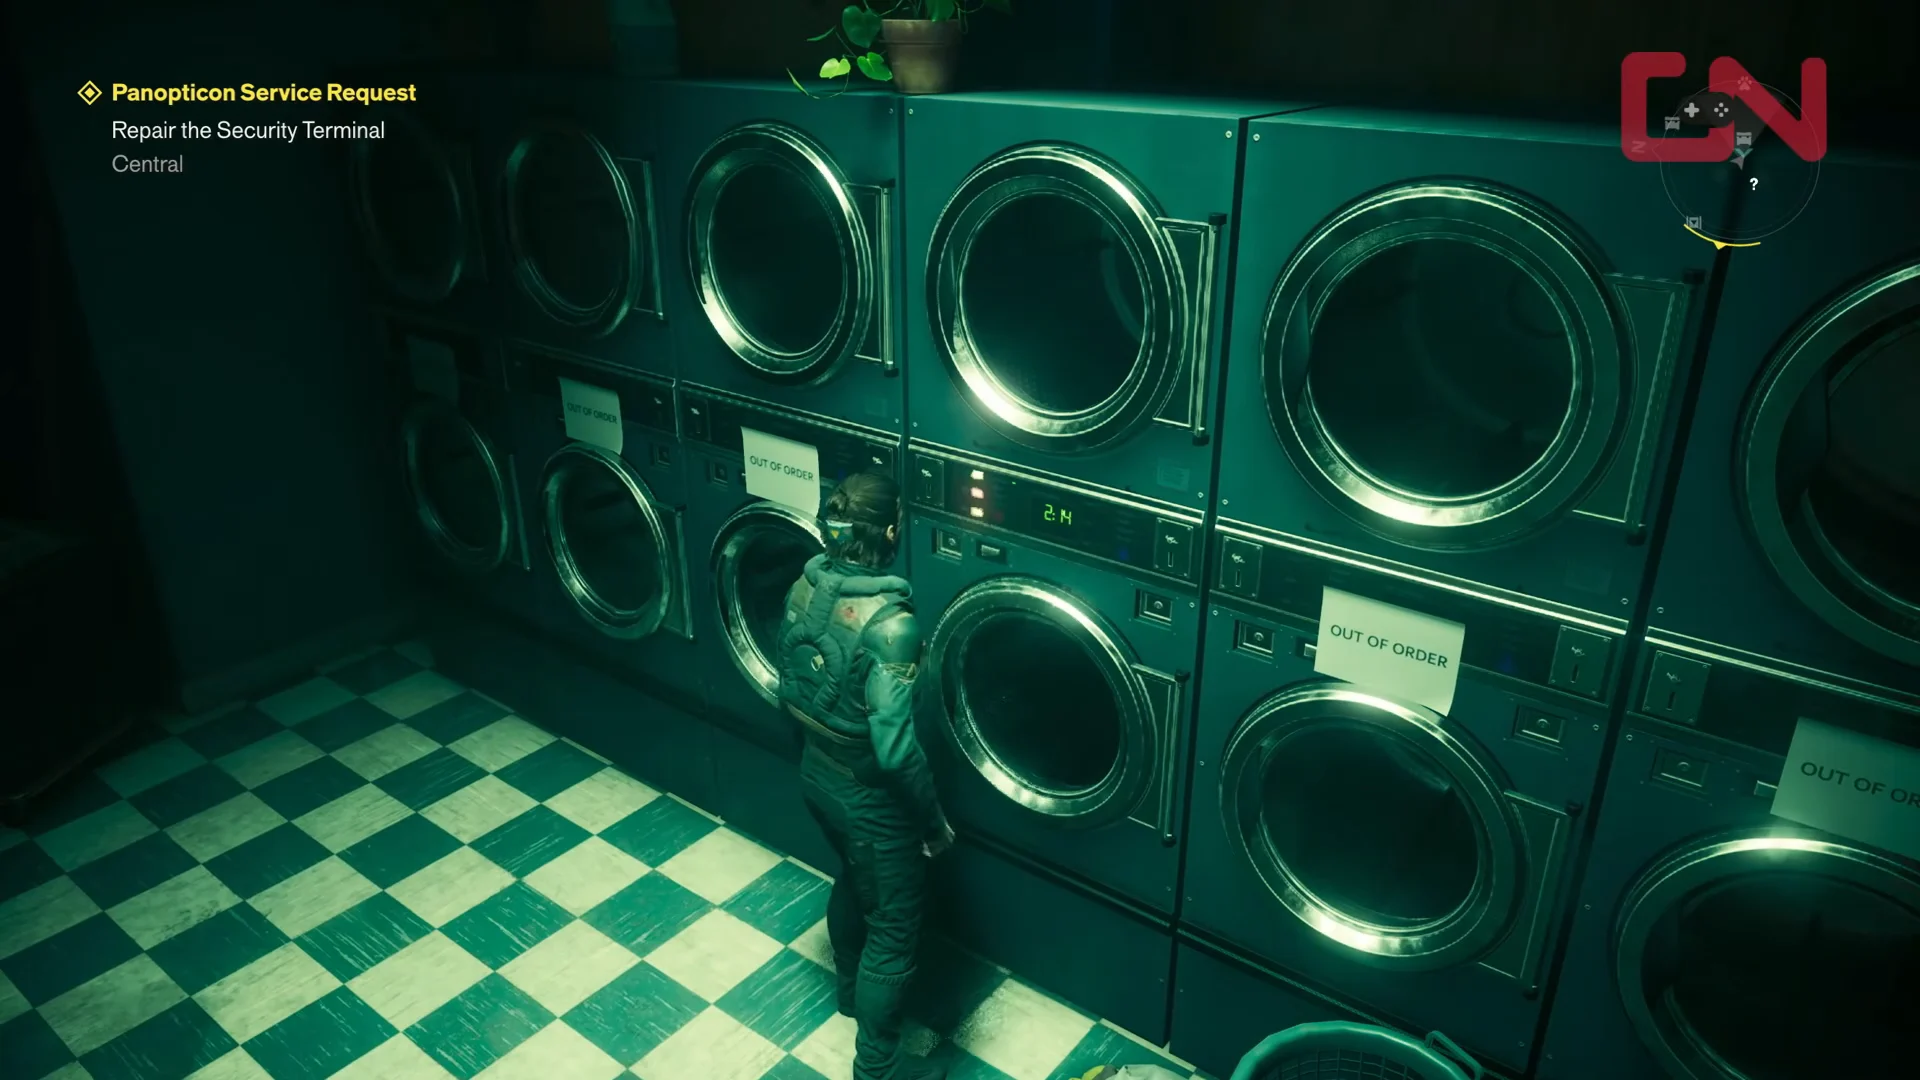
Read every line as a row of washing machines: switch on machines marked 1 and leave those marked 0 off. When facing the machines, the top line corresponds to the far-left row, while the bottom line matches the row nearest the store’s front-right corner. Most units are marked OUT OF ORDER and cannot be used; the code applies only to working machines that you can toggle.
| Row | Code | Turn on | Where it is |
|---|---|---|---|
| 1 | 0001000 | 4th (middle) | Long row on the left wall |
| 2 | 001100 | 3rd and 4th | Left island, face toward left wall |
| 3 | 100001 | 1st and 6th (both ends) | Left island, face toward center aisle |
| 4 | 000000 | None | Right island, both faces |
| 5 | 000000 | None | Right island, both faces |
| 6 | 000000 | None | Right wall, rear section by break room |
| 7 | 100000 | 1st only | Right wall, front section by entrance |
Set the washing machines in order
Count from each row’s leftmost position and set the machines from left to right. Turn off anything already running first, because the door only reacts when all seven rows match the code at the same time.
Confirm the puzzle is solved and grab the reward
There is no prompt and no countdown. Activating the final required machine causes the wall at the back of the break room to open automatically, revealing a staircase leading down. No master switch or lever is needed. If the wall stays closed, either the wrong machine is on or a working machine in rows one through three remains off.
The stairs descend to a basement corridor and a storage room filled with beds. Inside, a chest contains a Health Upgrade Point, the puzzle’s main reward. Collect three during the game to permanently increase Dylan’s maximum health. Two files lie on the corridor’s left side: Visitation And Stay Protocol and Do Not Leave The Shelter. They explain the shelter’s rules.
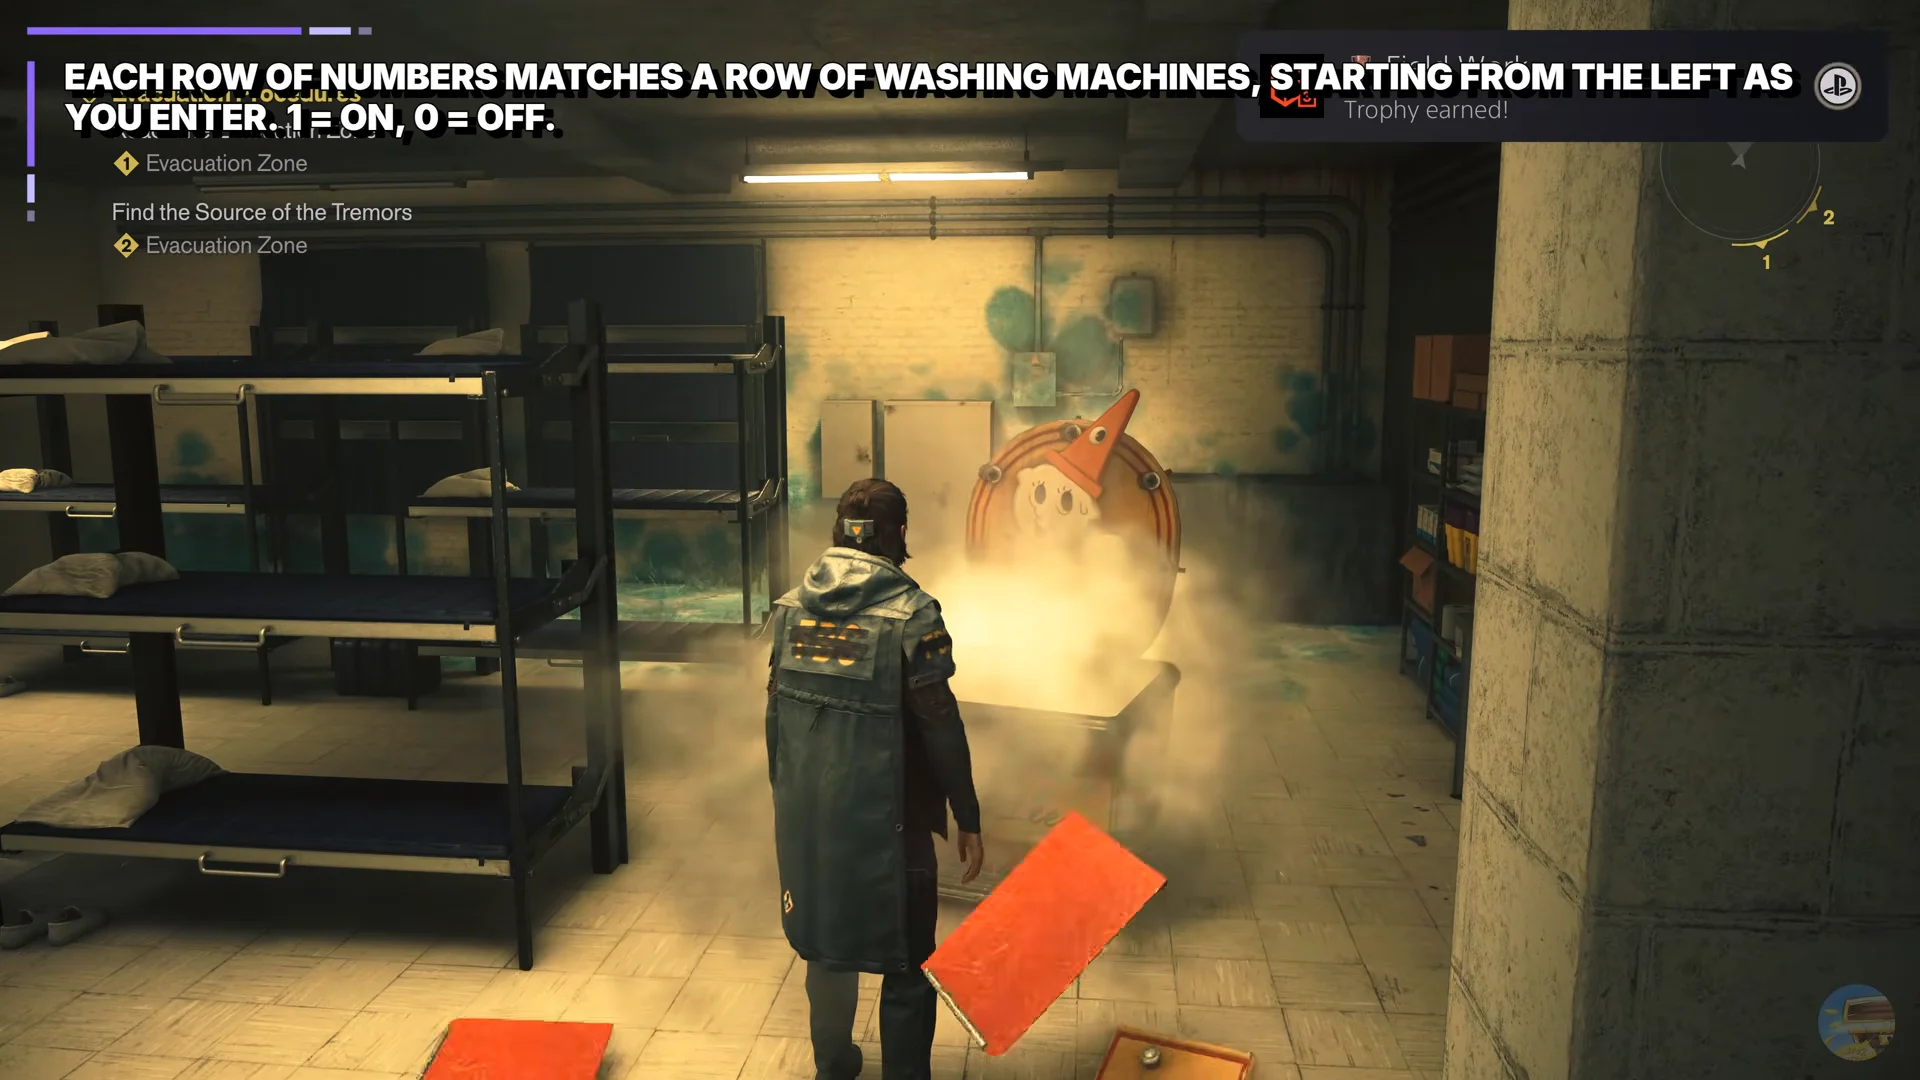
The lower area has no other contents, so take the upgrade and both documents before heading back upstairs. This bunker is one of six Secret Hideouts spread across the game’s zones; clear them all to earn the Backroom Espionage trophy.
If the back wall stays closed
Work through these checks before retrying the whole floor:
- Rows 4, 5, and 6 must be completely silent. A single running unit on the right island or rear wall blocks the door.
- Include OUT OF ORDER machines when counting positions. They cannot be switched on, but each still takes up a digit in its row, so count its position.
- Rely on each machine’s own green or amber console light to judge its state, not the ambient room lighting.
Once every row matches the flyer, the passage opens automatically, and the shelter and its Health Upgrade Point are yours.