
MBR2GPT.exe converts a system disk from the Master Boot Record (MBR) layout to the GUID Partition Table (GPT) layout without modifying or deleting the data already on it. The tool lives in the Windows\System32 directory on any supported version of Windows 11 and Windows 10, and it is the supported way to prepare a drive for UEFI boot and Secure Boot, which Windows 11 requires.
Quick answer: Boot into the Advanced Startup command prompt, run mbr2gpt /validate, then mbr2gpt /convert. After it reports success, restart and switch the firmware from Legacy BIOS to UEFI mode.
Requirements before running MBR2GPT
The tool validates the disk layout before it changes anything, and the conversion stops with an error if any check fails. Confirm these conditions first so the run completes.
- The disk currently uses MBR and is the system disk. MBR2GPT cannot convert non-system data disks.
- There are no more than three primary partitions, and none of them are extended or logical partitions.
- One partition is marked active and is the system partition.
- There is free space for the GPT metadata: 16 KB plus 2 sectors at the start of the disk and 16 KB plus 1 sector at the end.
- The BCD store on the system partition has a default OS entry pointing to the OS partition.
- Your device supports UEFI, since the disk can only boot in UEFI mode after conversion.
If BitLocker is enabled, suspend protection before you start. After conversion, delete the existing protectors and recreate them to resume BitLocker. Back up important files first, even though the process is non-destructive.
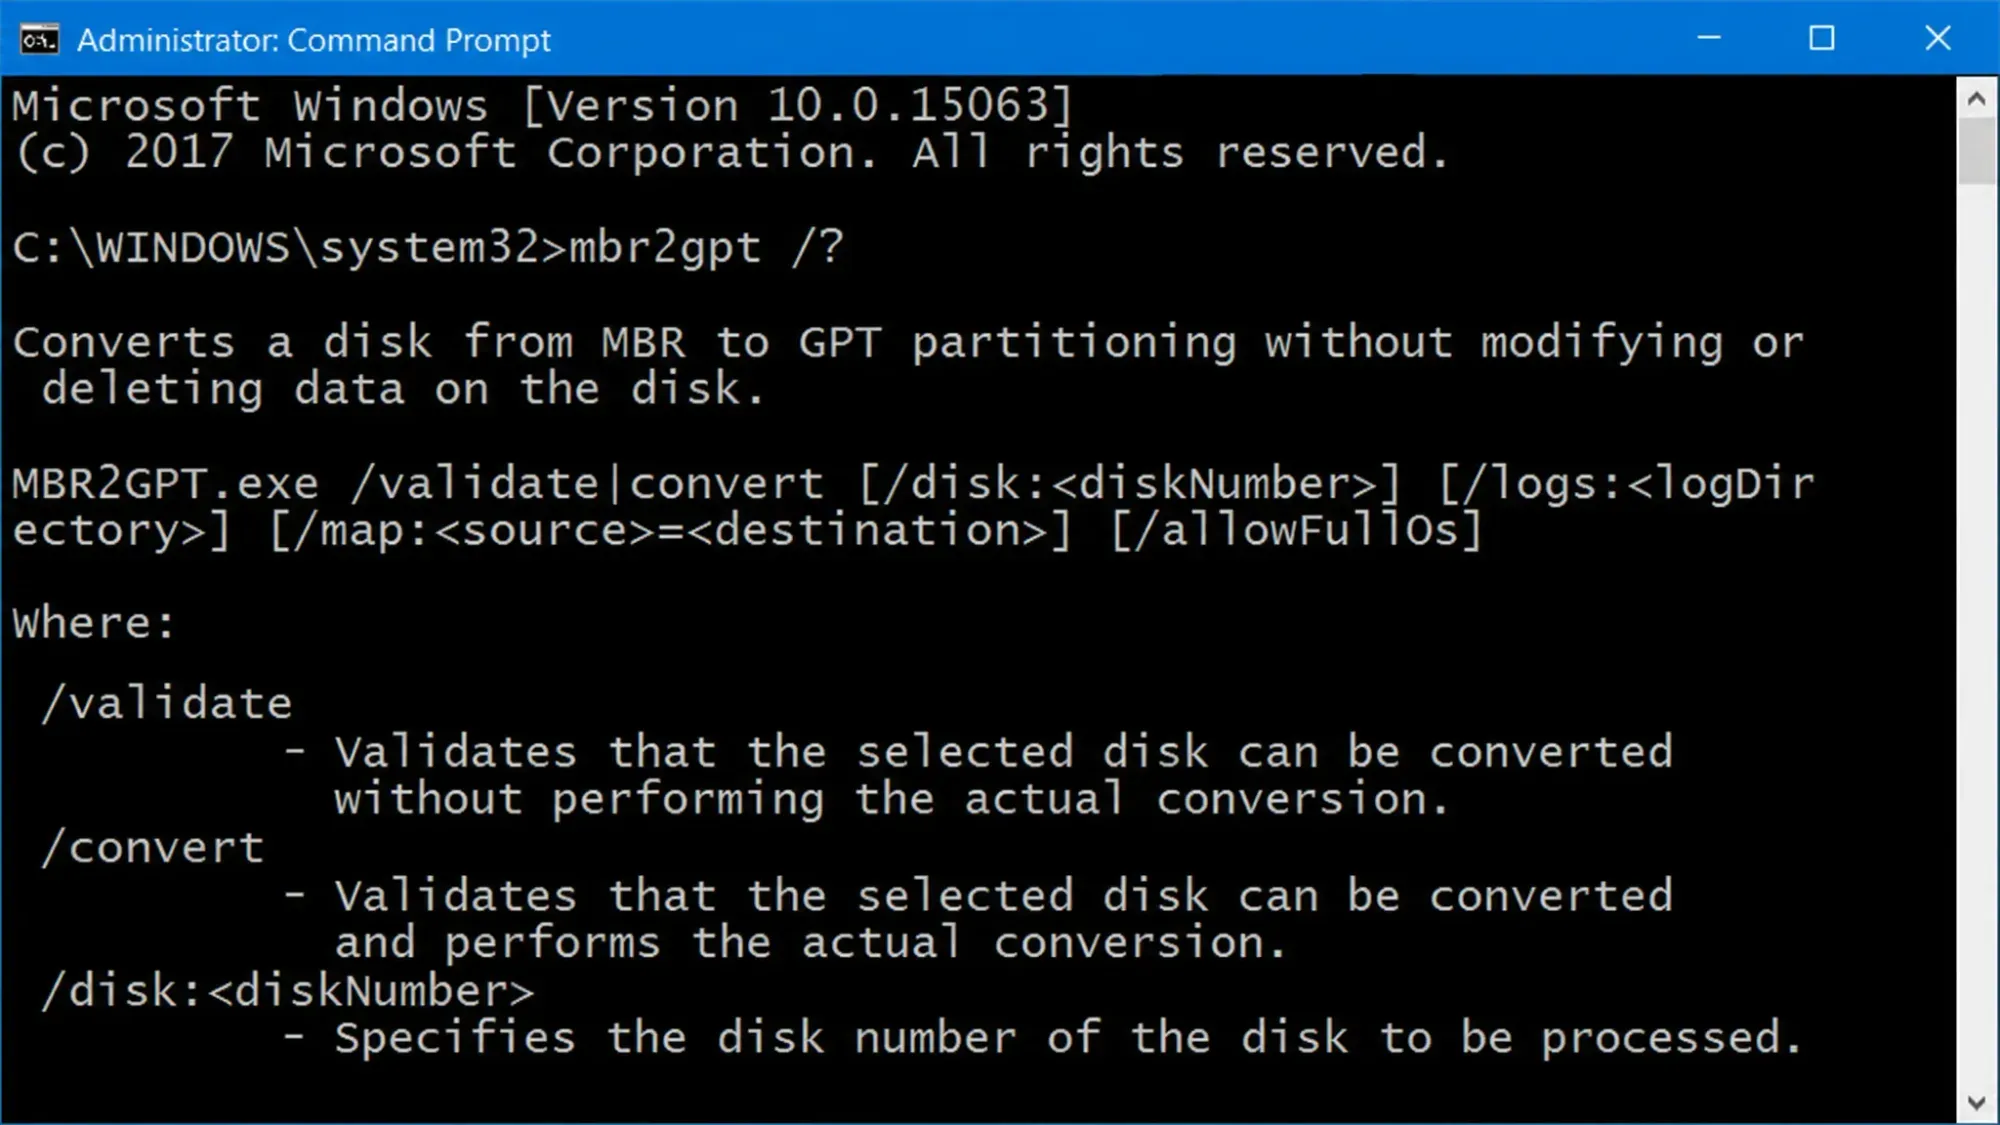
MBR2GPT syntax and options
The command takes a single primary action, either /validate or /convert, followed by optional switches.
MBR2GPT /validate|convert [/disk:<diskNumber>] [/logs:<logDirectory>] [/map:<source>=<destination>] [/allowFullOS]| Option | What it does |
|---|---|
/validate | Runs only the validation checks and reports whether the disk can be converted. |
/convert | Validates the disk, then performs the conversion if all checks pass. |
/disk:<diskNumber> | Picks the disk to convert. If omitted, the system disk is used. |
/logs:<logDirectory> | Writes logs to a folder you specify. Defaults to %windir%. The folder must already exist. |
/map:<source>=<destination> | Adds custom MBR-to-GPT partition type mappings. The MBR number is decimal. |
/allowFullOS | Overrides the block that limits the tool to Windows PE, so it can run inside full Windows. |
You can read the full reference on the official MBR2GPT documentation from Microsoft.
Convert MBR to GPT from the Advanced Startup command prompt
Running from Windows PE is the default supported environment and avoids the limitation where the in-use system partition cannot be reused.
mbr2gpt /validatembr2gpt /convertConvert from full Windows with /allowFullOS
If you prefer to run the tool from the desktop instead of Windows PE, add /allowFullOS to override the block. Because the current MBR system partition is in use, it cannot be reused, so a new EFI system partition is created by shrinking the OS partition.
diskmgmt.msc, and note the number of the target disk (for example, Disk 0).mbr2gpt /validate /disk:0 /allowFullOSmbr2gpt /convert /disk:0 /allowFullOSReplace 0 with your system disk number if it differs.
Verify the conversion worked
A successful run prints a sequence ending with “Conversion completed successfully” and a reminder to switch the firmware to UEFI. To confirm the new layout, open DiskPart and run list disk; the converted disk shows an asterisk in the Gpt column.
You can also open Disk Management, right-click the disk, choose Properties, and look at the Volumes tab. The Partition style field reads “GUID Partition Table (GPT)” once the change is complete. A new FAT32 EFI system partition of about 100 MB (260 MB on 4K sector disks) appears alongside your existing partitions.
Switch the firmware to UEFI mode
After conversion the disk only boots in GPT mode, so the computer will not start until the firmware is set correctly. Enter the BIOS or firmware settings at startup and change the boot type from Legacy to UEFI. If you are preparing for Windows 11, enable Secure Boot at the same time. The exact menu names vary by motherboard.
Why MBR2GPT fails and how return codes map
The most common failure is disk layout validation. This happens when the disk runs an unsupported older Windows version, when there are more than the allowed partitions, or when there is no free space to create the EFI system partition. Conversion also stops if a volume is encrypted and BitLocker is not suspended.
| Return code | Meaning |
|---|---|
| 0 | Conversion completed successfully. |
| 1 | Canceled by the user. |
| 2 | Failed due to an internal error. |
| 3 | Failed due to an initialization error. |
| 4 | Failed due to invalid command-line parameters. |
| 5 | Failed while reading the disk geometry and layout. |
| 6 | Failed because one or more volumes are encrypted. |
| 7 | Failed because the disk layout does not meet requirements. |
| 8 | Failed while creating the EFI system partition. |
| 9 | Failed while installing boot files. |
| 10 | Failed while applying the GPT layout. |
| 100 | GPT layout succeeded, but some boot configuration entries could not be restored. |
When validation reports too many partitions, delete or move one volume so the disk holds no more than three primary partitions, and back up that data first. If there is no room for the EFI system partition, shrink the OS volume to free unallocated space, then run the tool again. Detailed logs are written to setupact.log and setuperr.log in %windir%, alongside diagerr.xml and diagwrn.xml, and they pinpoint exactly which check stopped the run.
Once the disk shows GPT in DiskPart and the firmware is set to UEFI with Secure Boot on, the machine is ready for an in-place Windows 11 upgrade with no need to wipe or reinstall.


