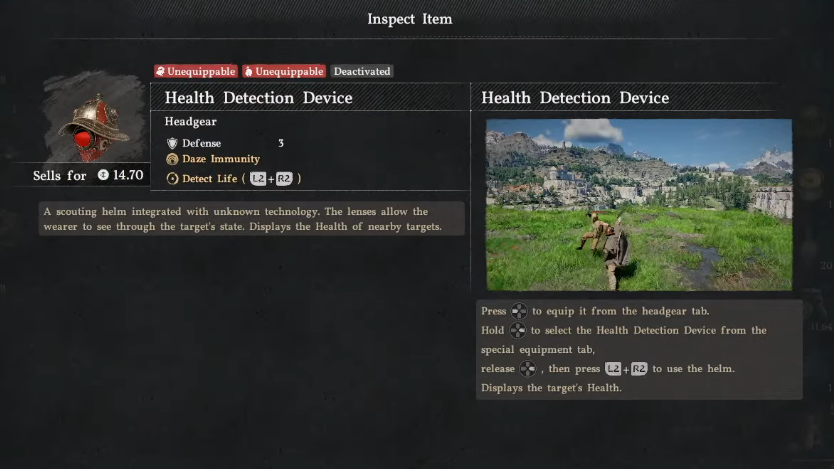
The Health Detection Device is a special helmet in Crimson Desert that displays floating health bars above non-boss enemies. It is missable, sits inside Marni’s Laboratorium in the Republic of Delesyia, and only becomes useful once you equip it and activate the right function on your wheel.
Quick answer: Travel to Marni’s Laboratorium on the eastern island of Delesyia, enter the main building, take the side corridor between the two large boiler mechanisms, and pick up the helmet from the table in the room at the end. Equip it, switch your functions wheel to “Detect Life,” and press the activation button to reveal enemy HP bars.
Where to find the Health Detection Helmet
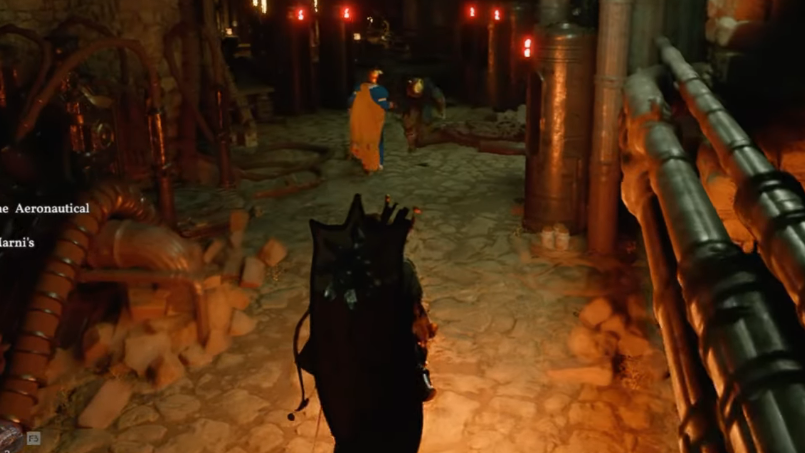
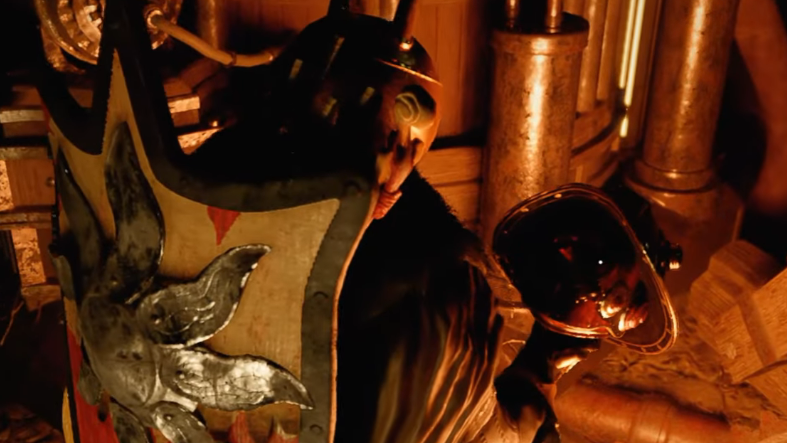
The helmet sits inside Marni’s Laboratorium, located on the eastern island of the Republic of Delesyia. You can reach the building either during Chapter 11 (the Brave New World questline, which forces you through this complex) or by traveling there freely after the area has been opened up. Hostile constructs patrol the grounds, so equipping the Visione and keeping a weapon ready is sensible if you arrive before clearing the site.
The pickup is tucked down a side corridor that is easy to walk past, which is why most players miss it on a first pass.
Stepwise route inside Marni’s Laboratorium
How to equip and activate it
The helmet does nothing until you both wear it and select its function. Two separate inputs are involved, which is the most common reason players think the item is broken.
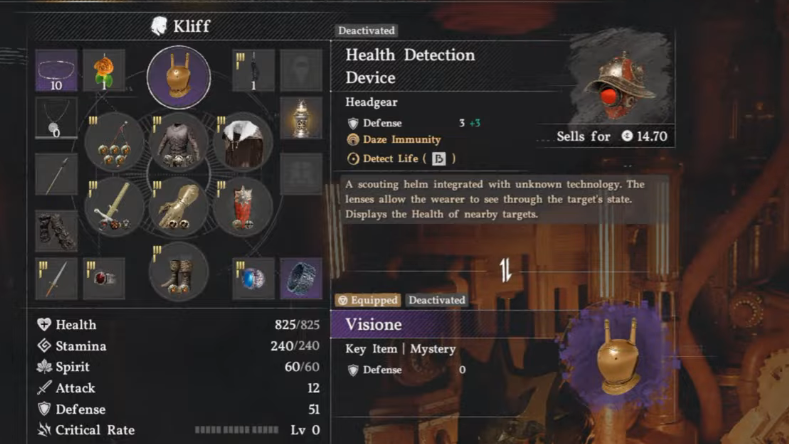

What the helmet does and does not do
| Property | Detail |
|---|---|
| Slot | Head (replaces other helmets while active) |
| Effect | Displays HP bars above non-boss enemies in range |
| Activation | Equip the helmet, set the functions wheel to Detect Life, then press the activation button |
| Works on bosses | No — major bosses do not show a readable bar from the device |
| Defense value | Negligible compared to combat helms; treat it as a utility item |
| Region | Republic of Delesyia, eastern island |
| Story tie-in | Picked up freely, or encountered naturally during Chapter 11: Brave New World |
Practical examples in combat
The device is most useful in three situations where guessing enemy HP wastes resources or gets you killed.
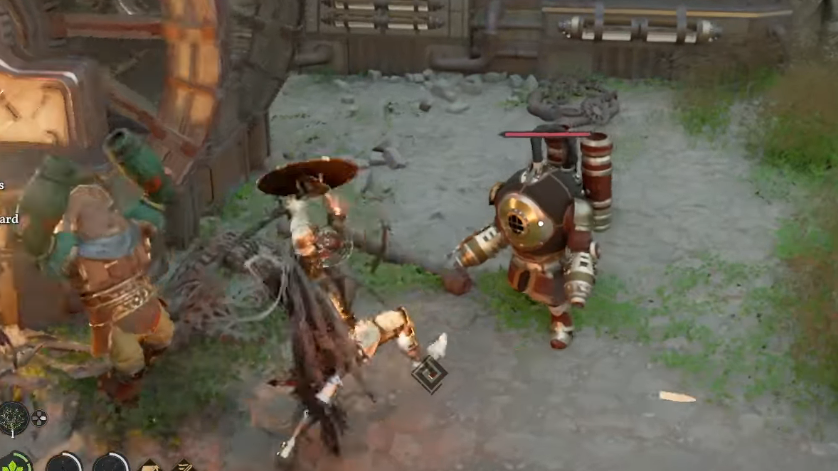
- Elite mobs in Delesyia: Armored constructs and heavier mechanical enemies have long HP pools. Seeing the bar drop lets you decide whether to commit to a finisher combo or back out to heal.
- Group fights: When you are surrounded by mixed enemies, the bars show which target is closest to death so you can clear adds quickly and shrink the group.
- Skill efficiency testing: Wearing the helmet on a training dummy or weaker enemy lets you measure exactly how much damage individual skills or combos deal, which is helpful when comparing weapon upgrades.
Common reasons the helmet seems broken
If the visor never drops or no bars appear, one of the following is almost always the cause:
- The helmet is in inventory but not equipped to the head slot.
- The functions wheel is still set to a different gadget, such as the lantern or Visione, so the activation button triggers that item instead of Detect Life.
- You are looking at a boss-tier enemy, which the device does not display.
- You have moved out of effective range; the bars only appear over enemies near you.
Cycle the functions wheel back to Detect Life, confirm the helmet icon is on your character, and press the activation button again. The visor animation is the visual confirmation that the device fired correctly.
Picking up the Health Detection Device is a small detour, but it pays off across the rest of Delesyia and the late-game chapters where enemy density climbs. Once it is in your kit, you can swap to it before any tough engagement, read the room, and stop burning potions on enemies that are already a hit away from going down.