
The single biggest damage jump in Diablo 4 Season 15 does not come from a rarer item or a new skill. It comes from how you split your damage bonuses across the game’s separate multiplier pools. Two characters with identical total percentages can end up hundreds of percent apart in real output, purely because one spread the bonuses evenly and the other dumped everything into one stat.
Quick answer: Spread your damage bonuses evenly across the separate multiplier pools instead of piling into one. Equal multipliers compound, so 10 x 10 x 10 produces 1000 while 10 x 5 x 15 only reaches 750.
Why balancing multipliers gives more damage
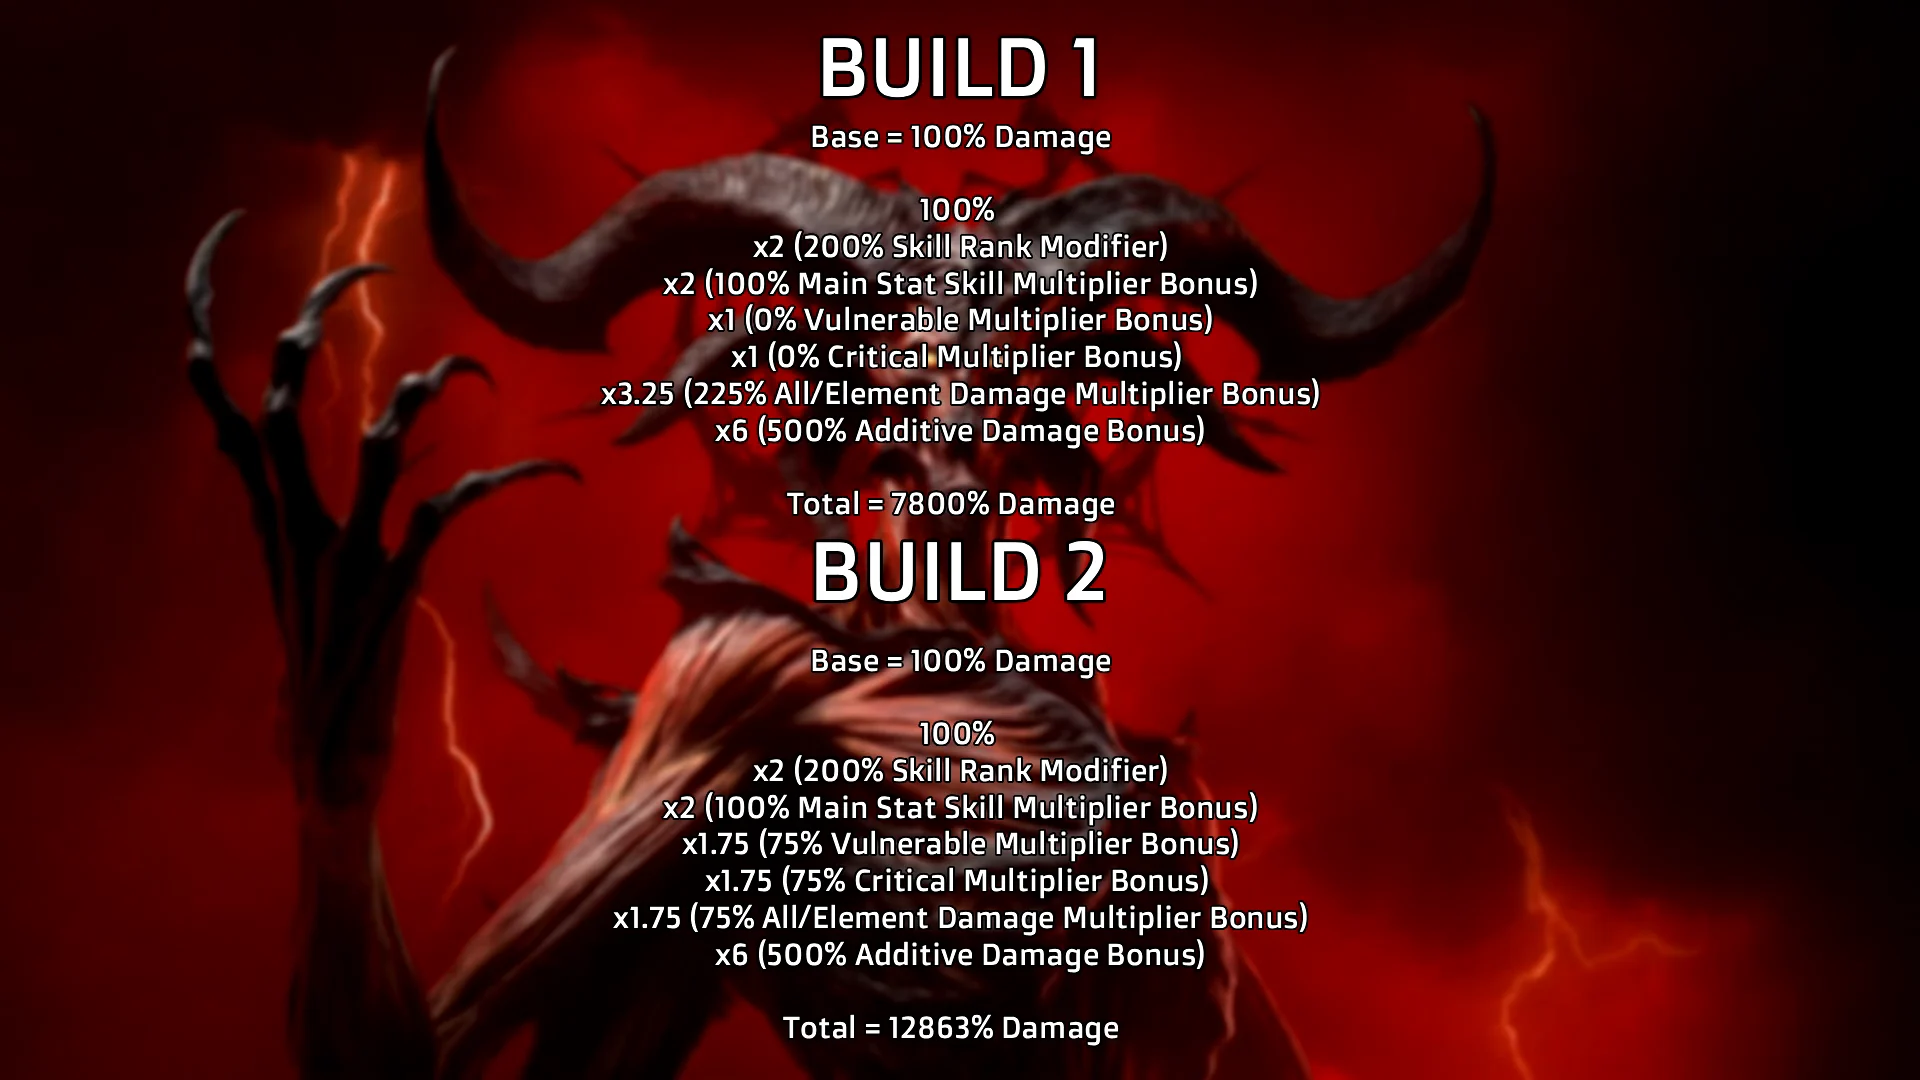
Damage in Diablo 4 is built from several pools that multiply against each other. Because they multiply, the total is largest when each pool is roughly the same size. Piling one pool sky-high while leaving another small wastes the multiplication. The clearest way to see it is with round numbers: 10 x 10 x 10 = 1000, but 10 x 5 x 15 = 750, even though both share the same raw values.
The same rule scales to real builds. An imbalanced setup that pushes one multiplier hard can land around 7800% total damage, while the same points redistributed evenly across the pools reach roughly 12863%. Nothing changed except the balance between categories.
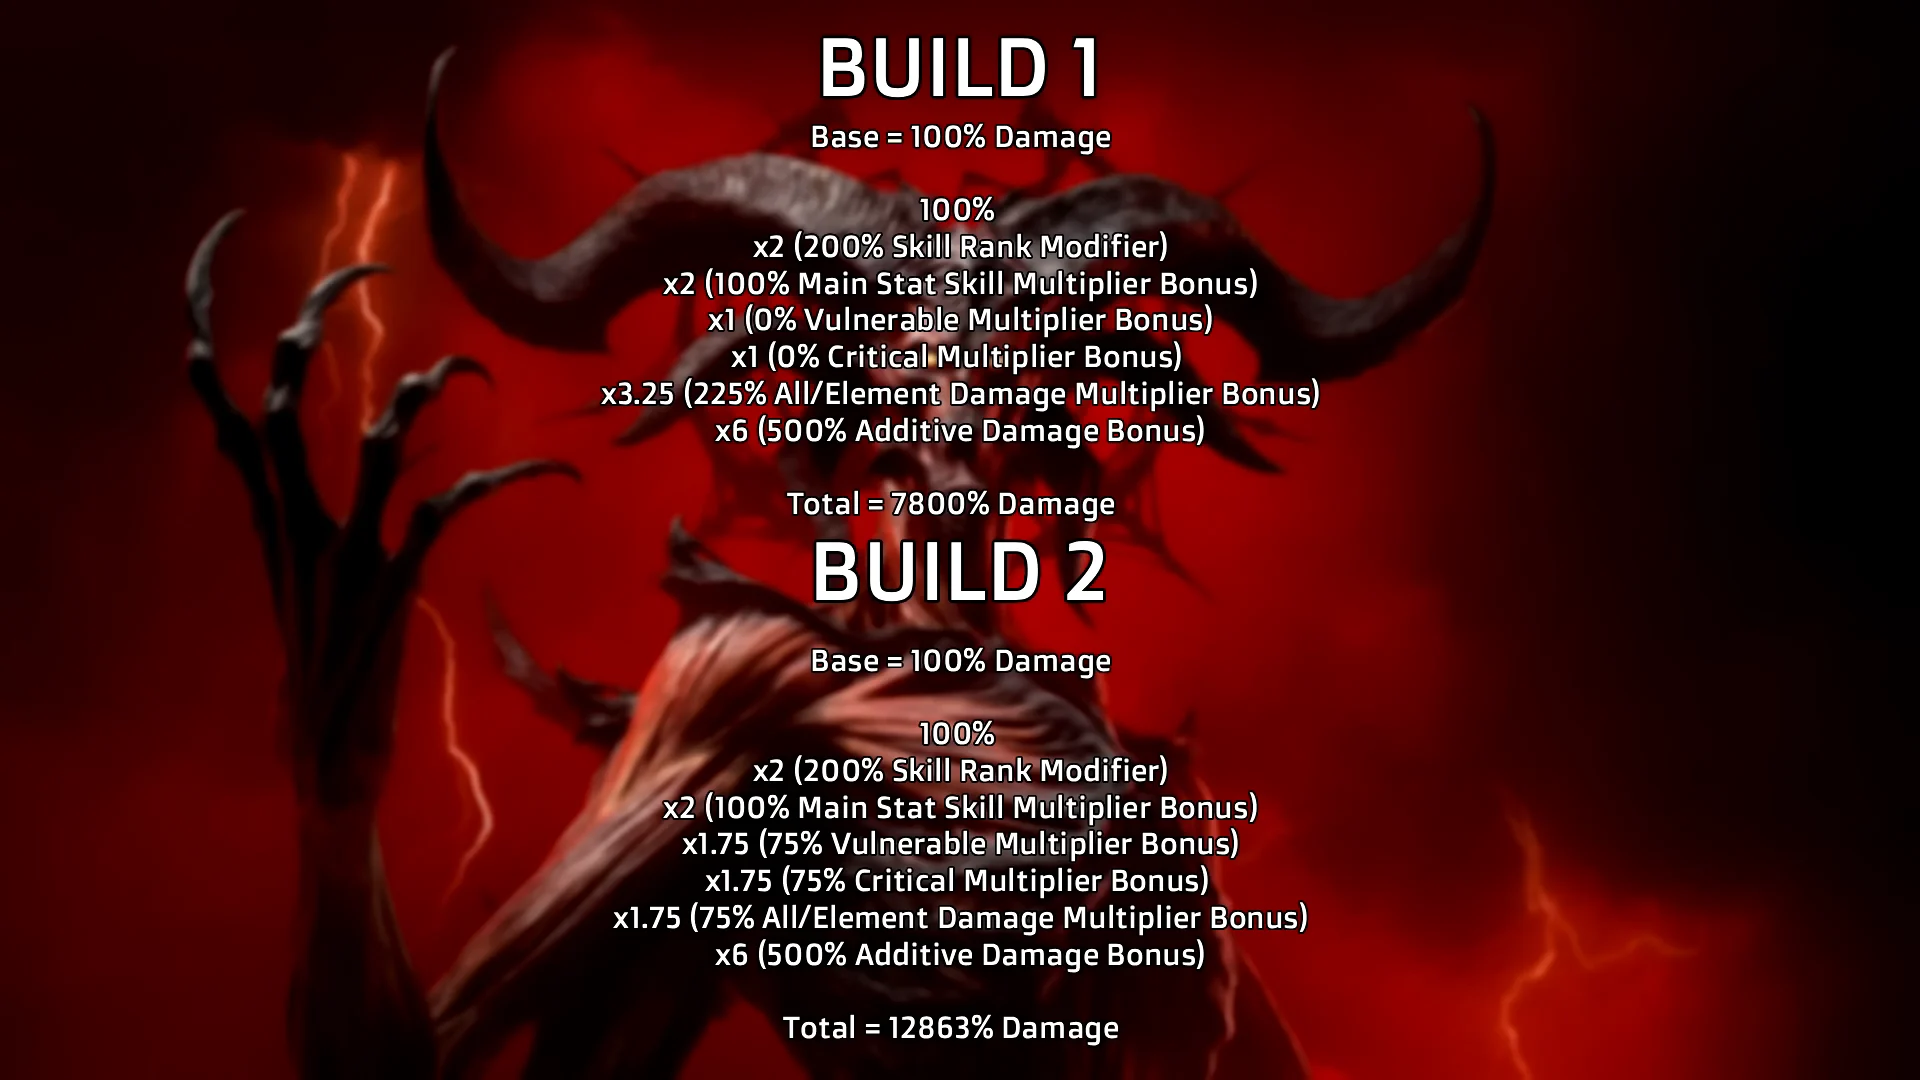
The payoff shows up on boss fights, where balanced multipliers turn drawn-out kills into fast melts even in high Torment.

The separate multiplier pools
Four categories multiply against one another. Weapon damage, main stat, and skill ranks each act as their own multiplier on top. Your goal is to keep each of these pools filled rather than maxing one.
| Multiplier pool | Key stat | Where it rolls |
|---|---|---|
| Vulnerable Damage | Vulnerable Damage % | Gloves, rings, amulet |
| Critical Strike Damage | Crit Damage % (not DoT) | Weapons, jewelry, gloves |
| Damage Over Time | DoT % (not crit) | Weapons, jewelry |
| Elemental / Physical | All Damage, element/physical % | Weapons, gem sockets |
| Additive (+) damage | Combined +% affixes | Tempers, Paragon |
Critical Strike Damage and Damage Over Time roll with the highest numbers on gear, but they are mutually exclusive. Damage-over-time hits cannot critically strike, so a DoT build gains nothing from crit damage and a crit build gains nothing from DoT. Pick one and ignore the other.
Where each multiplier rolls and what to Masterwork
Vulnerable Damage is the pool with the fewest sources. It only appears on gloves, rings, and the amulet, which makes it the top target for Masterworking critical upgrades. Because it is rare and multiplicative, every extra point of Vulnerable Damage is worth far more than the same point poured into an already-full pool.
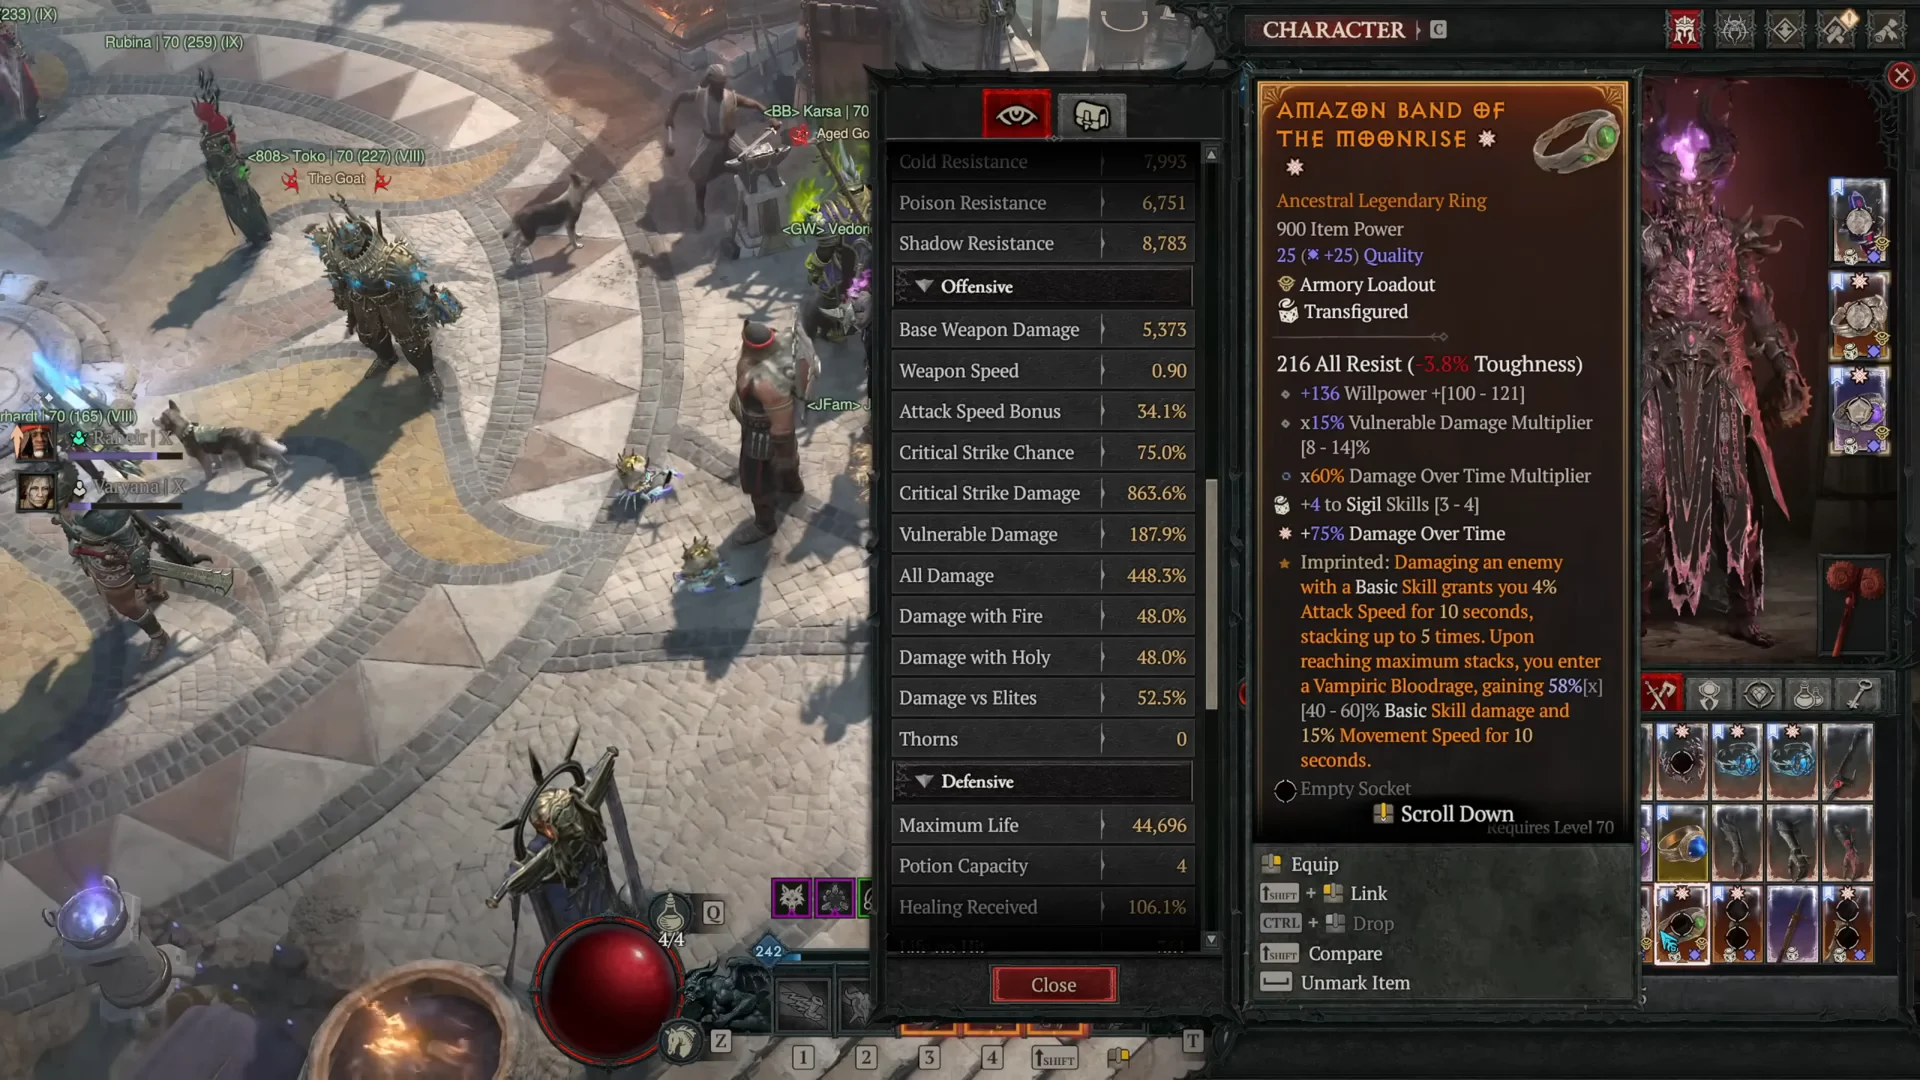
Critical Strike Damage and elemental multipliers also live on rings, so inspect each slot to see which multiplicative rolls it carries before you decide where to invest your critical hits.
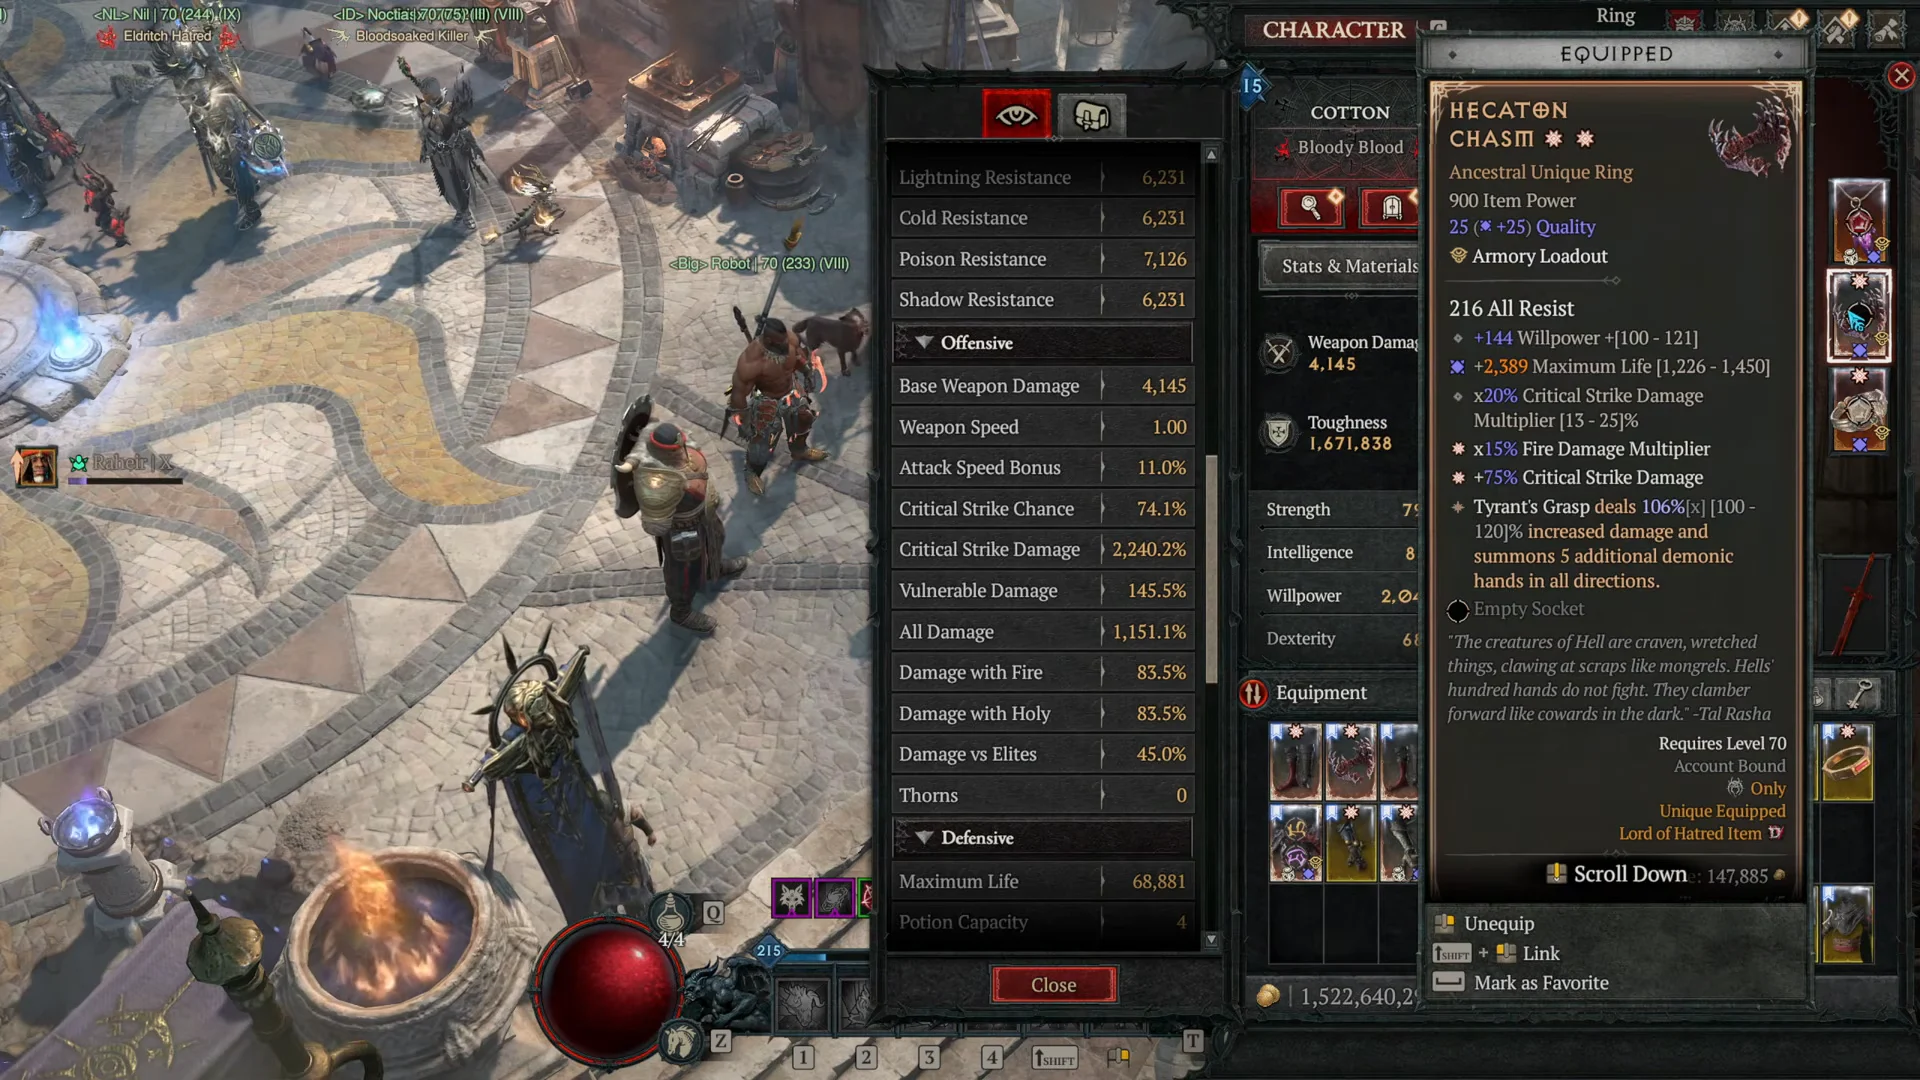
Elemental, physical, and additive damage
All Damage and specific elemental or physical multipliers do not multiply each other. They add together into one shared pool, then that combined figure multiplies the rest. Weapon gem sockets feed this pool heavily, contributing up to 50% or more per matched pair.
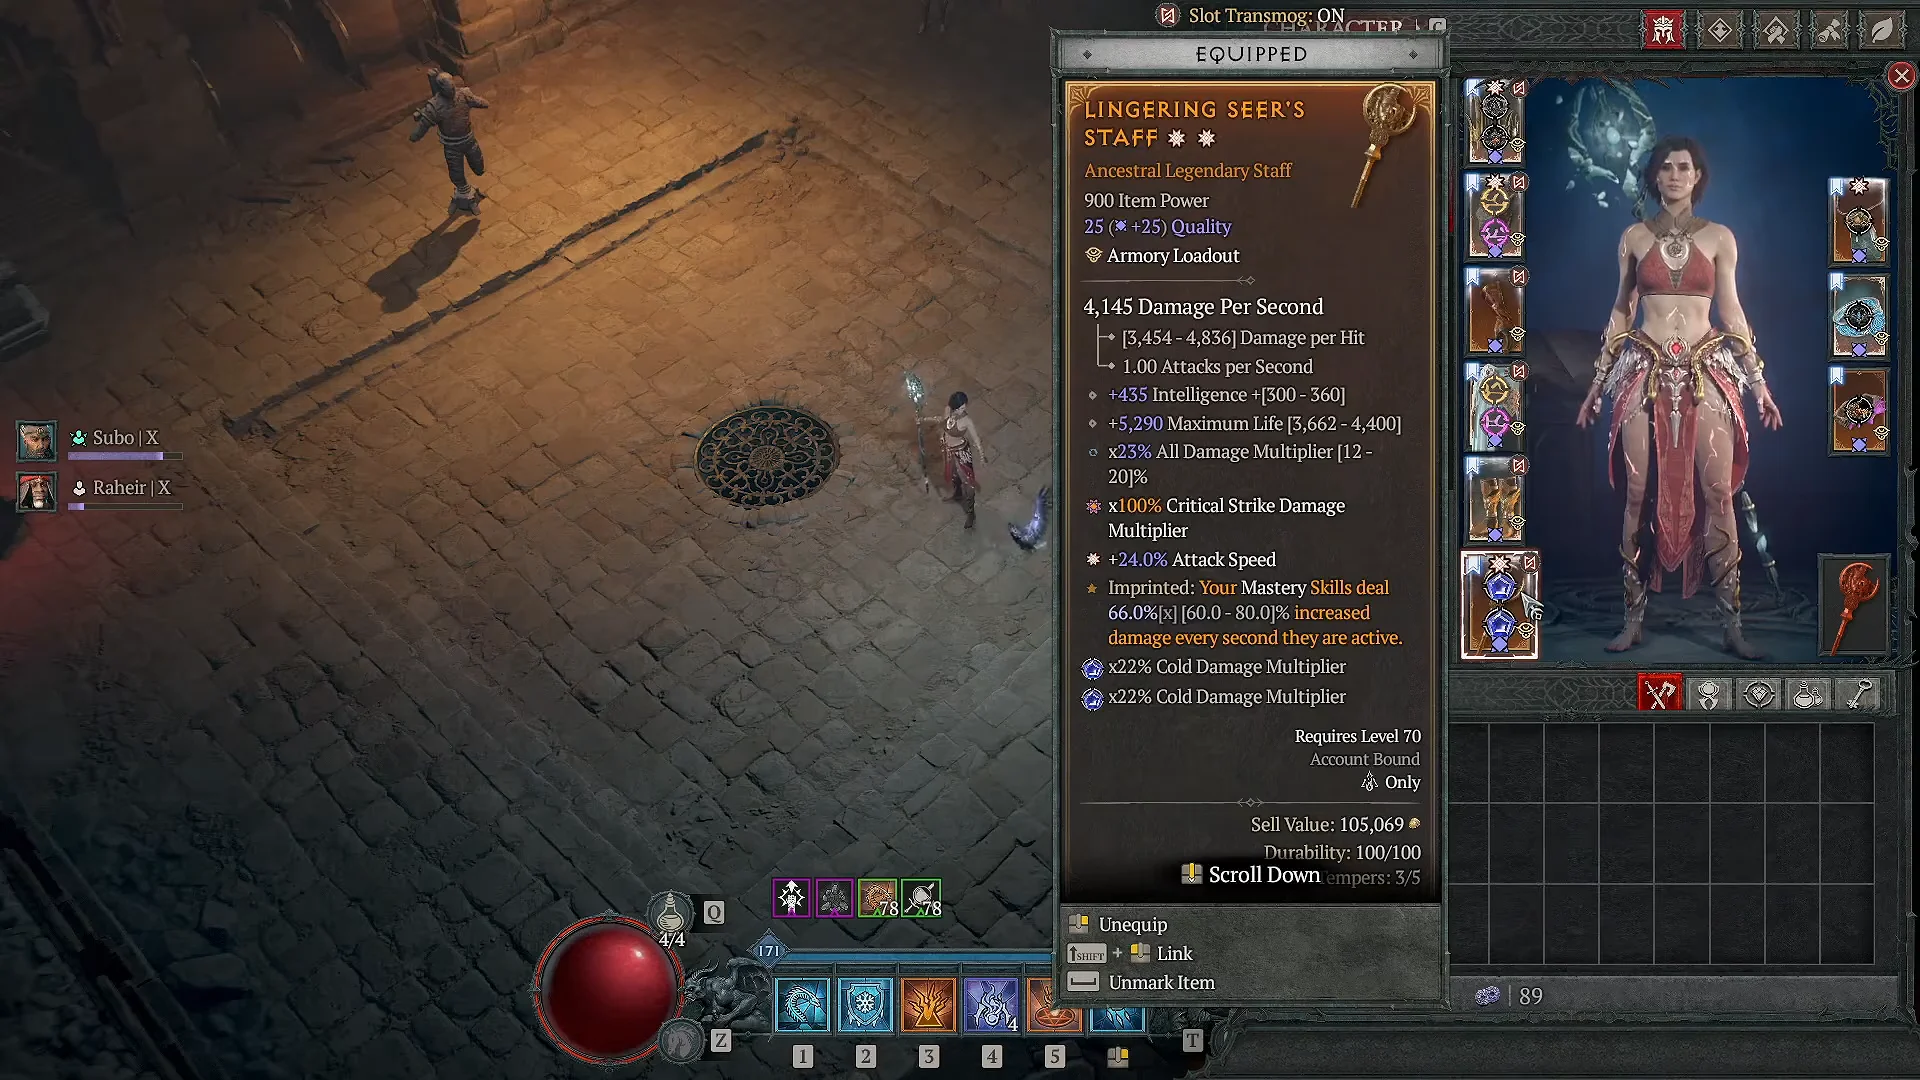
Additive damage affixes, the ones marked with a plus sign, all collapse into a single bracket. Splitting between several additive types does nothing extra, so on offensive tempers you simply chase the single highest additive value rather than mixing categories.
Runeword effects worth targeting
- Lo rune (Deadly Strike): gives hits that do not crit—including damage-over-time damage—a chance to inflict twice the damage, making it ideal for DoT builds that cannot crit.
- Infinity (Crushing Blow): deals a portion of an enemy’s maximum life as damage, effective down to roughly 35% health.
- Enigma: grants Teleport, adding mobility to any class that equips it.
Defensive caps: armor, resistances, and life
Survivability follows its own set of thresholds. Once armor and resistances hit their soft caps, extra points give almost nothing, so anything beyond that should go into Maximum Life.
- Armor gains begin to taper at roughly 15,000 total sheet armor.
- Above a sheet value of 10,000, Resistances give sharply reduced returns as they approach the 85–90% cap.
- Once you meet both caps above, continue building Maximum Life, since it has no diminishing returns.
The Stone of Jordan ring matches all resistances to your single highest elemental resistance. On a fire build, for example, you can stack only Fire Resistance to cap every element at once while gaining bonus elemental damage, freeing up the rest of your gear for offense.
Unlock the Cabochon Merchant in the Undercity
For high-tier crafting materials, the Cabochon Merchant is the quickest option. Unlock the merchant by activating the Bauble Day node in the Undercity War Plan tree. While running the Undercity, kill a Portal Prankster, a rare Treasure Goblin that gives extra rewards, to make the merchant appear.
The Cabochon Merchant sells high-tier Runes, Grand quality gems, and Splinters for gold and Forgotten Souls. Its stock can be rerolled using the same currencies, with a refund cost of 50,000,000 gold. That gives you a reliable, gold-driven way to buy the exact gems and runes your multiplier pools need.
Horadric Cube crafting for balanced gear
Use the Horadric Cube to shape gear into a balanced setup rather than depending on drops. Two recipes let you adjust pieces you already have. Affix Value Reroll changes the numerical rolls on an item’s existing affixes, keeping their types the same and leaving Greater Affixes untouched. For charms and seals, Horadric Reroll replaces their basic affix rolls while retaining the item’s unique power or set identity.
Craft unbound Mythic Uniques
Transfigure gambled Legendaries safely
Get the Hellfire Torch charm
Gather three Splinters; the set must include the Splinter of Destruction and the Splinter of Terror. Transmute them with the Horadric Cube to make Wirt’s Lucky Coins. Use the coins at Tristram’s well to bring up a portal leading to the Prime Evil Council. The Council drops the Hellfire Torch mythic charm when defeated.
Put these pieces together and the “10x” result stops being a slogan. Fill every multiplier pool from the merchant and your crafted gear, keep them balanced rather than lopsided, and cap defenses before overstacking them — and the same character sheet produces far more damage on any class.