Dragon’s Dogma 2 has three save slots, and each slot has three kinds of saved data. You can save by hand at any time, load any of the three copies from the title screen, and keep a second character running in a separate slot. On PC the on-screen prompts use F to confirm and Esc (or the right mouse button) to go back.
Quick answer: Save by hand from the Pause Menu under System → Save → Save and Continue. Use Change Save Slot or New Game on the title screen to run a second character in one of the three save slots.
The three kinds of saved data
Each save slot keeps three distinct versions of your progress. You can see them as cards on the right of the Save screen and on the load-selection screen. The most recently updated version is marked “(Most Recent Saved Data)”.
| Save type | When it is created |
|---|---|
| Autosave | Written automatically by the game |
| Interim Save | A manual save you can make at any time |
| Last Inn Rest Save | Created when you rest at an inn or in your dwelling. |
Each slot holds one Interim Save, and making a manual save replaces its existing copy. A note below the cards says that updating your Last Inn Rest Save also updates Autosave and Interim Save.
Make a manual save mid-game
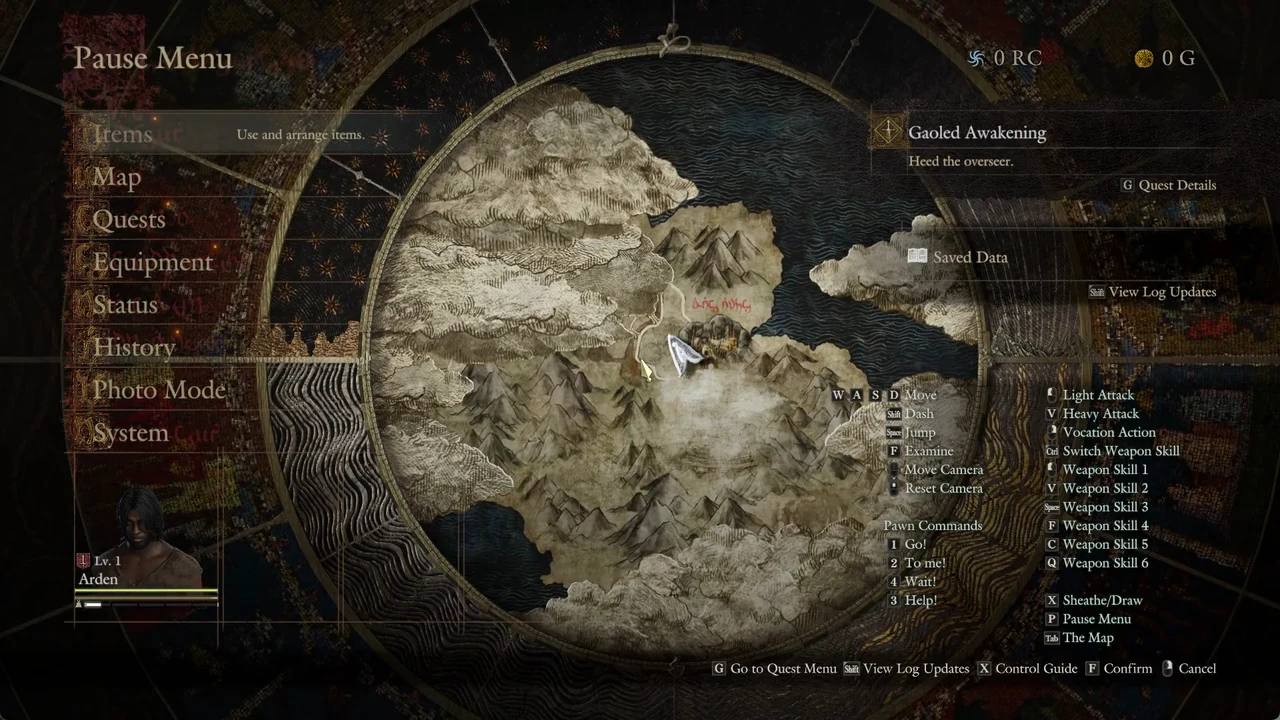
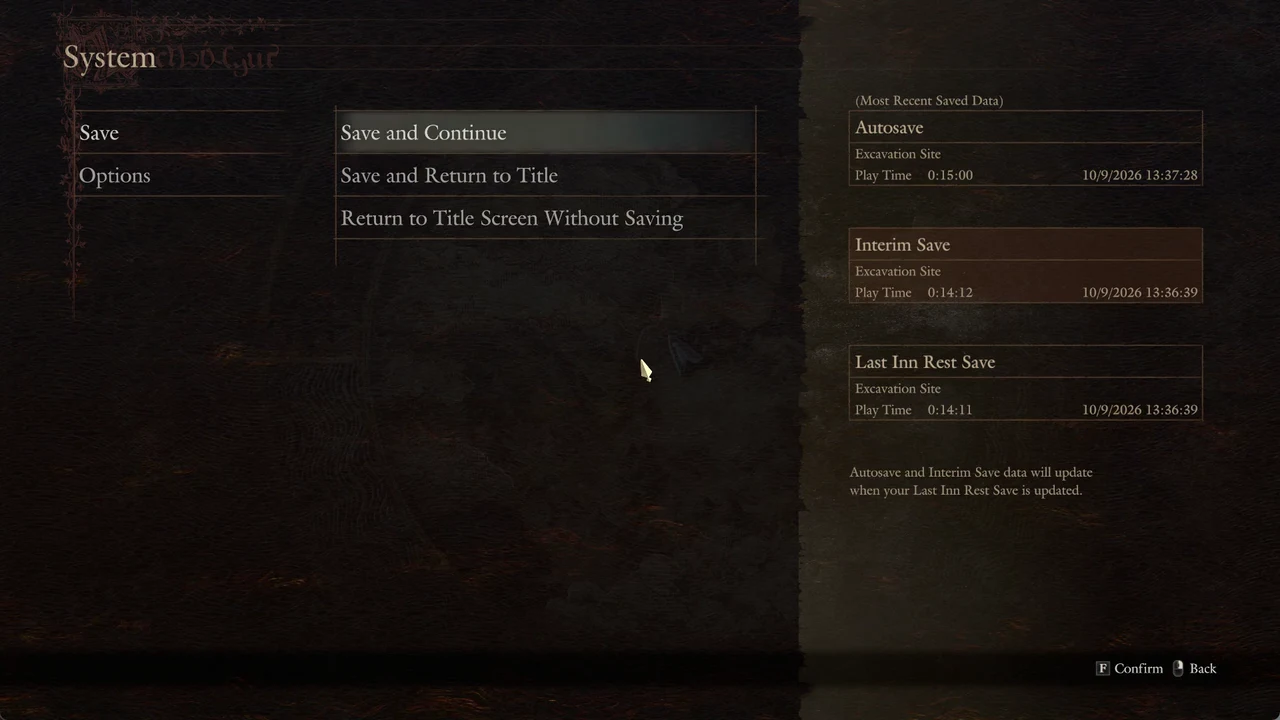
To leave the game with a save, pick Save and Return to Title and answer Yes to the same rewrite prompt. The screen goes black and returns to the title logo. Choosing Return to Title Screen Without Saving leaves without touching the Interim Save.
A manual save only rewrites the Interim Save. The Autosave and the Last Inn Rest Save cards are left exactly as they were.
Load any of the three saves
Once a save exists, the title menu reads from the top: Load from Last Saved Data, Select Saved Data to Load, Change Save Slot, New Game and Options. You have two ways back in.
Load from Last Saved Data drops you straight into the newest save of the current slot, with no confirmation prompt. Pick this when you just want to continue.
Choose Select Saved Data to Load to open the Load Saved Data screen. For the current slot, you can load from Autosave, the last Interim Save or the last Inn Rest. The most recently updated copy bears the “(Most Recent Saved Data)” tag, making it easy to identify.
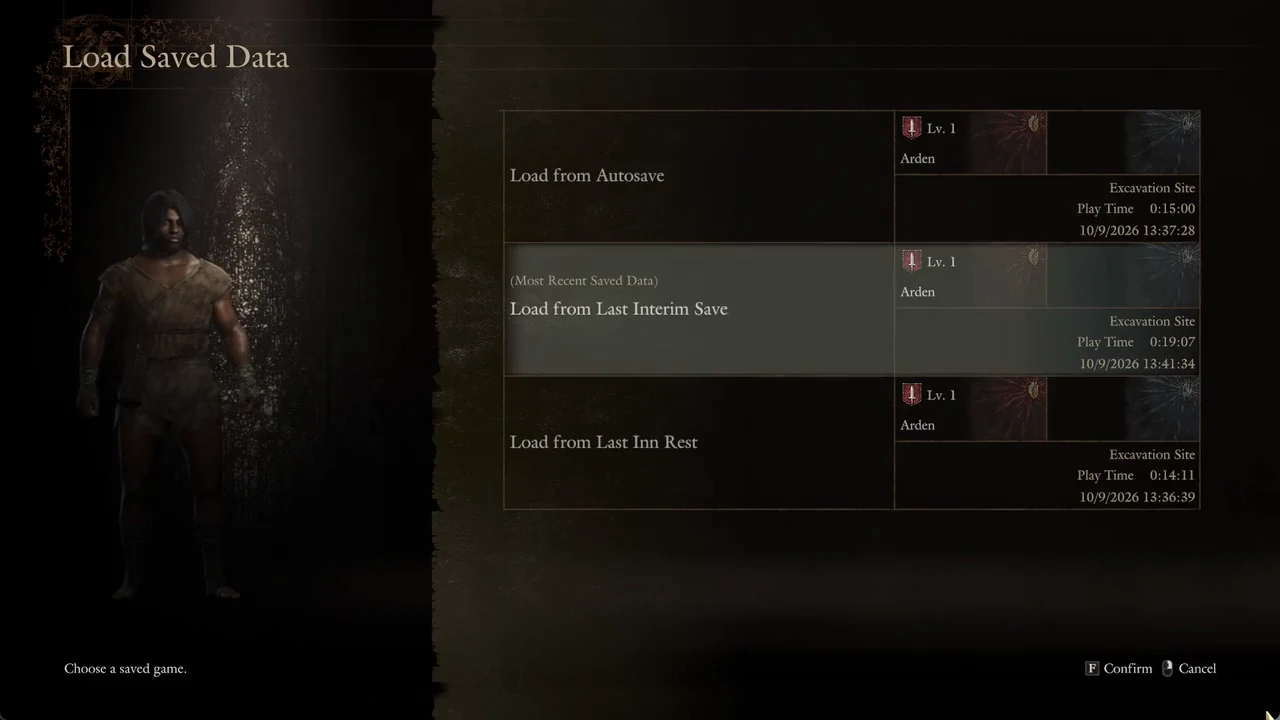
Each entry shows its location, Play Time and the date and time it was written, so you can confirm you are loading the point you expect before you commit.
Run a second character in a separate slot
You now have up to three save slots, each able to hold its own adventure. That lets you keep your current Arisen untouched while starting a fresh run alongside it. Two paths on the title menu lead to the slots.
Select Change Save Slot to bring up the Load Saved Data screen, with all three slots displayed side by side. Your active slot is marked Current Save Slot and displays its game mode, vocation icon, level, character name, Latest Save, location, Play Time and date. Slots without data are marked Empty.
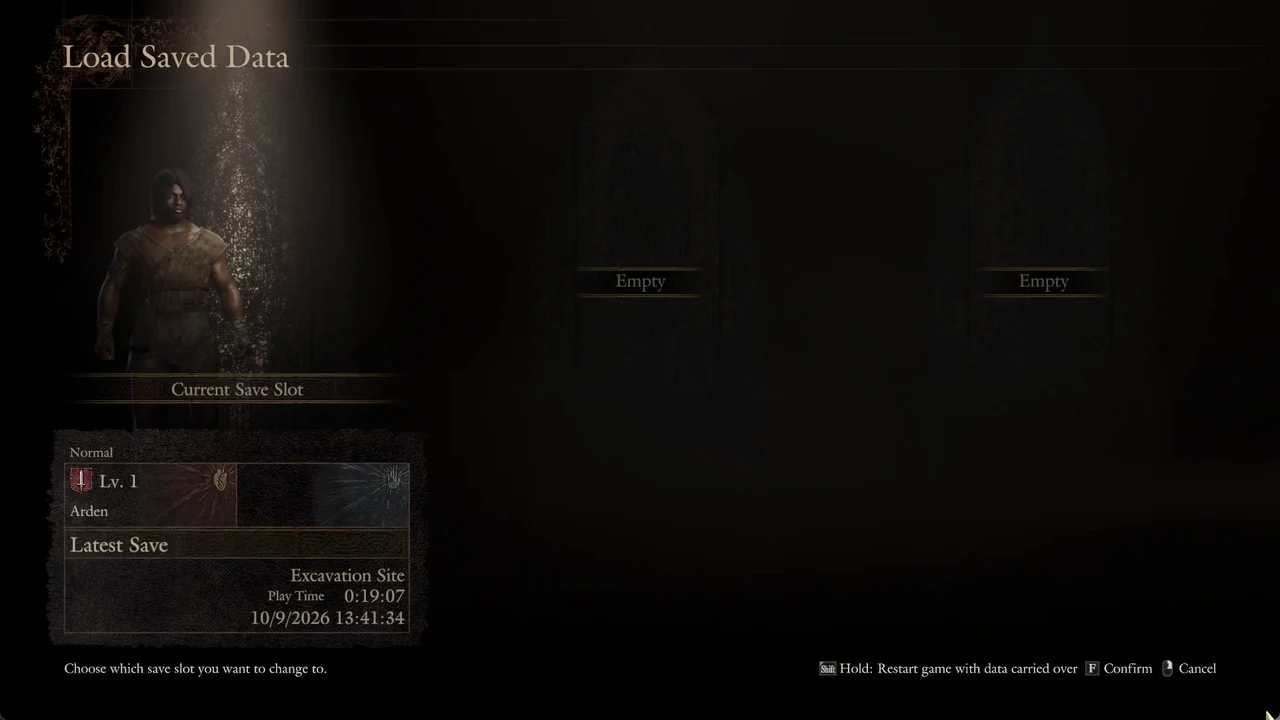
Move the cursor to an Empty slot and confirm. The game asks “No saved data found. This will overwrite the current slot and start a new game. Proceed?” with Yes and No. Answer No to back out.
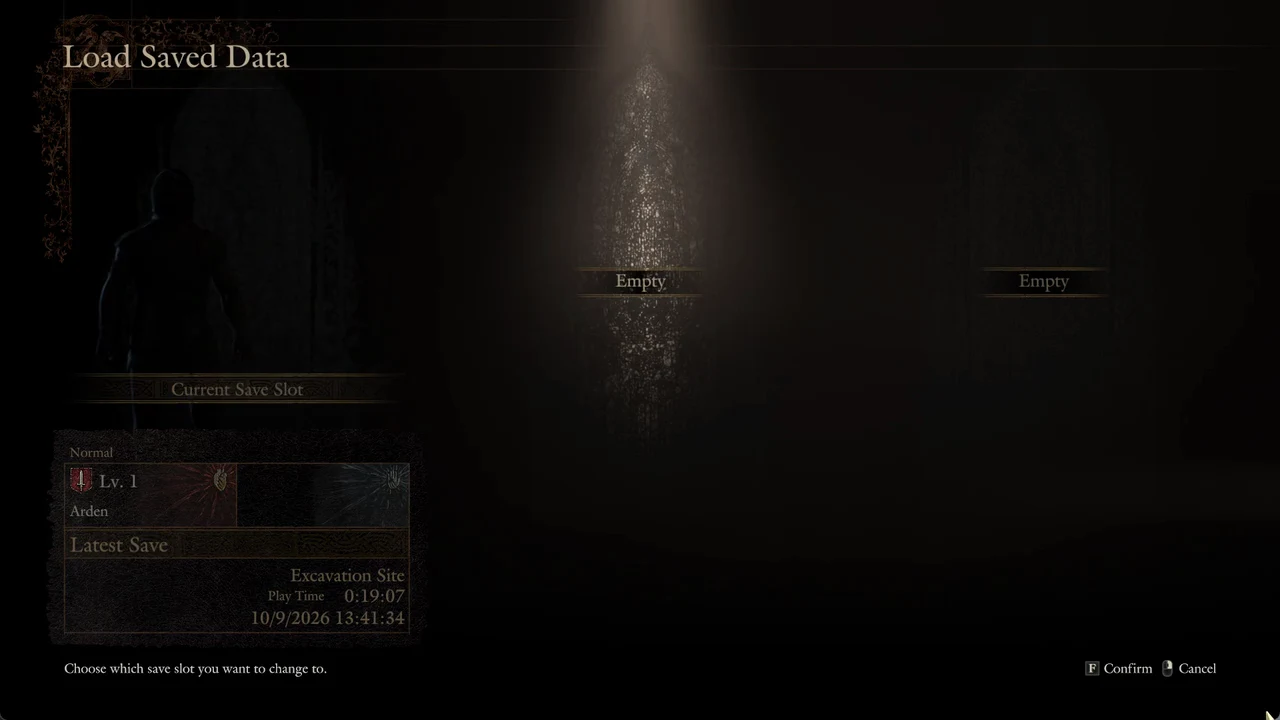
Selecting New Game brings up the same picker with three slots. If you choose one that already contains a character, an additional warning appears before the game erases anything.
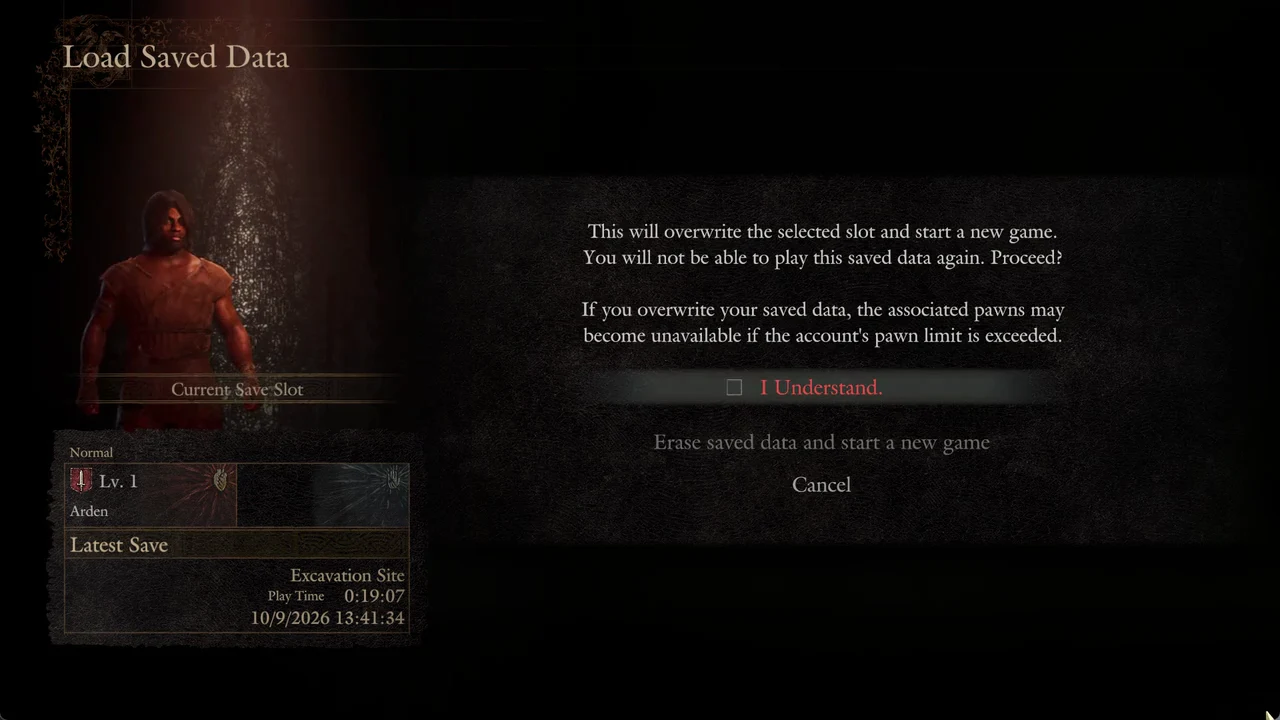
Picking an occupied slot under New Game shows “This will overwrite the selected slot and start a new game. You will not be able to play this saved data again.” It also warns that the associated pawns may become unavailable if the account’s pawn limit is exceeded. You must tick the “I Understand.” box before “Erase saved data and start a new game” stops being greyed out; the back key does not close this dialog, so move to Cancel to escape it.
Carry a character over with Restart game with data carried over
At the bottom of the Change Save Slot screen, holding Shift selects another option: Restart game with data carried over. It turns your saved data into transfer data and begins a new playthrough from the start. Your level and equipment remain, while quest progress resets.
Once data has been converted this way, the only option left for it is “Restart game with current level and equipment.” Use it when you want to replay the Arisen’s journey with the character you have already built. The New Game picker does not offer this carry-over hint, so reach it through Change Save Slot.
How to tell your save worked
When you load, each card’s date and time tells you exactly which point you are returning to.
Game mode belongs to the slot, not to your account. The slot card shows whether it is Casual, Normal or Hard, and the Options text for Game Mode notes that a change applies only to the Current Save Slot. That means you can hold a long-running character in one slot and start a different mode in another without the two affecting each other.