
Task automation in Windows 11 relies heavily on the Task Scheduler, a built-in utility that executes programs or scripts at specified times or in response to certain system events. By default, Task Scheduler’s detailed history logging is turned off, showing only the “Last Run Time” for each task. This limits the ability to diagnose task failures or verify successful execution. Enabling task history provides a comprehensive log of each run, making it easier to spot issues and confirm scheduled operations.
Enable Task Scheduler History Using the Task Scheduler Interface
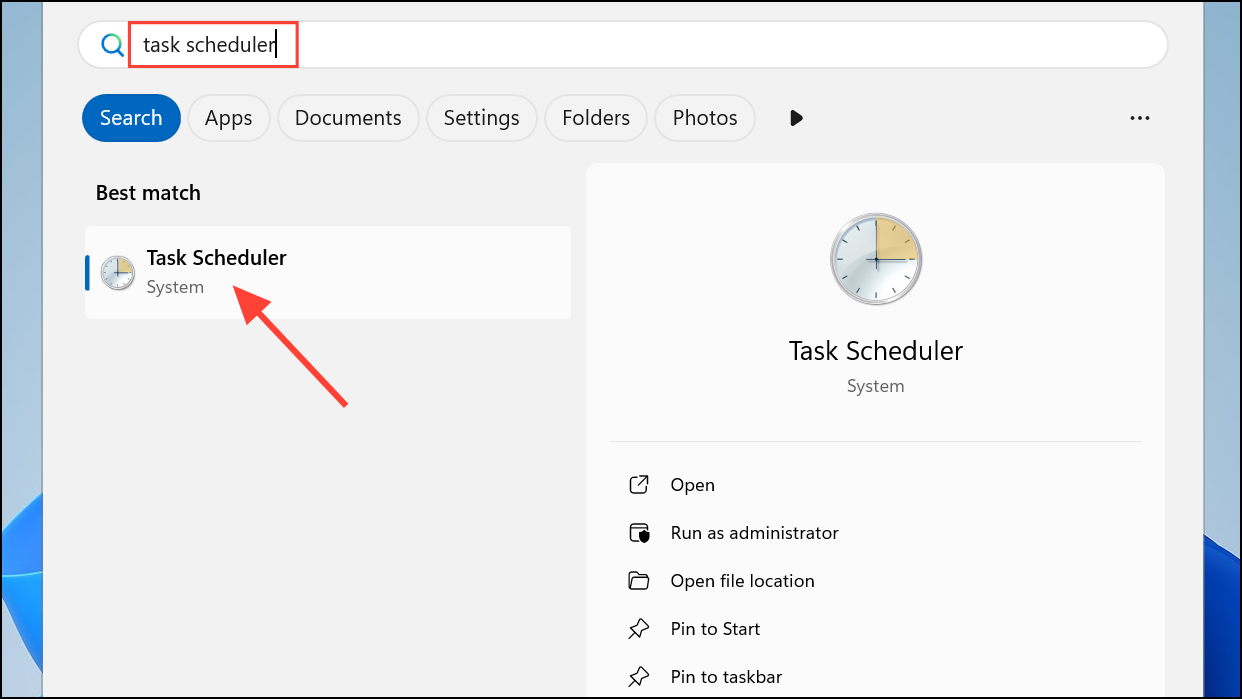
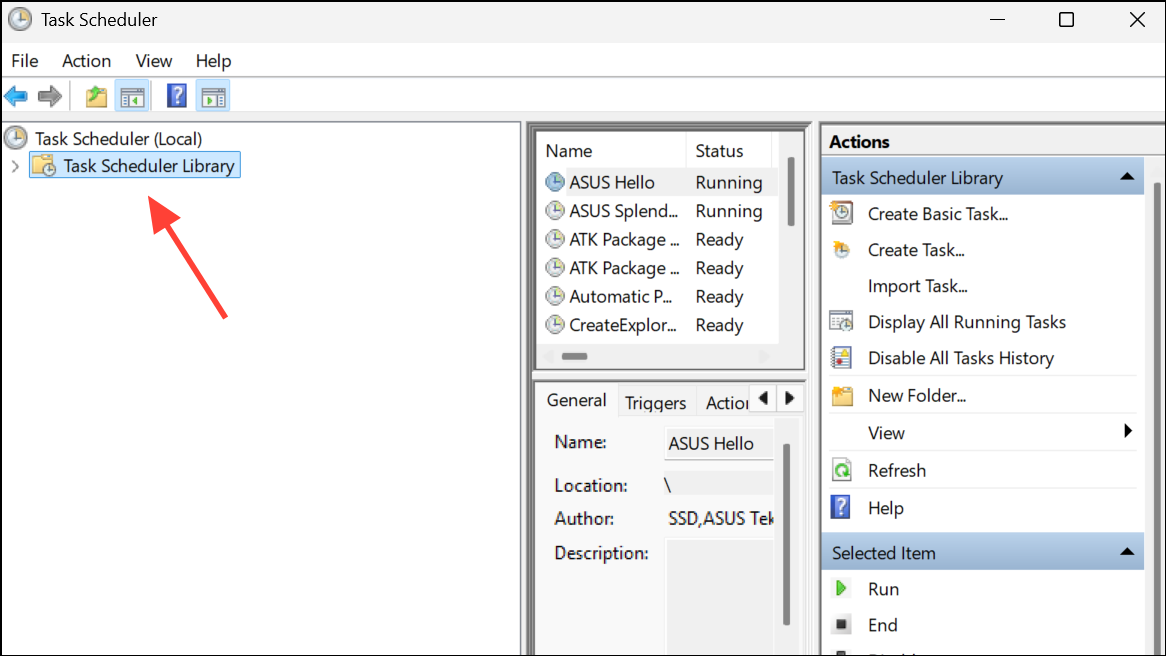
Step 1: Launch Task Scheduler by searching for Task Scheduler in the Windows search bar and selecting the app from the results. This opens the main Task Scheduler window, displaying the Task Scheduler Library and a summary of recent activity.
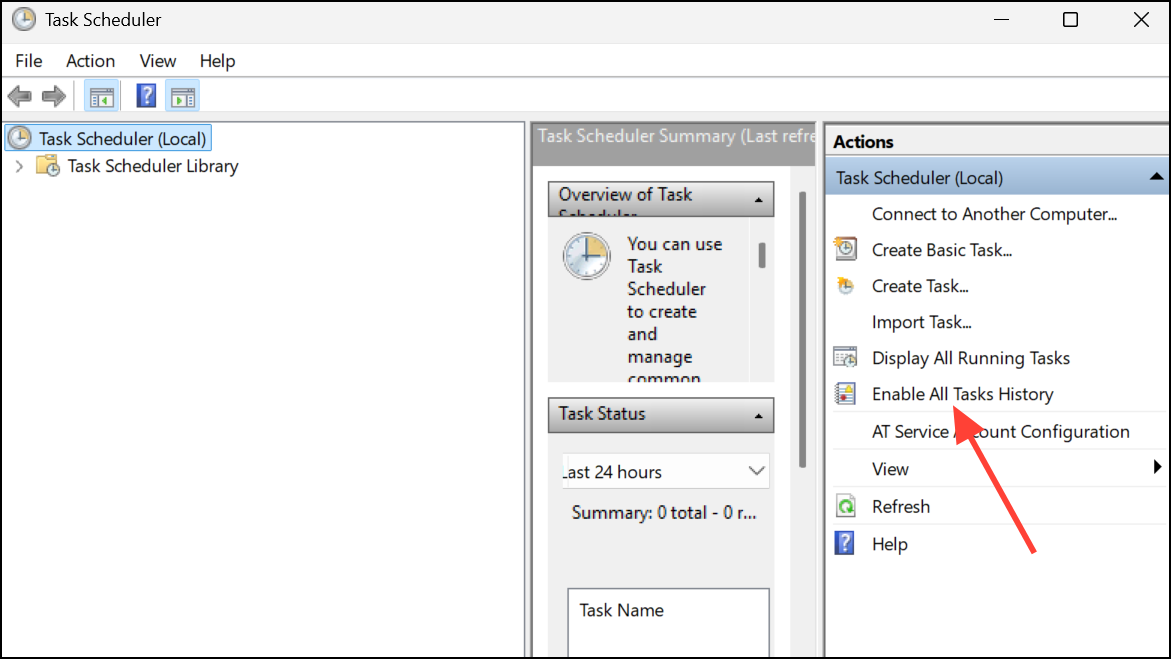
Step 2: In the right-hand Actions pane, locate and click Enable All Tasks History. This activates event logging for all tasks, allowing you to capture detailed run information and errors for every scheduled task. If you ever wish to stop logging, return to the same location and select Disable All Tasks History.
Enabling history is an all-or-nothing setting; Windows 11 does not support enabling history for individual tasks only.
Enable or Disable Task Scheduler History Using Command Prompt or PowerShell
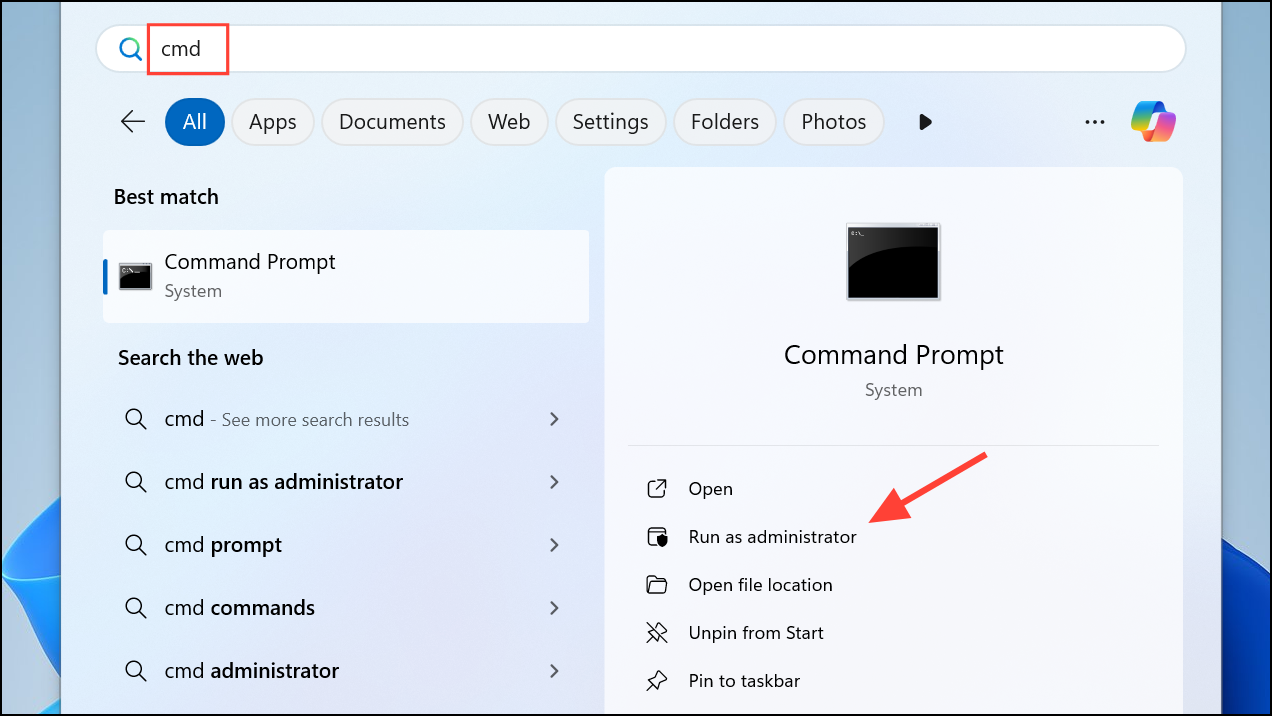
Step 1: Open Windows Terminal as an administrator. You can do this by searching for Windows Terminal or CMD in the Start menu, right-clicking the result, and choosing Run as administrator.
Step 2: To enable history logging, enter the following command and press Enter:
wevtutil set-log Microsoft-Windows-TaskScheduler/Operational /enabled:true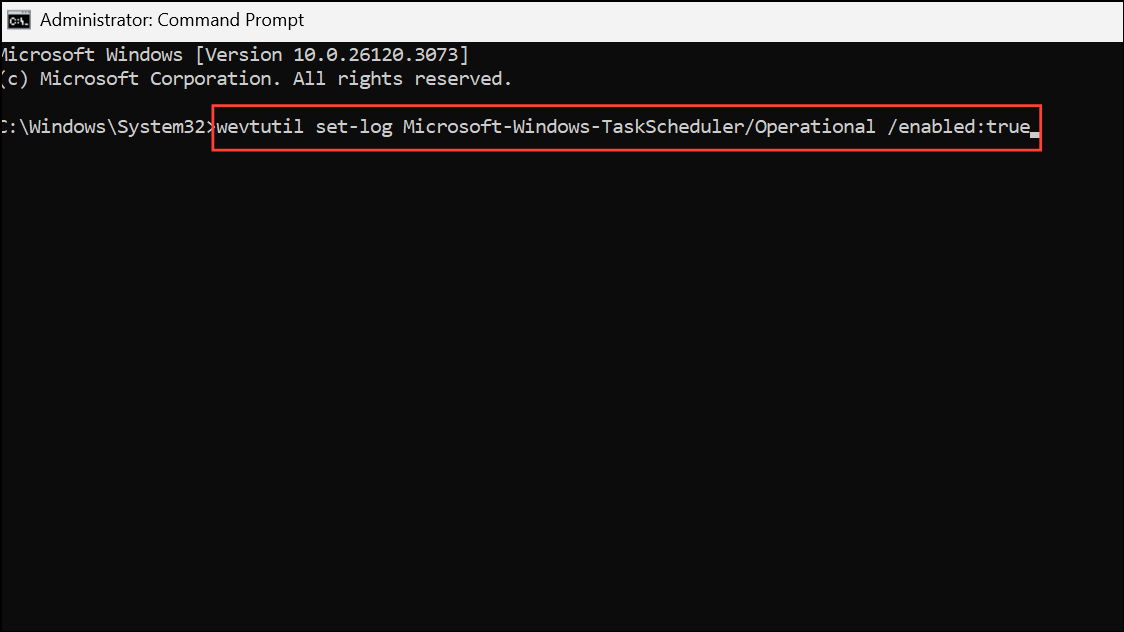
This command activates event logging for all scheduled tasks. To turn off history, use:
wevtutil set-log Microsoft-Windows-TaskScheduler/Operational /enabled:false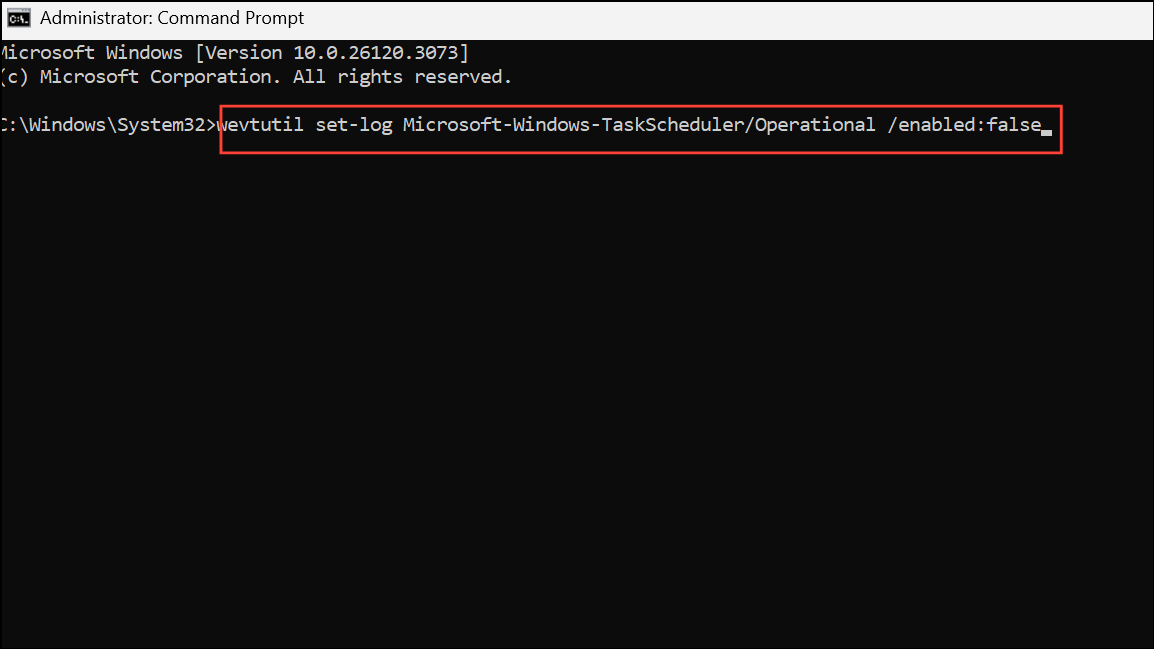
You can verify the status of logging with:
wevtutil get-log Microsoft-Windows-TaskScheduler/Operational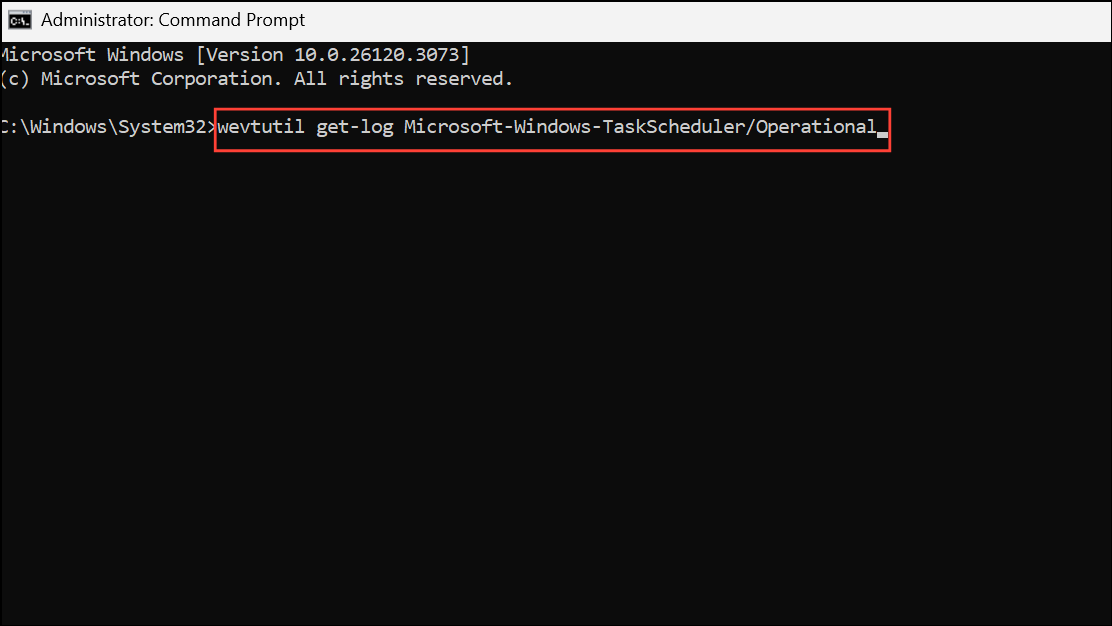
These commands provide a quick way to toggle task history without navigating the graphical interface, which can be especially useful for scripting or remote administration.
View Task Scheduler History
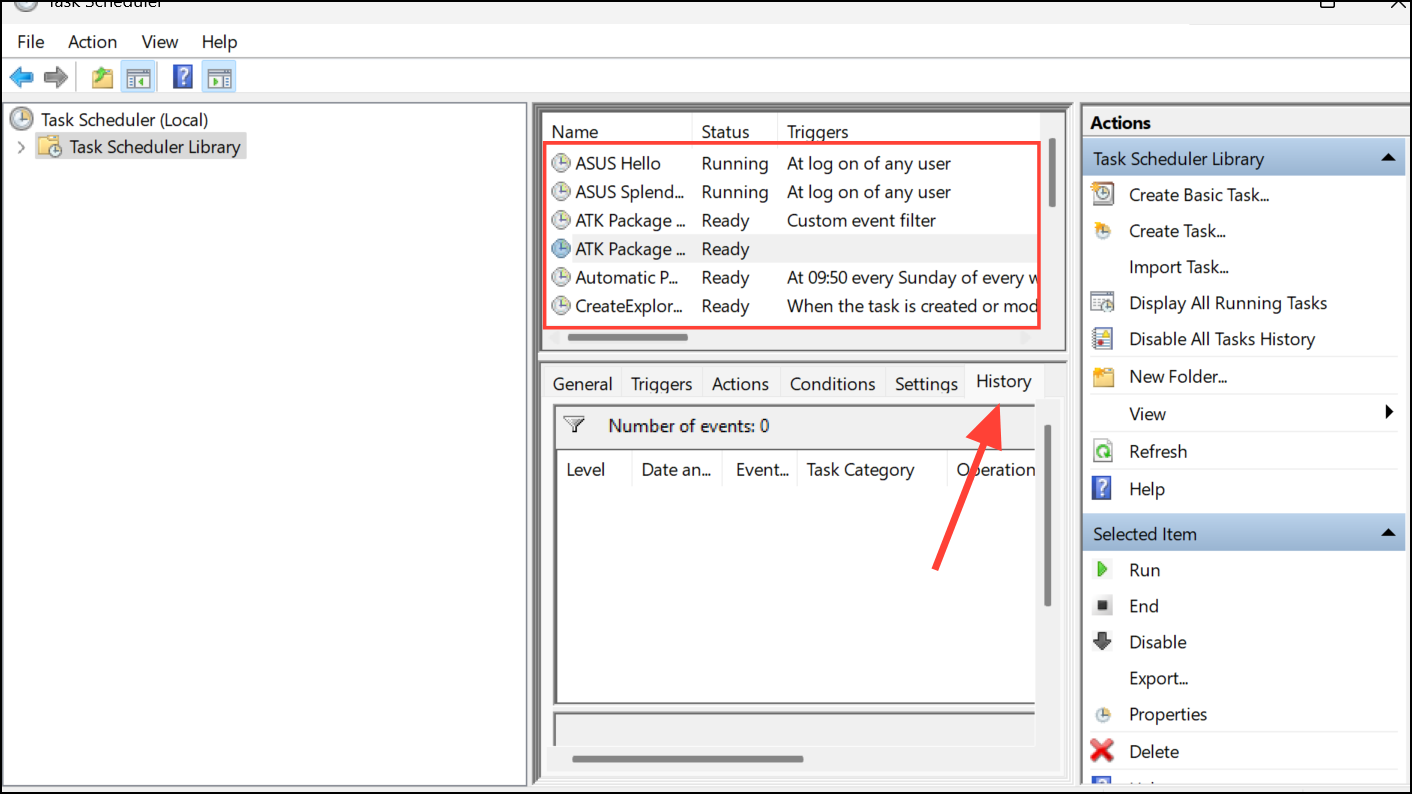
Step 1: After enabling history, return to the Task Scheduler window. In the left pane, click Task Scheduler Library to see a list of all scheduled tasks.
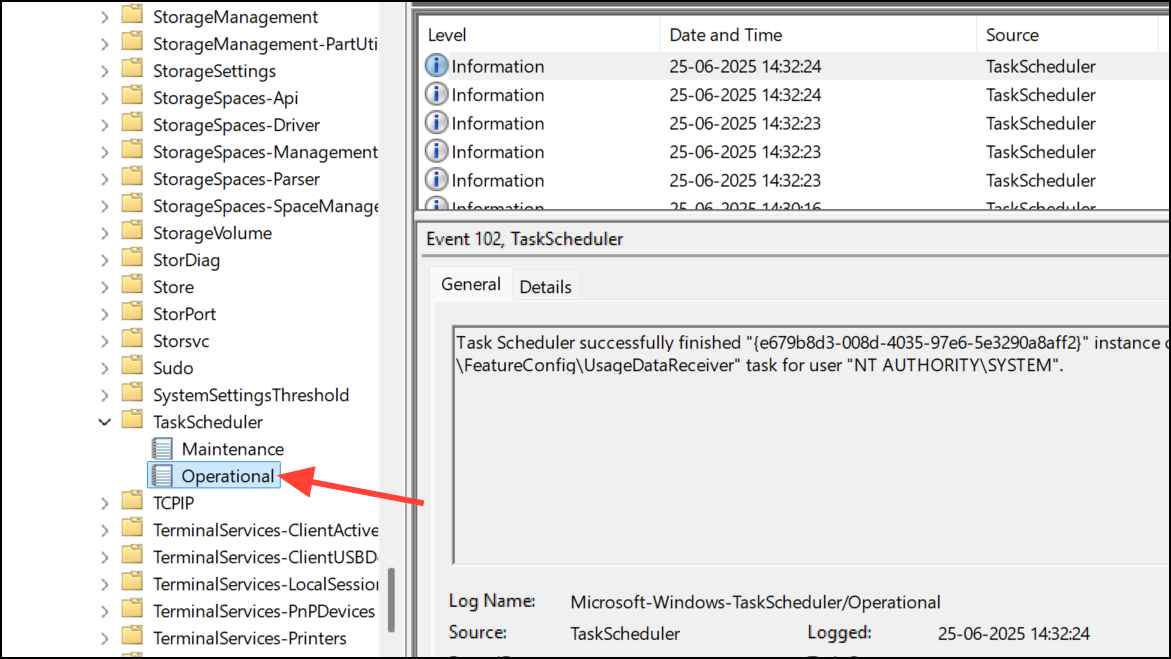
Step 2: Select a specific task from the middle panel. In the lower panel, click the History tab. This tab displays a chronological list of all events related to that task, including start times, completion, errors, and operational codes. The log provides valuable data for troubleshooting failed or missed runs, as well as confirming successful task execution.
If the History tab is empty, double-check that history is enabled as described above—event data will only appear after logging is active.
Clear Task Scheduler History
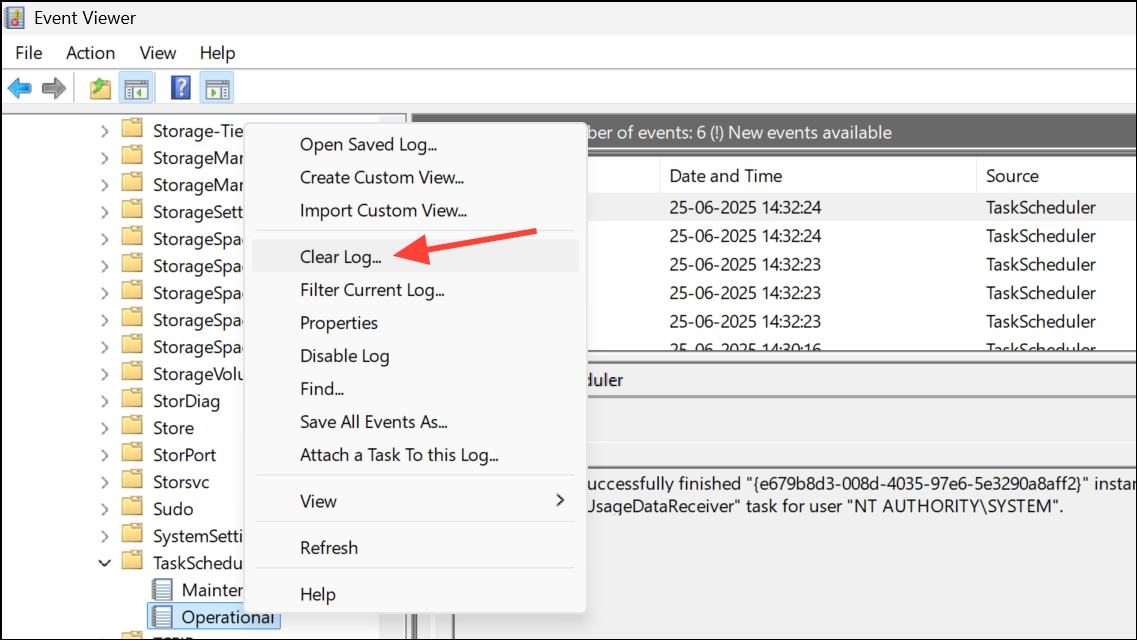
Clearing task history removes all recorded events, which can free up disk space and reset logs for a fresh troubleshooting session. This process is performed through the Event Viewer, as the Task Scheduler interface does not provide a direct option to clear history.
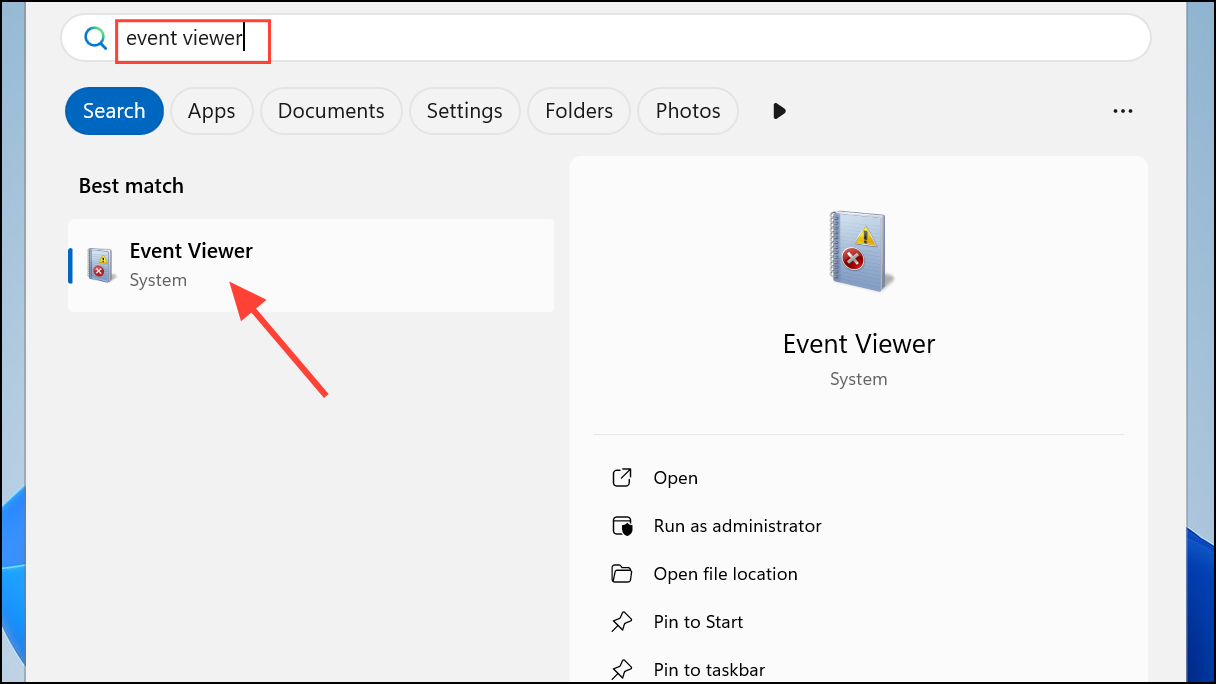
Step 1: Open Event Viewer by typing Event Viewer in the Windows search box and selecting the app.
Step 2: In the left pane, navigate to Applications and Services Logs > Microsoft > Windows > TaskScheduler > Operational. This log contains all the Task Scheduler event history.
Step 3: Right-click Operational and select Clear Log. You can choose to save the log before clearing if you want to archive previous events for later analysis. Once cleared, all previous task execution records are permanently deleted.
Additional Tips and Troubleshooting
Task Scheduler history logs are stored as .evtx files in C:\Windows\System32\Winevt\Logs. If you need to export or back up logs, you can copy them from this directory.
If you notice that no events are being recorded even after enabling history, ensure you have administrative privileges, as activating or deactivating history requires admin rights. Also, remember that enabling history affects all tasks—there is no way to log events for a single task only.
For advanced users, PowerShell and Command Prompt provide further options to query, export, or filter scheduled task data. For example, use schtasks /query in Command Prompt or Get-ScheduledTask in PowerShell to list all tasks and their statuses.
Activating, reviewing, and clearing Task Scheduler history in Windows 11 gives you full visibility into automated task activity, making it easier to identify issues and confirm scheduled jobs are running as expected. Regular log reviews and maintenance can prevent troubleshooting headaches down the line.