
Windows 11 update attempts can halt with error code 0x80246007, leaving critical security patches or feature upgrades incomplete. This error may also block Microsoft Store app downloads and updates, often due to corrupted update components, interrupted services, or problematic user profiles. Addressing the underlying issues restores normal update functionality and ensures your device stays current and secure.
Repair Windows Update Error 0x80246007 with a Clean Windows Reinstallation
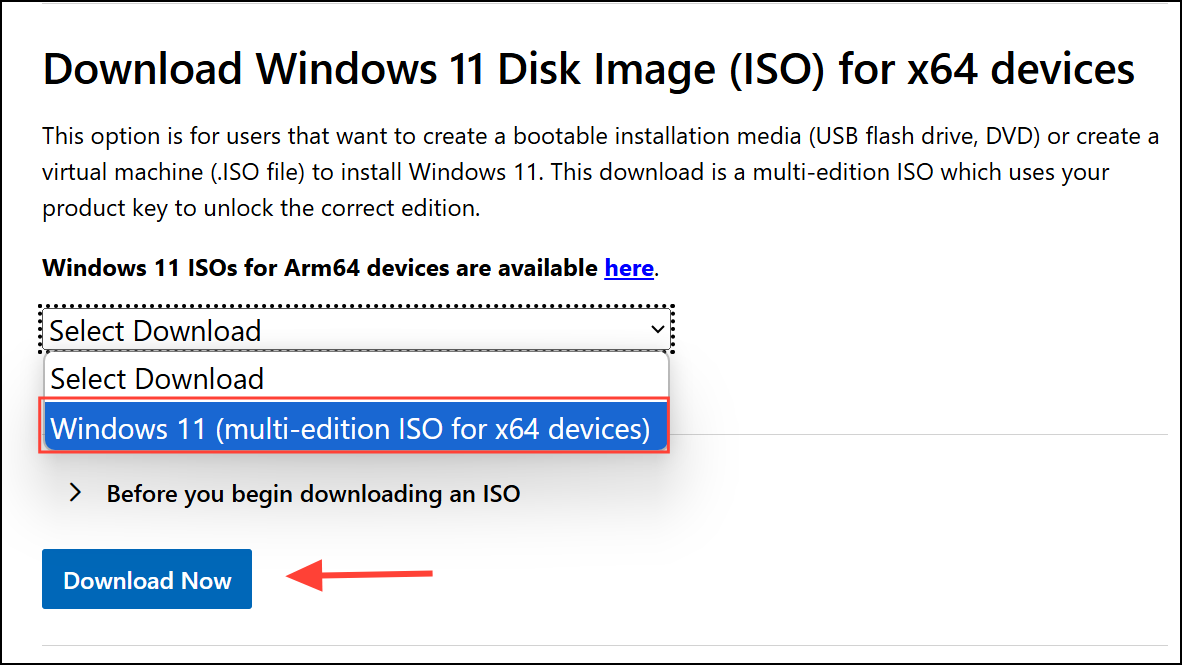
Step 1: Download the latest Windows 11 ISO from the official Microsoft website. This ensures you have the most current installation files for a reinstallation. Visit the official Windows 11 download page and select the option to download the ISO file.
Step 2: Back up important files before proceeding. While the reinstallation process offers options to keep personal files, always create an external backup to avoid accidental data loss.
Step 3: Double-click the downloaded ISO file to mount it as a virtual drive. Open the drive and run setup.exe to start the Windows 11 installation wizard.
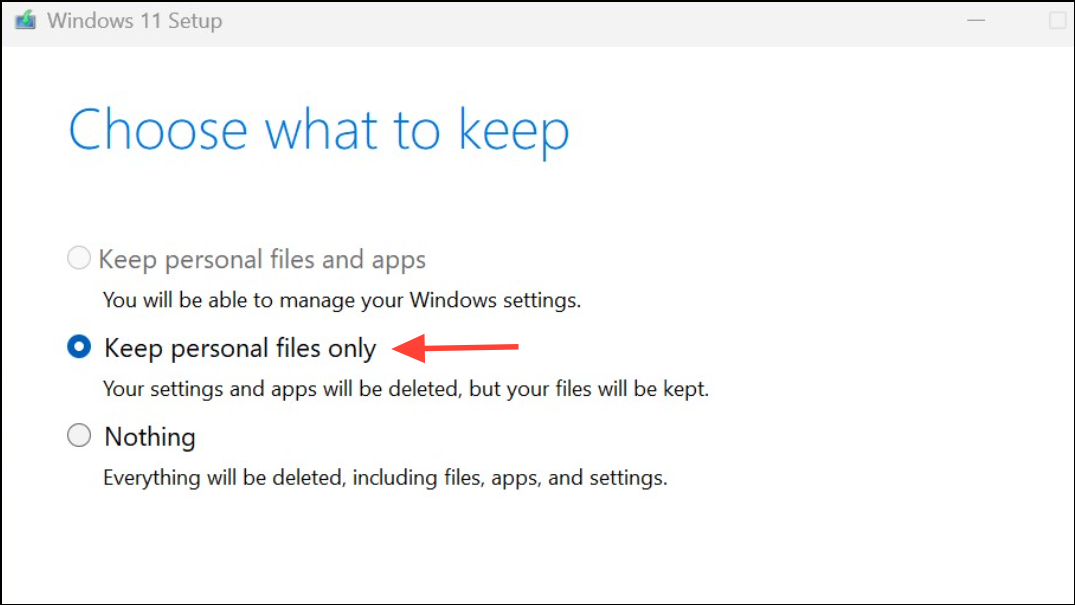
Step 4: When prompted, choose Keep personal files only. This option preserves your documents and data but removes installed apps and resets system settings, which can resolve deep-seated update errors caused by corrupt applications or system files. If you select Keep personal files and apps, the issue may persist, so opt for files only.
Step 5: Follow the on-screen instructions to complete the reinstallation. After setup finishes and your system restarts, check for updates in Settings > Windows Update to confirm that error 0x80246007 no longer appears.
Reset Windows Update Components and Services
Step 1: Open Notepad and copy the following batch script, which systematically stops update-related services, renames key folders, re-registers system files, and restarts services:
SC config trustedinstaller start=auto
net stop bits
net stop wuauserv
net stop msiserver
net stop cryptsvc
net stop appidsvc
Ren %Systemroot%\SoftwareDistribution SoftwareDistribution.old
Ren %Systemroot%\System32\catroot2 catroot2.old
regsvr32.exe /s atl.dll
regsvr32.exe /s urlmon.dll
regsvr32.exe /s mshtml.dll
netsh winsock reset
netsh winsock reset proxy
rundll32.exe pnpclean.dll,RunDLL_PnpClean /DRIVERS /MAXCLEAN
dism /Online /Cleanup-image /ScanHealth
dism /Online /Cleanup-image /CheckHealth
dism /Online /Cleanup-image /RestoreHealth
dism /Online /Cleanup-image /StartComponentCleanup
Sfc /ScanNow
net start bits
net start wuauserv
net start msiserver
net start cryptsvc
net start appidsvc
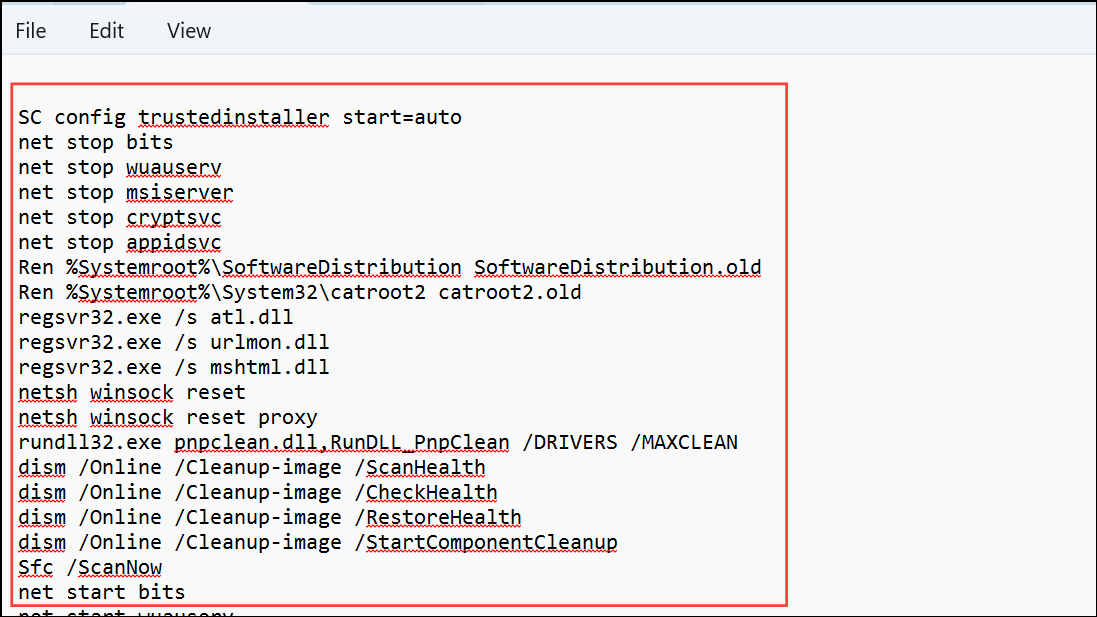
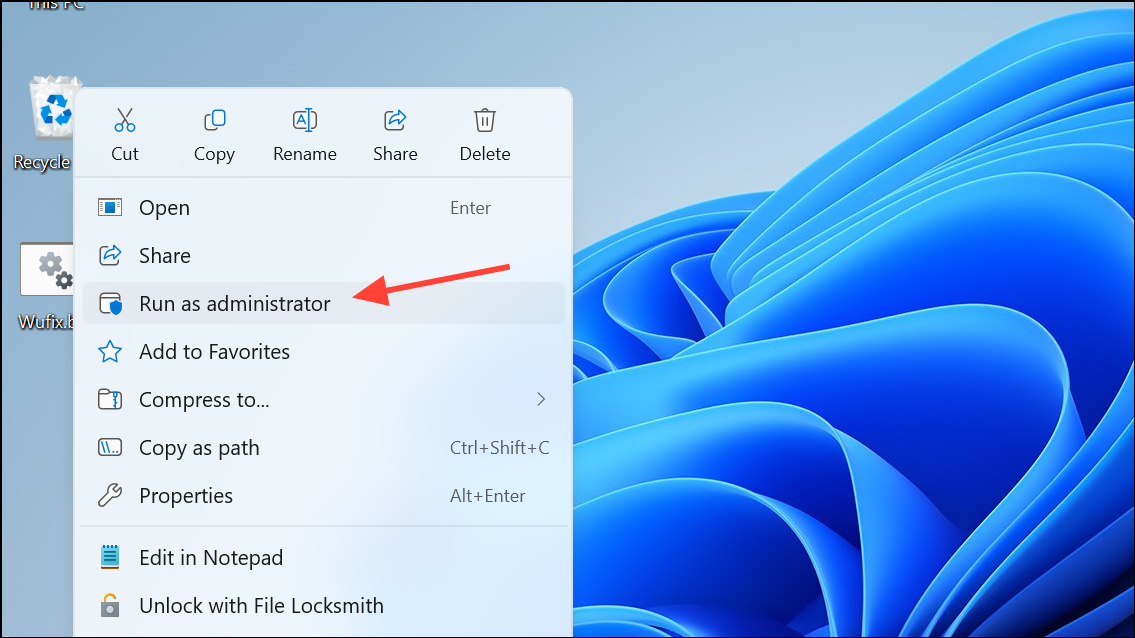
Step 2: Save the file as Wufix.bat on your Desktop. Right-click the file and select Run as administrator. Confirm any prompts. This script stops and restarts update services, clears cached update data, and repairs system files.
Step 3: Allow the script to finish all tasks. Restart your computer, then try running Windows Update again to check if the error is resolved.
Start and Configure Essential Windows Services
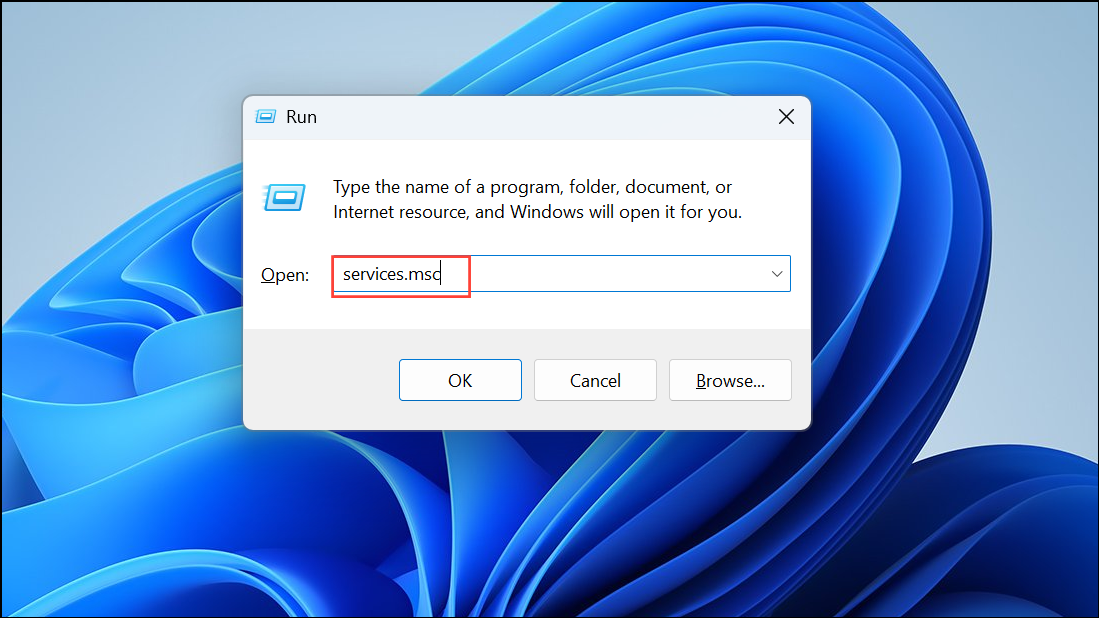
Step 1: Press Windows + R to open the Run dialog, type services.msc, and press Enter. This opens the Services management console.
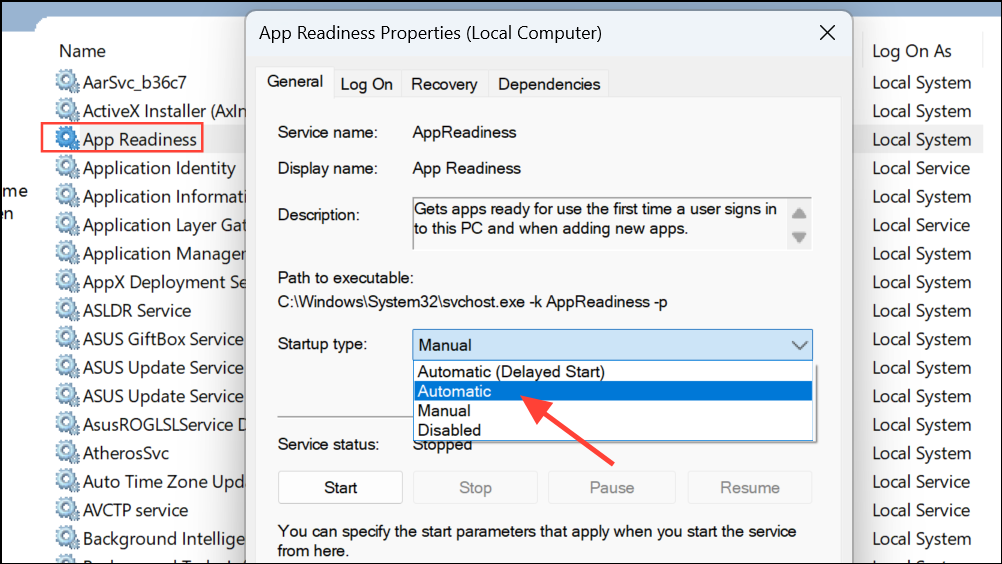
Step 2: Locate App Readiness in the list. Double-click it, set Startup type to Automatic, apply changes, and click Start if the button is available.
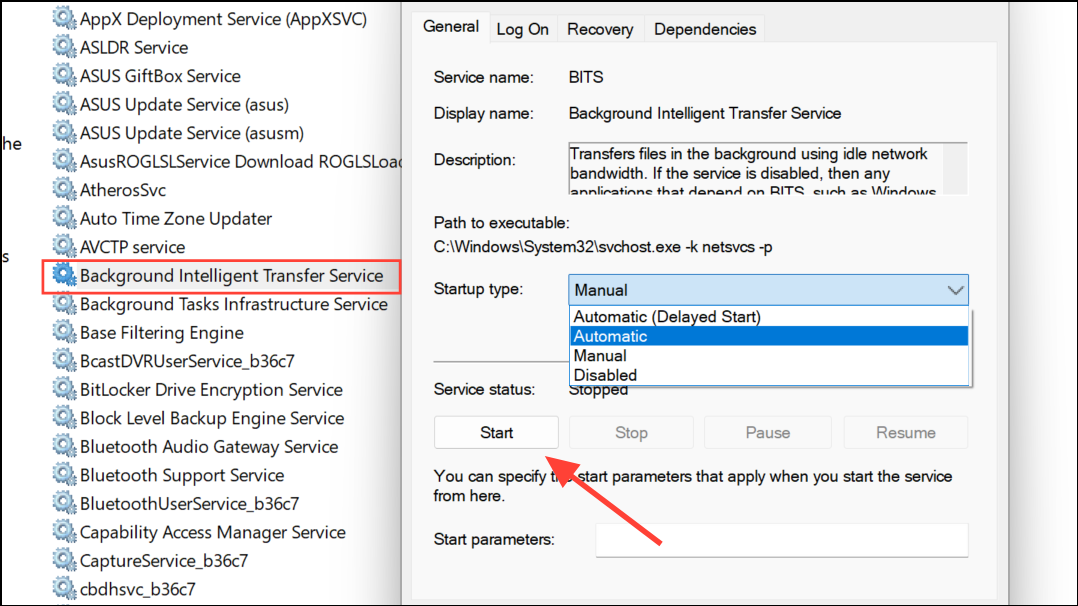
Step 3: Repeat for Windows Update and Background Intelligent Transfer Service (BITS). Both should be set to Automatic. If either is stopped, click Start. Right-click and select Restart for both services to ensure they are running smoothly.
Step 4: Close the Services window and attempt the update again.
Delete or Rename Update-Related Folders
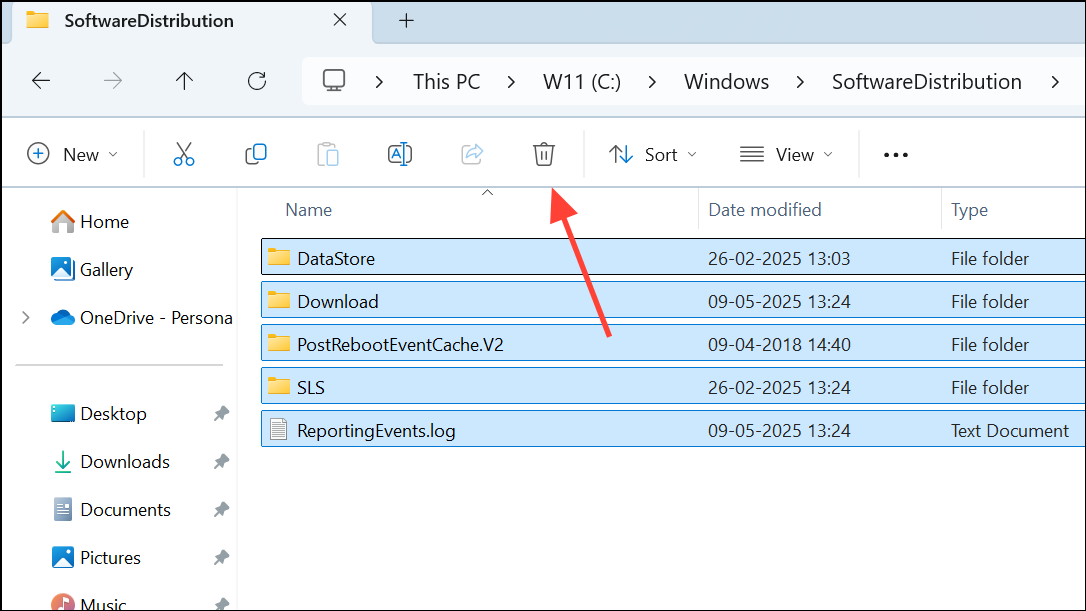
Step 1: Open File Explorer and navigate to C:\Windows\SoftwareDistribution. Delete all contents of this folder. This folder stores temporary update files, and clearing it removes potential corruption that blocks updates.
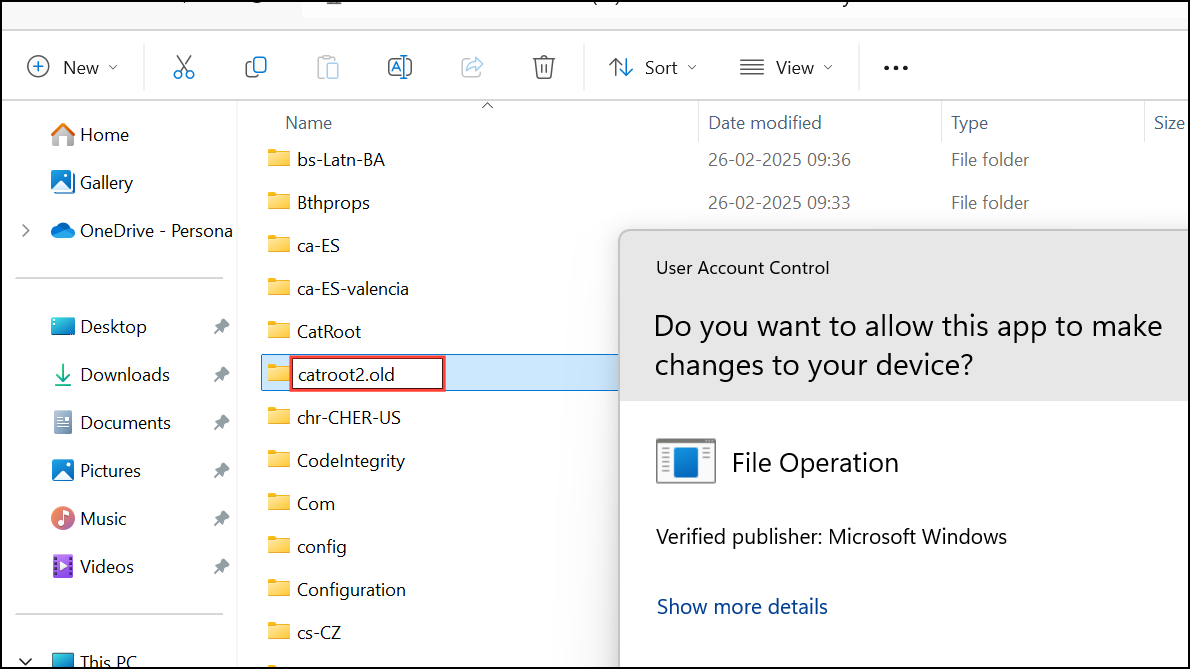
Step 2: Go to C:\Windows\System32\catroot2 and rename the folder to catroot2.old. The system will create a new folder automatically, which can fix signature or catalog errors during updates.
Step 3: If present, locate C:\$WinREAgent. Copy it to your Desktop for backup, then delete the original. This folder can interfere with updates if left over from previous installations.
Step 4: Restart your PC and check for updates again.
Run the Windows Update Troubleshooter
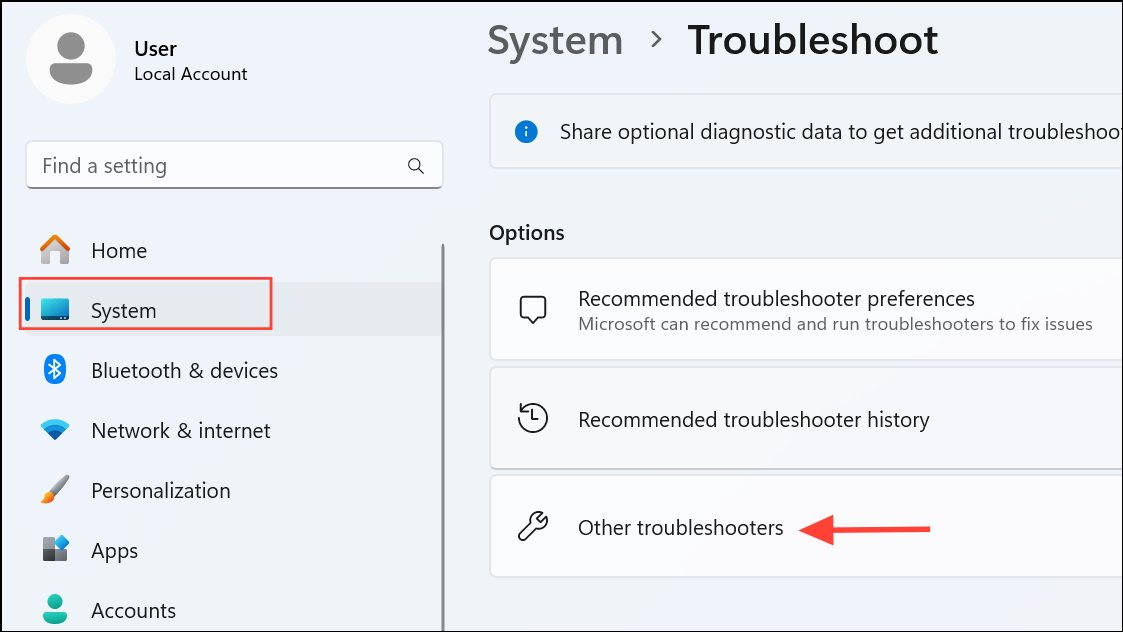
Step 1: Open Settings using Windows + I, then go to System > Troubleshoot > Other troubleshooters.
Step 2: Find Windows Update in the list and click Run. The troubleshooter will scan for common update issues and attempt automatic repairs, such as resetting services or clearing temporary files.
Step 3: After the troubleshooter completes, restart your computer and try updating again.
Repair Invalid User Profile SIDs in the Registry
Step 1: Back up your registry using a tool like Acelogix RegBak to avoid accidental data loss. Registry changes can impact system stability, so this backup provides a recovery option.
Step 2: Download and run a registry fix file provided by a trusted source or Microsoft support representative that addresses invalid profile SIDs. Double-click the .reg file and confirm the changes.
Step 3: After applying the fix, restart your computer. Attempt the update process again. Invalid user profile SIDs can prevent upgrades and cause repeated update failures.
Use the Windows 11 Installation Assistant or Media Creation Tool
Step 1: Download the Windows 11 Installation Assistant from Microsoft’s official site. Run the tool and follow the on-screen instructions to update your system without a clean reinstall. This method is useful when standard update mechanisms fail, but you want to preserve both files and apps.
Step 2: Alternatively, use the Media Creation Tool to create a bootable USB or download the ISO. Run setup.exe from the ISO and follow the prompts to upgrade your Windows version.
Additional Troubleshooting Steps
- Ensure your system date and time are correct. Incorrect settings can disrupt update authentication.
- Temporarily disable third-party antivirus or firewall software that might block update downloads.
- Check your internet connection for stability; switch networks or restart your router if needed.
- If updates still fail, try creating a new local user account to rule out profile-specific issues.
- For persistent errors, consider performing a system restore to a point before the issue began.
Resolving error 0x80246007 on Windows 11 often involves resetting update components, repairing system files, or reinstalling Windows while keeping your files. With these steps, you can restore normal update and Microsoft Store functionality and keep your device protected with the latest features and fixes.