External speakers are convenient and beneficial for those concerned with sound quality and volume. With the recent advancement in technology, the prices of external speakers have come down considerably.
External speakers are available with both cable and Bluetooth connectivity. With a wide variety of system configurations and speaker models available, problems with speaker connectivity arise. Multiple hardware and software issues prevent a computer from connecting to a speaker.
In this article, we will discuss the various fixes and troubleshooting methods to resolve sound issues with external speakers.
Fixing Problems with Speaker Connectivity and Sound Quality
In case you are unable to connect to a speaker or are not getting any sound output, try these methods one by one until the issue is resolved.
Check Volume
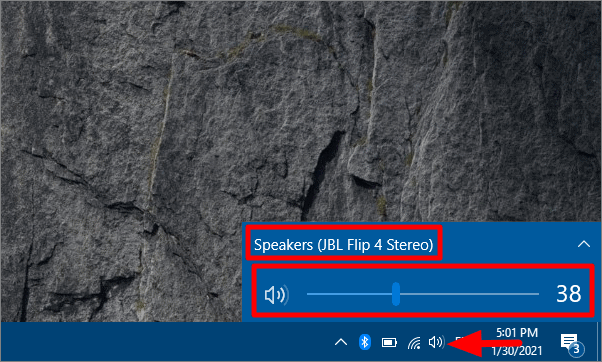
If you are connected to a speaker but are not receiving any sound output, one of the first things to check for is volume. Many a time, the volume is turned down or muted, resulting in no audio output from the external speakers.
Click on the speaker icon on the System Tray to check the system volume. It shows the speakers currently in use for audio output at the top and the volume level underneath it. If the voume is set to 0, drag and move the slider to the right to unmute it and increase the volume.
If the audio issue is still unresolved, check the volume in the app or website you are using to play sounds. Click on the speaker shaped icon on the app or website and check the volume level. If it is on mute or the volume level is low, adjust it to the optimal level.
Also, check for the sound level of the external speakers. Generally, there is a knob to adjust the volume, which rotated to the right or clockwise increases the volume. In some external speakers, there are buttons to adjust change the volume. Whichever type of speaker you are using, ensure that it is not on mute and try increasing the volume to fix the audio issue.
Check Playback Device
If you use multiple audio output devices on your system, there is a chance that while you want to play audio through one device, the system is playing it through another. It is a common problem when multiple speakers are connected to the system.
Click on the speaker sign in the System Tray, and then click on the arrow next to the speaker name.
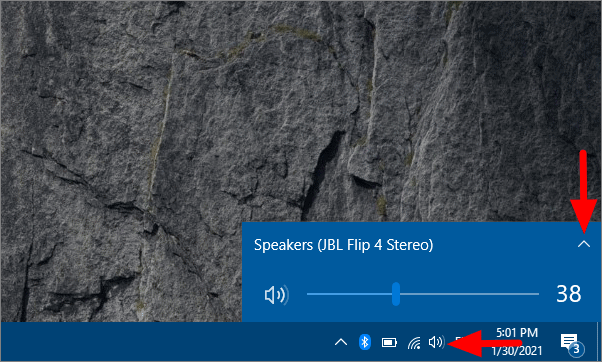
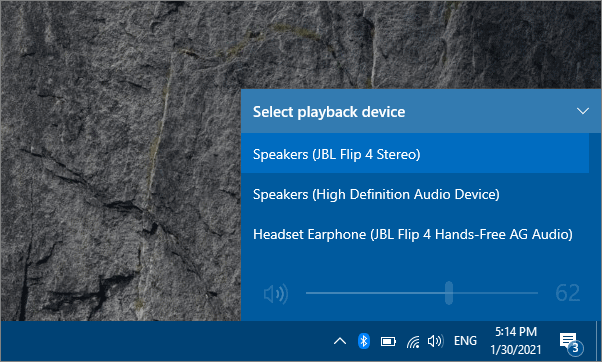
The various playback devices will be displayed here. Check if the one you want to use for sound output is selected. In case it isn’t, select the preferred one and then try playing audio.
Check the Connections
If you are using external speakers with a cable connection, check if the jack or USB is properly connected. Also, check for any damage in cables, since this goes unnoticed most of the time. If you find any loose connections or damaged cable, repair or replace them to fix the issue.
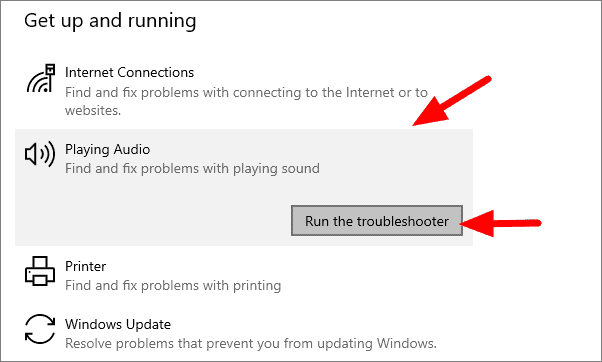
Playing Audio Troubleshooter
Running a troubleshooter is one of the easiest methods to identify and eliminate a problem.
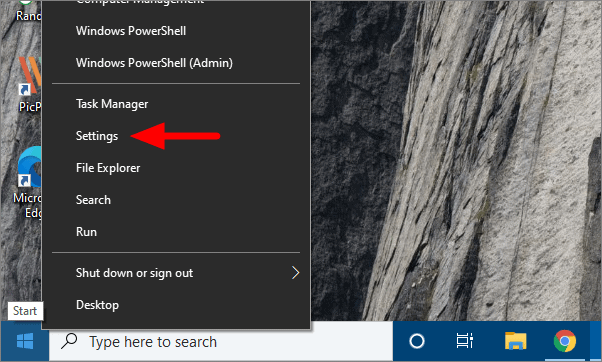
To run troubleshooter, right-click on the Start Menu and select Settings.
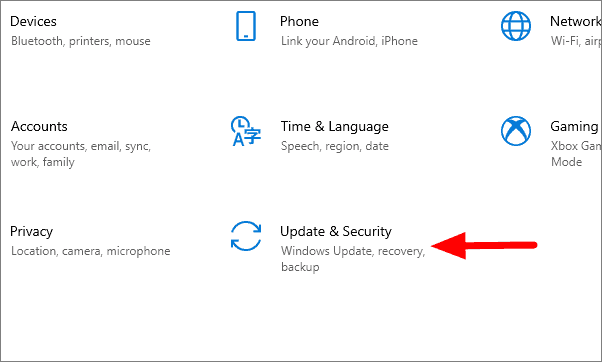
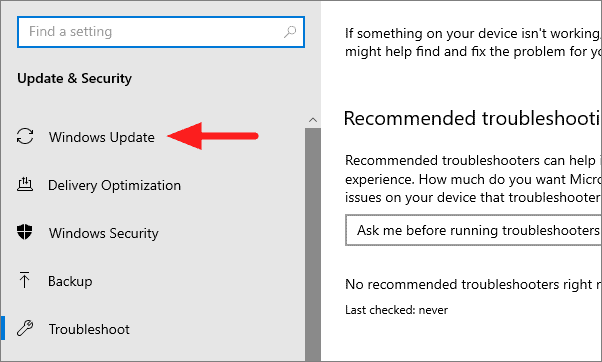
In Settings, select ‘Update & Security’, the last option.
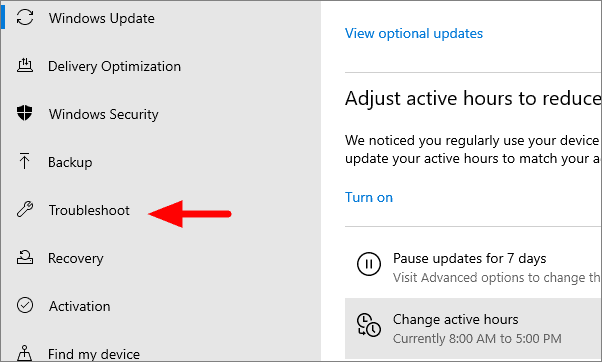
Search for ‘Troubleshoot’ tab on the left and open it.
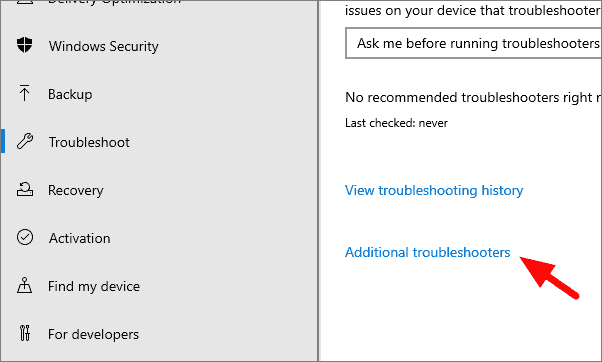
In Troubleshoot, click on ‘Additional troubleshooters’ if the ‘Playing Audio’ troubleshooter is not displayed here.
In Additional troubleshooters window, click on ‘Playing Audio’ and then select ‘Run the troubleshooter’.
The troubleshooter window will open and do an initial test. Select the speaker you are having trouble with and then click on ‘Next’. The troubleshooter will run and then display the issues with the speaker. Make the necessary changes as recommended by the troubleshooter to get things up and running.

Update Windows
If you are running an older version of Windows and there is a new version available, update it to see if that resolves the issue. Microsoft releases Windows updates to fix errors and bugs and also to add new features. If there is a software issue that is preventing you from connecting to the speaker or playing audio through it, updating Windows might help.
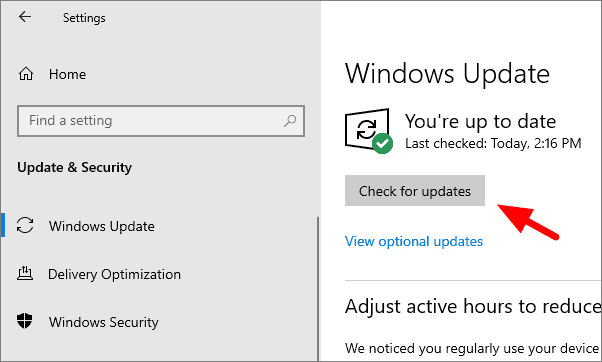
To update Windows, select the ‘Windows Update’ tab, the first option in Update & Security.
Click on ‘Check for updates’ at the right. If there are any pending updates, download and install them. Once the latest version is installed, check if the speakers start working.
Check Speaker Drivers
Check for driver updates for the speaker you are having audio troubles with, and update them, if any update is available.
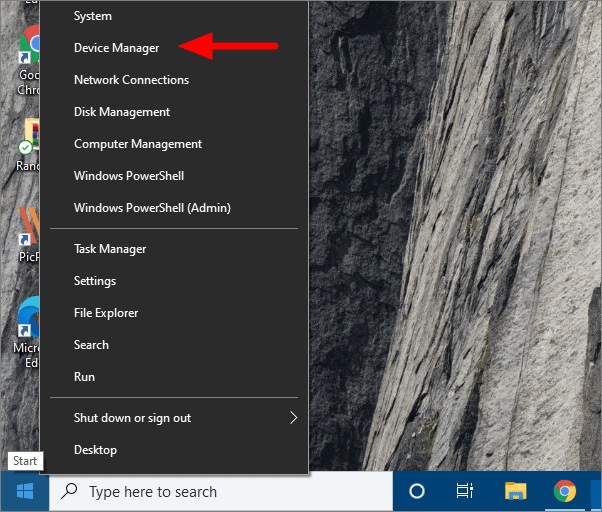
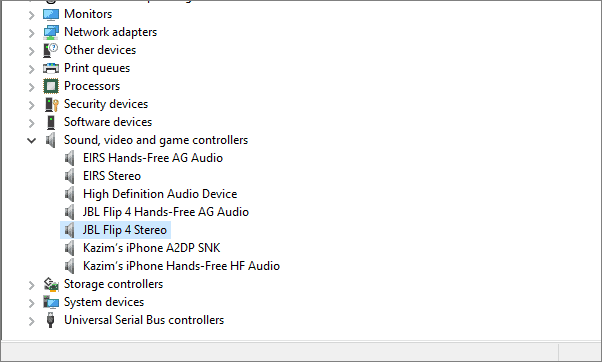
To check for driver updates, right-click on the Start Menu and select ‘Device Manager’.
Search for ‘Sound, video and game controllers’ and click on it. Double-click on the malfunctiong speakers to open speaker properties.
To check for updates, go to the ‘Driver’ tab and then click on ‘Update Driver’.
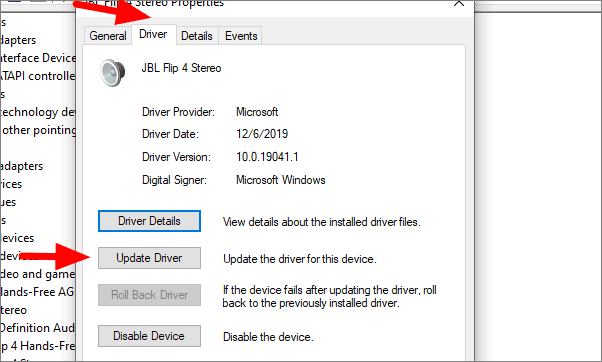
Select the first option to allow Windows to automatically search for the best available drivers.

If you have decent technical expertise, visit the speaker manufacturer’s website and download the latest driver. Then click on the second option, browse and the driver file to update.
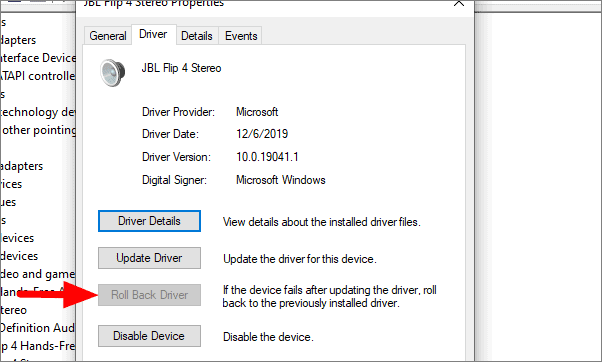
Moreover, if the problem started after you updated the driver, roll back to the previous version to fix the issue.
To roll back to the previous driver version, click on ‘Roll back driver’ in the Driver tab of speaker properties. If the driver has been updated recently, the ‘Roll back driver’ option will not be greyed out, which the case below.
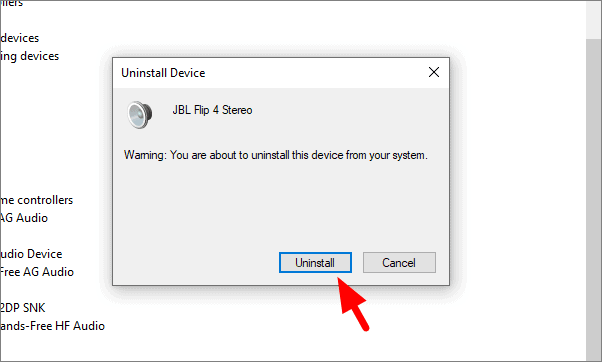
If the speaker still does not work, uninstall the device and then reboot your system to automatically reinstall the driver. This method works when the driver files are corrupt and reinstalling them will fix the issue. To uninstall, right-click on the malfunctioning speaker and click on ‘Uninstall device’.
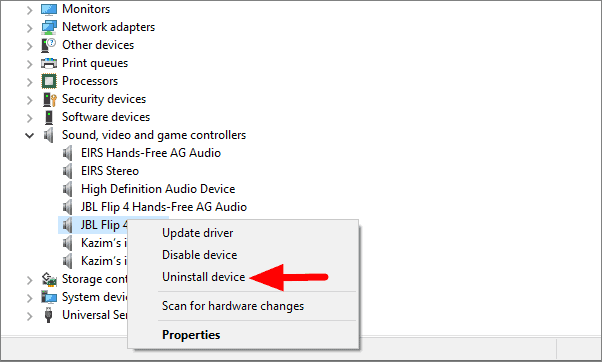
On the warning dialog box, click on ‘Uninstall’ to remove the driver.
Reboot your system and connect the external speakers. The problem should now be resolved.
System Restore
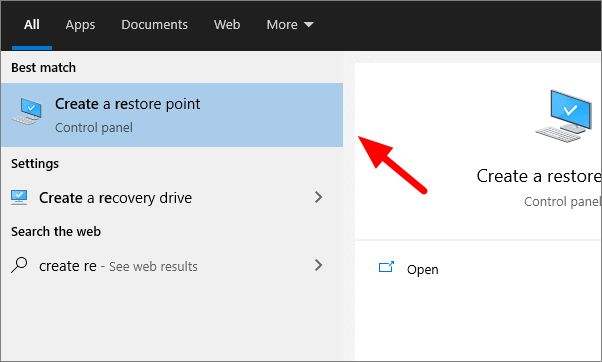
If your speaker was working fine until some time ago and stopped working all of a sudden, you can use system restore.
To proceed with system restore, search for ‘Create a restore point’ in the search menu.
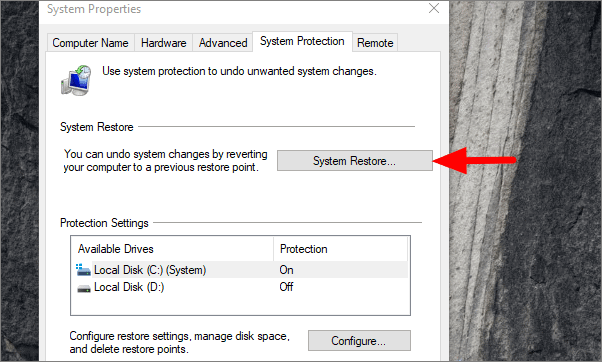
The System Protection tab will open by default. Click on ‘System Restore’
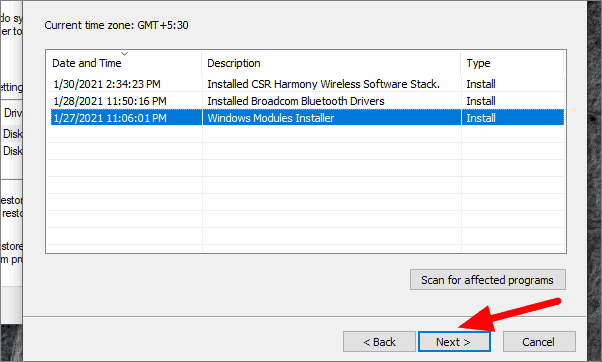
The System Restore window will open. Select the ‘Chose a different restore point’ option and click on ‘Next’ at the bottom.
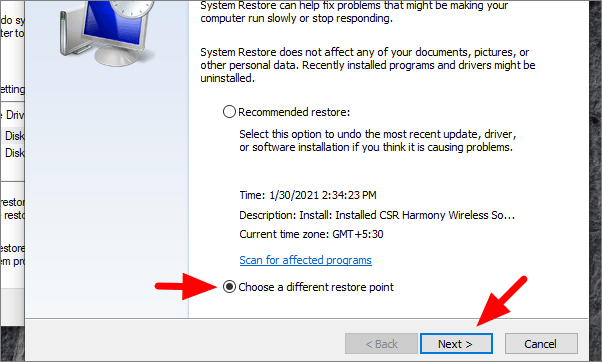
If you remmber when the speakers stopped working, select a restore point before it and click on ‘Next’.
On the next window, click on ‘Finish.
Now that we have discussed various methods to fix sound issues with external speakers, you can easily employ them and solve any problem that comes your way.


