
When Microsoft Store apps refuse to open or update on Windows 11, the problem often stems from a corrupted dependency, such as the Windows App Runtime. Other causes include a cluttered store cache, incorrect network settings, or missing system files. Resolving these issues involves a series of targeted repairs, starting with the most common and effective solutions for recent app-related errors.
Repair the Windows App Runtime
The Windows App Runtime is a critical component that many Microsoft Store apps rely on. If it becomes corrupted, apps may fail to update or launch, often with error codes like 0x80073CF9. Repairing this component can quickly restore app functionality.
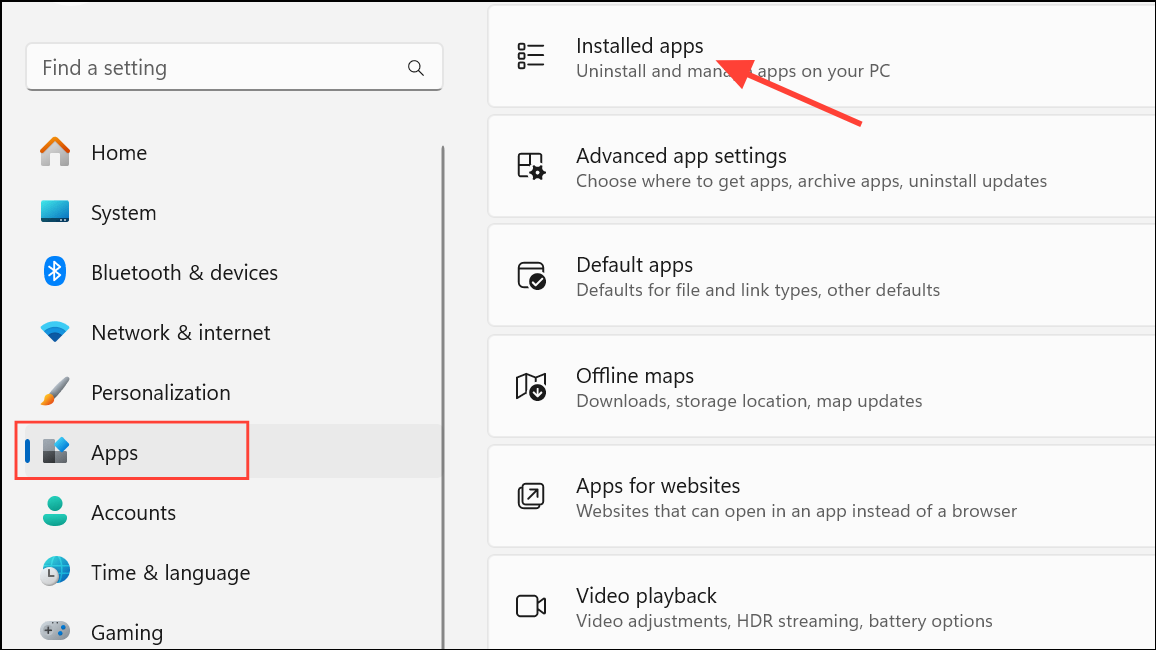
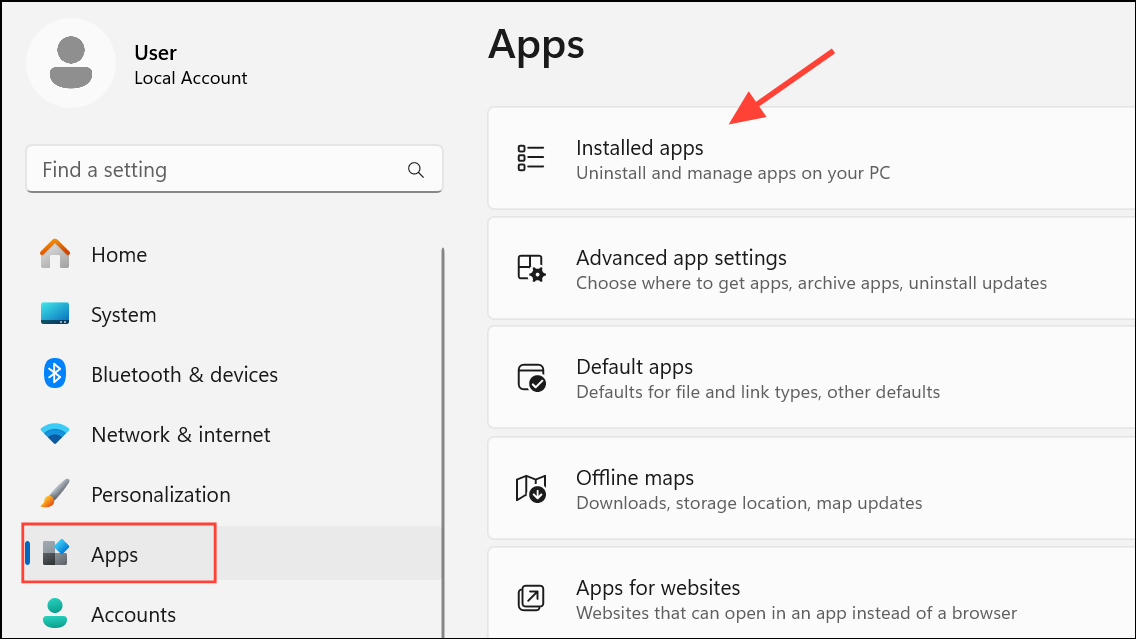
Step 1: Open the Settings app by pressing the Windows key + I. Navigate to the Apps section and select Installed apps (or Apps & features).
Step 2: In the search bar on the Installed apps page, type singleton to locate the Microsoft Windows App Runtime Singleton. Click the three-dot menu next to it and choose Advanced options.
Step 3: On the Advanced options screen, first click Terminate to force the process to stop. Next, click the Repair button. If repairing doesn't solve the problem, return to this screen and use the Reset button.
Step 4: If the issue persists, you may need to install the latest version of the Windows App SDK manually. Download the latest installer from the official Windows App SDK downloads page. After downloading, restart your computer and run the installer before attempting to use the Microsoft Store again.
Run the Windows Store Apps Troubleshooter
Windows includes a built-in troubleshooter designed to automatically diagnose and fix common problems with the Microsoft Store and its apps. This should be one of the first steps in any troubleshooting process.
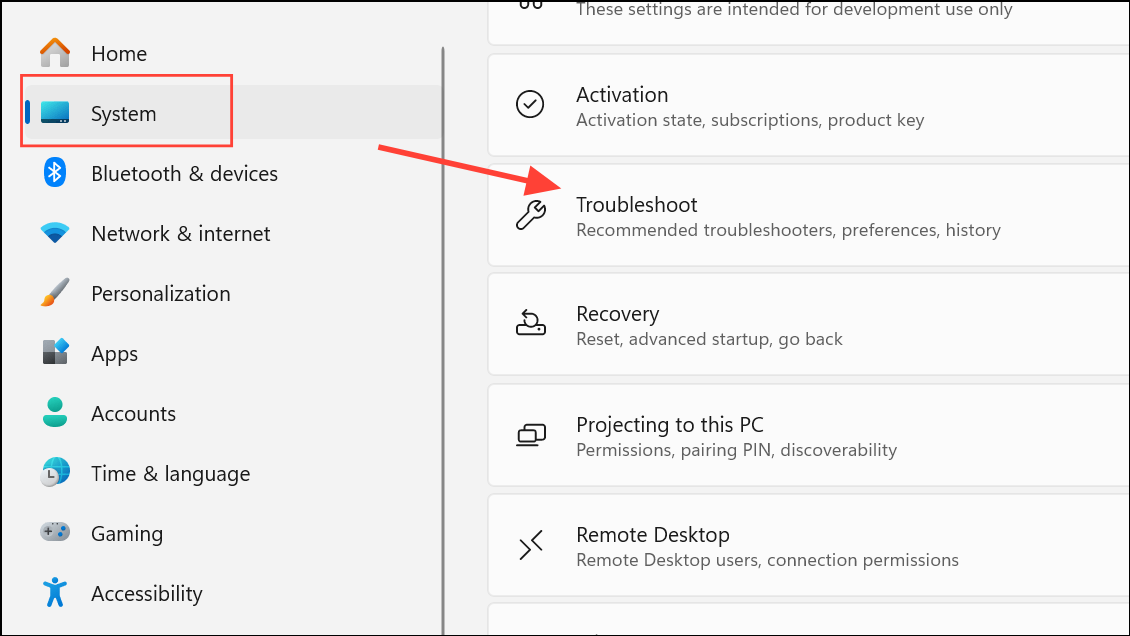
Step 1: Press the Windows key + I to open the Settings app. In the System tab, scroll down and select Troubleshoot.
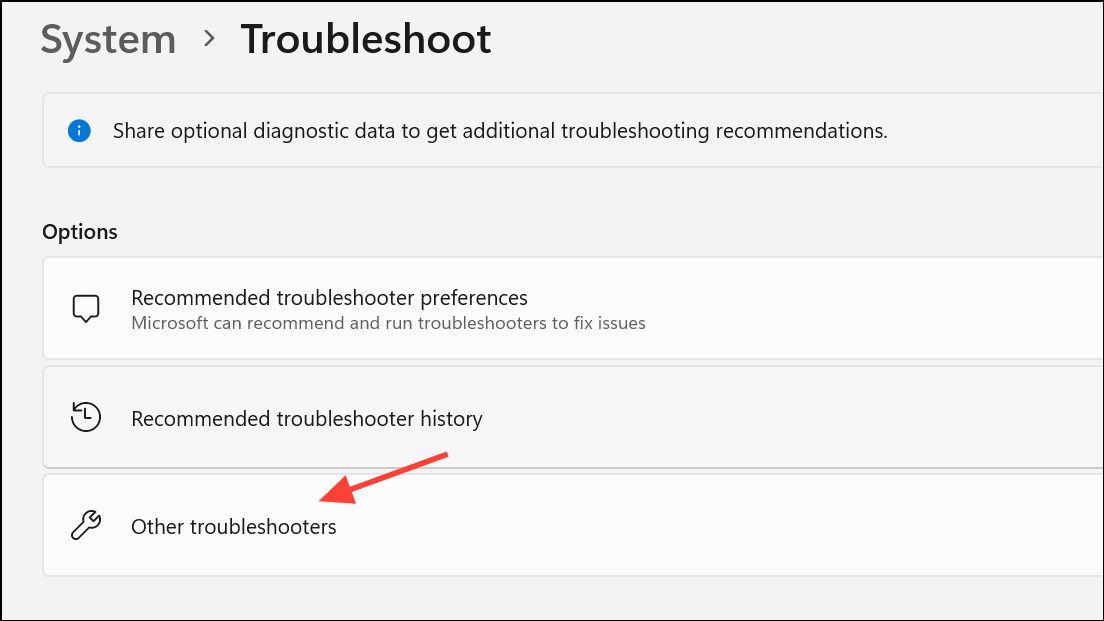
Step 2: Click on Other troubleshooters. Find Windows Store Apps in the list and click the Run button next to it. The troubleshooter will scan for issues and attempt to apply fixes automatically. Follow any on-screen instructions it provides.
Reset the Microsoft Store
Clearing the Microsoft Store's cache and resetting the application can resolve issues caused by corrupted temporary data or misconfigured settings. This process includes three main actions: clearing the cache with a command, repairing the app's files, and resetting it to its default state.
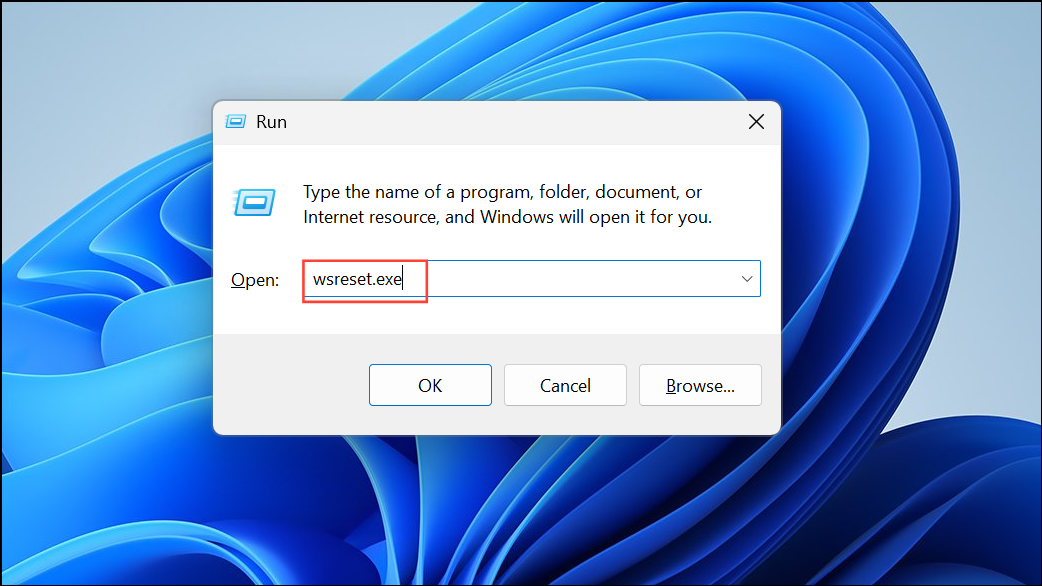
Step 1: To clear the cache, press the Windows key + R to open the Run dialog box. Type wsreset.exe and press Enter. A blank Command Prompt window will appear; wait for it to close automatically, which may take a few moments. Once it disappears, the Microsoft Store should launch on its own.
Step 2: If clearing the cache doesn't help, repair the app. Open Settings, go to Apps > Installed apps, and search for Microsoft Store. Click the three-dot menu, select Advanced options, and then click the Repair button. This will attempt to fix the app's files without affecting your data.
Step 3: As a final step, you can reset the app from the same Advanced options menu. Clicking Reset will permanently delete the app's data on your device, including sign-in details, and restore it to its original settings. You will need to sign back into the Store afterward.
Reinstall the Microsoft Store via the Xbox App
In cases where the Microsoft Store is completely missing or unresponsive, a clever workaround is to use the Xbox app to trigger its reinstallation. The Xbox app depends on the Store and can detect when it and other essential services are missing.
Step 1: If you don't have it installed, download the Xbox app from the official Xbox website and run the installer.
Step 2: Launch the Xbox app. It will likely display a banner or notification at the top indicating that some necessary components are missing. Click the link in the banner to fix the issue.
Step 3: You will be taken to a settings page that lists the missing dependencies, which should include the Microsoft Store. Follow the prompts to install all the missing items. Once complete, the Microsoft Store will be restored. You may need to visit the Store's Library to reinstall other apps that had disappeared, such as Calculator or Snipping Tool.
Re-register the Store Using PowerShell
For more stubborn issues, you can use PowerShell to force Windows to re-register the Microsoft Store application package for your user account. This can fix problems related to app registration and permissions.
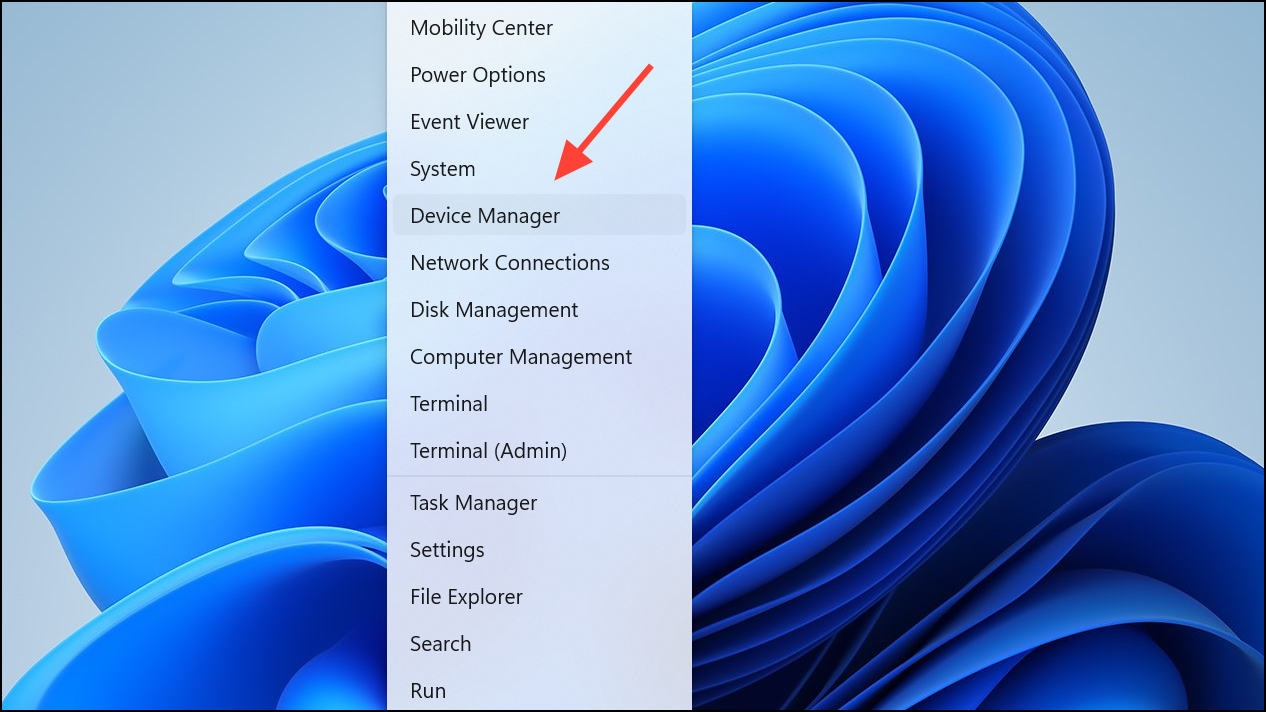
Step 1: Right-click the Start button and select Terminal (Admin) or Windows PowerShell (Admin) from the menu to open an elevated PowerShell window.
Step 2: Copy and paste the following command into the PowerShell window and press Enter. This command finds the Microsoft Store installation package and re-registers it.
Get-AppxPackage -AllUsers *Microsoft.WindowsStore* | Foreach {Add-AppxPackage -DisableDevelopmentMode -Register "$($_.InstallLocation)\AppXManifest.xml"}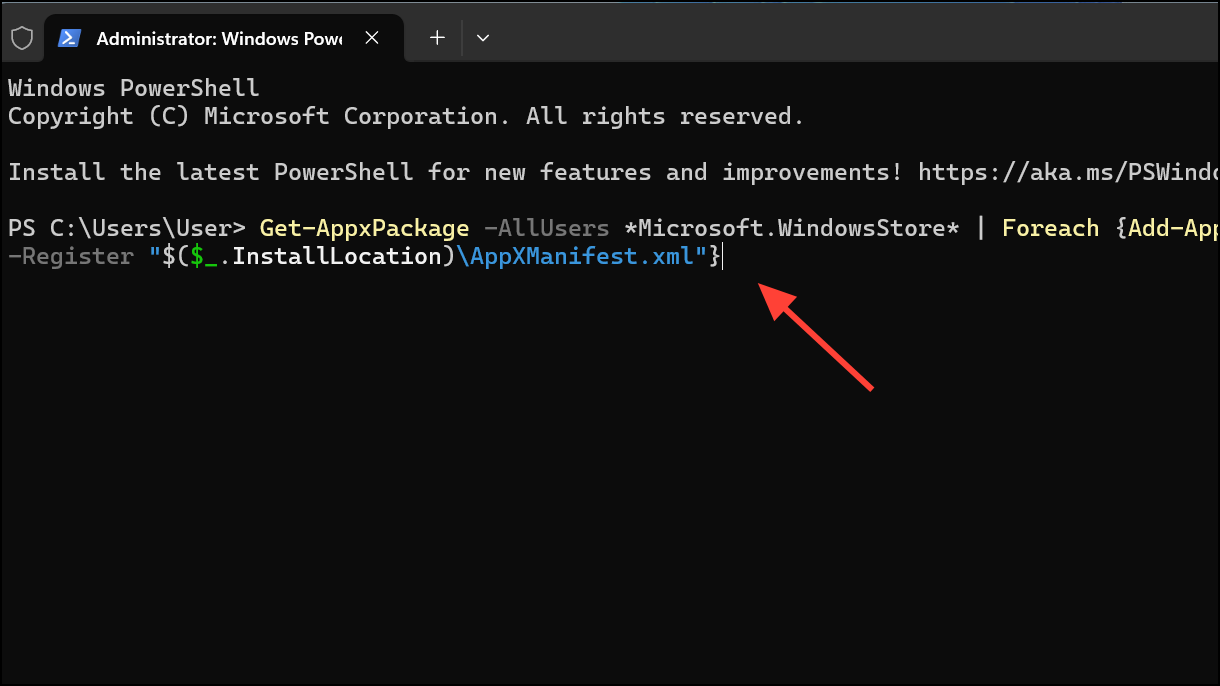
Step 3: Once the command finishes executing, restart your computer and check if the Microsoft Store is functioning correctly.
Check Network Configurations
Incorrect network settings, such as a misconfigured DNS server or proxy, can prevent the Microsoft Store from connecting to its services. Ensuring your settings are correct can often resolve connection-related errors.
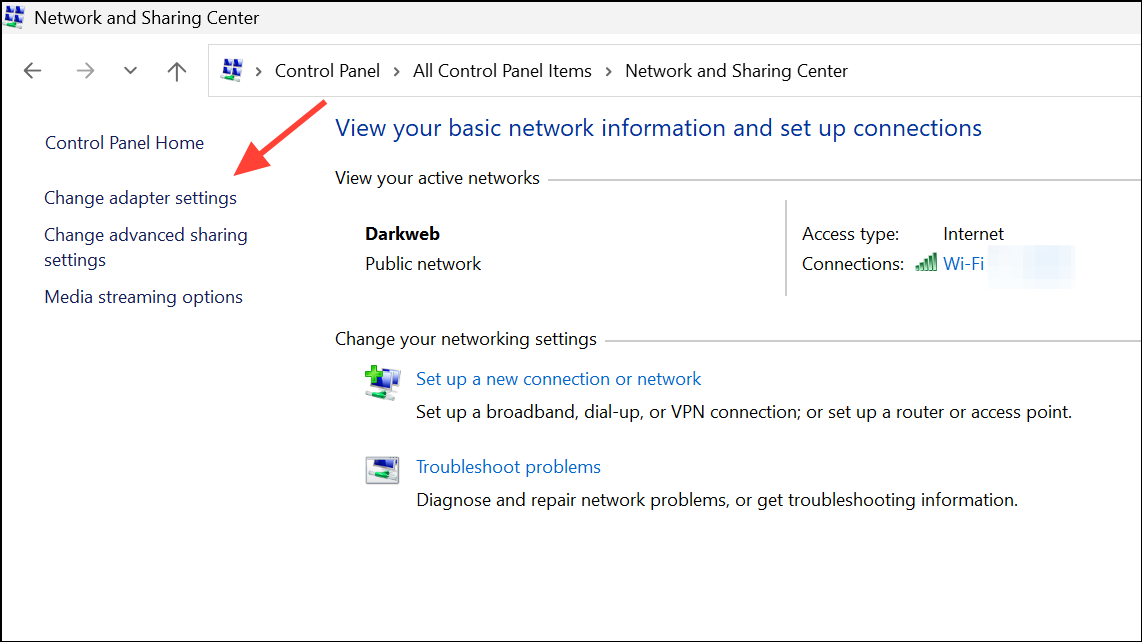
Step 1: To change your DNS, open Control Panel, navigate to Network and Sharing Center, and click Change adapter settings.
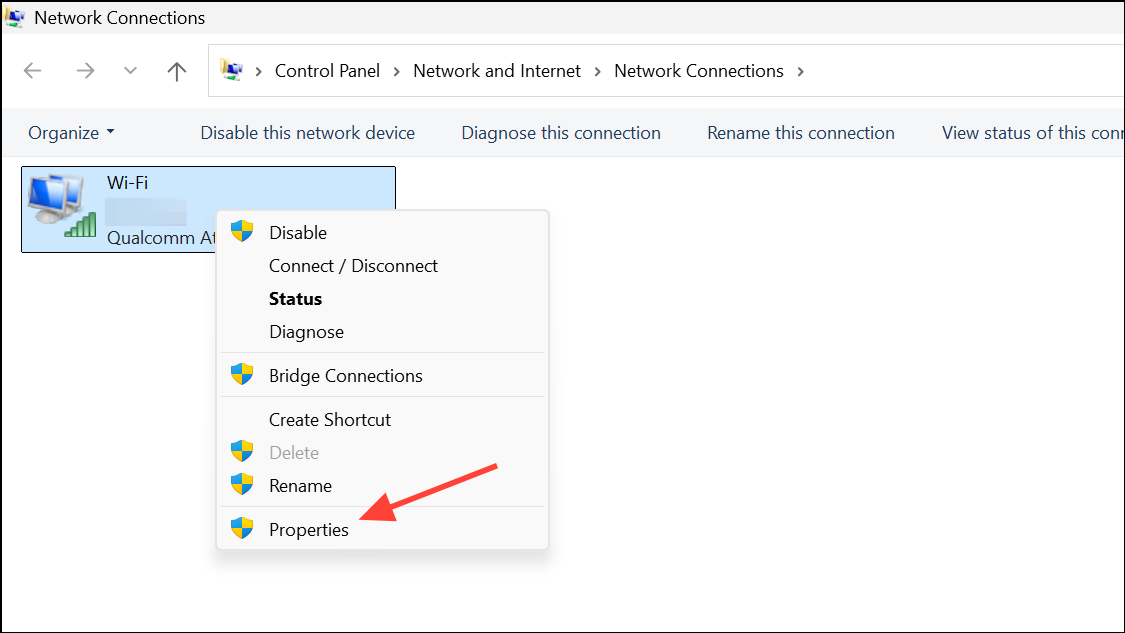
Step 2: Right-click your active network connection (e.g., "Ethernet" or "Wi-Fi") and select Properties.
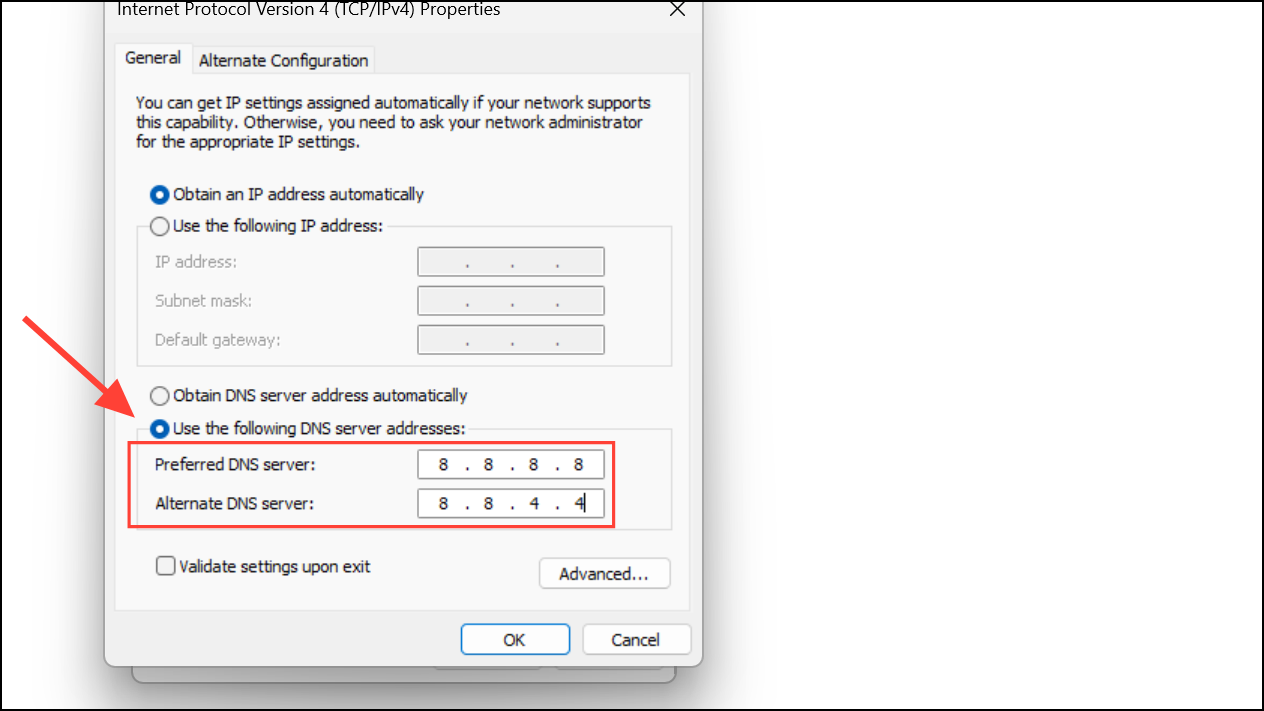
Step 3: Select Internet Protocol Version 4 (TCP/IPv4) and click Properties. Choose Use the following DNS server addresses and enter 8.8.8.8 for the Preferred DNS server and 8.8.4.4 for the Alternate DNS server. Click OK to save the changes.
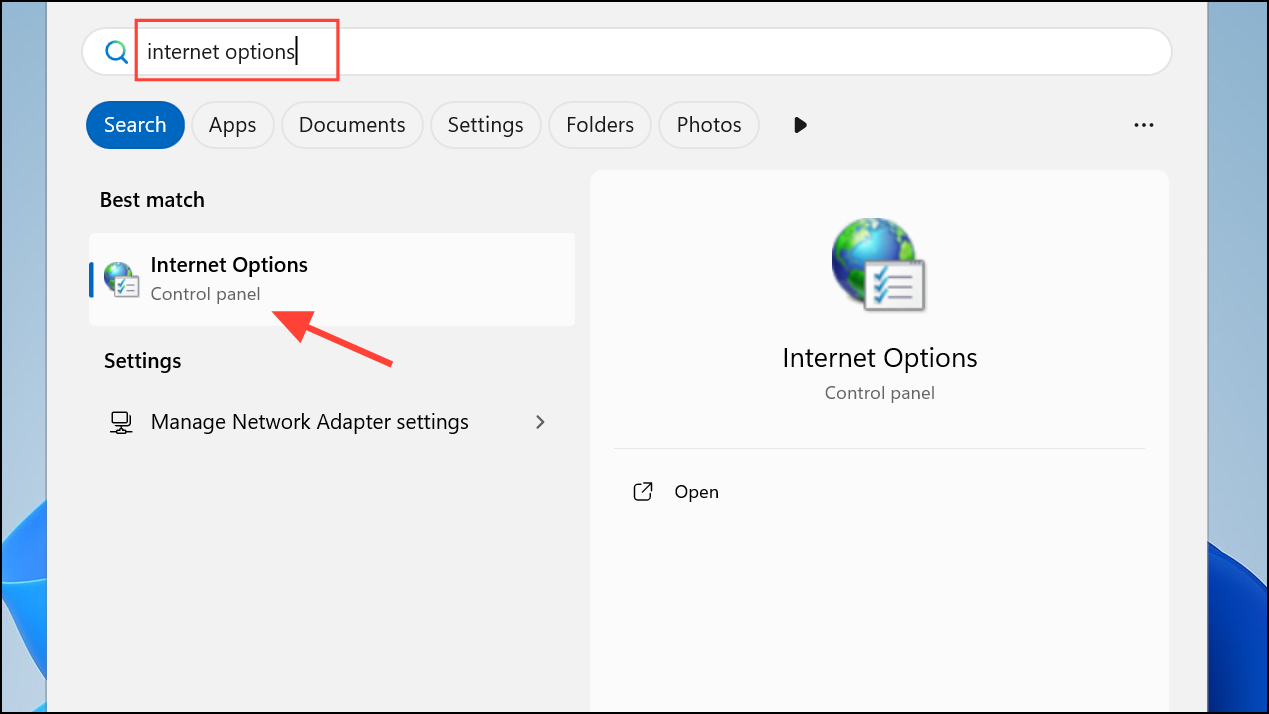
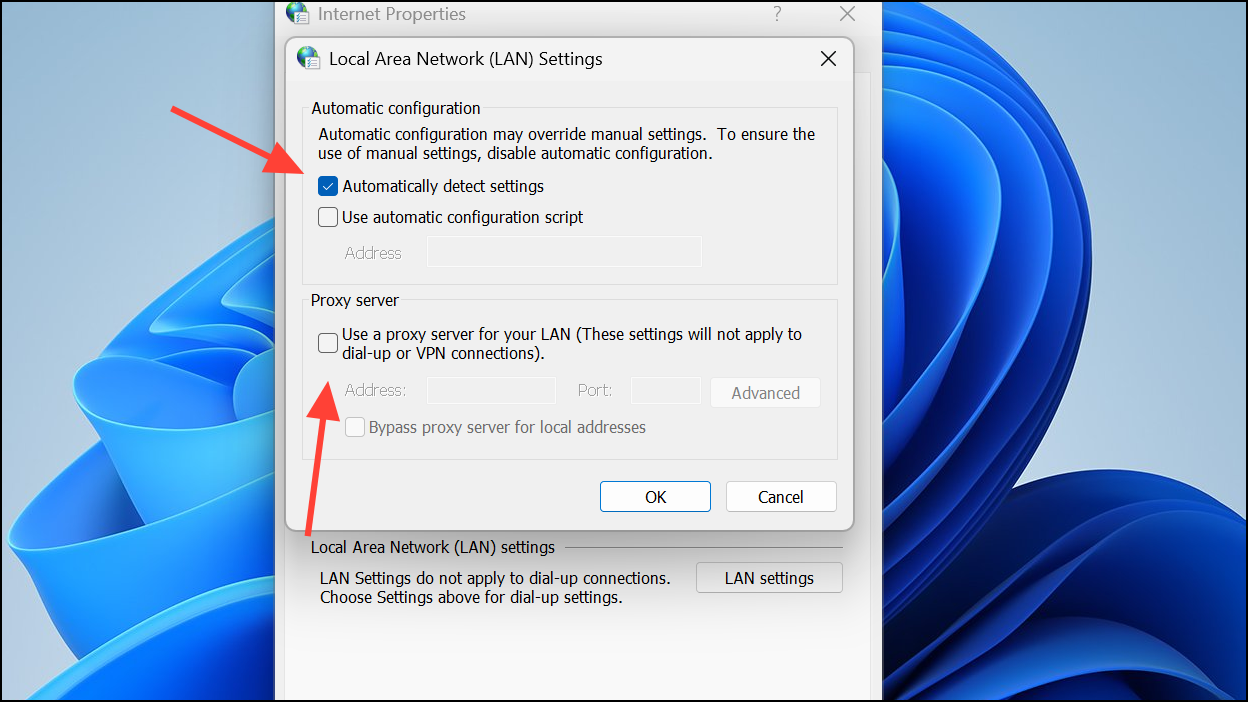
Step 4: To check your proxy settings, open the Start menu, search for "Internet Options," and open it.
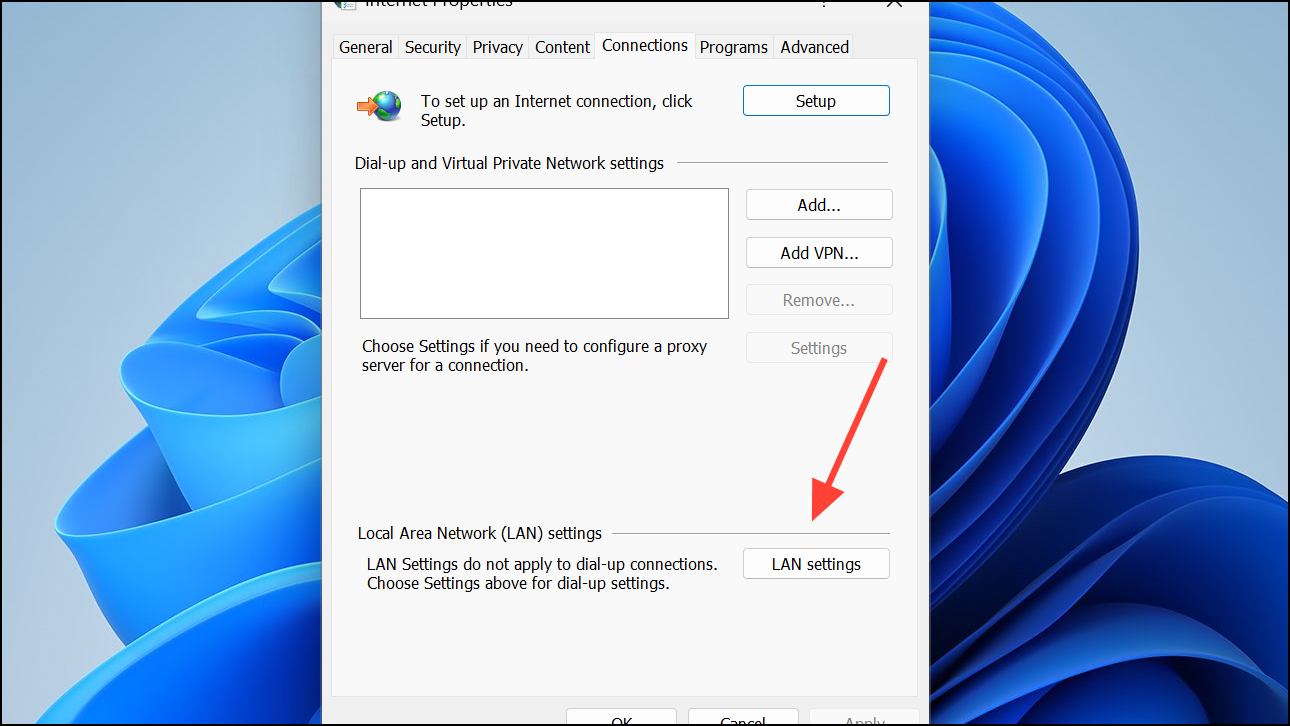
Step 5: Go to the Connections tab and click LAN settings.
Step 6: Ensure that Use a proxy server for your LAN is unchecked and Automatically detect settings is checked. Restart your computer after making any changes.
Repair System Files
Corrupted Windows system files can cause a wide range of problems, including issues with the Microsoft Store. You can use the built-in System File Checker (SFC) and Deployment Image Servicing and Management (DISM) tools to scan for and repair these files.
Step 1: Open Terminal or PowerShell as an administrator. First, run the DISM tool to repair the Windows component store by entering the following command:
dism.exe /online /cleanup-image /restorehealth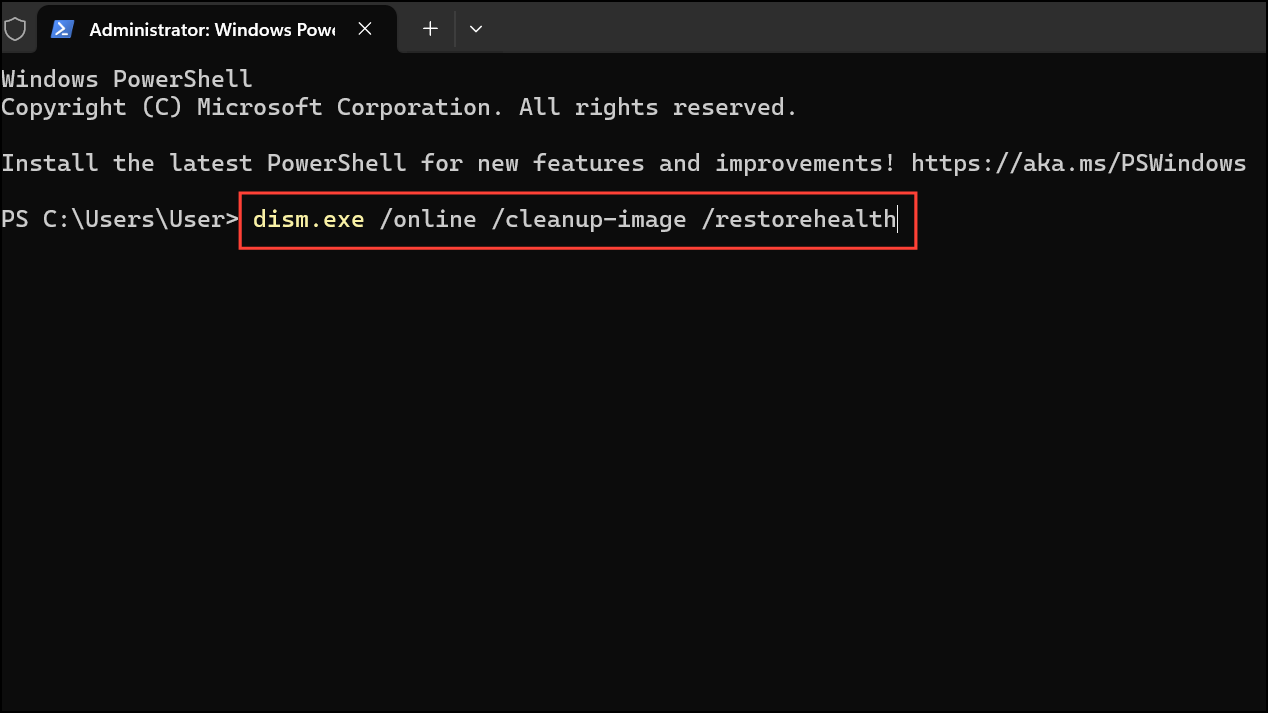
Step 2: After the DISM scan is complete, run the System File Checker with this command:
sfc /scannow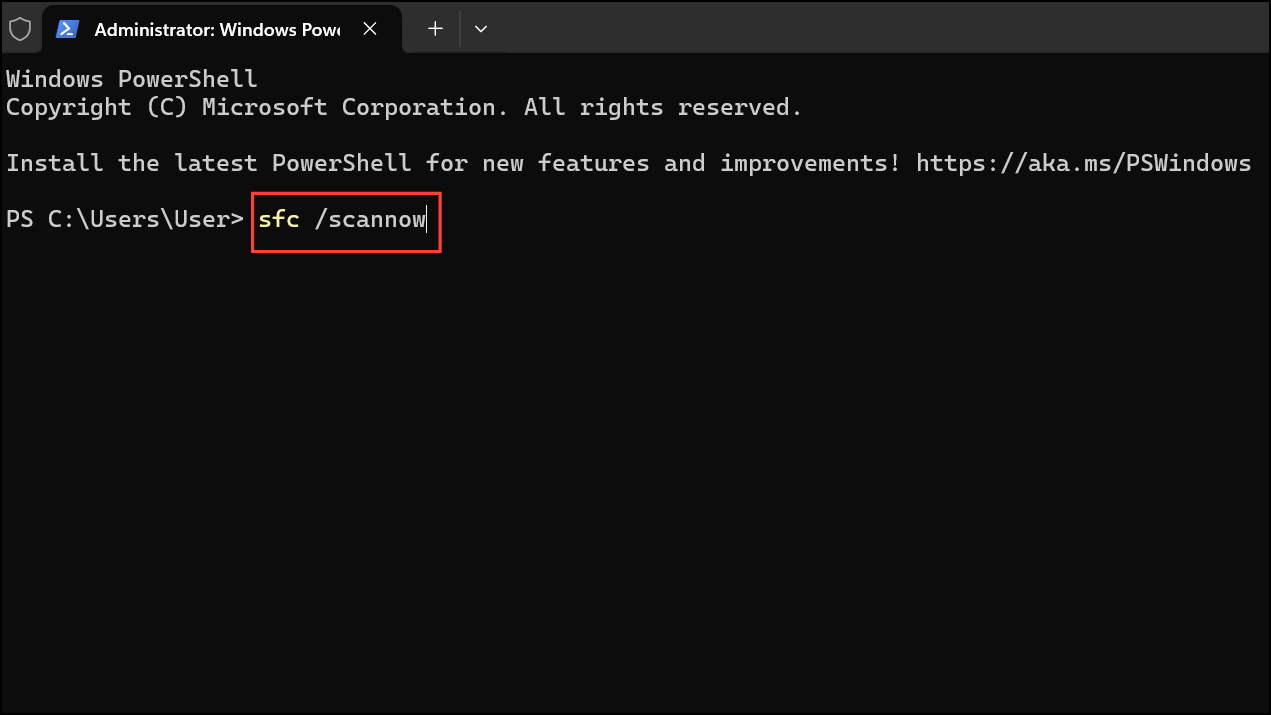
Step 3: Let the scan run to completion. It will find and replace any corrupted system files. Once it's finished, restart your computer and test the Microsoft Store.
Perform an In-Place Upgrade
If all other methods fail, an in-place upgrade is your final option before a complete reinstallation. This process reinstalls Windows 11 over your existing installation, repairing the operating system while keeping your personal files, apps, and most settings intact.
Step 1: Go to the official Windows 11 download page. Under the "Create Windows 11 Installation Media" section, click Download Now to get the Media Creation Tool.
Step 2: Run the Media Creation Tool. When prompted, choose the option to Upgrade this PC now. Alternatively, you can create an ISO file and mount it by right-clicking the file and selecting Mount. Then, run the setup.exe file from the virtual drive.
Step 3: Follow the on-screen instructions. On the "Ready to install" screen, ensure that the option to Keep personal files and apps is selected. The process will take some time, and your computer will restart several times.
With these troubleshooting steps, you should be able to get the Microsoft Store and your apps back in working order. Sometimes the most straightforward fixes do the job, but don't be surprised if a more creative solution, like using the Xbox app, is what ultimately saves the day.