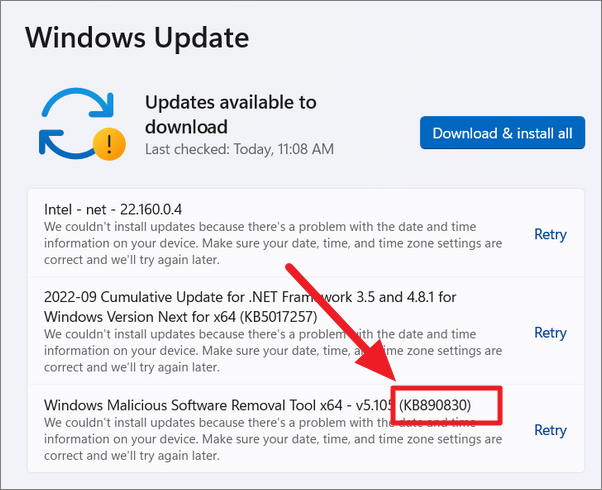
When attempting to update Windows 11, you may encounter an error message stating: “We couldn’t install updates because there’s a problem with the date and time information on your device. Make sure your date, time, and time zone settings are correct and we’ll try again later.” This frustrating issue can stem from various causes, including misconfigured time settings, incorrect active hours, or expired certificates. Fortunately, there are several methods you can try to resolve this problem and successfully install Windows updates.
Verify and adjust time and date settings
The first step in troubleshooting this issue is to ensure your computer’s time, date, and time zone are set correctly:
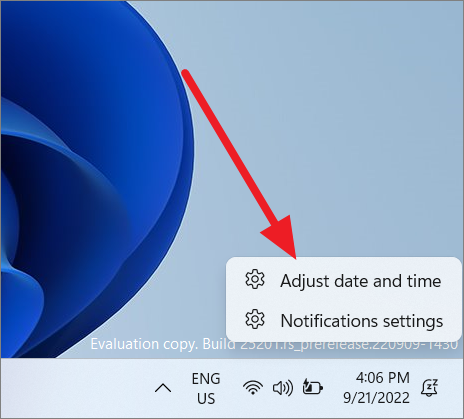
- Right-click on the time and date display in the taskbar’s bottom-right corner
- Select “Adjust date and time” from the menu
- In the Date & time settings window, ensure the “Set time automatically” option is enabled
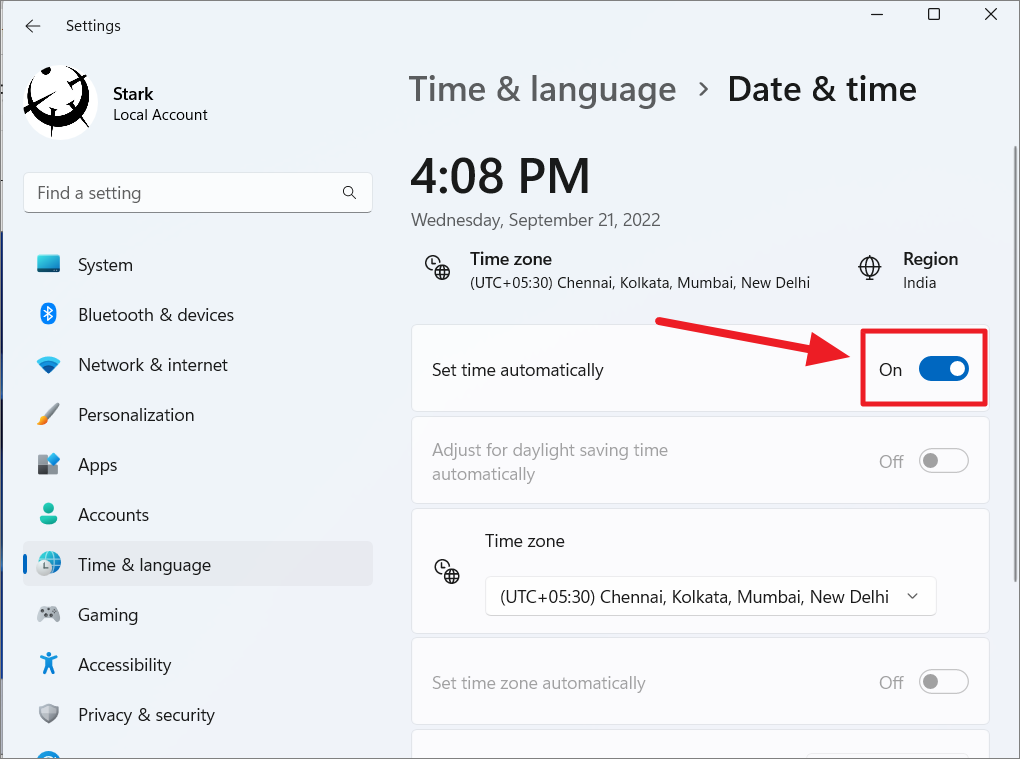
- Select your correct time zone from the dropdown menu

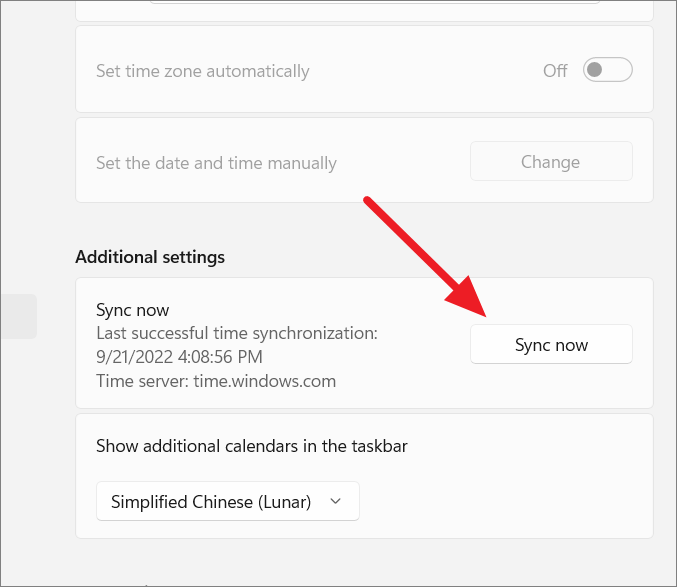
- Scroll down to the Additional settings section and click “Sync now” to synchronize your time with the Windows time server
After adjusting these settings, attempt to install the updates again.
Configure active hours to automatic
Windows uses the Active Hours setting to determine when to install updates and restart your device without interrupting your work. Ensuring this setting is configured correctly may help resolve update issues:
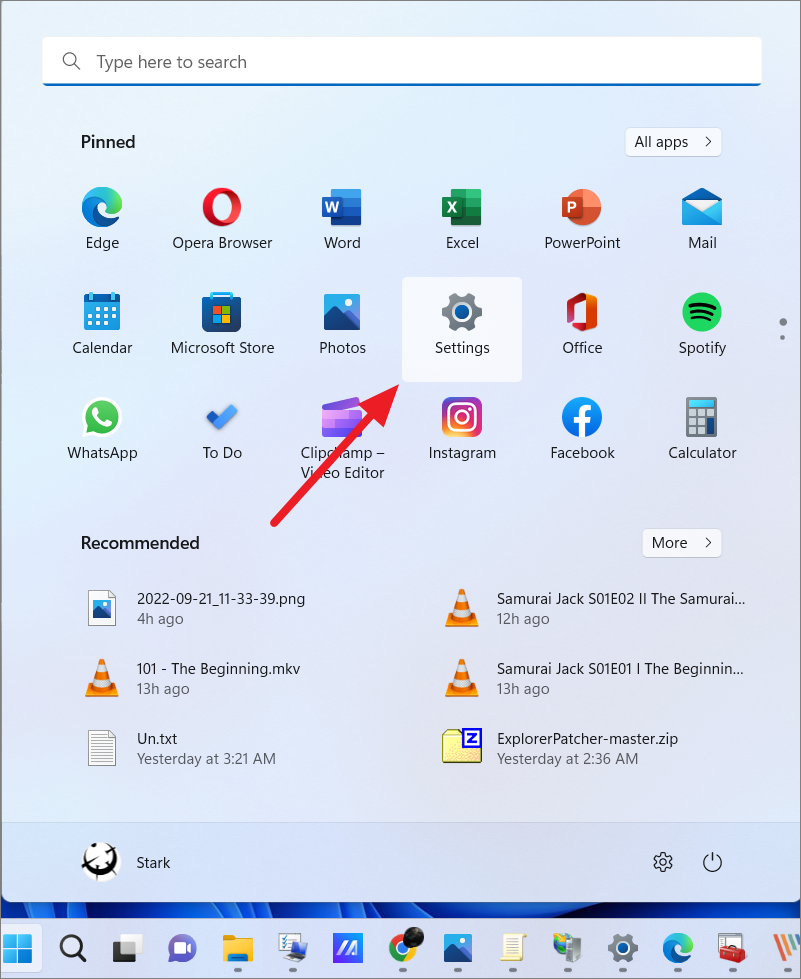
- Open the Start menu and click on “Settings”
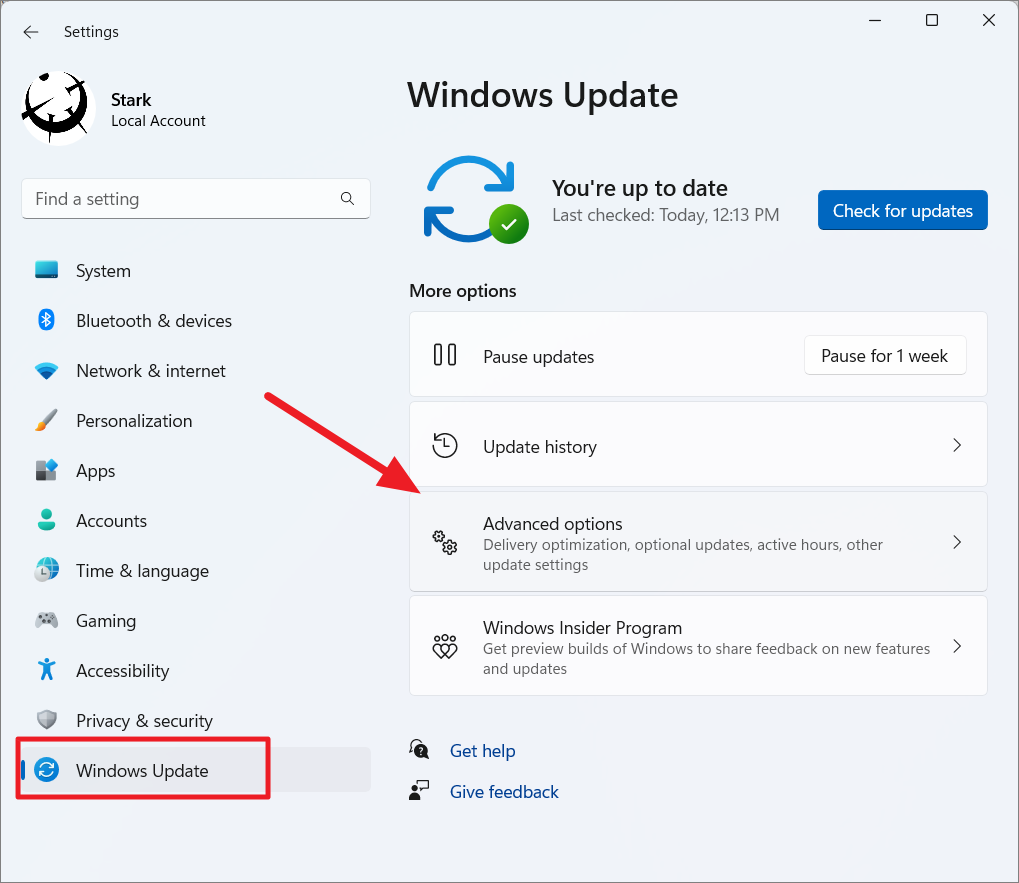
- In the left sidebar, select “Windows Update”
- Click on “Advanced options” in the right pane
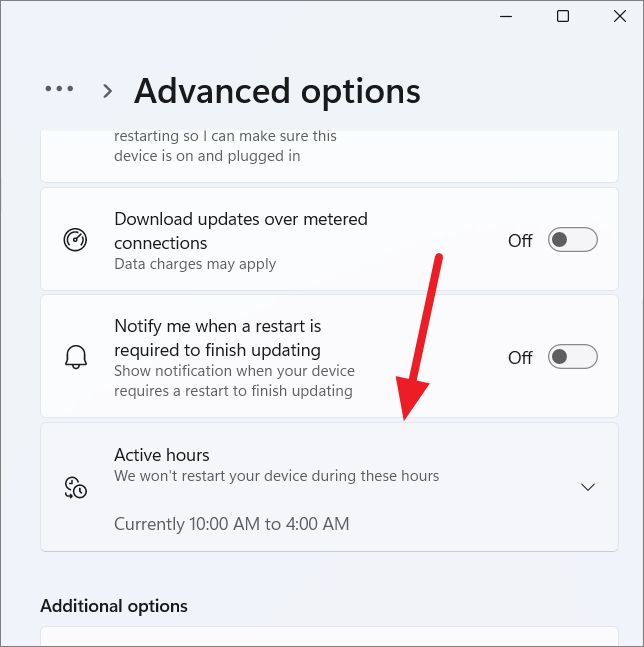
- Click on the “Active hours” option
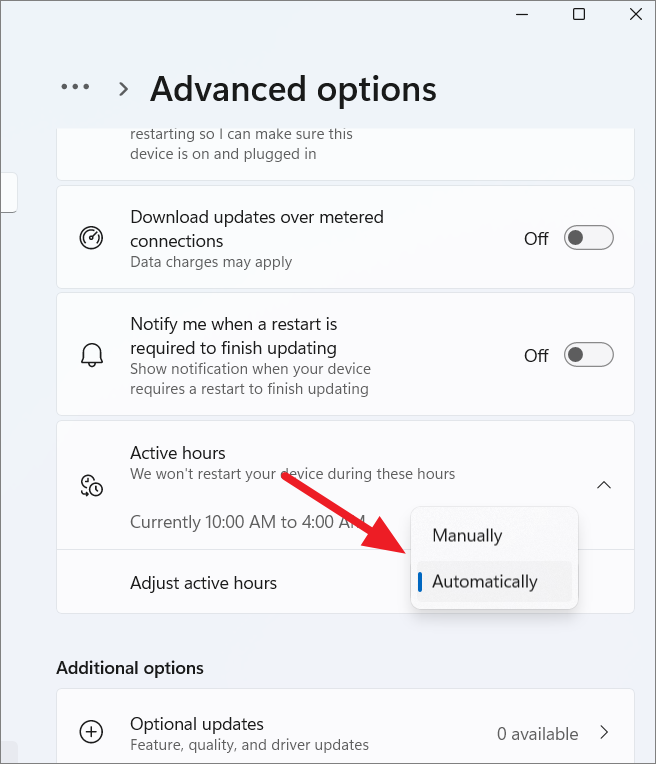
- Ensure the “Adjust active hours” option is set to “Automatically”
After making this change, restart your computer and try installing the updates again.
Use the Windows Update troubleshooter
Windows includes a built-in troubleshooter that can identify and resolve common update-related issues:
- Open Windows Settings by pressing Win + I
- Navigate to the “System” tab
- Click on “Troubleshoot” in the right pane
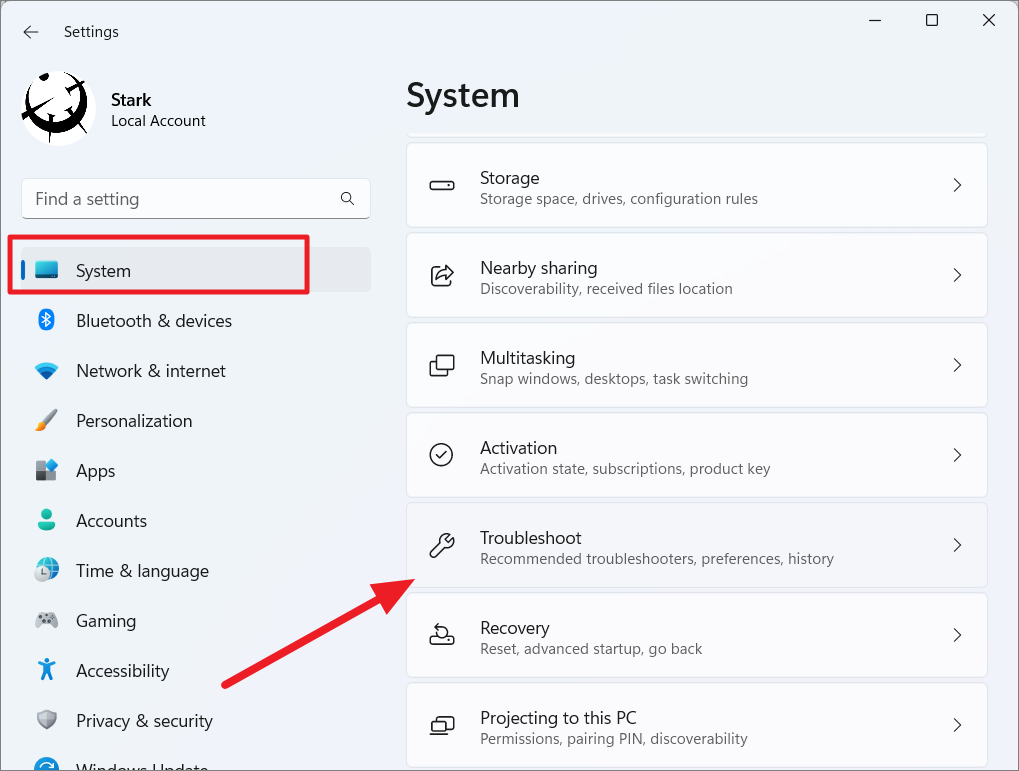
- Select “Other troubleshooters”

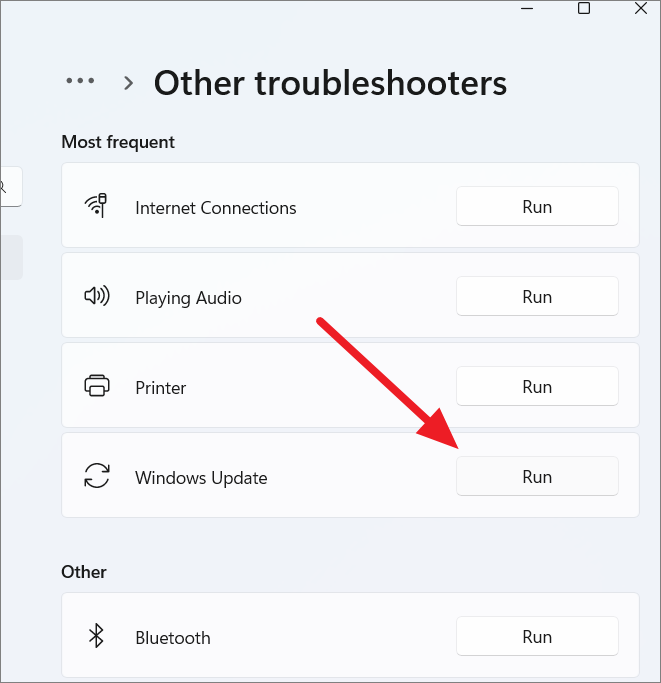
- Locate “Windows Update” in the Most frequent section and click “Run”
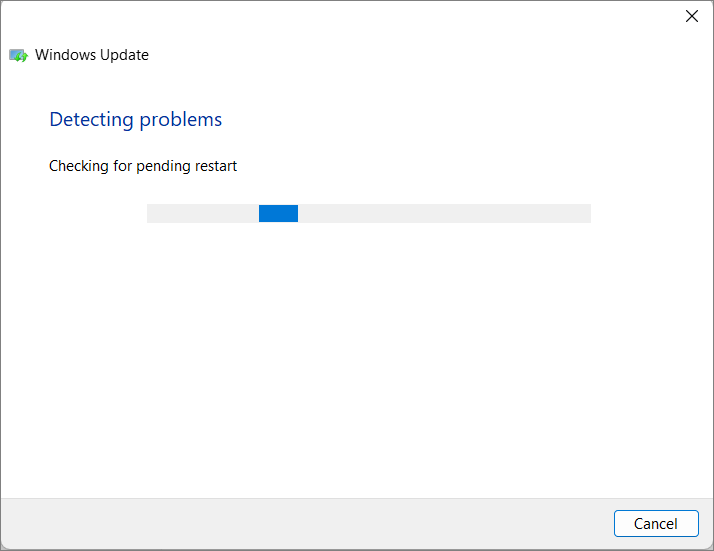
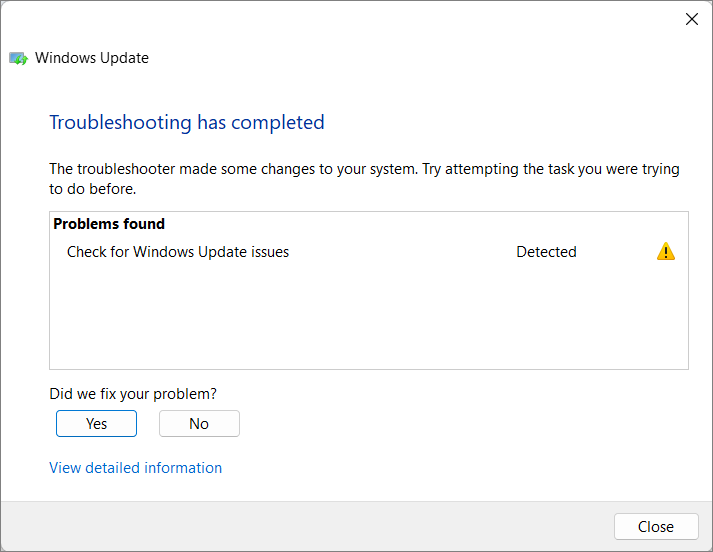
- The troubleshooter will scan your system, identify potential issues, and attempt to resolve them automatically. It may also provide suggestions for manual fixes if needed.
- Once the troubleshooting process is complete, attempt to update Windows again.
Manually install updates using Microsoft Update Catalog
If previous methods haven’t resolved the issue, you can try manually downloading and installing the problematic updates:
- Identify the Knowledge Base (KB) number of the failing update from the Windows Update settings
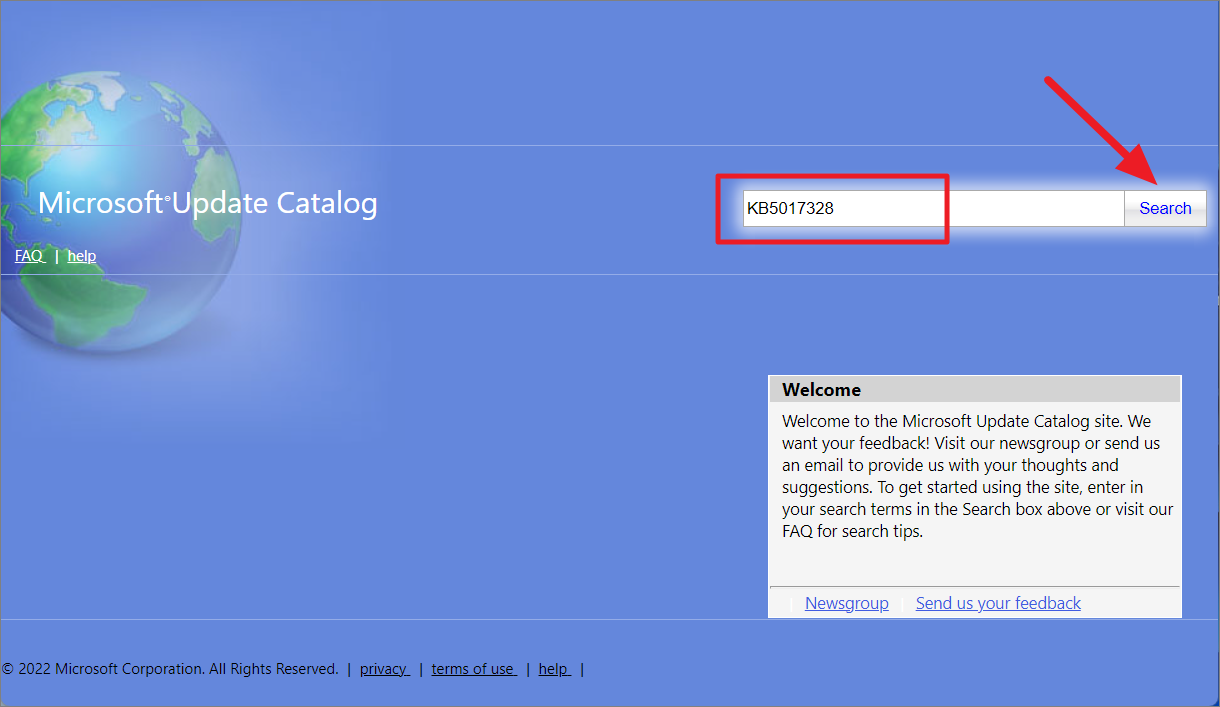
- Visit the Microsoft Update Catalog website
- Enter the KB number in the search field and click “Search”
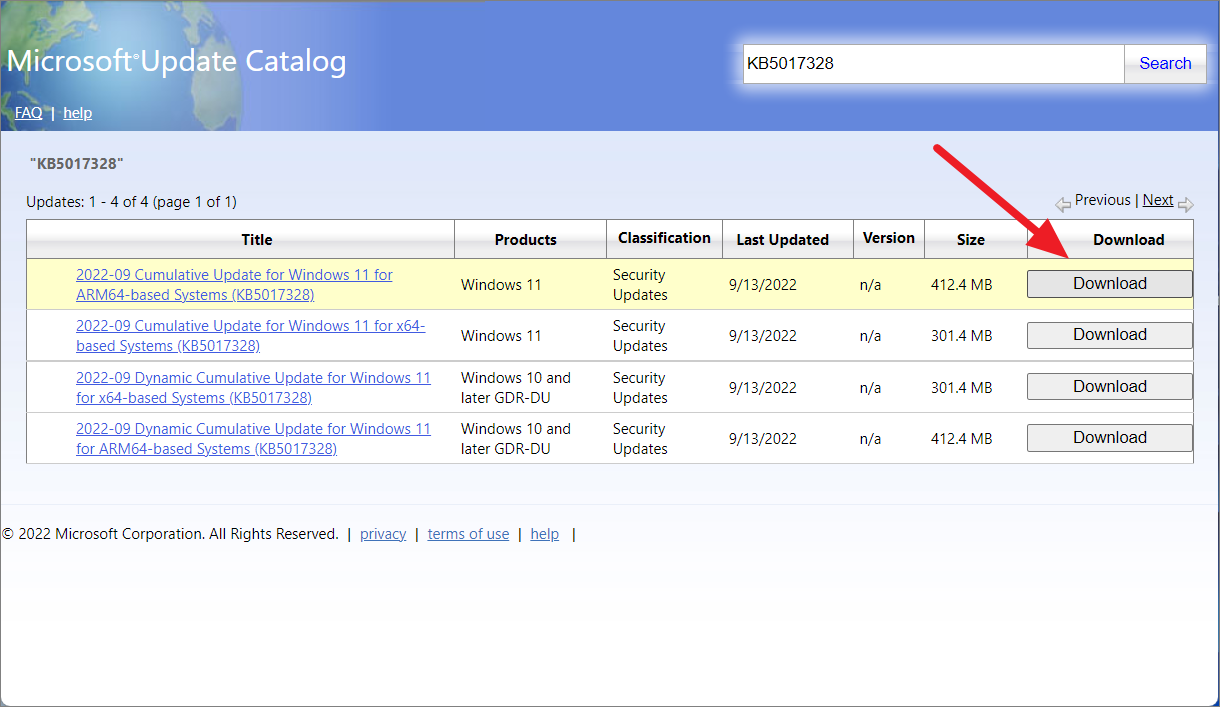
- Locate the appropriate update for your system architecture and click “Download”
- In the pop-up window, click the provided link to download the update file
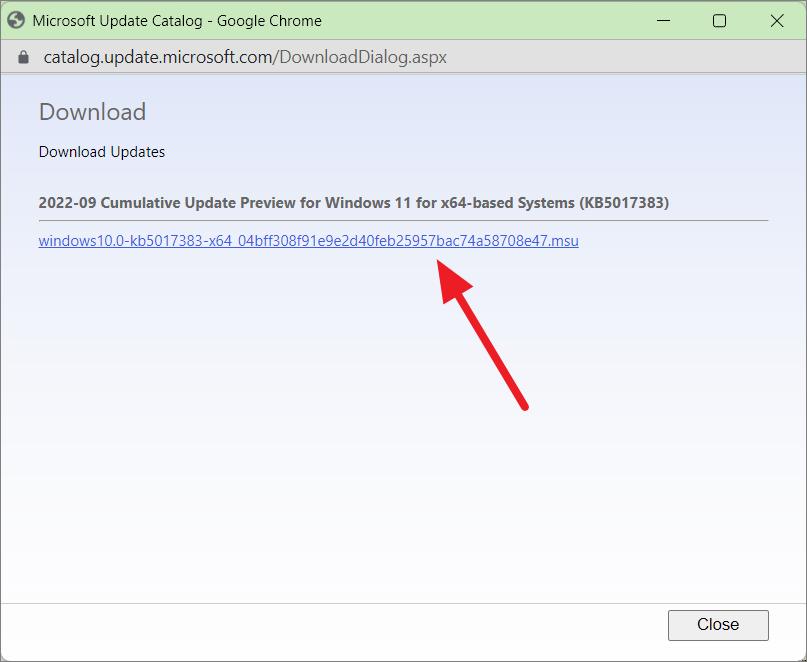
- Choose a download location and click “Save”
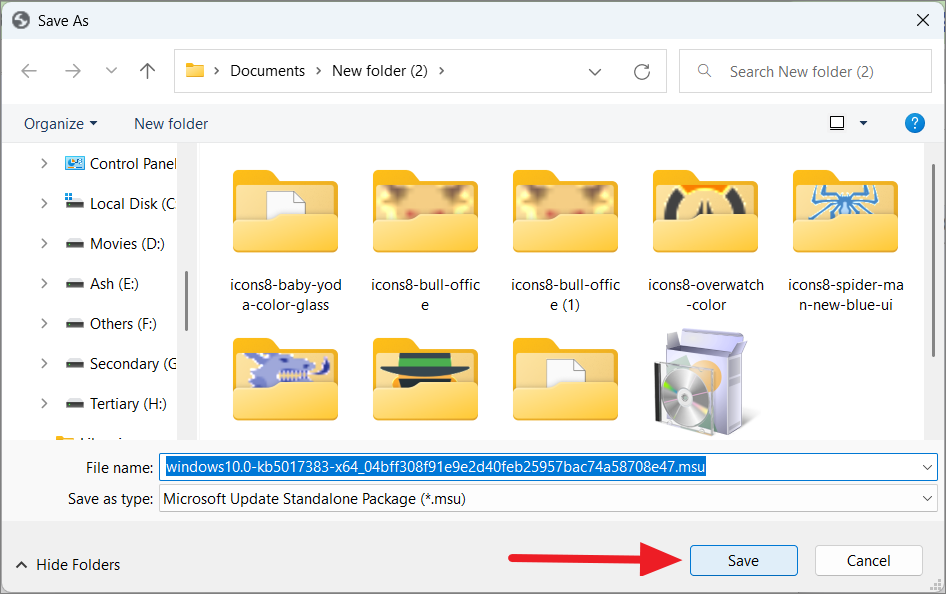
- If the downloaded file has a .msu extension, double-click it to install
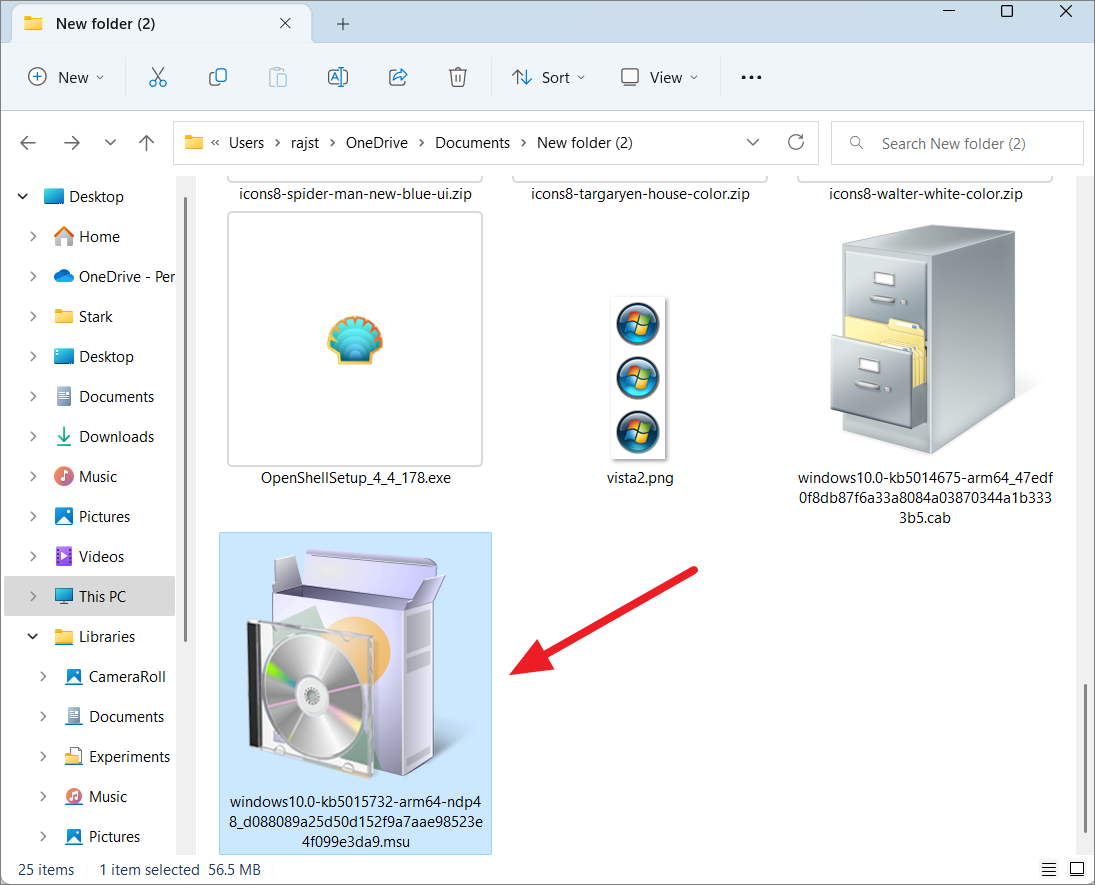
- If the file has a .cab extension, follow these additional steps:
- Double-click the .cab file to open it
- Select all contents (Ctrl + A)
- Right-click and choose “Extract”
- Select a destination for the extracted files
- Locate and run the “Setup” file in the extracted folder
Reset Windows Update components and policies
If all previous methods fail, you can try resetting Windows Update components and policies. This process involves using Command Prompt to stop services, delete temporary files, and reset various Windows Update-related settings:
- Open Command Prompt as administrator
- Restart your computer
- Restart the previously stopped services:
net start bits
net start wuauserv
net start appidsvc
net start cryptsvc- Reset Winsock:
netsh winsock reset
netsh winsock reset proxy- Re-register BITS and Windows Update-related DLL files (enter each command separately):
regsvr32.exe atl.dll
regsvr32.exe urlmon.dll
regsvr32.exe mshtml.dll
regsvr32.exe shdocvw.dll
regsvr32.exe browseui.dll
regsvr32.exe jscript.dll
regsvr32.exe vbscript.dll
regsvr32.exe scrrun.dll
regsvr32.exe msxml.dll
regsvr32.exe msxml3.dll
regsvr32.exe msxml6.dll
regsvr32.exe actxprxy.dll
regsvr32.exe softpub.dll
regsvr32.exe wintrust.dll
regsvr32.exe dssenh.dll
regsvr32.exe rsaenh.dll
regsvr32.exe gpkcsp.dll
regsvr32.exe sccbase.dll
regsvr32.exe slbcsp.dll
regsvr32.exe cryptdlg.dll
regsvr32.exe oleaut32.dll
regsvr32.exe ole32.dll
regsvr32.exe shell32.dll
regsvr32.exe initpki.dll
regsvr32.exe wuapi.dll
regsvr32.exe wuaueng.dll
regsvr32.exe wuaueng1.dll
regsvr32.exe wucltui.dll
regsvr32.exe wups.dll
regsvr32.exe wups2.dll
regsvr32.exe wuweb.dll
regsvr32.exe qmgr.dll
regsvr32.exe qmgrprxy.dll
regsvr32.exe wucltux.dll
regsvr32.exe muweb.dll
regsvr32.exe wuwebv.dll
regsvr32.exe wudriver.dll- Reset BITS and Windows Update services:
sc.exe sdset bits D:(A;;CCLCSWRPWPDTLOCRRC;;;SY)(A;;CCDCLCSWRPWPDTLOCRSDRCWDWO;;;BA)(A;;CCLCSWLOCRRC;;;AU)(A;;CCLCSWRPWPDTLOCRRC;;;PU)sc.exe sdset wuauserv D:(A;;CCLCSWRPWPDTLOCRRC;;;SY)(A;;CCDCLCSWRPWPDTLOCRSDRCWDWO;;;BA)(A;;CCLCSWLOCRRC;;;AU)(A;;CCLCSWRPWPDTLOCRRC;;;PU)- Rename SoftwareDistribution and catroot2 folders:
Ren %Systemroot%\SoftwareDistribution\DataStore DataStore.bak
Ren %Systemroot%\SoftwareDistribution\Download Download.bak
Ren %systemroot%\system32\catroot2 catroot2.bak- Delete BITS-related files:
Del "%ALLUSERSPROFILE%\Application Data\Microsoft\Network\Downloader\*.*"- Stop Windows Update services by entering these commands:
net stop bits
net stop appidsvc
net stop wuauserv
net stop cryptsvc
After completing these steps, attempt to run Windows Update again. If you encounter issues with any of these commands, try booting your computer into Safe Mode with Command Prompt and running the commands there.


