The current Spiral Abyss rotation in Genshin Impact 7.0 leans hard on two elements. Cryo and Stellar-Conduct handle the early halves, and single-target Pyro closes things out. The boss lineup includes the Perpetual Mechanical Array, the Gluttonous Yumkasaur Mountain King, and the Chimeric Winged Lion, and each half rewards a specific damage type through its Ley Line disorders.
Quick answer: Run a Stellar-Conduct Cryo team (for example Sandrone, Odette, Yae Miko, Alyosha) for the first halves of Floors 11 and 12, then swap to a single-target Pyro team led by Arlecchino, Hu Tao, or Mavuika for the second halves.
The Abyssal Moon blessing rewards Stellar-Conduct
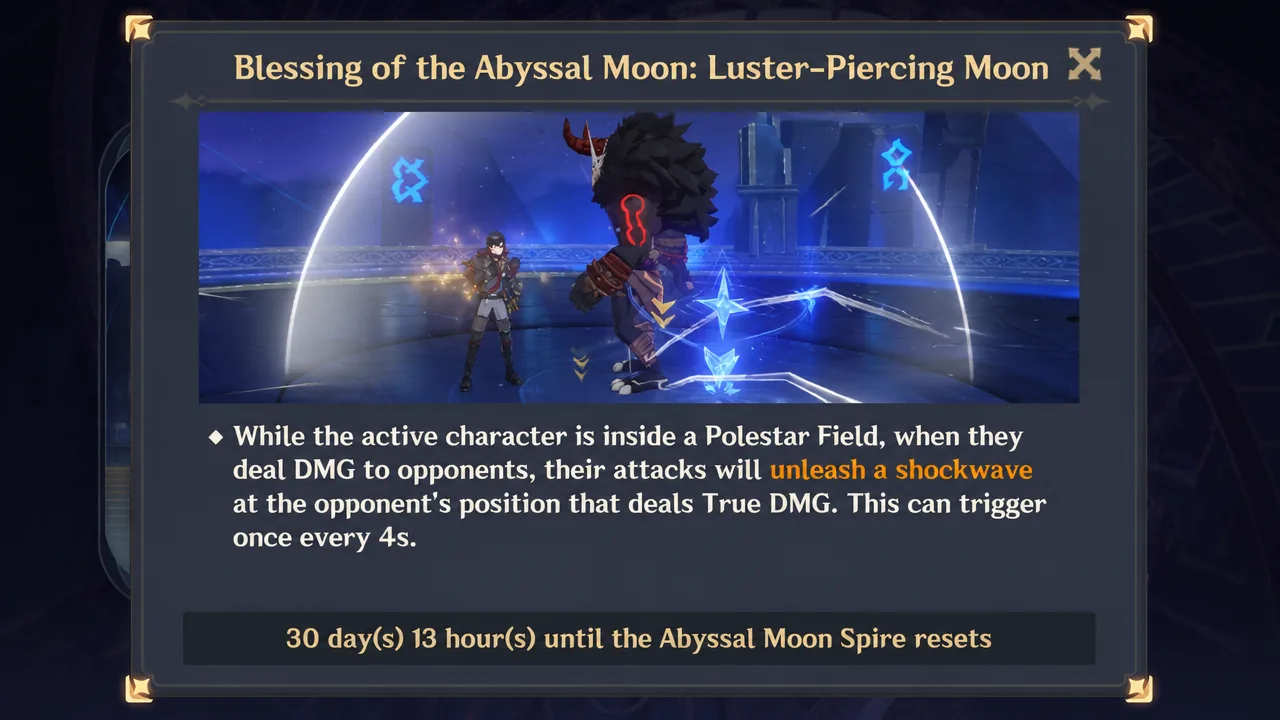
This cycle’s Blessing of the Abyssal Moon fires a True DMG shockwave whenever your active character deals damage while standing inside a Polestar Field. The effect can trigger once every 4 seconds.
While the active character is inside a Polestar Field, when they deal DMG to opponents, their attacks will unleash a shockwave at the opponent’s position that deals True DMG. This can trigger once every 4 seconds.
The catch is that Polestar Fields only appear from Stellar-Conduct reactions. That single rule shapes the whole rotation. Characters who can deal Stellar-Conduct damage get the most value out of the blessing, which is why Cryo and Electro pairings dominate the first halves of both floors.
Floor 11 teams and Ley Line disorders
Floor 11 splits cleanly between Cryo and Pyro. The first half hands every party member a 60% Cryo DMG bonus, and the second half swaps that for a 60% Pyro DMG bonus.
| Half | Ley Line disorder |
|---|---|
| First half | All party members gain a 60% Cryo DMG bonus |
| Second half | All party members gain a 60% Pyro DMG bonus |
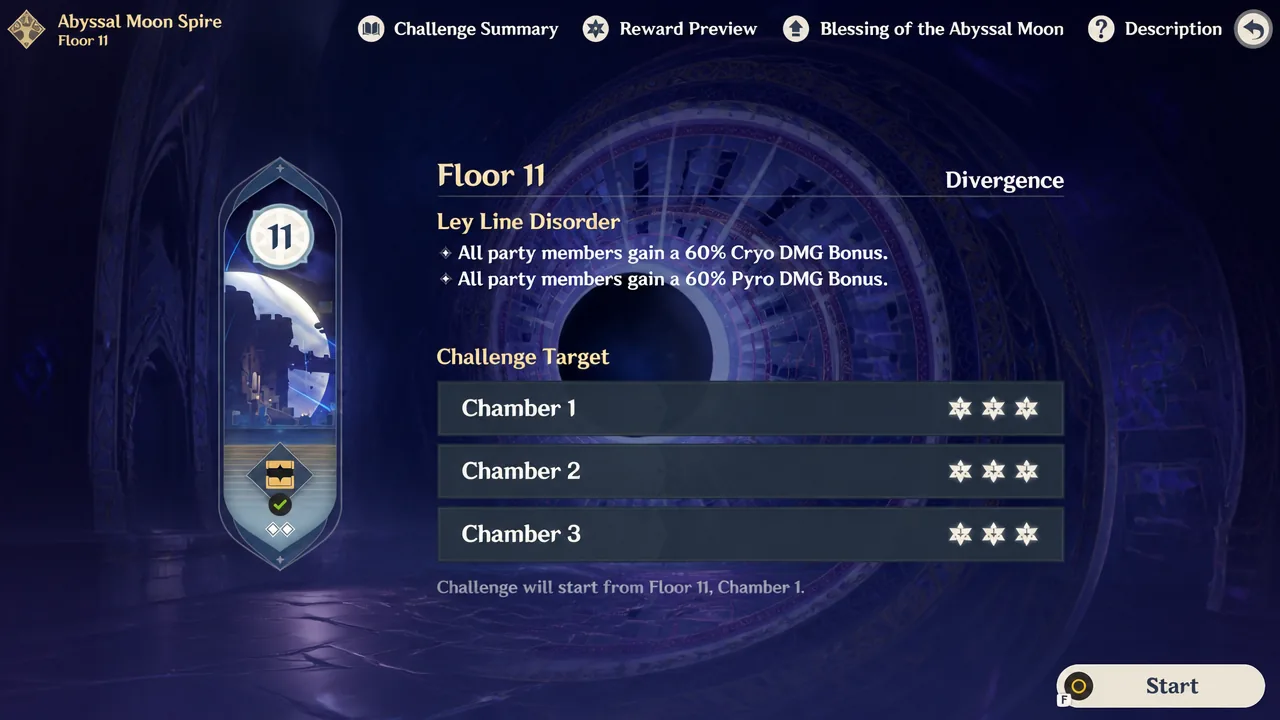
Floor 11 first half (Cryo)
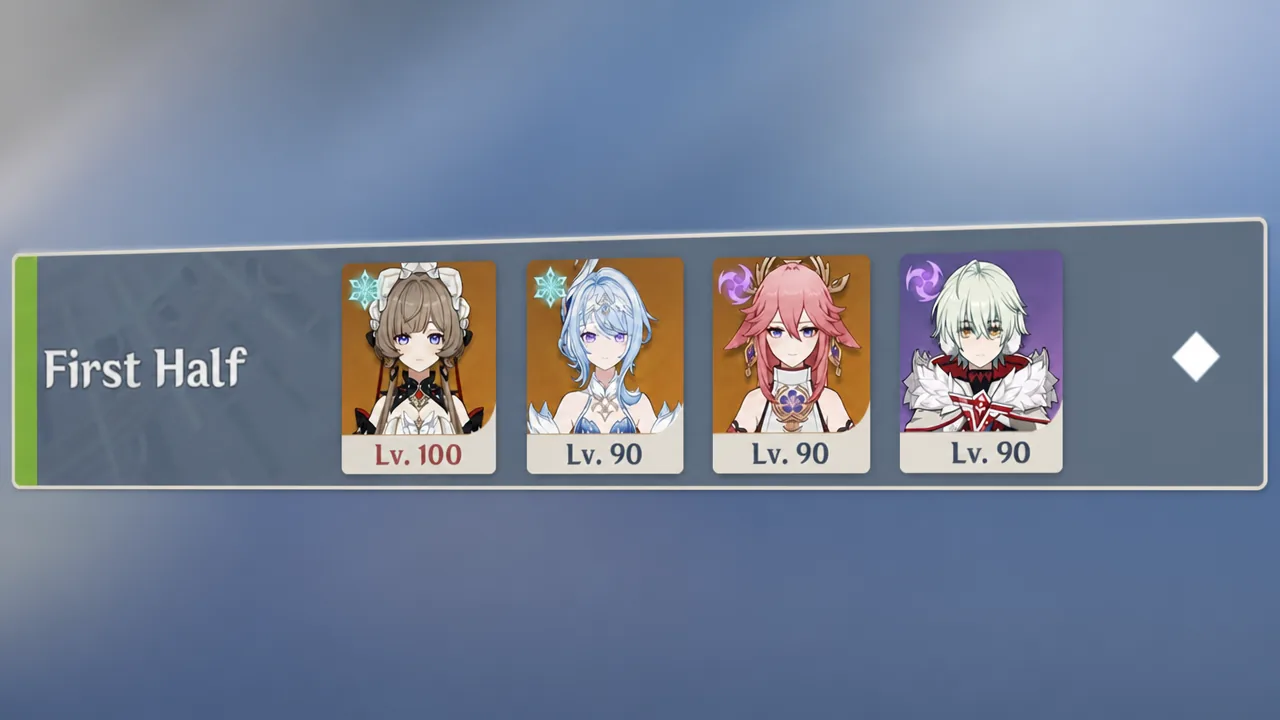
The first half is mostly waves of new Snezhnaya enemies that die quickly, plus the Mirror Maiden in the first chamber and the Thundering Wayob Manifestation in the third. Any well-built Cryo DPS clears it, and a Stellar-Conduct or Freeze setup lines up perfectly with the blessing. Avoid Hydro against the Mirror Maiden, since she carries 50% Hydro resistance.
| Core | Support |
|---|---|
| Sandrone + Odette | Yae Miko + Alyosha |
| Cryo Traveler + Odette | Alyosha + Sucrose |
| Sandrone + Escoffier | Yae Miko + Qiqi |
| Skirk + Furina | Escoffier + Shenhe |
Floor 11 second half (Pyro)
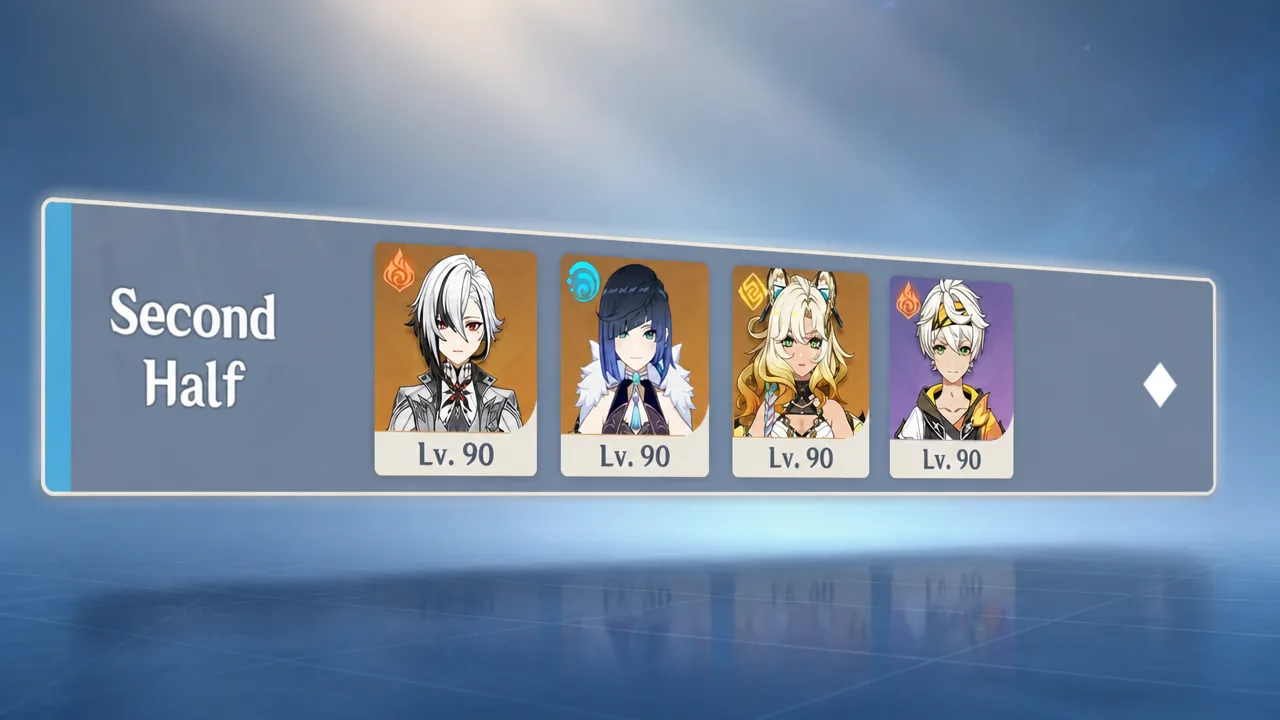
The second half brings the Frostarm Lawachurl, the Thunderhelm Lawachurl, and the Biting-Cold Wayob Manifestation. All of them need Pyro application to break their defenses, so a strong single-target Pyro DPS is the priority. The Lawachurls each carry 70% resistance to their own element, which is another reason to answer with Pyro instead of matching them.
| Core | Support |
|---|---|
| Arlecchino + Yelan | Xilonen + Bennett |
| Arlecchino + Fischl | Chevreuse + Nicole |
| Mavuika + Xilonen | Citlali + Bennett |
| Hu Tao + Furina | Yelan + Xilonen |
Floor 12 teams and Ley Line disorders
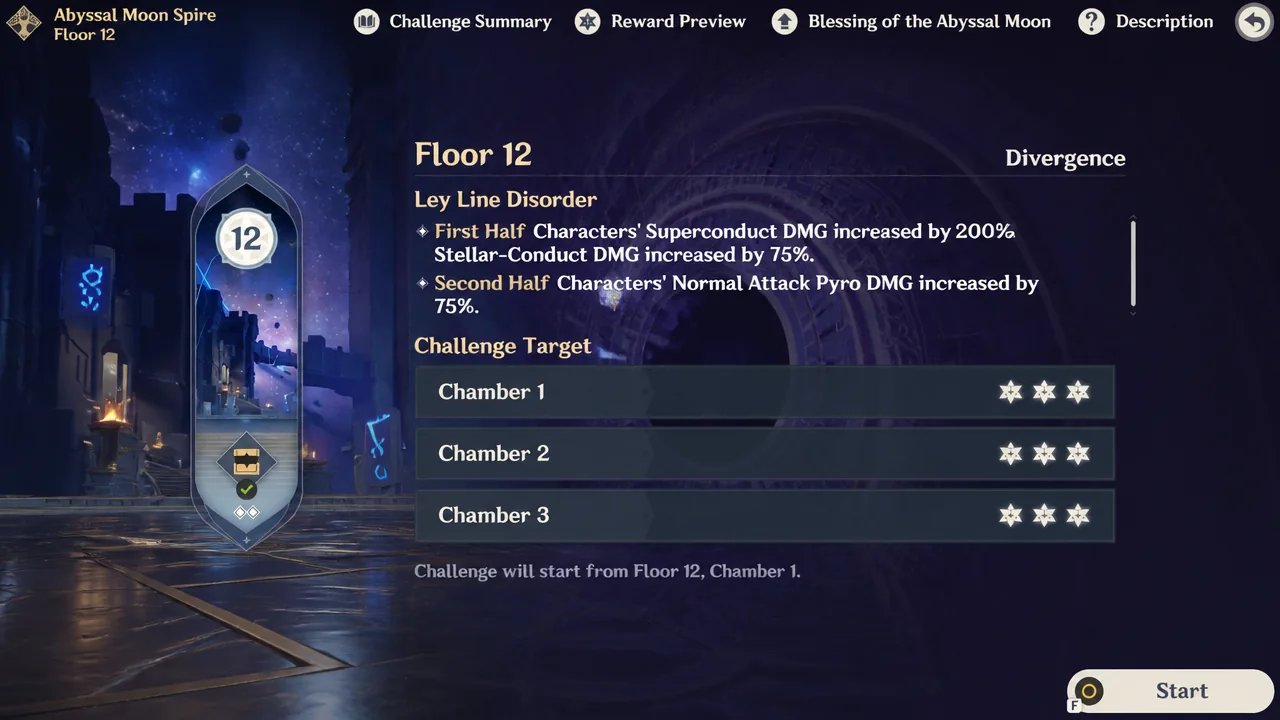
Floor 12 tightens the requirements. The first half specifically boosts Superconduct and Stellar-Conduct, while the second half only cares about Pyro Normal Attack damage.
| Half | Ley Line disorder |
|---|---|
| First half | Superconduct DMG +200%, Stellar-Conduct DMG +75% |
| Second half | Normal Attack Pyro DMG +75% |
Floor 12 first half (Stellar-Conduct/Superconduct)
The Chimeric Winged Lion in the second chamber has to be paralyzed with Stellar Glimmer reactions before it goes down, so any Stellar-Conduct team already meets the requirement. It also breaks its Electro shield most easily to Cryo and drops Anemo orbs that need Pyro, Hydro, Electro, or Cryo to clear. The Battle-Hardened Chimeric Volkodlak Archer in the third chamber has no reaction gate, so normal rotations work there.
| Core | Support |
|---|---|
| Sandrone + Odette | Yae Miko + Alyosha |
| Cryo Traveler + Odette | Alyosha + Sucrose |
| Wriothesley + Odette | Yae Miko + Qiqi |
| Cyno + Odette | Yae Miko + Diona |
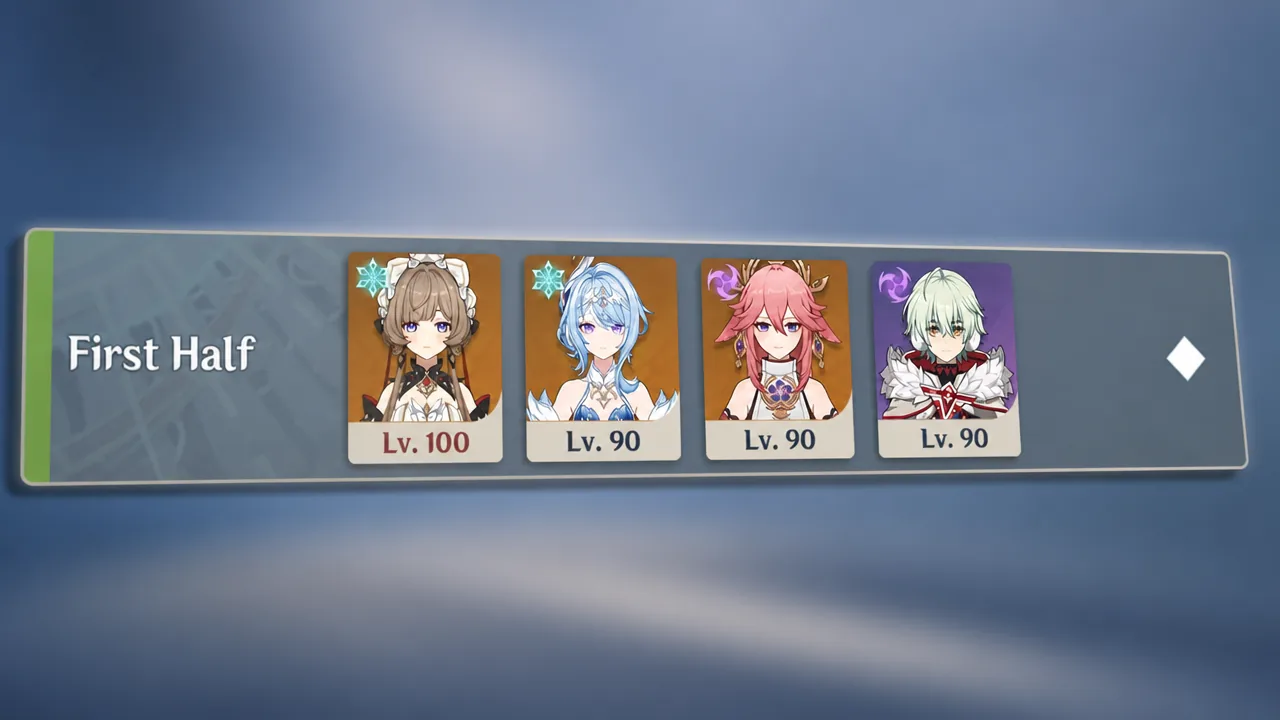
With both Odette and the Cryo Traveler available, you can mix and match the Cryo and Electro pieces around whoever you own. The disorder favors Superconduct too, so a Cryo carry paired with an Electro applier stays comfortable here.
Floor 12 second half (Pyro Normal Attacks)
Every chamber in the second half fields enemies weak to Pyro, and the Normal Attack buff is tailored for Arlecchino. In the second chamber, the Iniquitous Baptist and the Cryo Abyss Mages both lose their shields to Pyro application. In the third chamber, set the Flamegrantes thrown by the Gluttonous Yumkasaur Mountain King on fire with Pyro so they explode and damage the boss. Keep Dendro off this fight, since the Yumkasaur carries 70% Dendro resistance.
| Core | Support |
|---|---|
| Arlecchino + Yelan | Xilonen + Bennett |
| Arlecchino + Fischl | Chevreuse + Nicole |
| Mavuika + Xilonen | Citlali + Bennett |
| Hu Tao + Furina | Yelan + Xilonen |
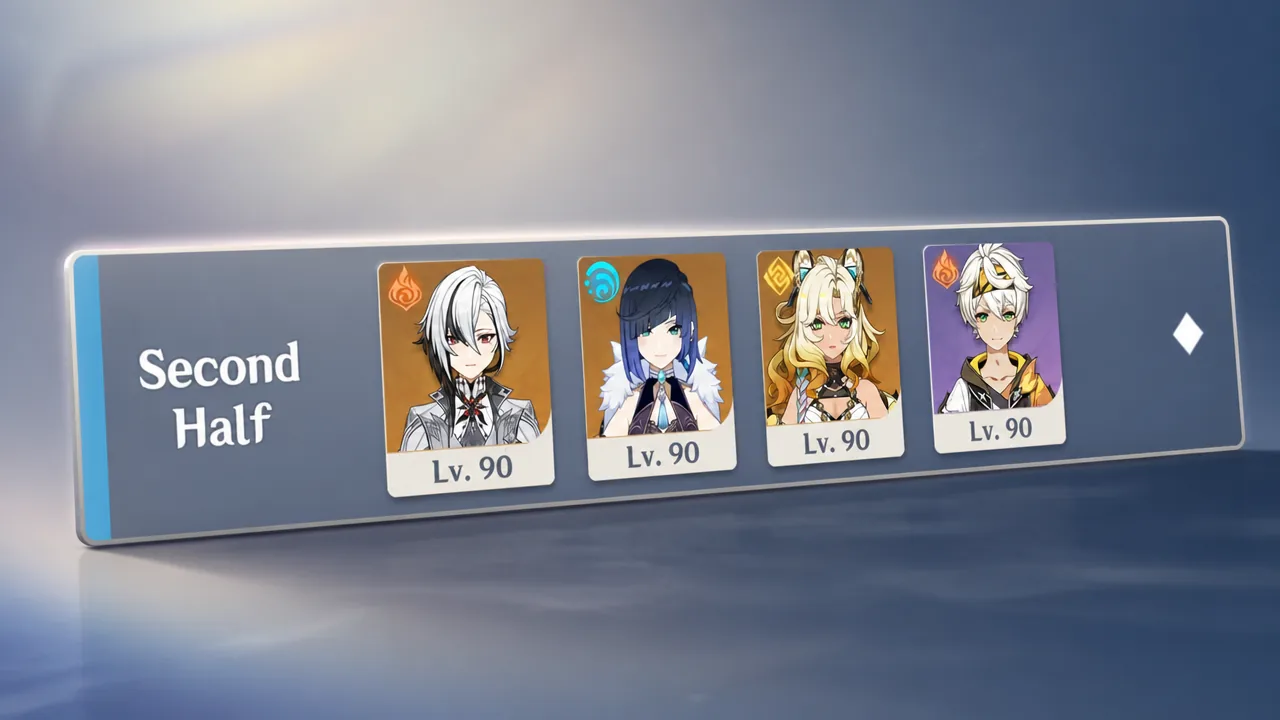
How to confirm a full clear
Each chamber can be cleared with a different team, and the game only keeps your best attempt, so there is no penalty for splitting your Cryo and Pyro rosters across the two halves. A full clear of Floors 11 and 12 shows nine stars per floor on the Abyssal Moon Spire summary once all three chambers hit their time targets.
Note: This rotation has few hard reaction locks outside the Chimeric Winged Lion’s Stellar Glimmer requirement. If you can’t build around the buffs, any strong team you already own can still push through, since most chambers gate on element rather than a specific reaction.