


Vesna arrives in Version 7.1 as a 5-star Anemo sword user who stays on the field and does the damage herself, which is unusual for the element. The catch is that her damage lives inside Stellar Swirl, a reaction converted from Cryo Swirl, so she needs Cryo teammates more than she needs a gacha weapon. That is exactly why a fully free-to-play squad of Cryo Traveler, Faruzan and Diona can carry a C0R0 Vesna through the first half of Spiral Abyss Floor 12.
Quick answer: Run Vesna on-field with Cryo Traveler, Faruzan and Diona. Set up all three supports first, then double-cast Vesna’s Skill. Build her with an ATK% goblet, never an Anemo DMG% goblet.
Why Stellar Swirl forces a Cryo team
Stellar Swirl creates a Stellar Vortex that deals damage when it explodes and again at intervals. Its damage and its radius both grow the more Stellar Swirls you trigger, so the reaction rewards constant Cryo application rather than one big burst window. Without a Cryo unit in the party, Vesna is just an Anemo driver with none of her scaling.
Her passive kit favors that same lineup. At fourth ascension, each Cryo or Anemo ally gives her 6% ATK; an ally with any other element instead provides 25 Elemental Mastery. Her last passive also boosts Stellar Swirl for the entire team by 0.7% for each 100 ATK she possesses, up to 14%. With Vesna, Cryo Traveler, Faruzan and Diona together, all four party members are Cryo or Anemo and contribute to the ATK increase.
Her Elemental Skill, The Art of Victory, puts her into Armed for Action mode and infuses her Normal, Charged and Plunging Attacks with Anemo. Most of her personal damage comes from the Skill attacks themselves, not from the Burst.
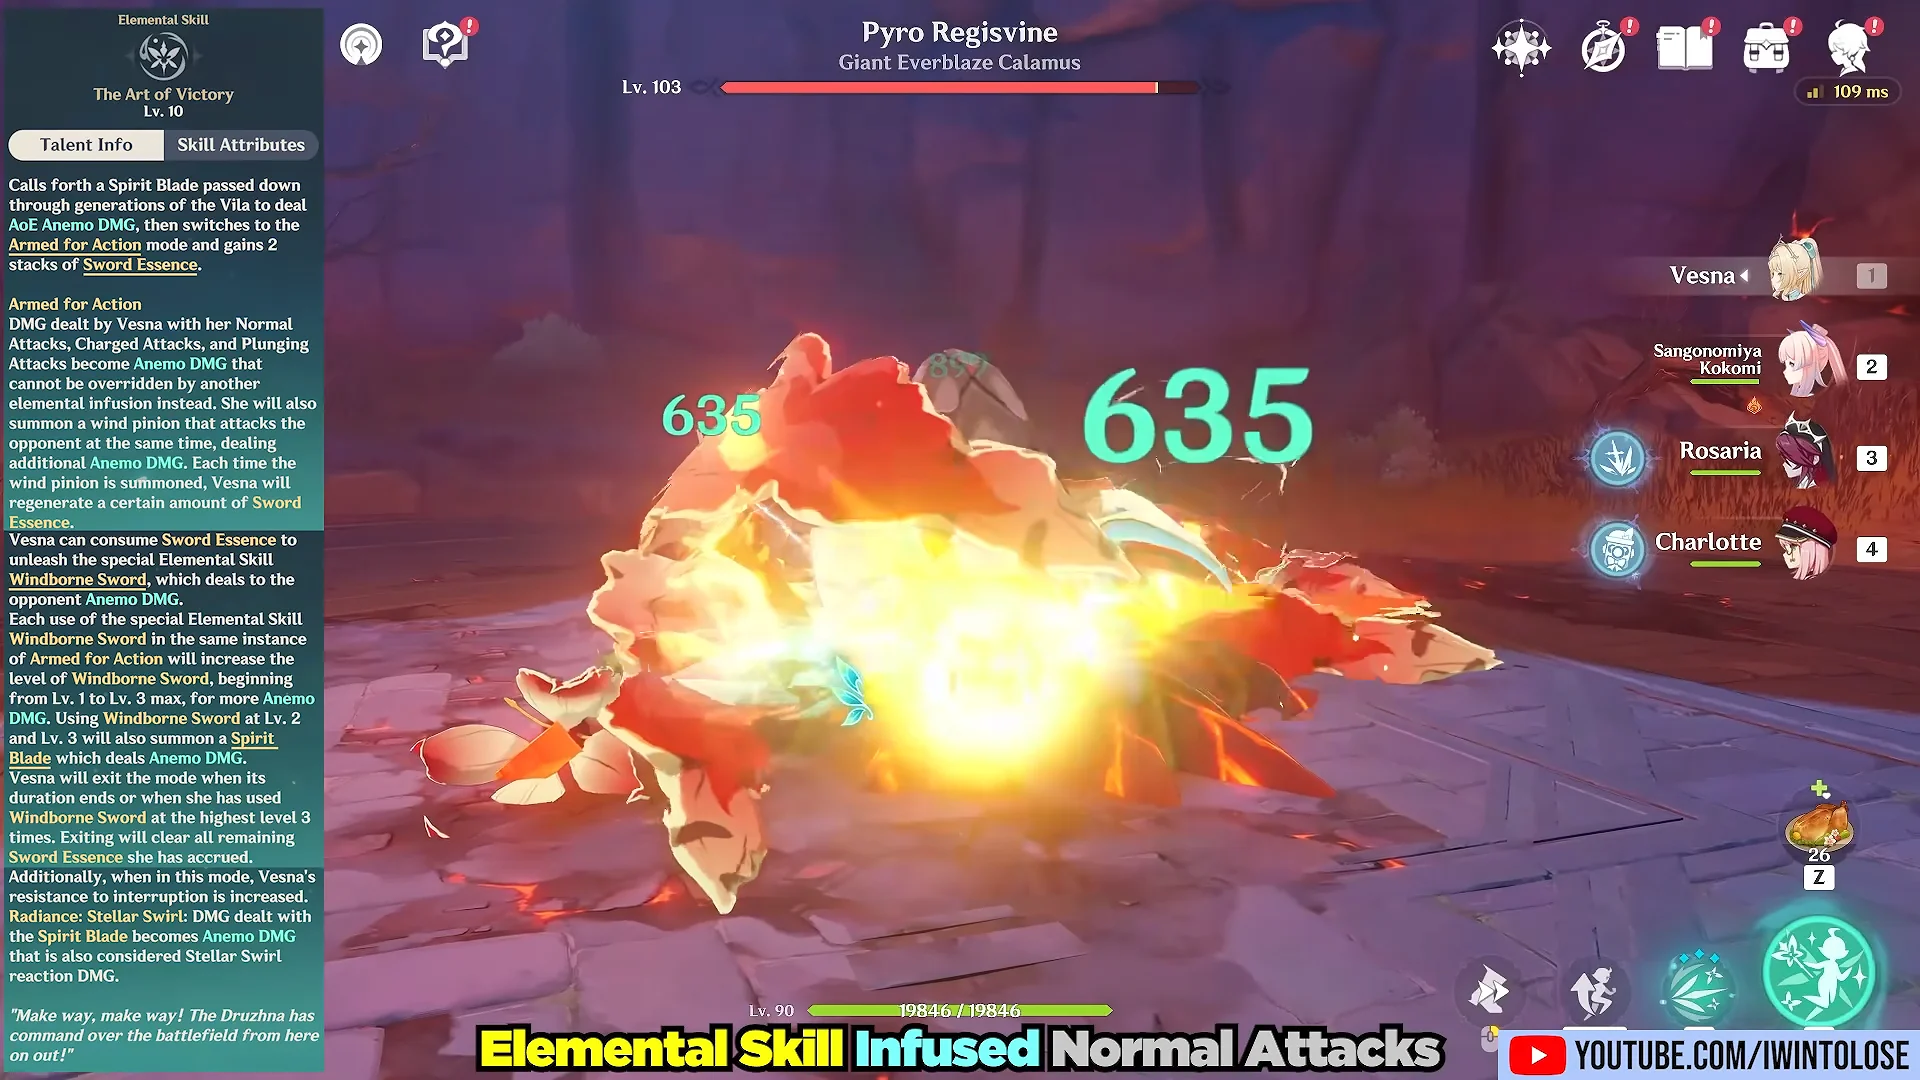
Stellar Swirl uses the same damage formula as Lunar reactions, which means an Anemo DMG% goblet does nothing for it. Vesna and her Stellar reaction teammates want ATK% goblets instead.
The free-to-play lineup and each role
- Vesna (Anemo) — on-field Stellar Swirl DPS, stays on the field for the whole damage window.
- Cryo Traveler — the Cryo core. Free to everyone, applies Cryo off-field and adds real personal damage in Stellar Swirl teams.
- Faruzan (Anemo) — additive damage buffs and Anemo RES reduction, at her strongest at C6.
- Diona (Cryo) — shield, healing and a second Cryo layer. At C6 she also hands out 200 Elemental Mastery.
Sucrose is the other common fourth slot here, bringing large Elemental Mastery buffs and Viridescent Venerer RES shred. She trades Diona’s shield for more damage, so pick based on whether you want to eat hits without flinching.
Rotation for the Vesna and Cryo Traveler team
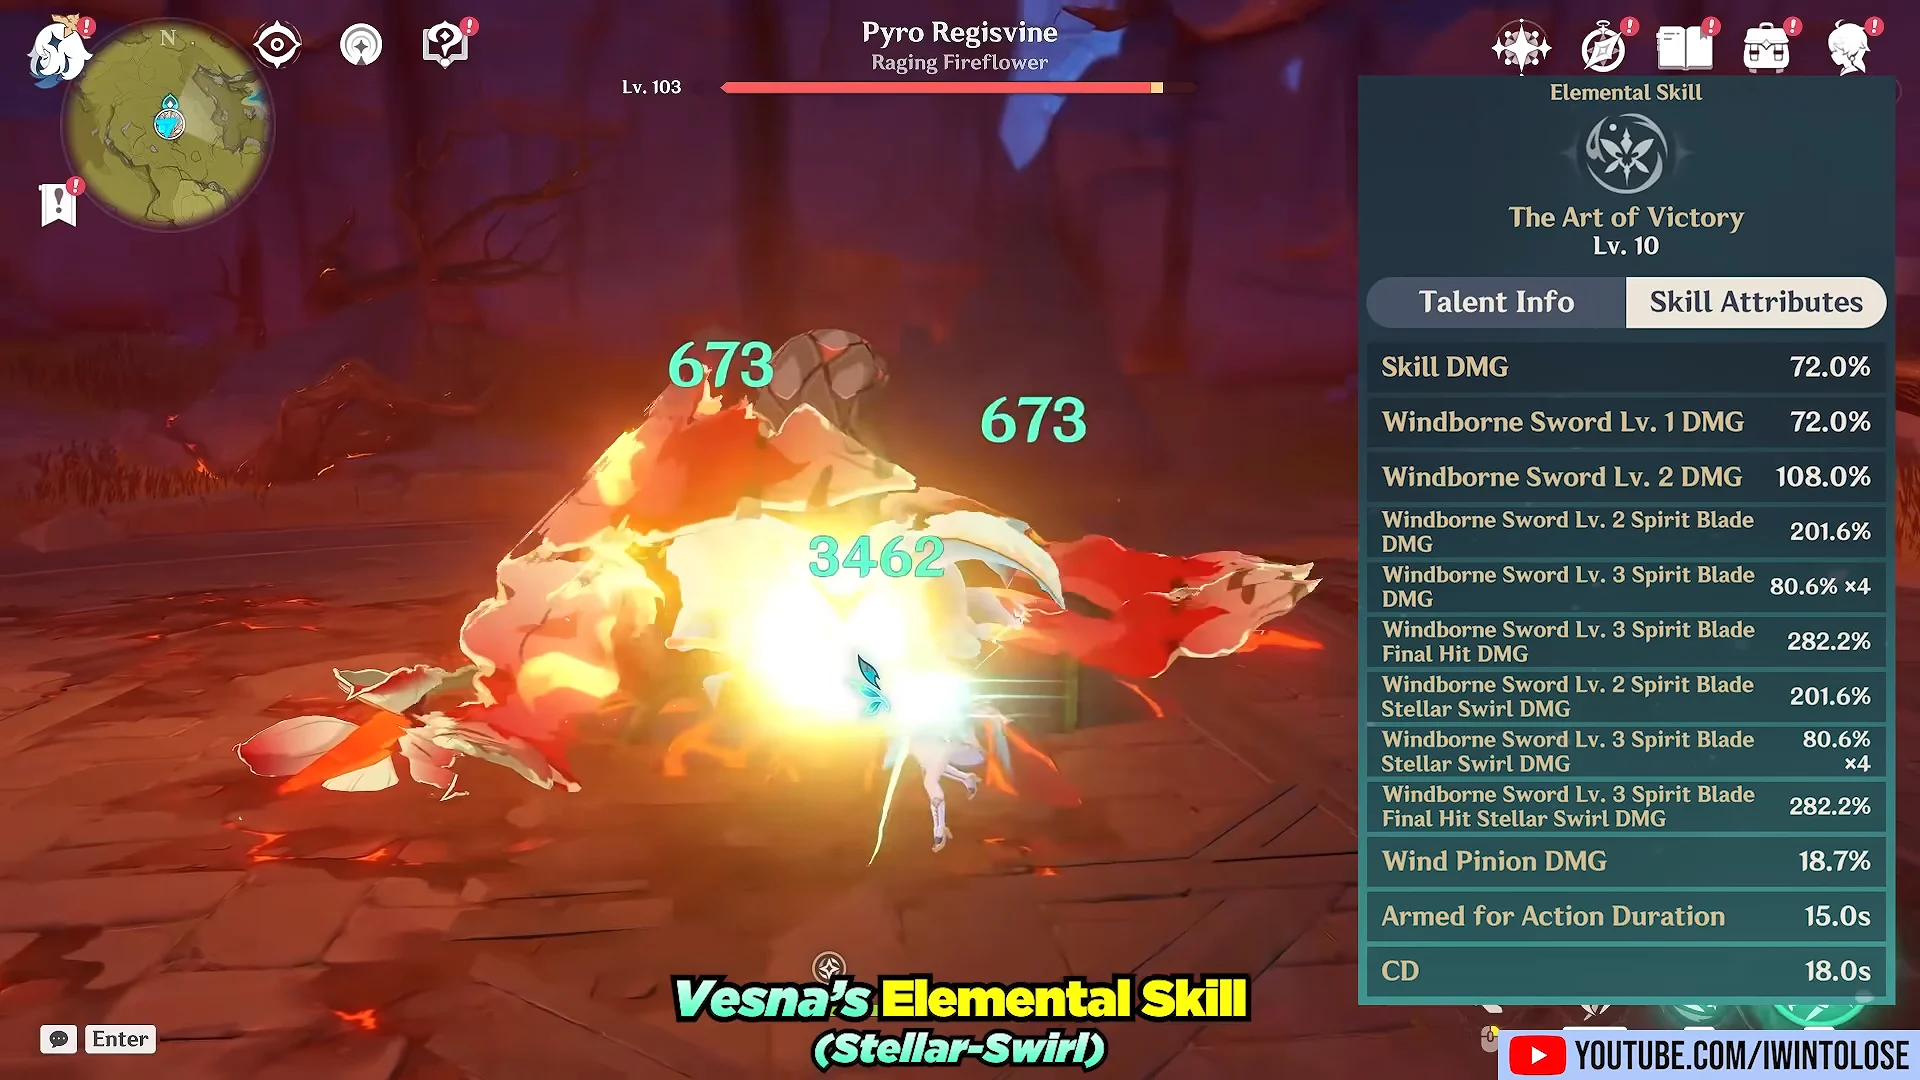
Leaving the field strips Vesna’s Unruffled stacks, which build up to six and increase her Spirit Blade damage. Finish her sequence before rotating back to the supports.
Vesna’s four-star weapon and artifact setup
| Weapon | Source | Key stats |
|---|---|---|
| Emberwell | Snezhnaya craftable | 510 ATK, 165 EM |
| 7.1 event sword | Free event reward | 510 ATK, 41.1% ATK, 104 EM |
| Finale of the Deep | Fontaine craftable | ATK% plus healing passive |
| Beyond the Chrysalis | Signature 5-star | 674 ATK, 44.1% CRIT DMG |
Emberwell is the pick for a C0R0 run and can be refined to R5 through billets. Its passive raises ATK when you trigger an elemental reaction and adds Stellar reaction damage on top when that reaction is a Stellar one, which Vesna does constantly by design. The 7.1 event sword is free at R5 and holds up against the craftables.
Her signature is only around a 25% damage increase over the alternatives, and teams without C6 Faruzan barely notice the gap. Faruzan teams take roughly an 8 to 10% hit without a gacha weapon, which is still not a reason to dive into the weapon banner.
Equip 4-piece Scarlet Proof and use ATK% for the sands and goblet; choose CRIT Rate or CRIT DMG for the circlet. Prioritize CRIT substats, followed by ATK%, Energy Recharge, and Elemental Mastery. Viridescent Venerer serves as the fallback set. Level talents in this order: Skill, Burst, then Normal Attack.
Support builds used in the C0R0 clear
| Character | Weapon | Artifacts | Cons |
|---|---|---|---|
| Vesna | R5 four-star sword | 4pc Scarlet Proof | C0 |
| Cryo Traveler | Four-star sword | Heart of the Furnace | C6 |
| Faruzan | Favonius Warbow R5 | 4pc Viridescent Venerer | C6 |
| Diona | Sacrificial Bow R5 | 4pc Noblesse Oblige | C6 |
Every unit here is level 90 with maxed talents, and the two 4-star support slots are both at C6, which is the realistic bar for this comp rather than a stretch goal. Faruzan can also run Tenacity of the Millelith if you would rather park Viridescent Venerer on someone else, and Diona works fine on a Favonius Warbow for energy. Heart of the Furnace on Cryo Traveler is the notable choice, since the set adds a flat Stellar damage bonus that the rest of the team benefits from.
What Floor 12 asks for in Version 7.1
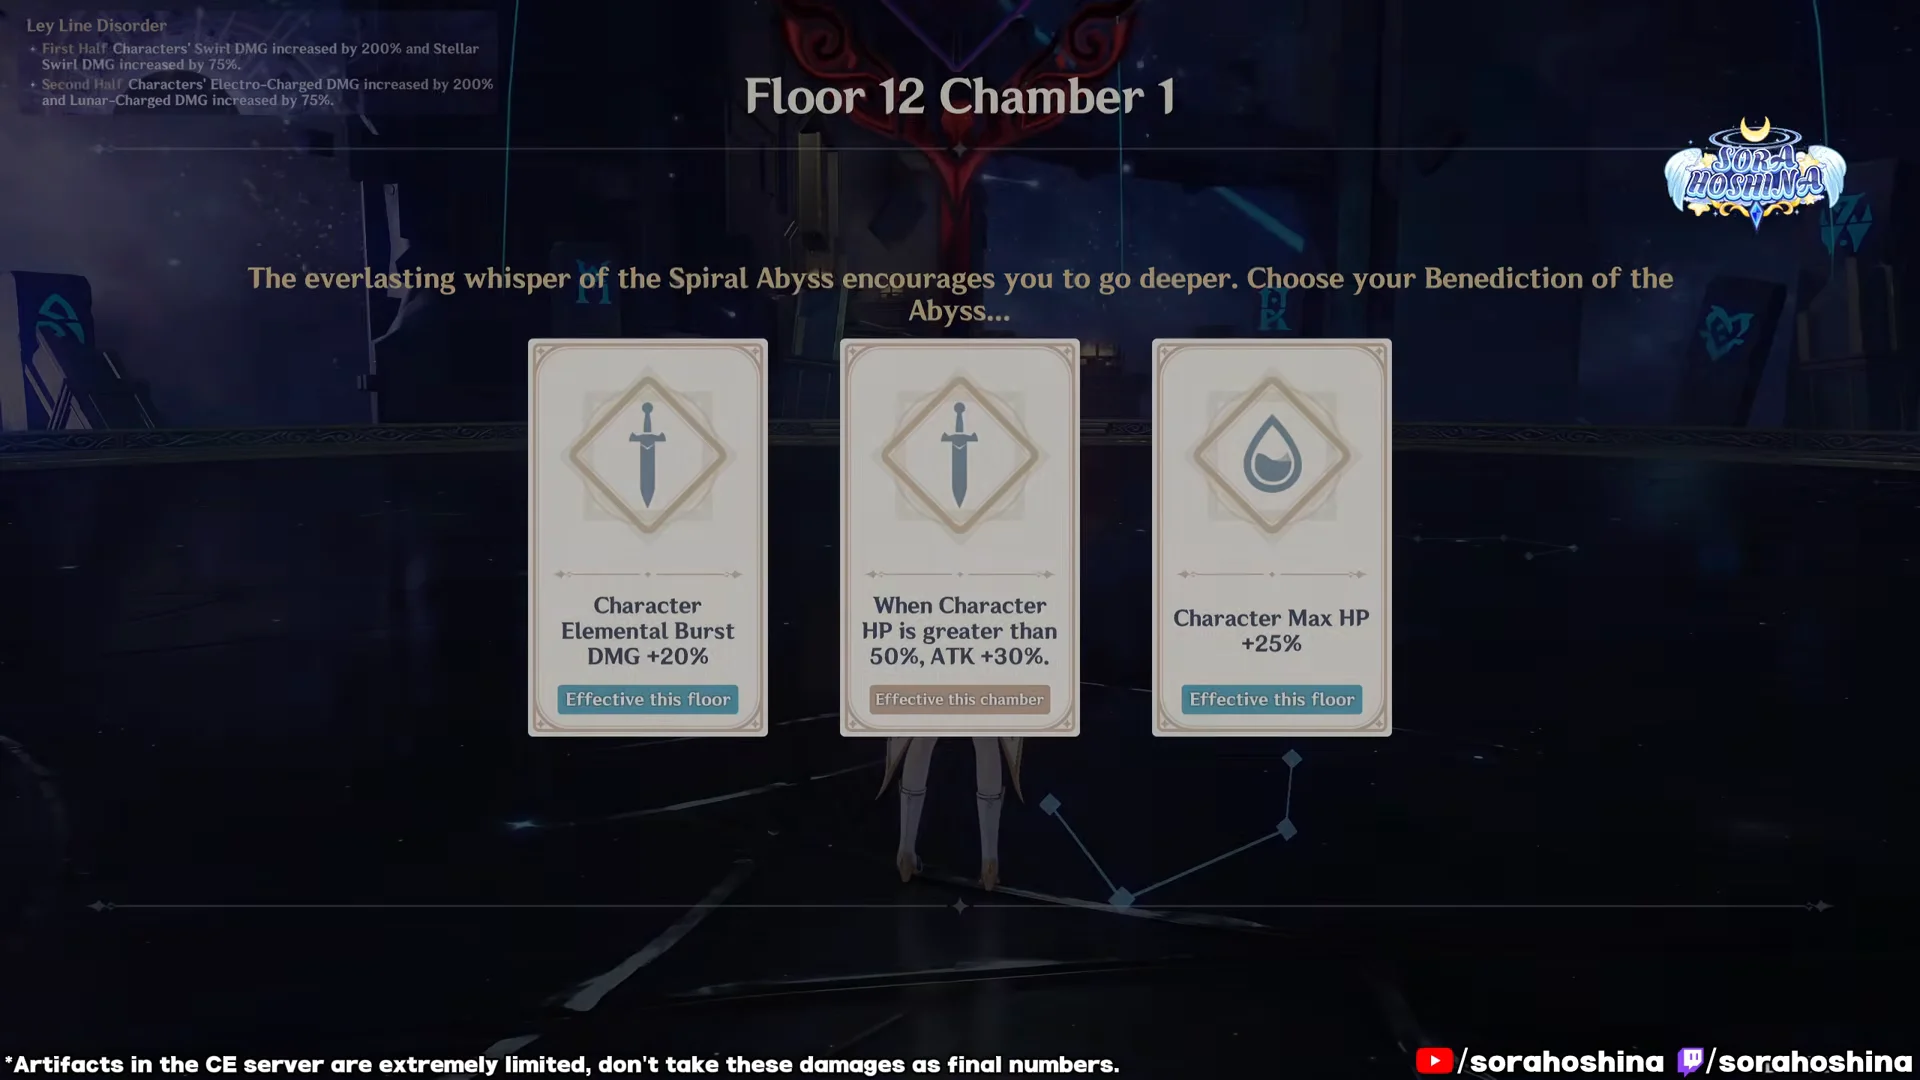
The current Ley Line Disorder increases Swirl damage by 200% and Stellar Swirl damage by 75% in the first half, which is about as direct an invitation to run this team as the Abyss gets. The second half flips to Electro-Charged and Lunar-Charged, so plan a separate Hydro or Electro squad for it. Enemies sit at level 95 to 100 across the floor.
The Blessing of the Abyssal Moon, Ice-Surging Moon, fires a shockwave dealing True DMG at the target’s position whenever a character lands Swirl or Stellar Swirl damage, on a 4-second cooldown. That blessing rotates out on October 16, 2026 at 4:00 server time.
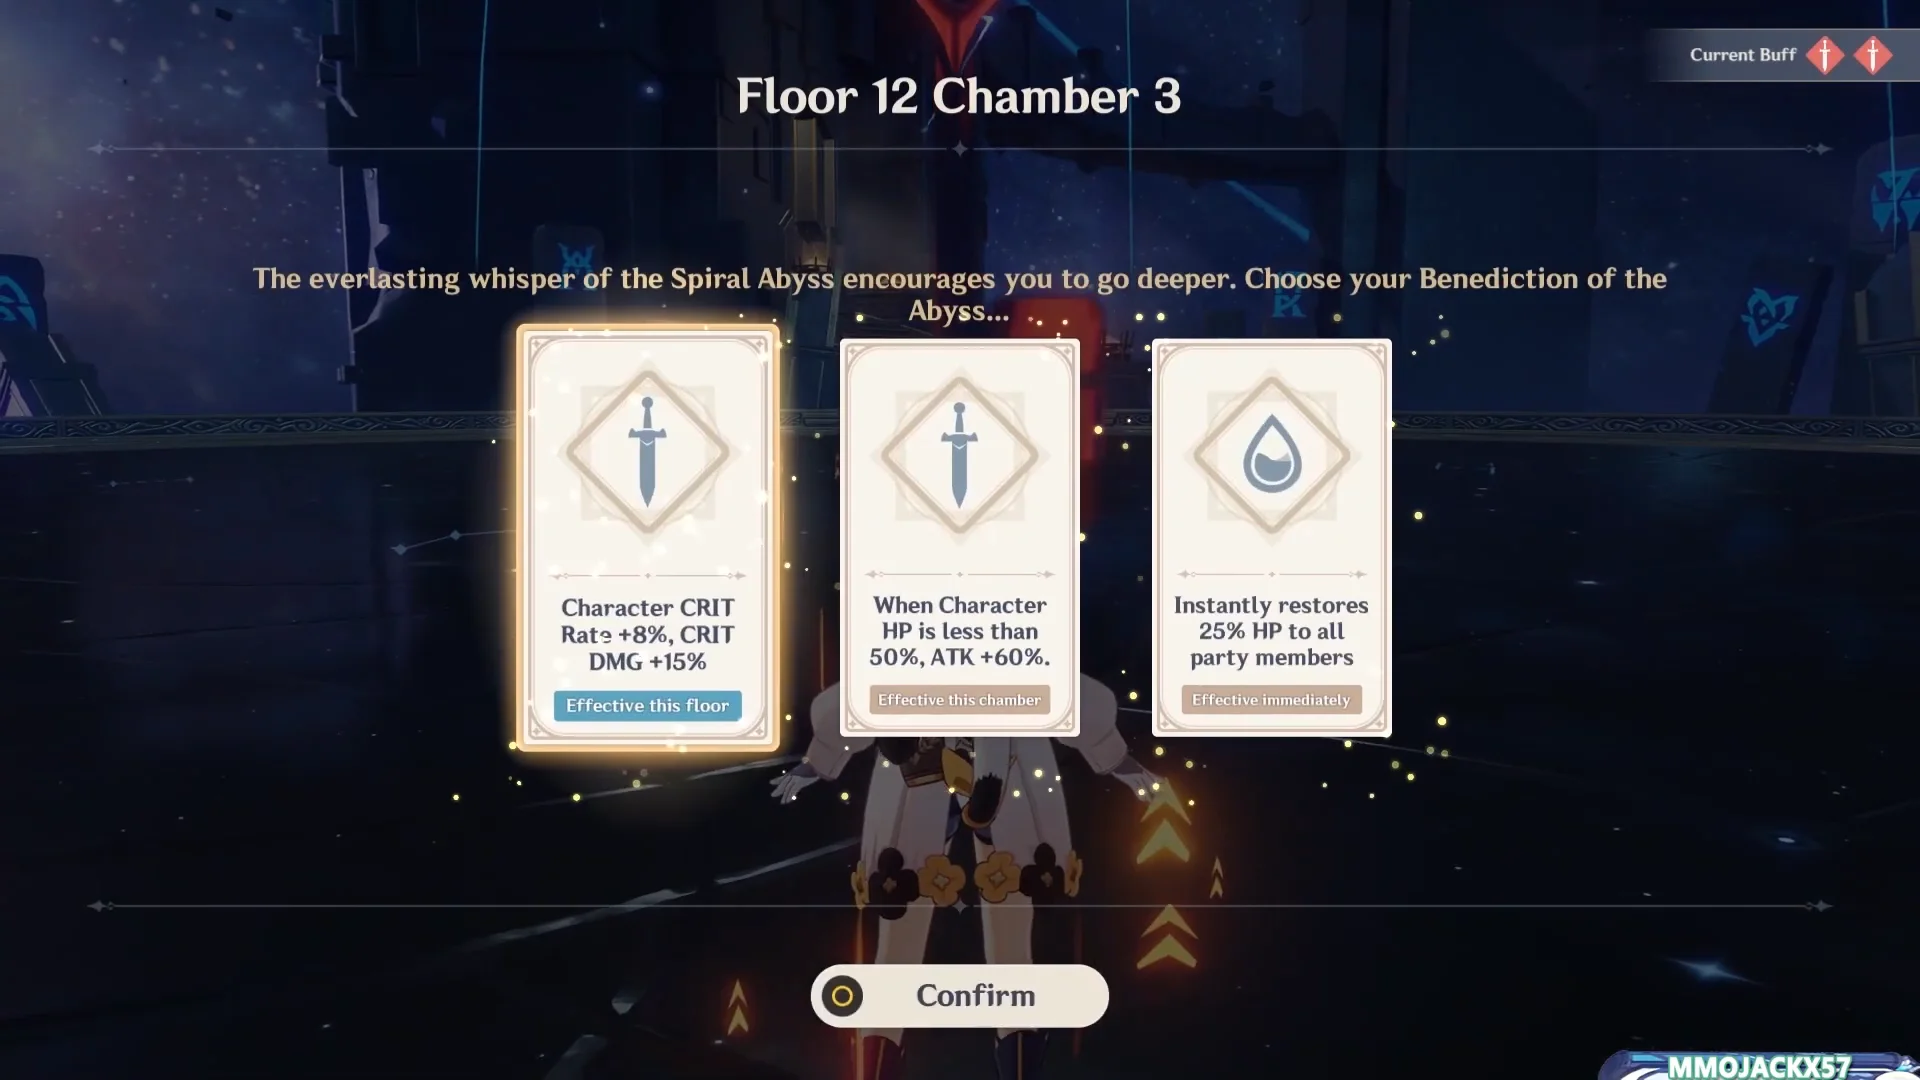
Each chamber opens with a Benediction card choice before combat starts. For an ATK-scaling team, take the flat ATK increase when it appears in Chamber 1; the CRIT Rate and CRIT DMG card is the pick over conditional low-HP ATK buffs or a heal.
| Chamber | First half enemy | Mechanic to beat |
|---|---|---|
| 12-1 | Bandersnatch | Fill its Fury gauge, faster with Electro |
| 12-2 | Immortal Construct | Break shield regeneration with Stellar damage |
| 12-3 | Churin | Jack Frost statues, keep your distance |
Chamber 1 is a damage check once the Bandersnatch grows and turns vulnerable. Chamber 2 is where the Stellar core earns its slot, since the Immortal Construct keeps regenerating shields to avoid dying and Stellar damage is what shuts that down. Set up the moment the shield animation starts rather than after.
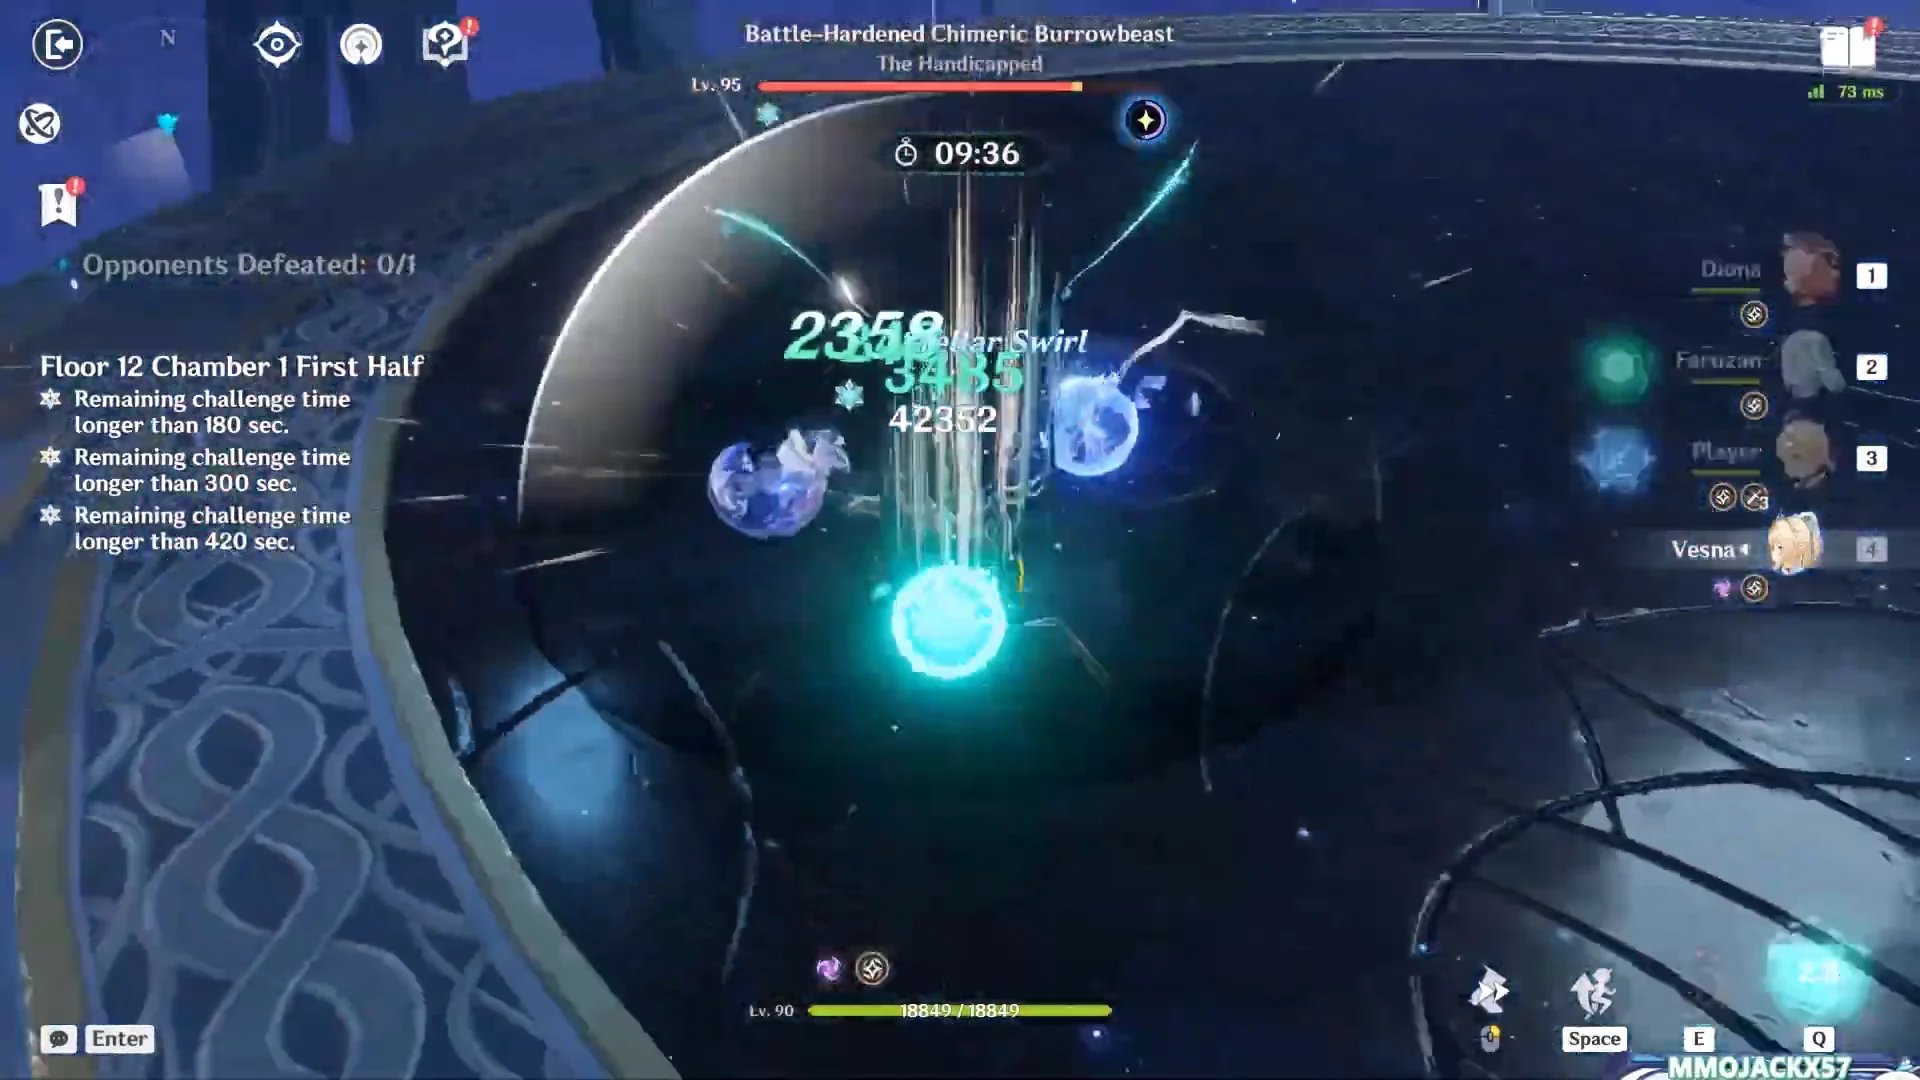
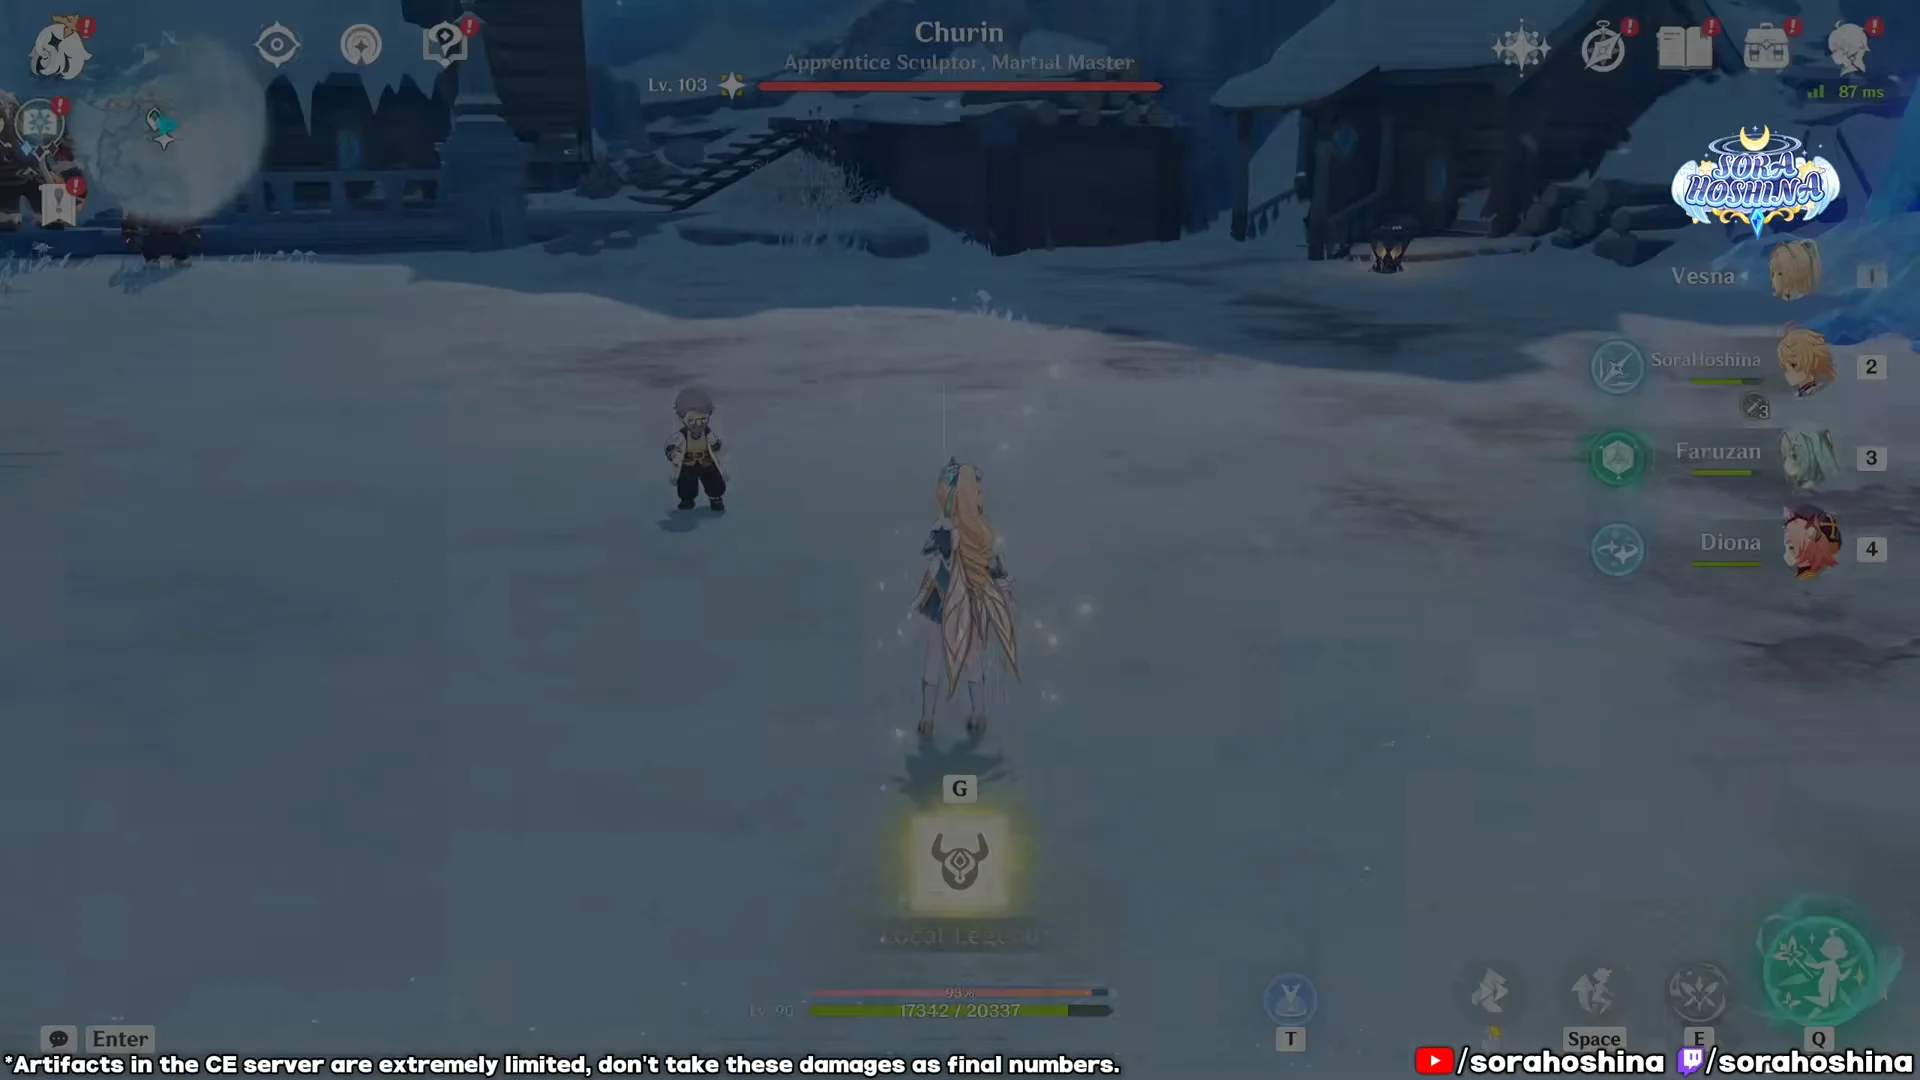
Churin in Chamber 3 summons Jack Frost statues the instant the fight starts, and standing next to one can delete your active character outright. Diona’s shield helps, but distance helps more.
How to confirm the clear worked
Every chamber on Floor 12 runs on the same star conditions, and the timer is what grades you rather than any damage total. You earn one star for finishing with more than 180 seconds left, two for more than 300 seconds, and three for more than 420 seconds remaining on the 600-second clock.
- Chamber 1 asks you to defeat 1 opponent, then 10 opponents.
- Chamber 2 asks for 1 opponent, then 2 opponents.
- Chamber 3 is a single opponent in each half.
Nine stars across the floor pays out 60,000 Mora and 200 Primogems as the star bounty, with one Domain Reliquary Tier I and two Domain Reliquary Tier II on top. If those appear in your mail and the floor shows nine stars filled, the run counted.
The When Warm Winds Cavort banner is scheduled for September 23 to October 13, 2026, with Vodyanitsa’s banner in Version 7.1’s opening phase. If she is obtained without Odette or Vodyanitsa, follow this route: build Cryo Traveler, craft Emberwell, then let the free units handle the enabling.





