Vodyanitsa is the 5-star Hydro catalyst user released in Version 7.1, and she is built entirely around supporting someone else. Her personal damage is low, her healing and resistance shred come from one button, and almost every number in her kit scales off Max HP. That makes her constellation question unusually simple: one of them changes how much damage your team does, and the rest mostly change how comfortable she is to play.
Quick answer: C2 is her only constellation that directly raises team damage in a meaningful way, giving 50% CRIT DMG to Hydro and Cryo or 60% CRIT DMG to Stellar Swirl, plus nine extra seconds of Skill uptime.
What C2 Echoes That Pierce the Snow adds
The trigger is the Horn of Spring’s Call, the coordinated attack her Elemental Skill summons. Every time it strikes an enemy, Vodyanitsa gains the “Two Voices in Black and White” effect, and which version of that effect you get depends on whether a Wandering Vortex is involved.
| Condition | Buff | Duration |
|---|---|---|
| Horn of Spring’s Call hits, no Wandering Vortex | +50% CRIT DMG for Hydro and Cryo damage | 5s |
| Wandering Vortex on field, or within 5s of one exploding | +60% CRIT DMG for Stellar Swirl reaction damage | 5s |
| Skill enhancement (always active) | Song of Ages Past duration extended | +9s |
Two details decide whether that is a big number or a dead stat. First, the buff only lands on the currently active party member, so a team that deals most of its damage off-field gets much less out of it. Second, the damage has to be Hydro, Cryo, or Stellar Swirl reaction damage. Anything outside those categories takes nothing from the CRIT DMG line and only benefits from the longer Skill window.
The nine-second extension to Song of Ages Past is the quiet half of C2. It stretches her healing, interruption resistance, and resistance shred across more of your rotation, which matters even in teams where the CRIT DMG mode is a poor fit.
What Vodyanitsa already does at C0
She performs at full capacity without any duplicate copies. Her Elemental Skill, Rechitativ: Sonorous Dawn, brings out her Water Imp form, inflicts AoE Hydro damage, and applies Song of Ages Past. While it lasts, the Horn of Spring’s Call periodically homes in on an enemy and hits it; targets struck by either effect have their Hydro RES and Cryo RES reduced by 25%. The active character gains interruption resistance and continuous healing based on her Max HP.

Her Elemental Burst, Sink With Thee, deals AoE Hydro damage and hits harder when cast during Song of Ages Past. It costs 60 Energy on a 15-second cooldown, but it is a bonus rather than a requirement, which is why most builds skip heavy Energy Recharge. The Skill itself runs on a 16-second cooldown.
Her passives carry a surprising amount of the kit:
- The Last Djeguako Songstress: Casting her Skill turns any Stellar Vortex on the field into a Wandering Vortex, and party members who trigger Stellar Swirl during Song of Ages Past create one too. Generating or detonating a Wandering Vortex cuts nearby enemies’ Anemo RES by 35% for six seconds and extends Radiance: Stellar Swirl on allies by four seconds.
- Dirge of the Fandyr: Her Skill supplies 25 Lead Vocal stacks and 10 Chorus stacks. Both sets remain for 30 seconds, and recasting the Skill refreshes their durations.
- Echoes Over the Frozen Lake: When she holds the Skill while out of combat, she enters her Water Imp form. This allows up to 10 seconds of stamina-based swimming, including movement across the water’s surface.
- Heartless Siren Song: Purely cosmetic — she sings with her own voice instead of using an instrument.
Her Normal Attack chain, Psyshkhwe Arietta, is four Hydro strikes with a stamina-draining held water ball and a standard AoE plunge. You will rarely use any of it.
C0 vs C2 by team type
Stellar Swirl teams (Vesna, Yumemizuki Mizuki, Sandrone)
This is where C2 pays the most, because her own passive keeps Wandering Vortexes on the field, which means the 60% Stellar Swirl CRIT DMG mode is the one you will see most of the time. It also stacks on top of the Anemo RES shred she already provides at C0.
Vesna benefits the most. Vodyanitsa is already a strong third or fourth slot for her at C0 and can edge out Faruzan, with Odette holding the best-in-slot support position. Yumemizuki Mizuki is the weaker case — Faruzan is generally the better fourth slot there, so C2 is improving a support you may not be running anyway. Sandrone played as a Stellar Swirl DPS slots in cleanly alongside Odette or Sucrose, since Vodyanitsa covers both Cryo and Anemo shred in one character.
Freeze and Cryo teams (Skirk, Lohen, Wriothesley)
Here you get the 50% Hydro and Cryo CRIT DMG version instead, and it lands on whoever is on field. In a Skirk Freeze team with Furina and Escoffier, that is exactly where the damage is, so C2 translates directly into bigger numbers. Vodyanitsa is already a clear fourth-slot upgrade over Citlali, Shenhe, or Yelan in those compositions at C0, thanks to her Cryo RES shred, Hydro application, and healing.

Lohen and Wriothesley work the same way in Cryo-focused setups. Cryo Traveler teams also use her, though the buff only applies while the Traveler is the active character.
Hydro DPS teams (Neuvillette, Kamisato Ayato, Varka)
Neuvillette is the cleanest case for the Hydro half of C2: he is on field, his damage is Hydro, and Vodyanitsa is already shredding Hydro RES for him at C0. Ayato and Varka follow the same logic, with Varka teams leaning more on her as a buffer and healer.
Her extra Hydro application makes her a poor fit for Vaporize teams. Freeze-leaning setups with Furina and Skirk suit her far better than reaction teams that need clean elemental timing.
Vodyanitsa constellations C1 to C6
| Constellation | Effect |
|---|---|
| C1 — Waters in Full Splendor | Each heal from Song of Ages Past raises nearby allies’ ATK by 1% of her Max HP for 5s |
| C2 — Echoes That Pierce the Snow | +50% Hydro/Cryo CRIT DMG or +60% Stellar Swirl CRIT DMG; Skill duration +9s |
| C3 — Song Lingering on a Spring Morning | Elemental Skill level +3, up to level 15 |
| C4 — Melancholic Voice Upon the Gentle Waters | Healing +50% below 40% HP, or +20% Max HP for 6s above it, up to 3 stacks |
| C5 — Together, Down Into the Deep | Elemental Burst level +3, up to level 15 |
| C6 — Neverending Song of Revelry | C2 buff applies to all nearby allies; +30% Stellar Swirl DMG and +60% Hydro/Cryo DMG |
C6 is the constellation that fixes C2’s biggest restriction. Spreading “Two Voices in Black and White” to every nearby party member makes it usable in teams with off-field damage dealers, and the flat 60% Hydro and Cryo damage bonus during Song of Ages Past is a second, separate multiplier on top.
Because healing is a constant part of her kit, C1 and C4 never struggle to stay active. C1 makes every heal grant the team an ATK increase based on her Max HP. C4 either improves emergency healing or gives her up to 60% more Max HP through stacking; that extra HP also strengthens all of her HP-scaling buffs. C3 and C5 simply raise talent levels.
The build that makes her buffs land
Everything she gives the team is tied to Max HP, so the target is roughly 65,000 HP. That means HP% on the Sands, Goblet, and Circlet, with HP% substats ahead of everything else. Energy Recharge is optional and only worth building if you plan to fit her Burst into the rotation. Level her Elemental Skill first, then her Burst if you use it, and leave Normal Attacks alone.
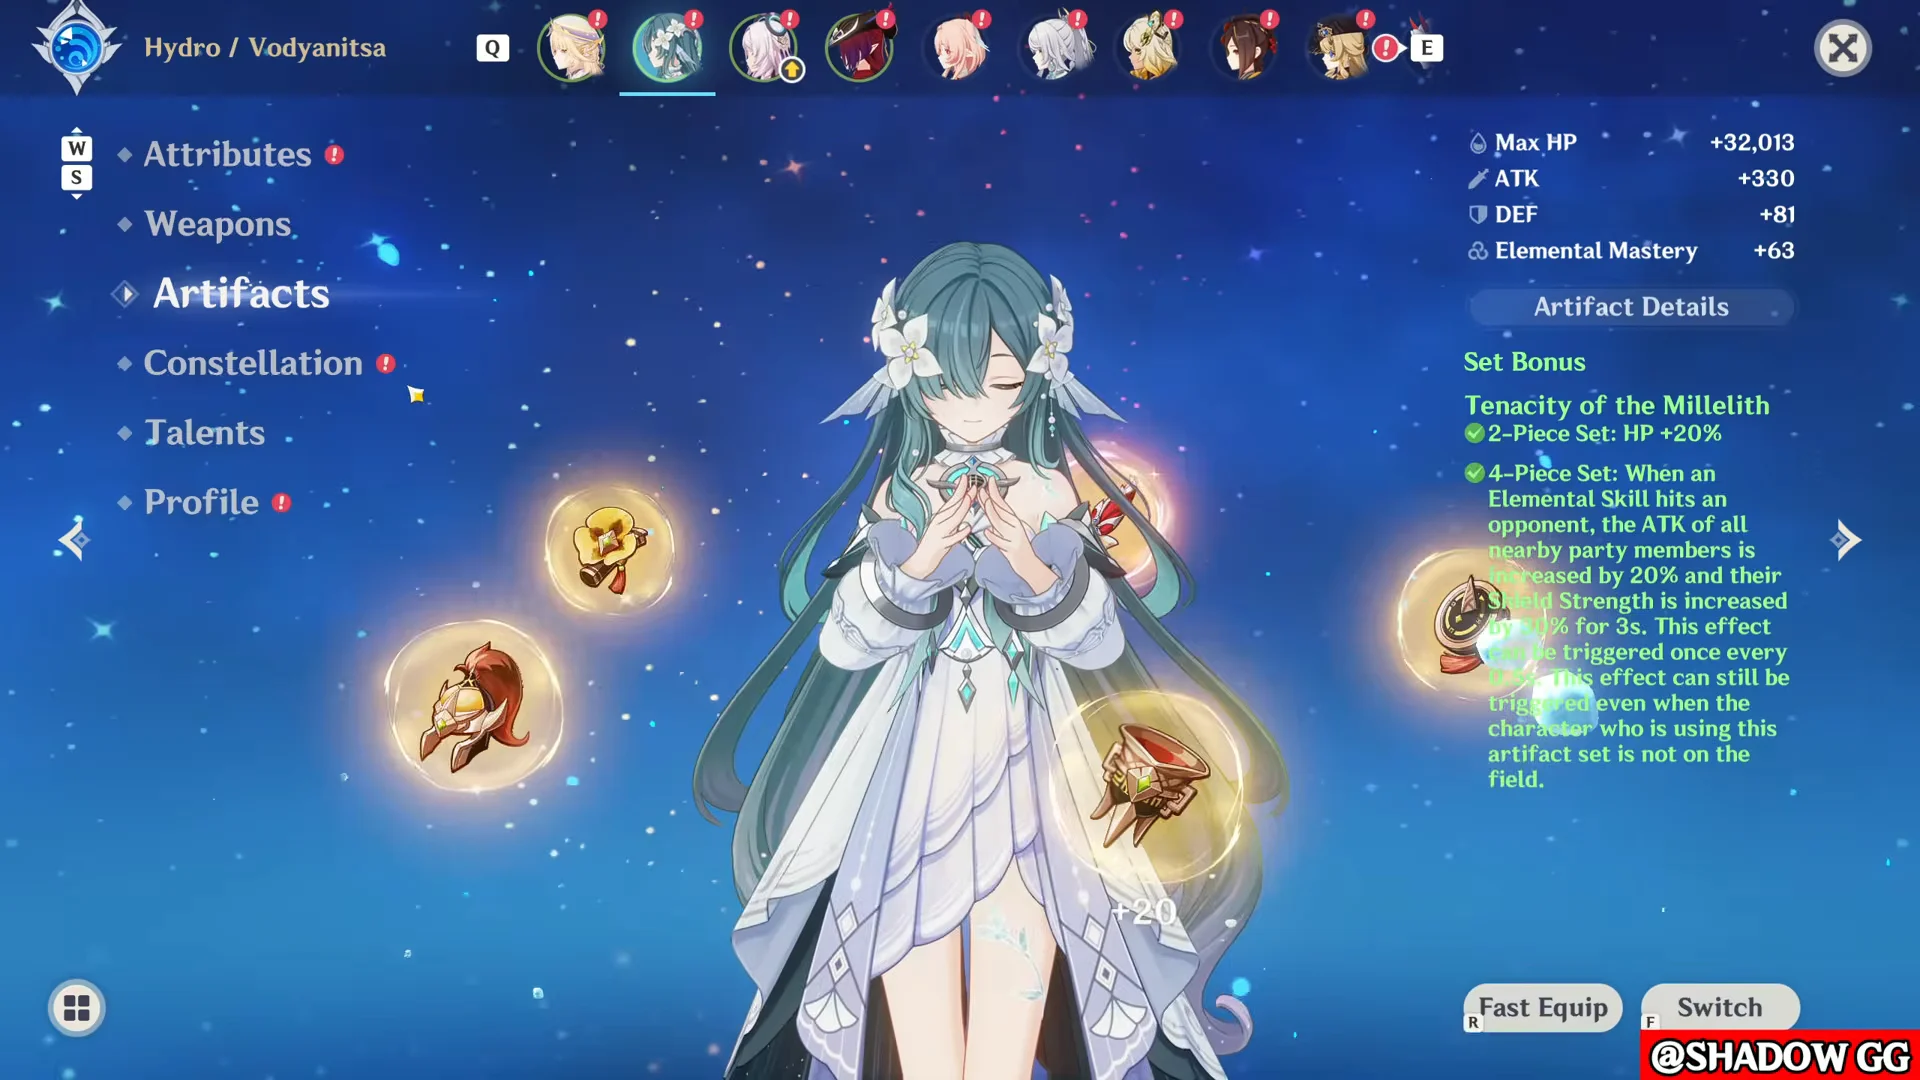
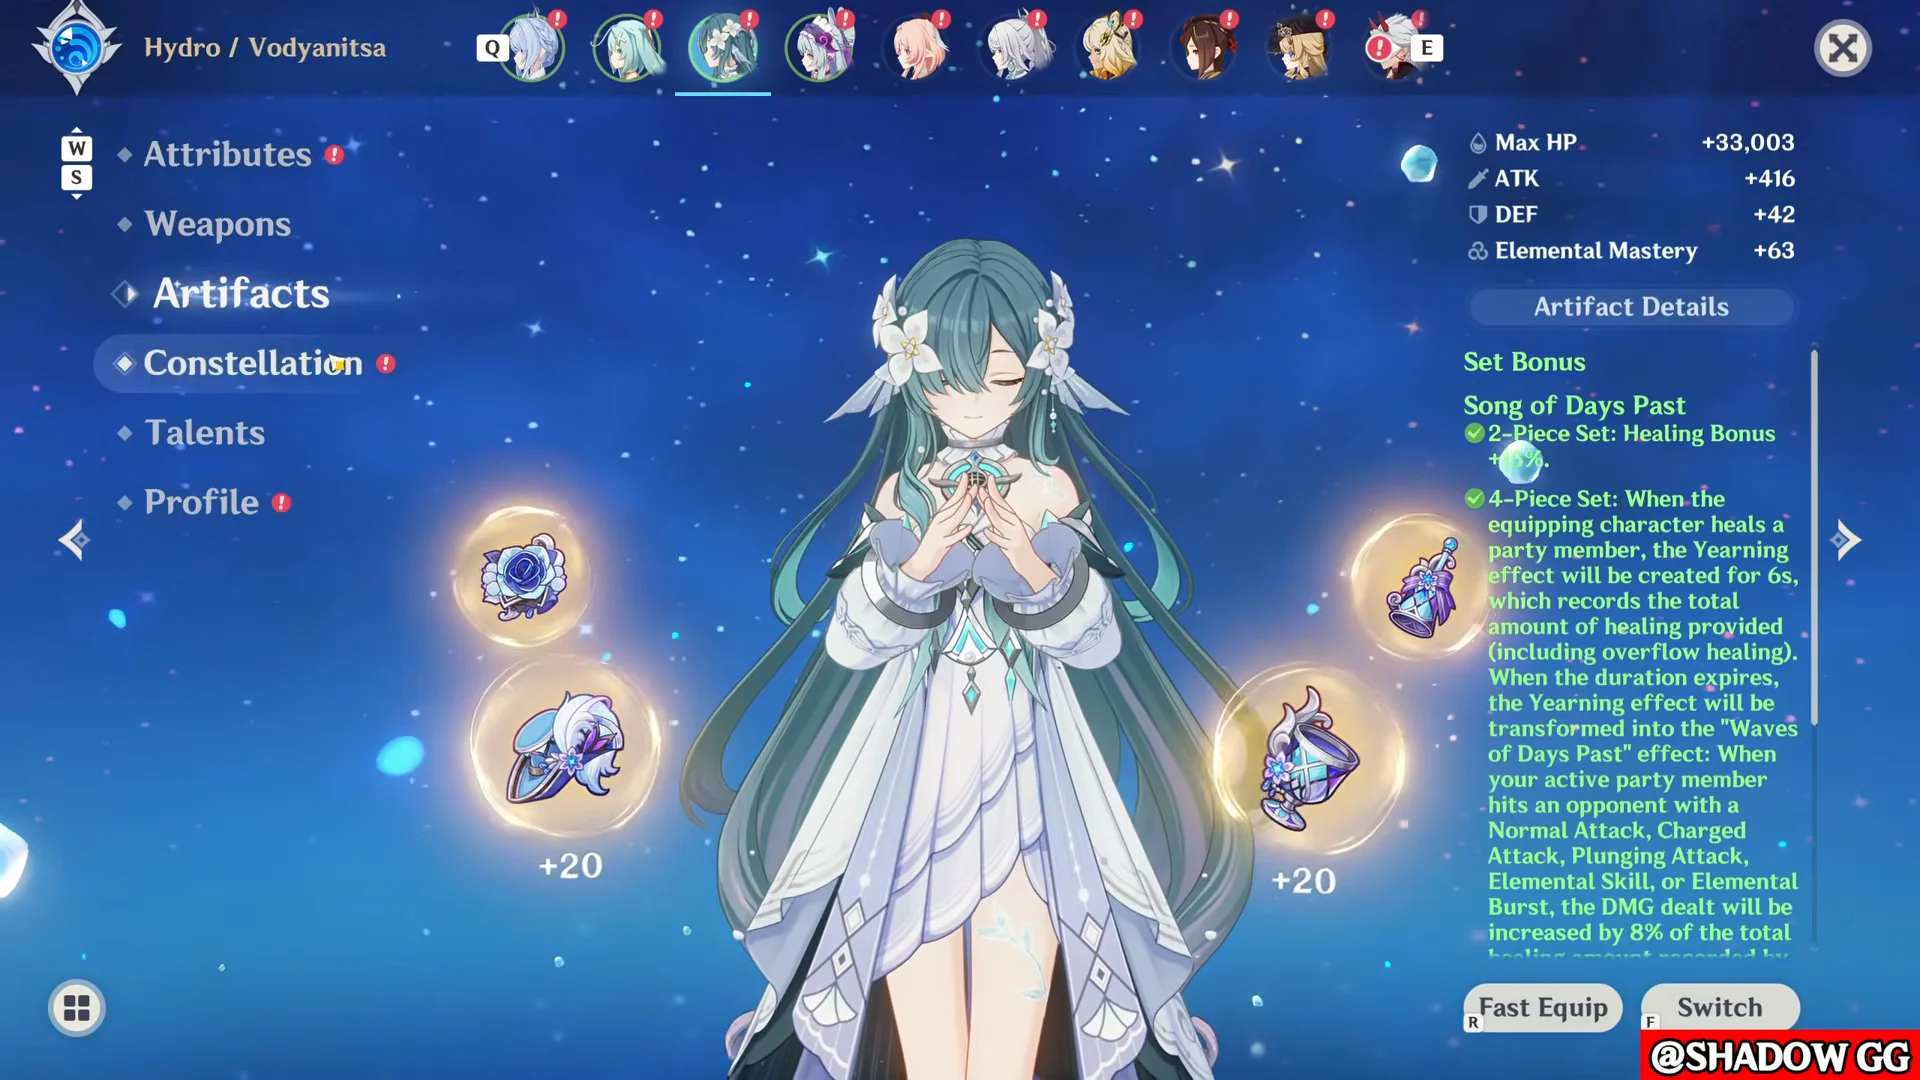
Tenacity of the Millelith is her strongest artifact set. The 2-piece gives HP, and the 4-piece pushes a 20% ATK buff to the party every time her off-field Hydro damage connects, which suits Skirk Freeze and Vesna Stellar Swirl teams. Song of Days Past is the alternative when another character already holds Tenacity, converting her healing into bonus damage. Instructor works as a stopgap, but the lost HP hurts her buff scaling.
Her signature catalyst, Hymn of the Maelstrom, carries 542 Base ATK and 66.2% HP, adds a small Healing Bonus, and stacks Max HP plus an ATK buff for the active character that grows with every 1,000 Max HP she holds over 40,000. Those bonuses increase by a further 75% for five seconds when an ally triggers Frozen or Stellar Swirl. It is her best-in-slot, but Thrilling Tales of Dragon Slayers covers most of the same ground at R5 for free, and Prototype Amber, Jadefall’s Splendor, Everlasting Moonglow, and Ash-Graven Drinking Horn are all workable.
Constellation investment priority
If you are spending on her, the order is C2, then C6, then C1. C2 is the single largest jump, C6 removes its active-character restriction and layers on flat elemental damage, and C1 adds a passive ATK buff that costs you nothing to maintain. C3, C4, and C5 are comfort.
Whether C2 is worth the pulls comes down to what you actually play. If your main damage dealer stands on field and deals Hydro, Cryo, or Stellar Swirl damage, it is a real damage constellation and one of the better C2s available for a support. If your team’s damage sits off field or lands outside those three categories, you are paying a five-star price for nine extra seconds of healing and shred — and C0 already handles that part of her job perfectly well.