
Creating system restore points in Windows 11 is a wise practice to safeguard your system before making significant changes like installing new software, updating drivers, or modifying system settings. However, accessing the system restore feature through multiple menus can be time-consuming. By adding a ‘Create Restore Point’ option directly to the context menu, you can streamline this process and create restore points with just a right-click. In this guide, we’ll explore two methods to add this convenient option to your context menu.
Adding ‘Create Restore Point’ option via registry file merge
If you prefer a quick and hassle-free method, merging a pre-made registry file is the best choice. This approach simplifies the process and requires minimal effort.
- Open
Notepadby searching for it in the Start Menu and selecting it from the results.

- Copy and paste the following code into the Notepad window:
[HKEY_CLASSES_ROOT\Directory\Background\shell\Create Restore Point]
"HasLUAShield"=""
"Icon"="SystemPropertiesProtection.exe"

[HKEY_CLASSES_ROOT\Directory\Background\shell\Create Restore Point\command]
@="PowerShell -windowstyle hidden -command \"Start-Process cmd -ArgumentList '/s,/c, PowerShell Checkpoint-Computer -Description \"Manual\" -RestorePointType \"MODIFY_SETTINGS\"' -Verb runAs\""

[HKEY_LOCAL_MACHINE\SOFTWARE\Microsoft\Windows NT\CurrentVersion\SystemRestore]
"SystemRestorePointCreationFrequency"=dword:00000000
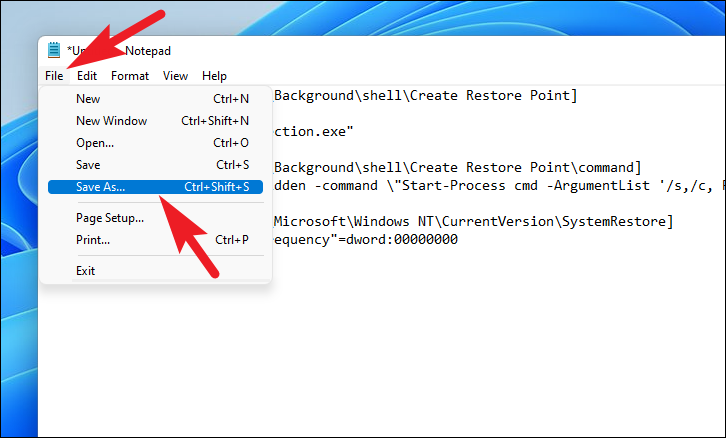
- Click on the ‘File’ menu and select ‘Save As…’.
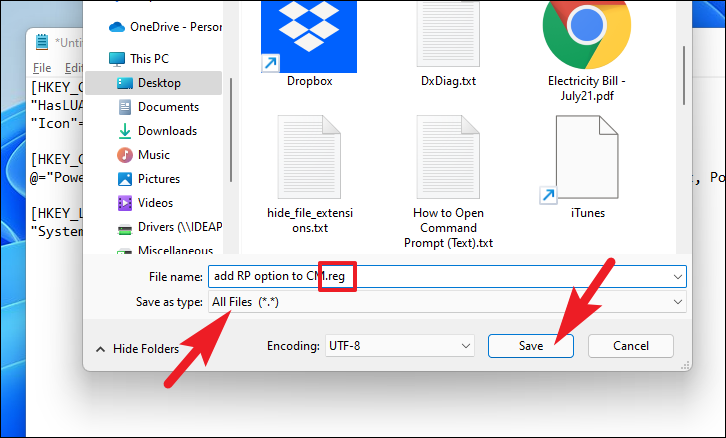
- In the ‘Save As’ dialog:
- Choose a destination to save the file.
- Name the file with a
.regextension, such asCreateRestorePoint.reg. - Set ‘Save as type’ to ‘All Files’.
- Click ‘Save’ to create the registry file.
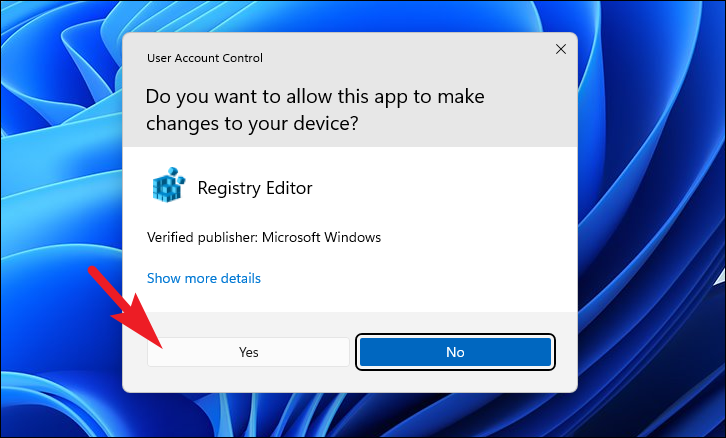
- Navigate to the saved file location and double-click it to merge it into your registry.

- If prompted by User Account Control (UAC), click ‘Yes’ to allow the changes.
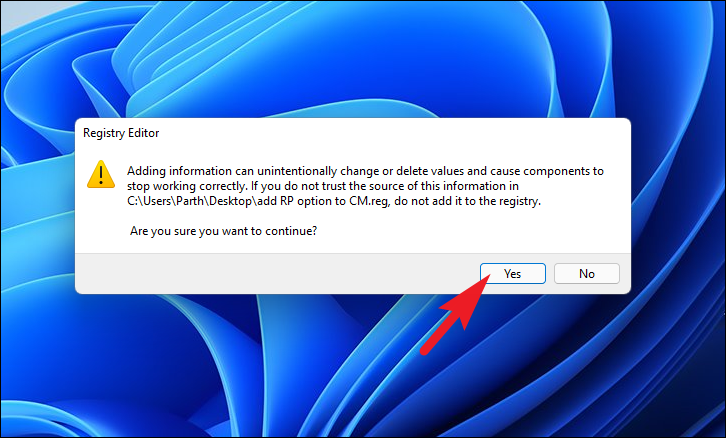
- A warning message about adding information to the registry will appear. Read it carefully and click ‘Yes’ to proceed.
- Restart your computer to apply the changes.
- After restarting, right-click on your desktop and select ‘Show more options’. You will now see the ‘Create Restore Point’ option in the context menu.

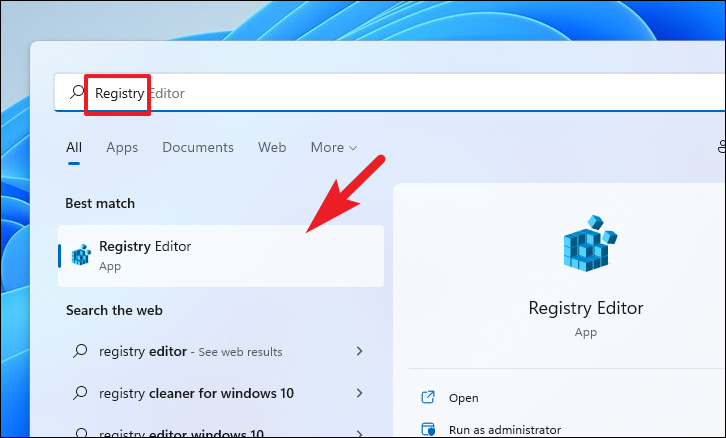
Manually adding the option using Registry Editor
If you prefer a more hands-on approach, you can manually add the ‘Create Restore Point’ option by editing the registry yourself. This method gives you complete control over the process.
- Open
Registry Editorby searching for it in the Start Menu and clicking on it.
- Navigate to the following key by copying and pasting the path into the registry editor’s address bar:
HKEY_CLASSES_ROOT\DesktopBackground\Shell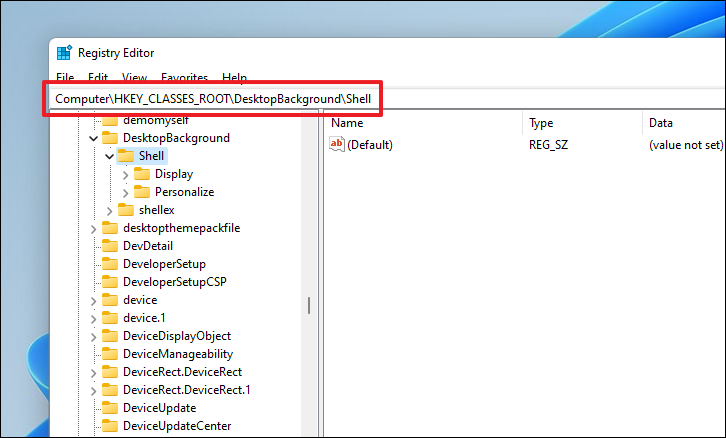
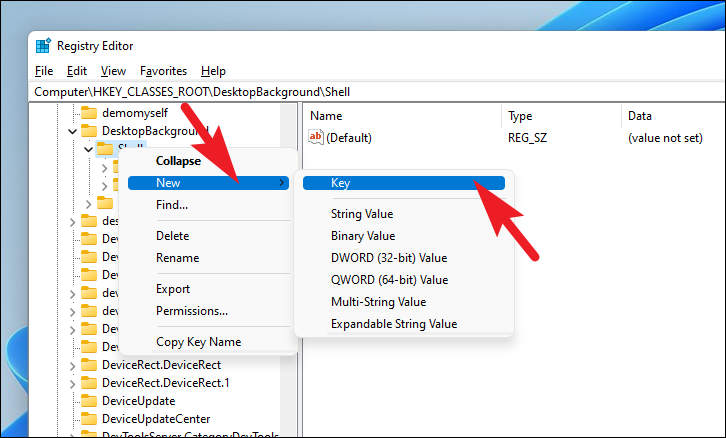
- Right-click on the ‘Shell’ key, select ‘New’, and then ‘Key’. Name the new key
RestorePoint.
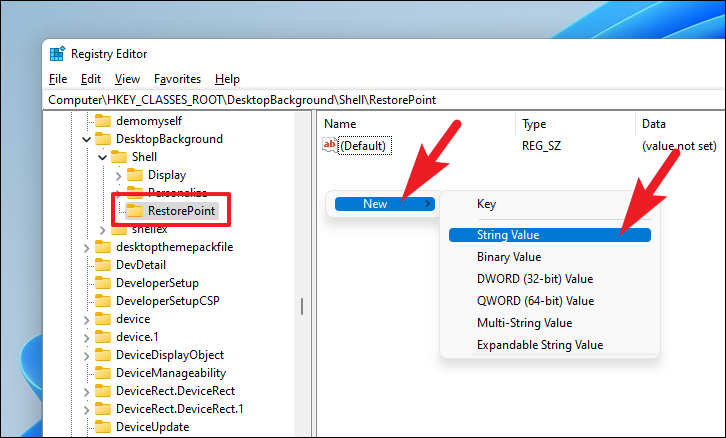
- Select the ‘RestorePoint’ key. In the right pane, right-click and choose ‘New’ > ‘String Value’. Name this value
MUIVerb.
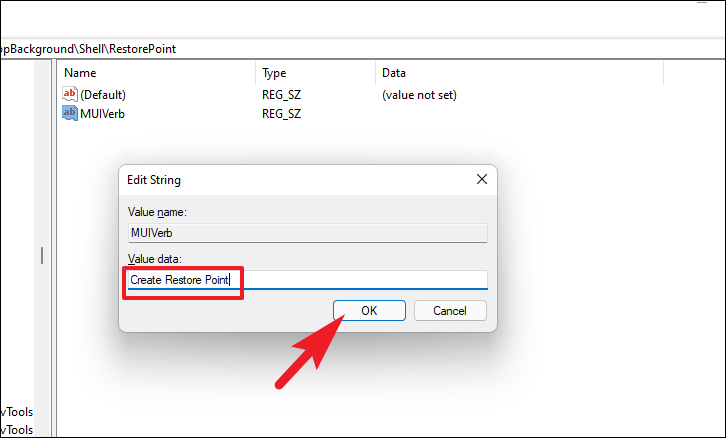
- Double-click on
MUIVerband set its value data toCreate Restore Point. Click ‘OK’ to save.
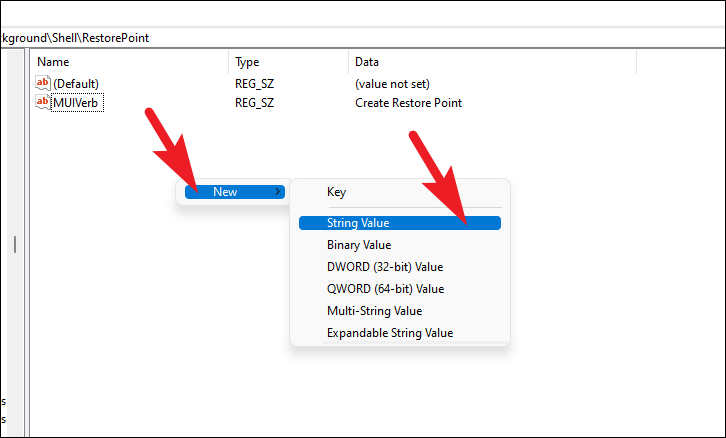
- In the right pane, right-click and select ‘New’ > ‘String Value’. Name this value
Icon.
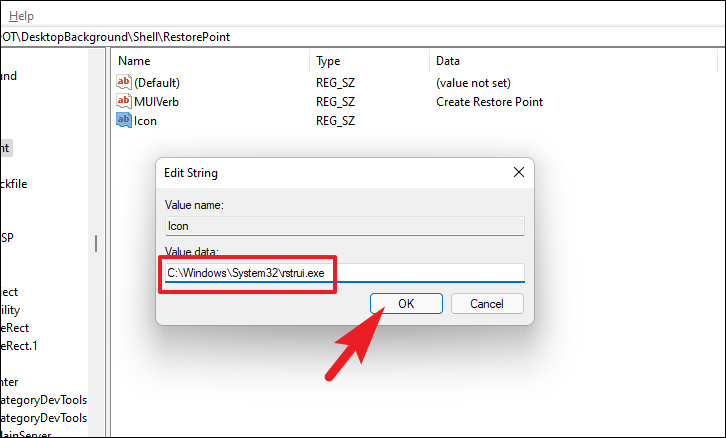
- Double-click on
Iconand set its value data toC:\Windows\System32\rstrui.exe. Click ‘OK’.
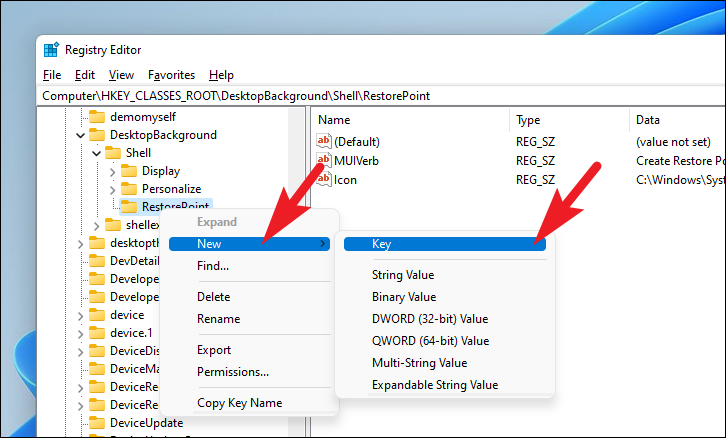
- Right-click on the ‘RestorePoint’ key, select ‘New’, and then ‘Key’. Name this subkey
Command.
- Select the ‘Command’ key. In the right pane, double-click on the ‘Default’ value.
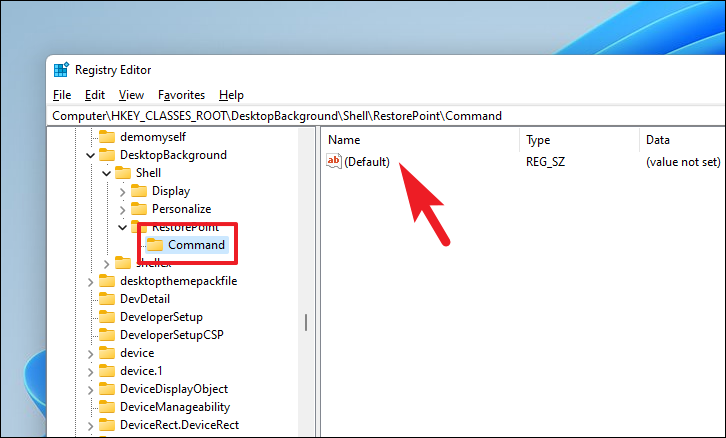
- Set the value data to the following command and click ‘OK’:
powershell.exe -c start -verb runas cmd '/k wmic.exe /Namespace:\\root\default Path SystemRestore Call CreateRestorePoint "My Restore point", 100, 7'
- Restart your computer to implement the changes.
- After restarting, right-click on your desktop and choose ‘Show more options’. The ‘Create Restore Point’ option should now appear in the context menu.

By following these methods, you can easily add a ‘Create Restore Point’ option to your Windows 11 context menu, making it more convenient to protect your system before making important changes.


