
User Account Control (UAC) is a vital security feature in Windows 11 that helps prevent unauthorized changes to your system. By prompting for permission when administrative tasks are initiated, UAC ensures that only approved actions are executed. This guide will show you how to enable and configure UAC settings using different methods.
Turn on User Account Control from Control Panel
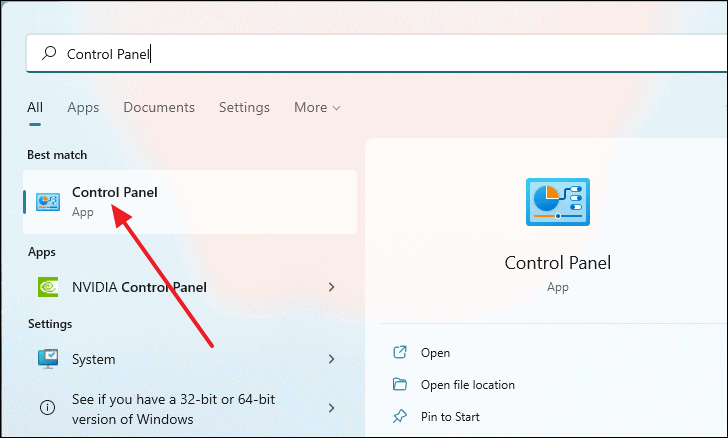
- Open the Control Panel by typing
Control Panelin the Start Menu search and selecting it from the results.
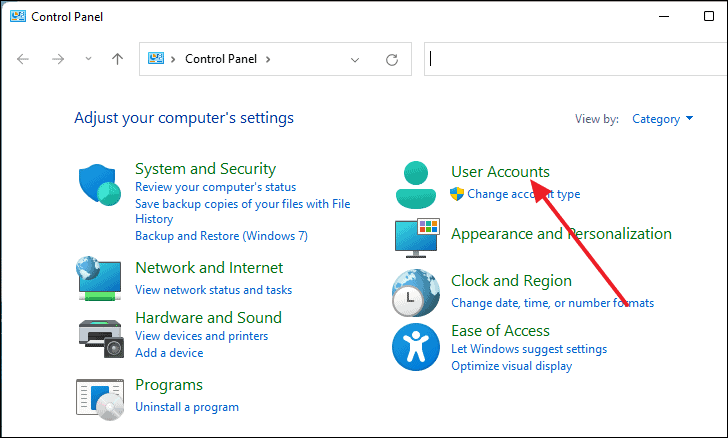
- Click on User Accounts.
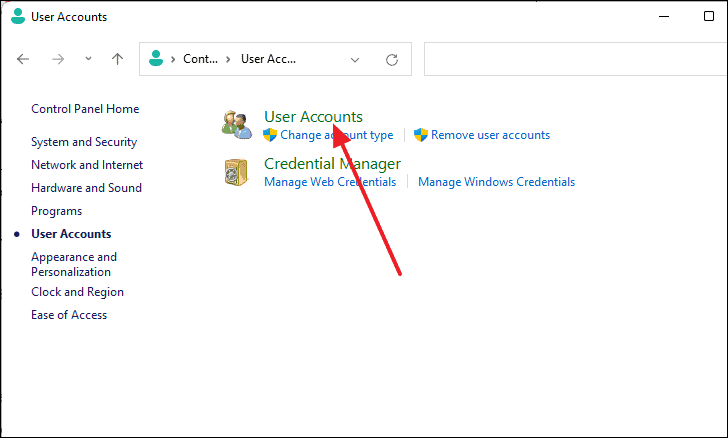
- Select User Accounts again from the list of options.
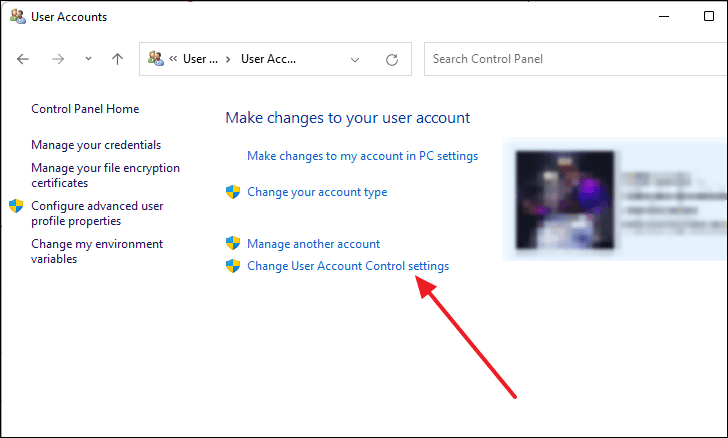
- Under the Make changes to your user account section, click on Change User Account Control settings.
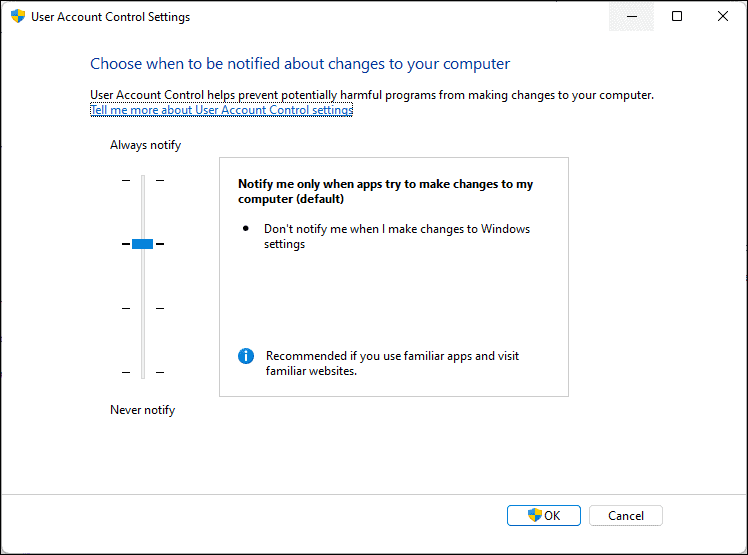
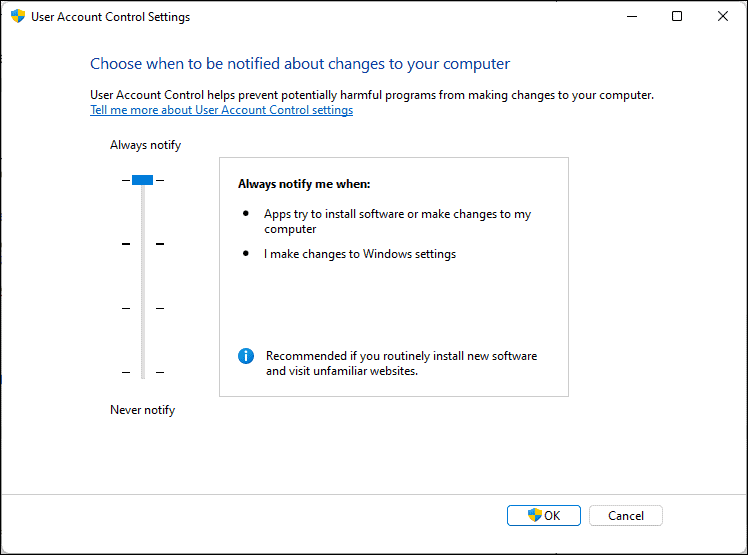
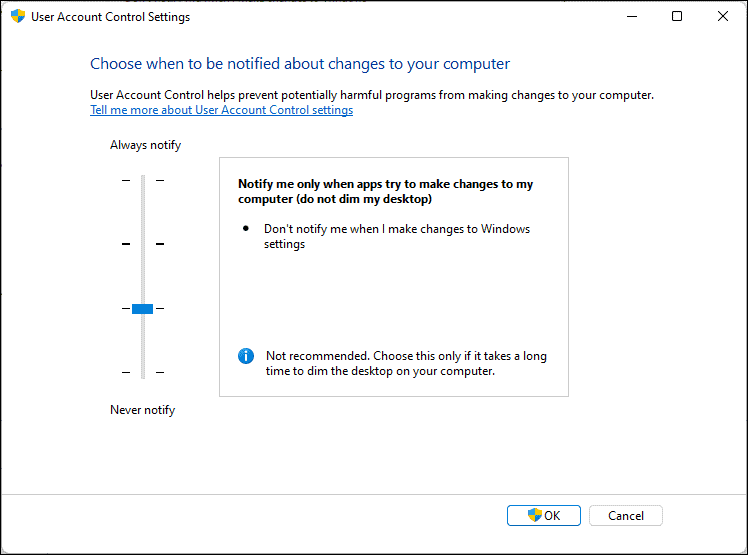
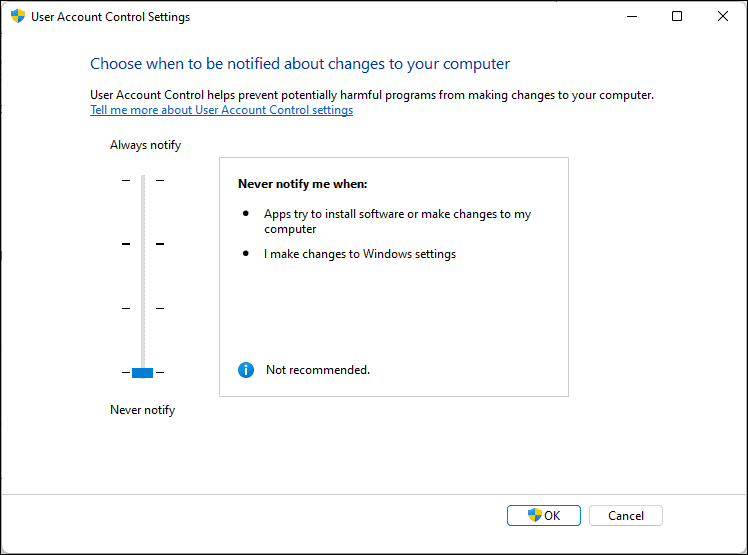
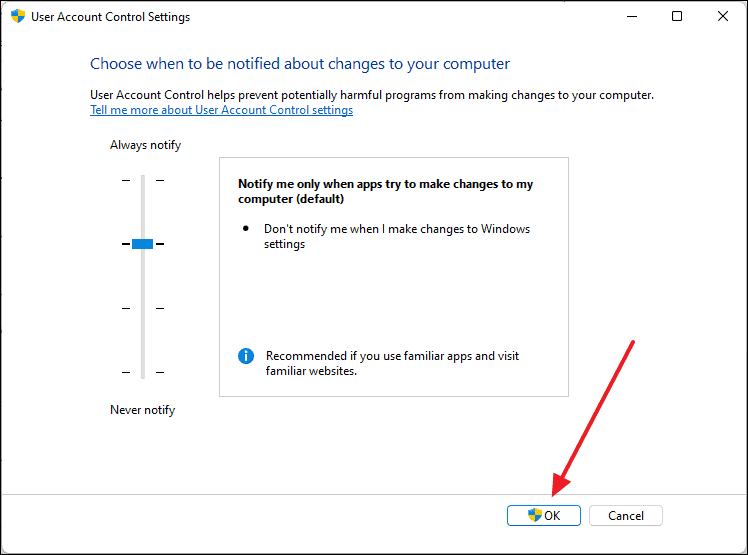
- In the User Account Control Settings window, adjust the slider to choose when to be notified about changes to your computer.
Here are the different notification levels you can choose from:
Always notify me (highest level): This setting will prompt you whenever applications or users attempt to install software or make changes to your system. It also notifies you when you make changes to Windows settings.
Notify me only when apps try to make changes to my computer (default level): You will be notified only when programs try to make changes, not when you alter Windows settings.

Notify me only when apps try to make changes to my computer (do not dim my desktop): Similar to the default, but your desktop will not be dimmed during prompts. This is less secure because it allows other programs to interfere with the prompt.
Never notify me (lowest level): UAC is turned off. You won’t receive notifications when changes are made, which can leave your system vulnerable to security threats.
- After selecting your preferred notification level, click OK to save the changes.
Turn on User Account Control using Local Security Policy Editor
- Press
Windows+Ron your keyboard to open the Run dialog.
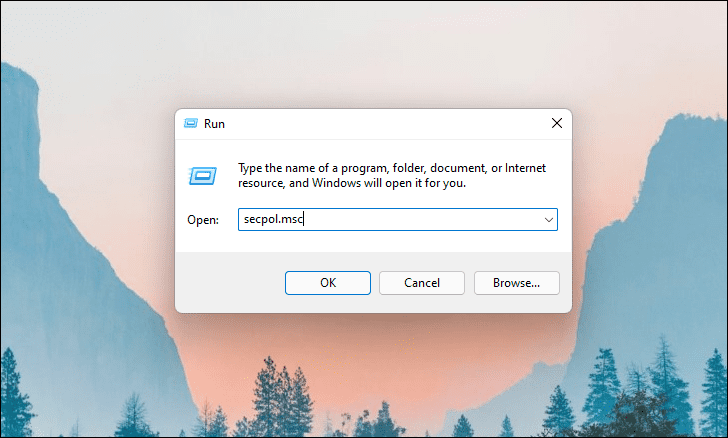
- Type
secpol.mscinto the Run dialog and pressEnterto open the Local Security Policy editor. - In the Local Security Policy window, expand Local Policies from the left pane and select Security Options.
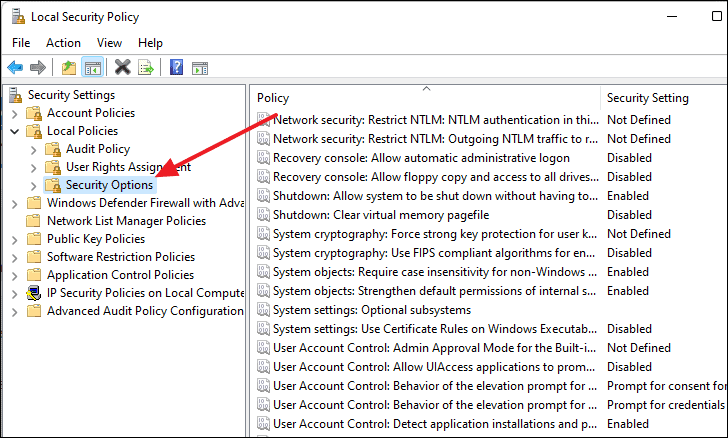
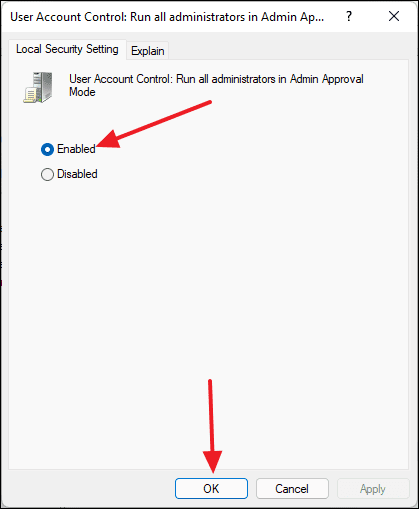
- In the right pane, locate User Account Control: Run all administrators in Admin Approval Mode and double-click on it.
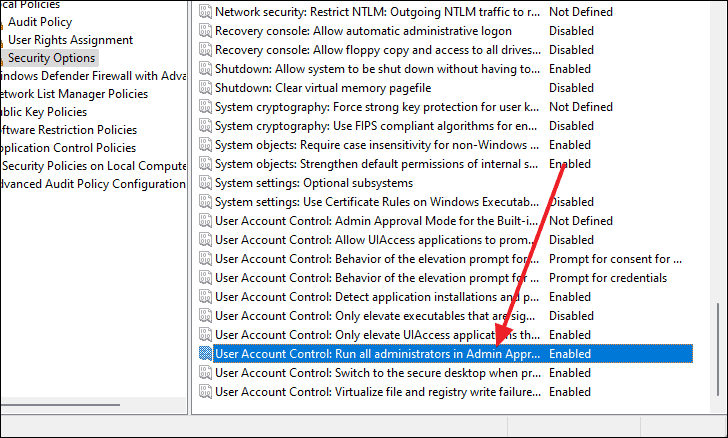
- In the policy properties window, select Enabled and click OK to apply the changes.
- Close the Local Security Policy editor.
By following these methods, you can easily enable and configure User Account Control in Windows 11 to enhance your system’s security. Adjusting UAC settings allows you to have control over the level of notifications you receive when changes are made to your computer.


