Accessing your Google Drive files directly from Windows File Explorer can greatly simplify file management and enhance your workflow. By integrating Google Drive into File Explorer on Windows 11, you can treat your cloud files as if they were stored locally on your computer. This guide will walk you through the steps to add Google Drive to File Explorer and configure it to suit your needs.
Adding Google Drive to File Explorer
To access your Google Drive files from File Explorer, you'll need to download and install the Google Drive for Desktop app. This application allows you to synchronize your Google Drive with your computer, enabling seamless access to your files.
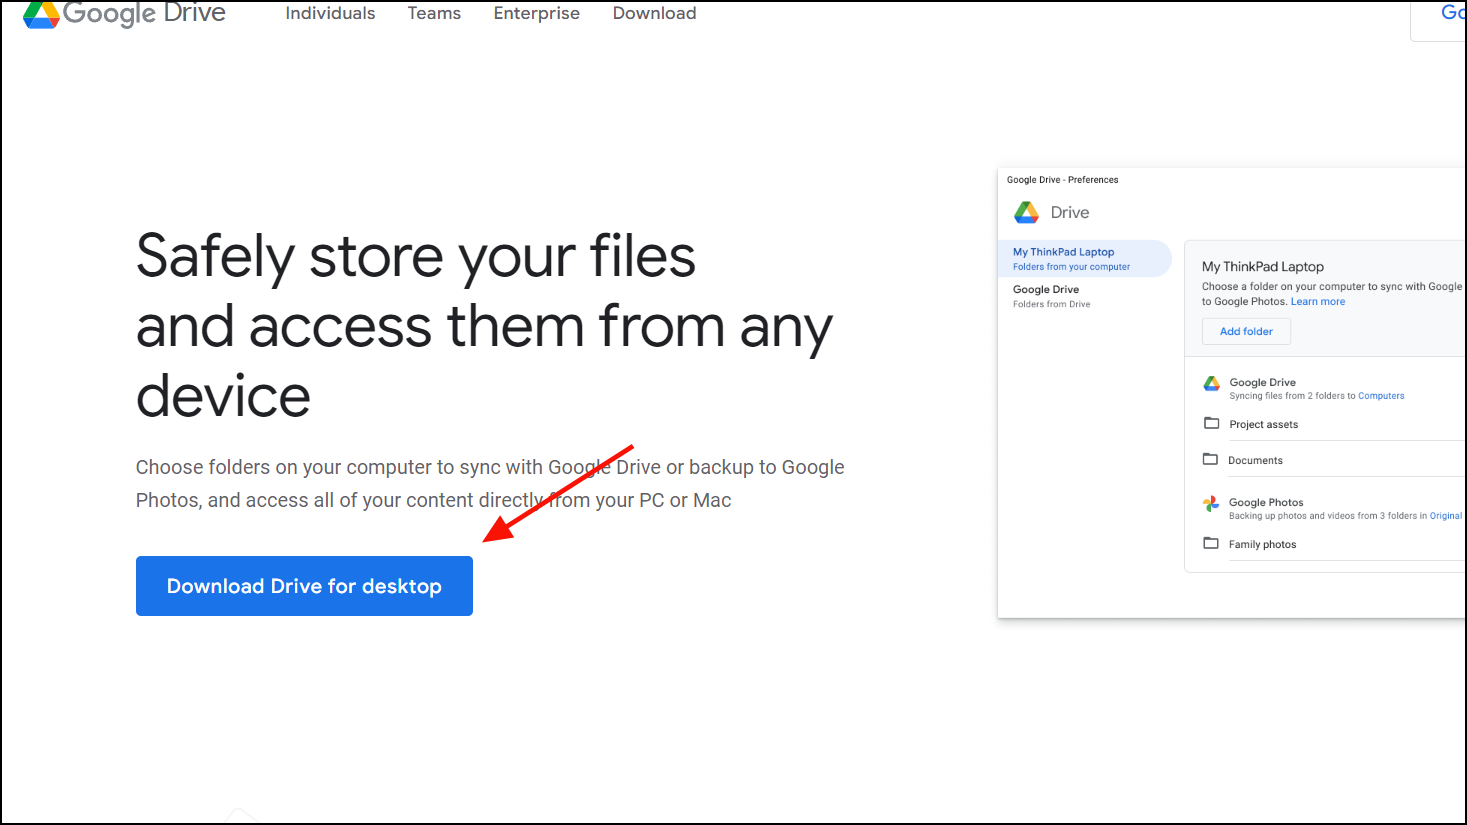
Step 1: Visit the Google Drive download page and click on the 'Download Drive for desktop' button.
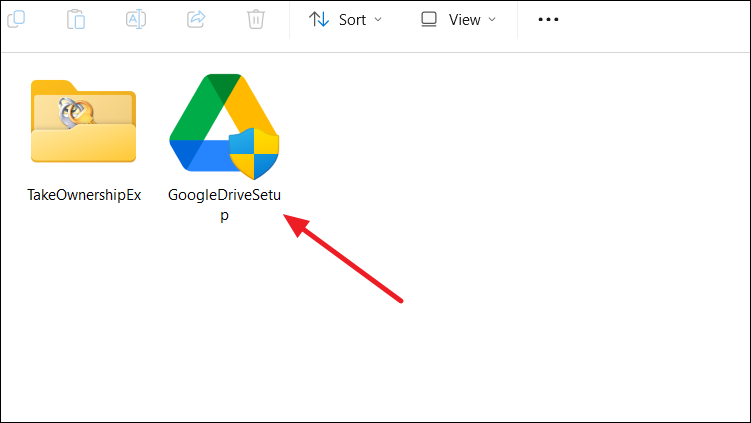
Step 2: Once the installer has downloaded, open it by double-clicking the setup file. If prompted by the User Account Control, click 'Yes' to allow the installation.
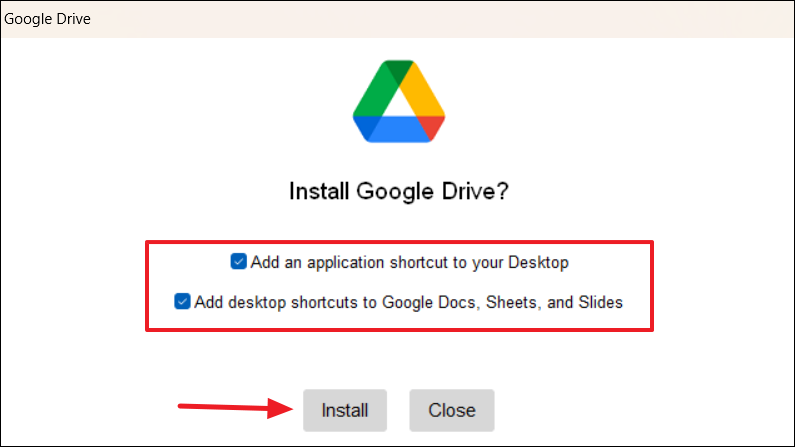
Step 3: During the installation, you can choose to add shortcuts to Google Drive and Google's online office apps on your desktop. Select the options that suit your preference and click 'Install' to proceed.
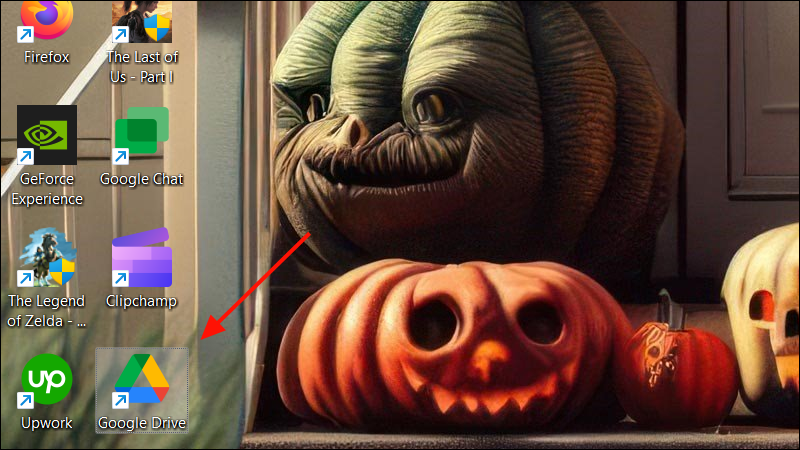
Step 4: After the installation is complete, launch the Google Drive app either from the installer or the desktop shortcut.
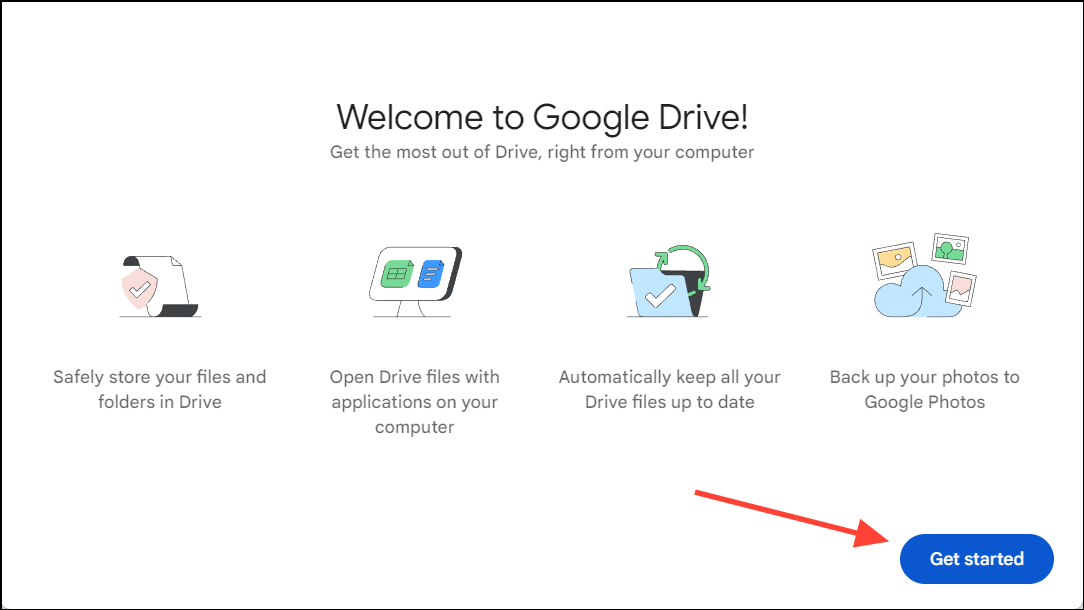
Step 5: In the Google Drive app window, click on 'Get started' to begin the setup process.
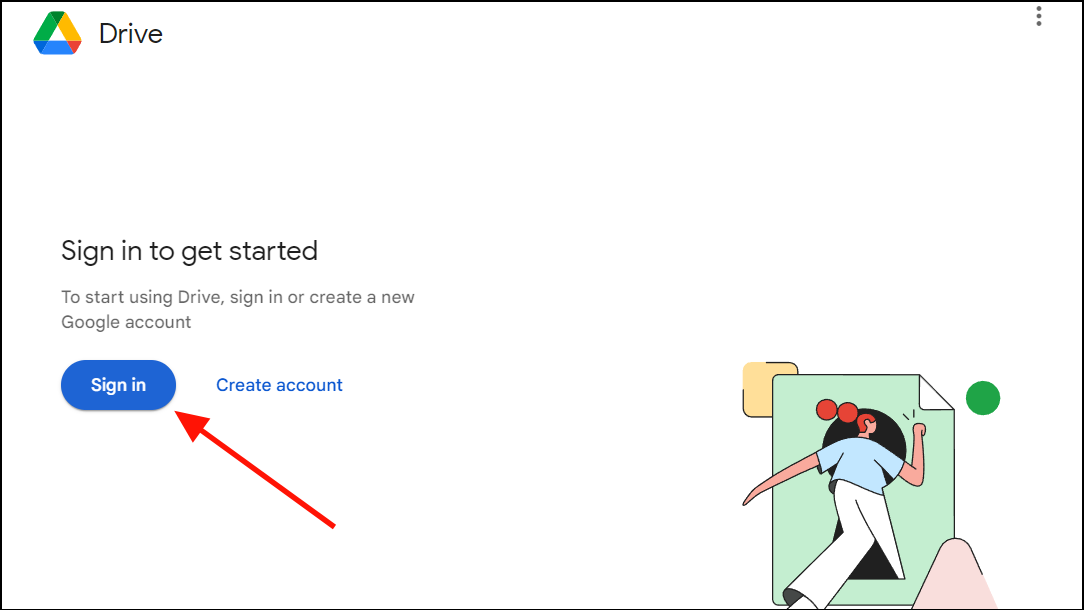
Step 6: Click 'Sign in' to log into your Google account.
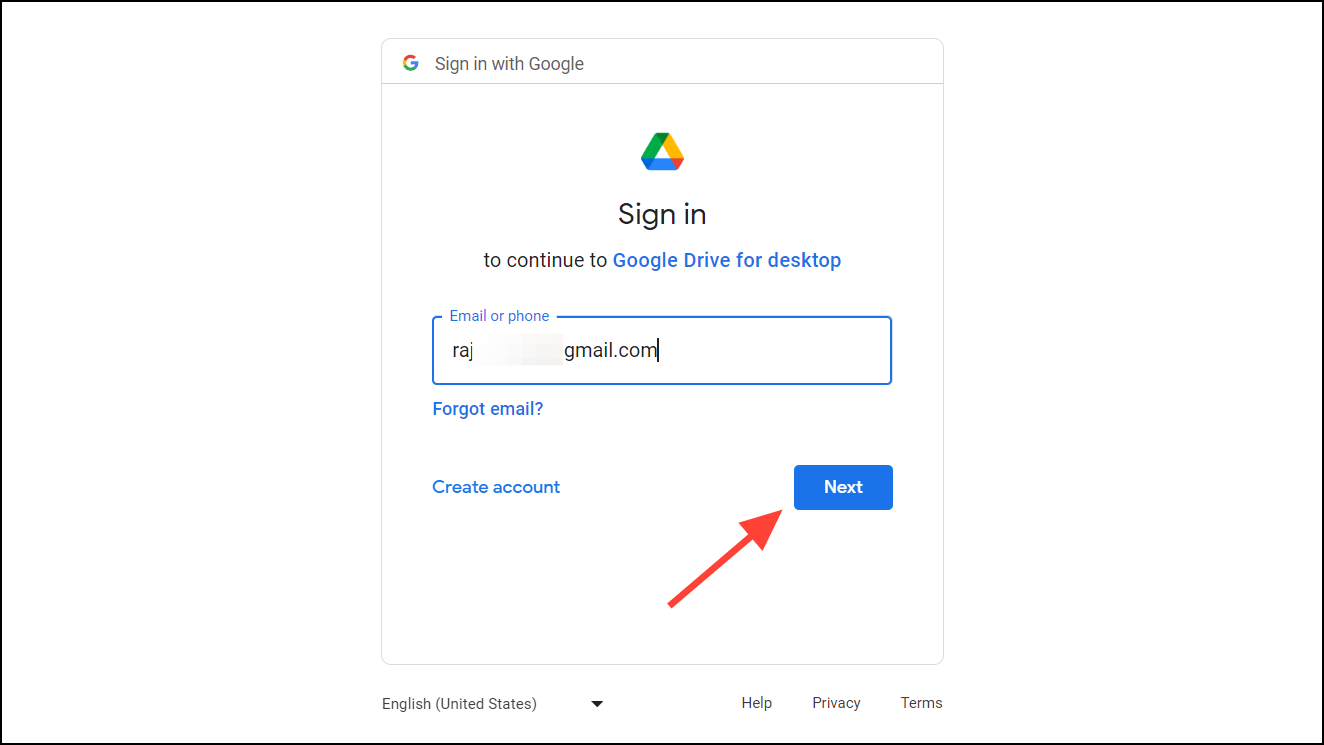
Step 7: A browser window will open, prompting you to sign in to your Google account. Enter your email and password to continue. If you're already signed in, this step will be quicker.
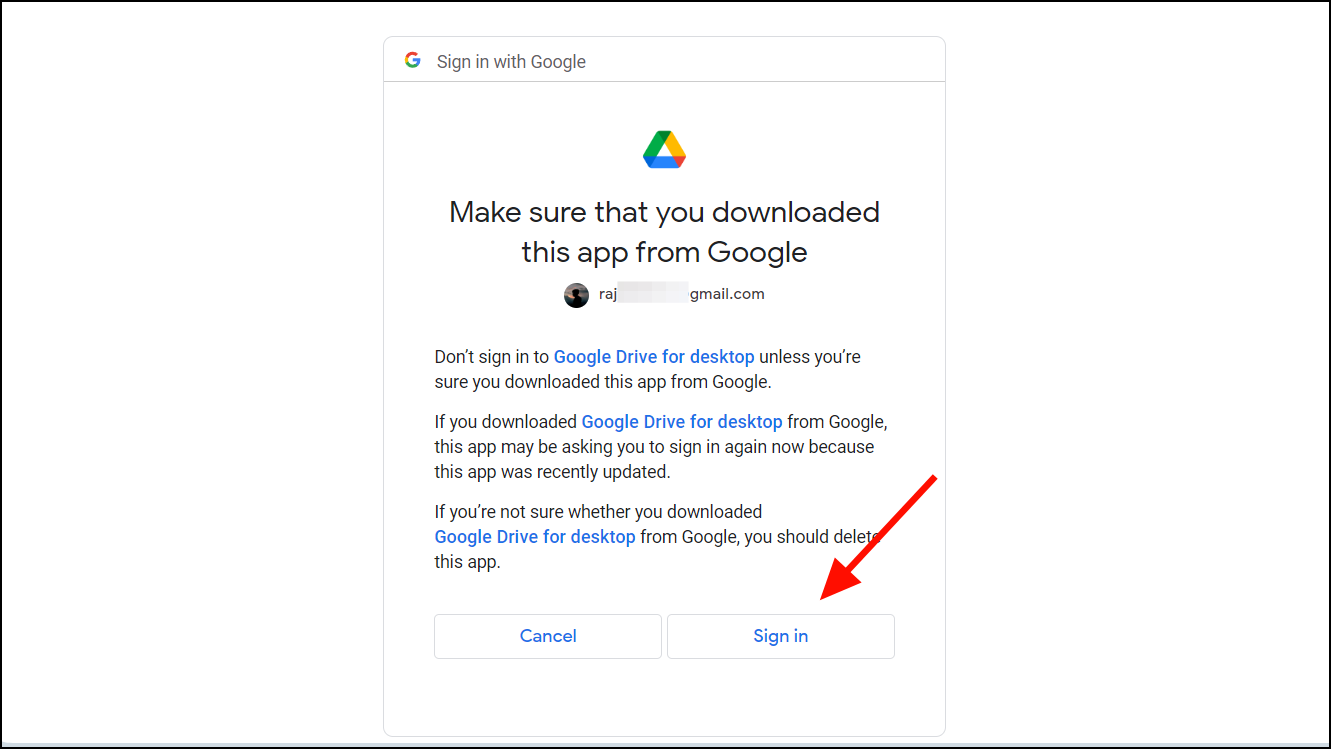
Step 8: Grant the necessary permissions by clicking 'Sign in' on the consent screen. This allows the app to access your Google Drive files.
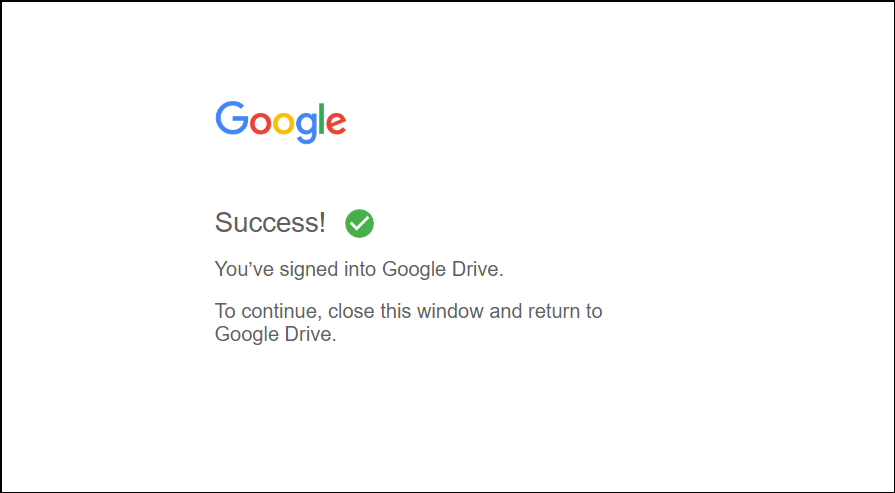
Step 9: After successfully signing in, you will see a 'Success' message. You can now close the browser window and return to the app.
Setting Up Google Drive on Windows 11
With the app installed and your account connected, you can now configure which folders to sync between your computer and Google Drive.
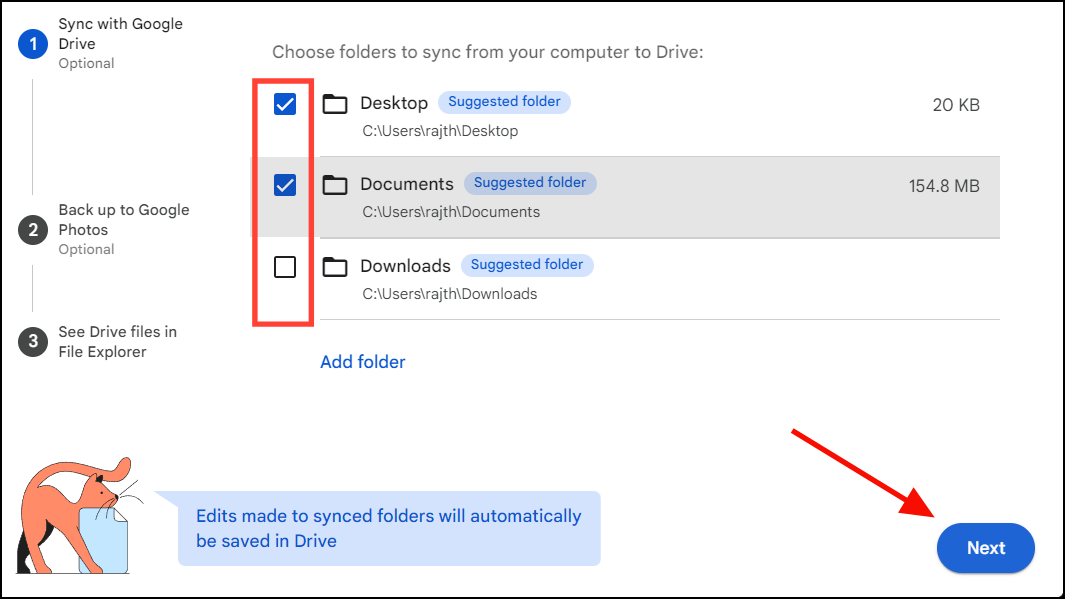
Step 1: Back in the Google Drive app, select the library folders you wish to sync to Google Drive, such as Documents, Desktop, or other folders. Then, click 'Next'.
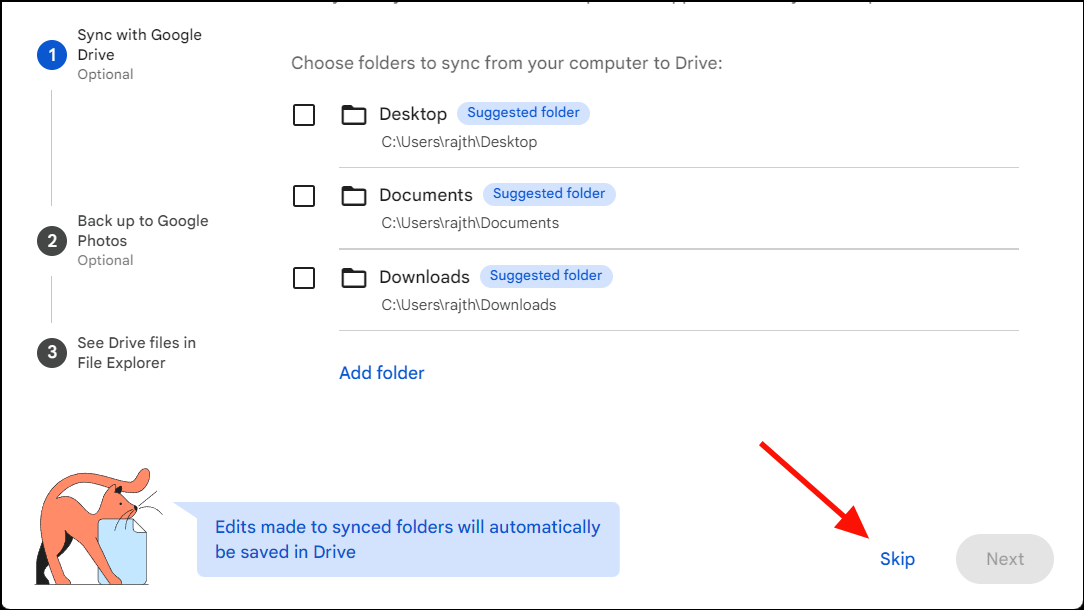
Step 2: If you prefer not to sync certain folders at this time, you can skip this step by clicking 'Skip'. You can also add additional folders by clicking 'Add folder' and selecting the desired directories.
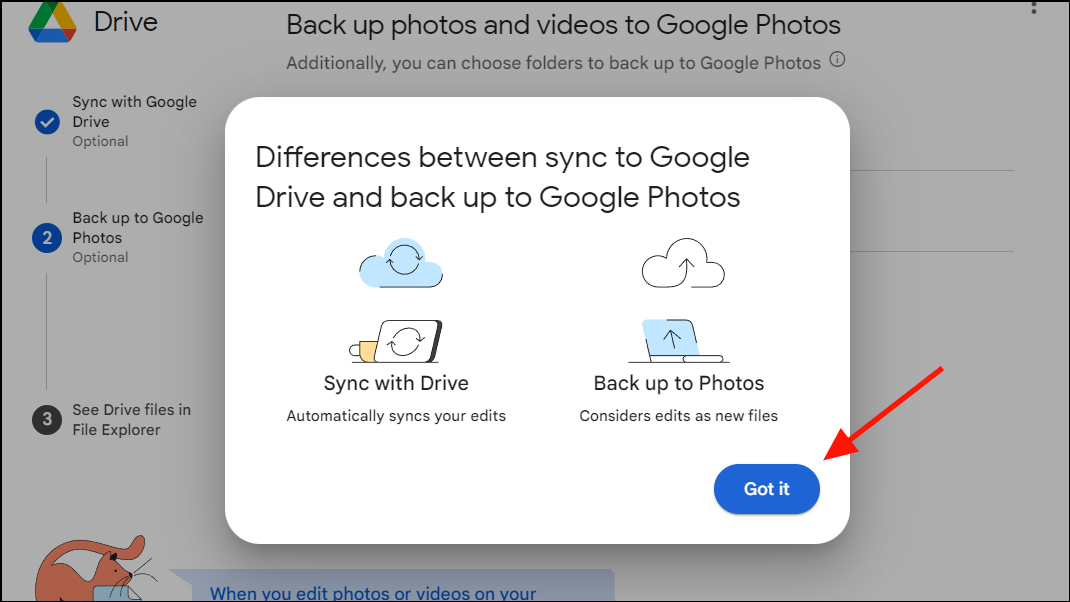
Step 3: Understand that library folders containing photos and videos will back up to Google Photos, while other files sync to Google Drive. Click 'Got it' when ready to proceed.
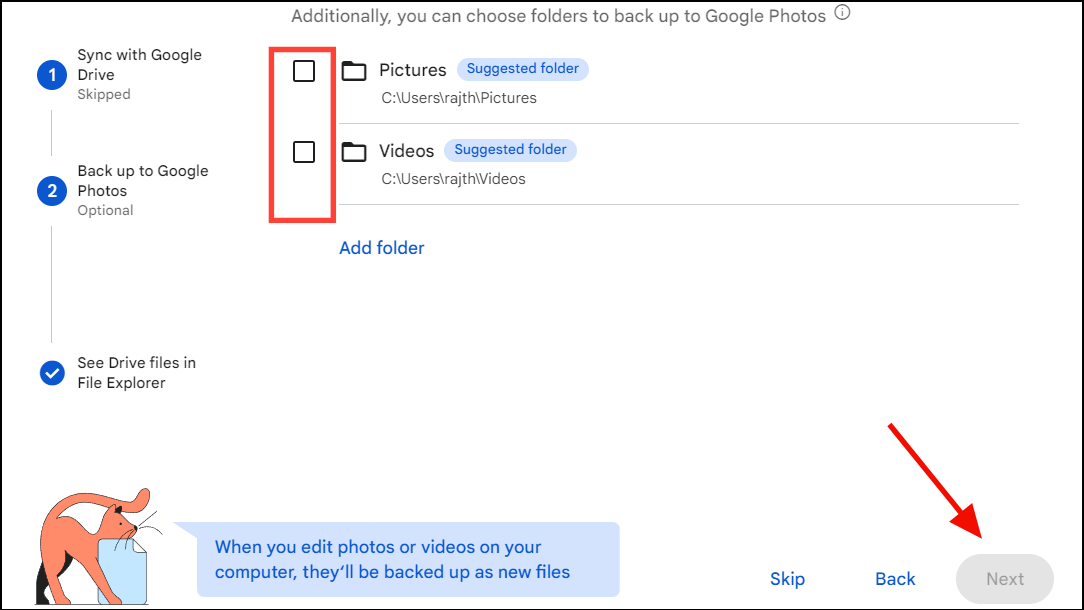
Step 4: Choose the folders you want to back up to Google Photos and click 'Next'. If you prefer to skip this step, click 'Skip'.
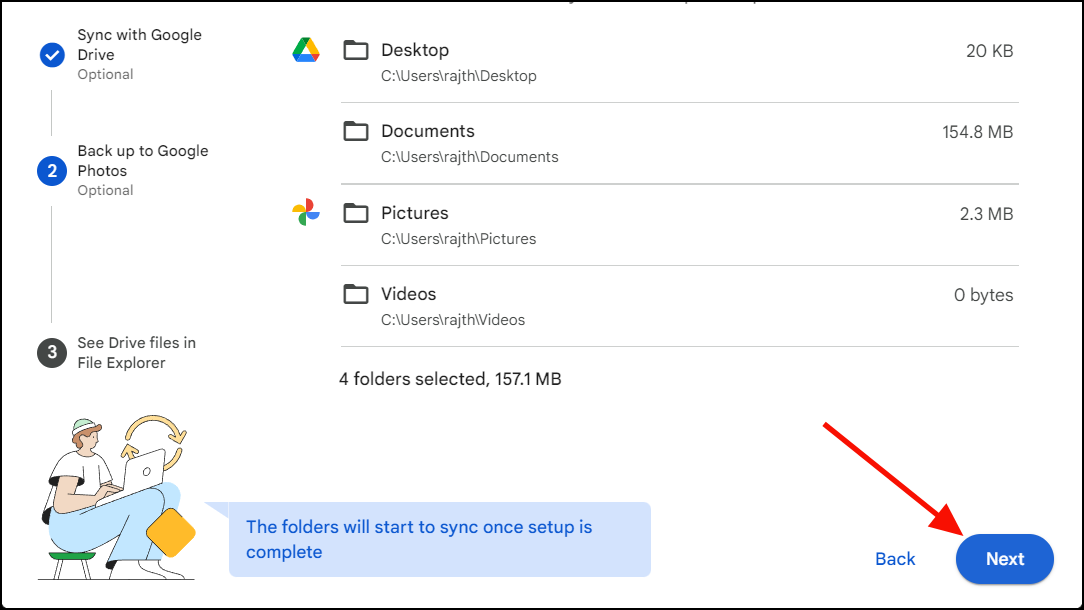
Step 5: Review your selections for syncing and backup. Once satisfied, click 'Next' to continue.
Step 6: On the following screen, click 'Next' once more to proceed to the final setup step.
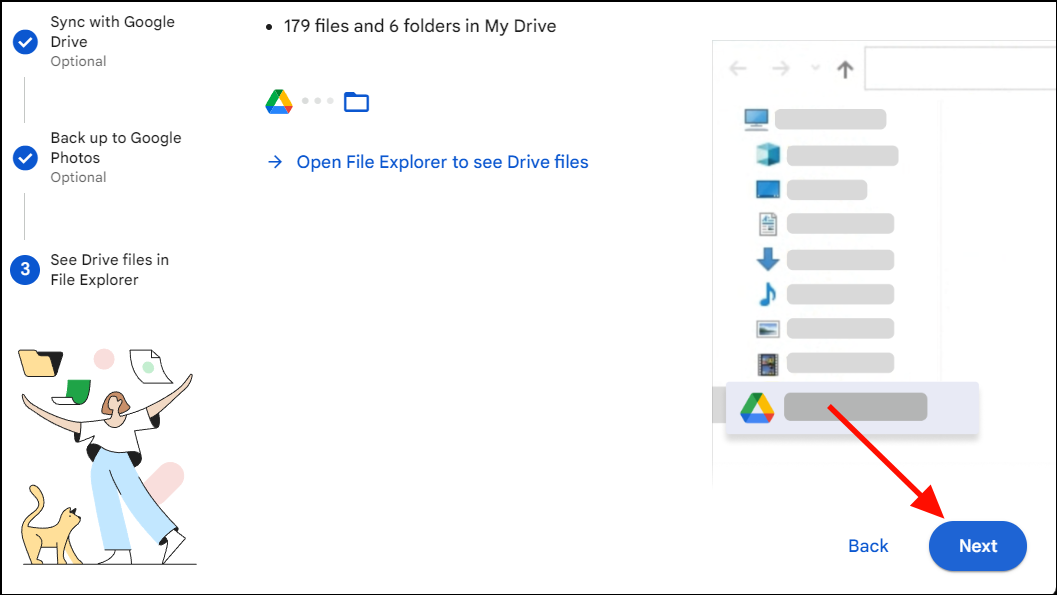
Step 7: Finally, click 'Open Drive' to access your Google Drive folder in File Explorer.
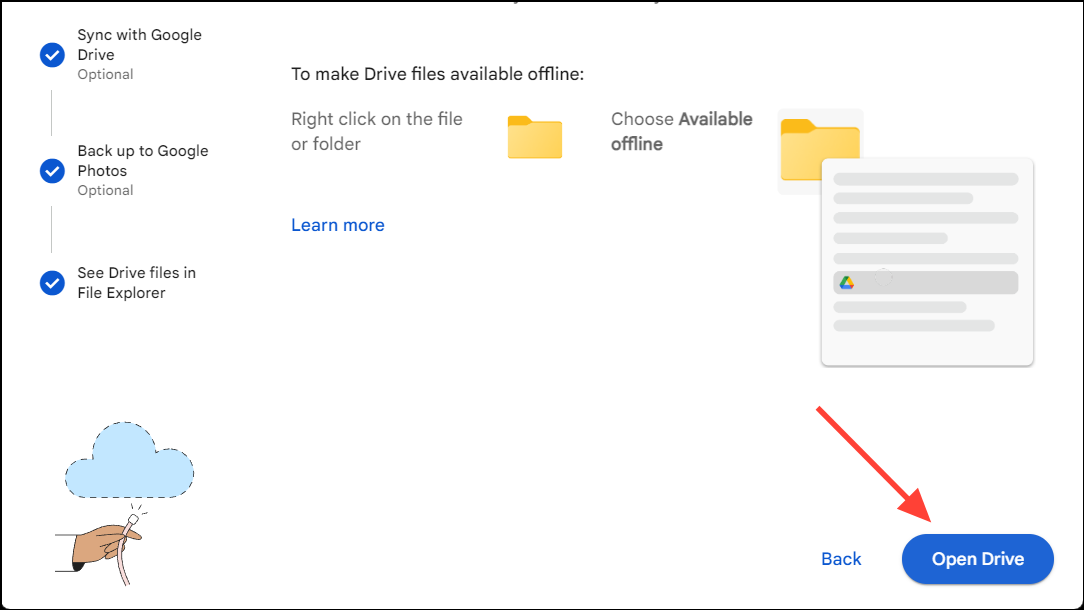
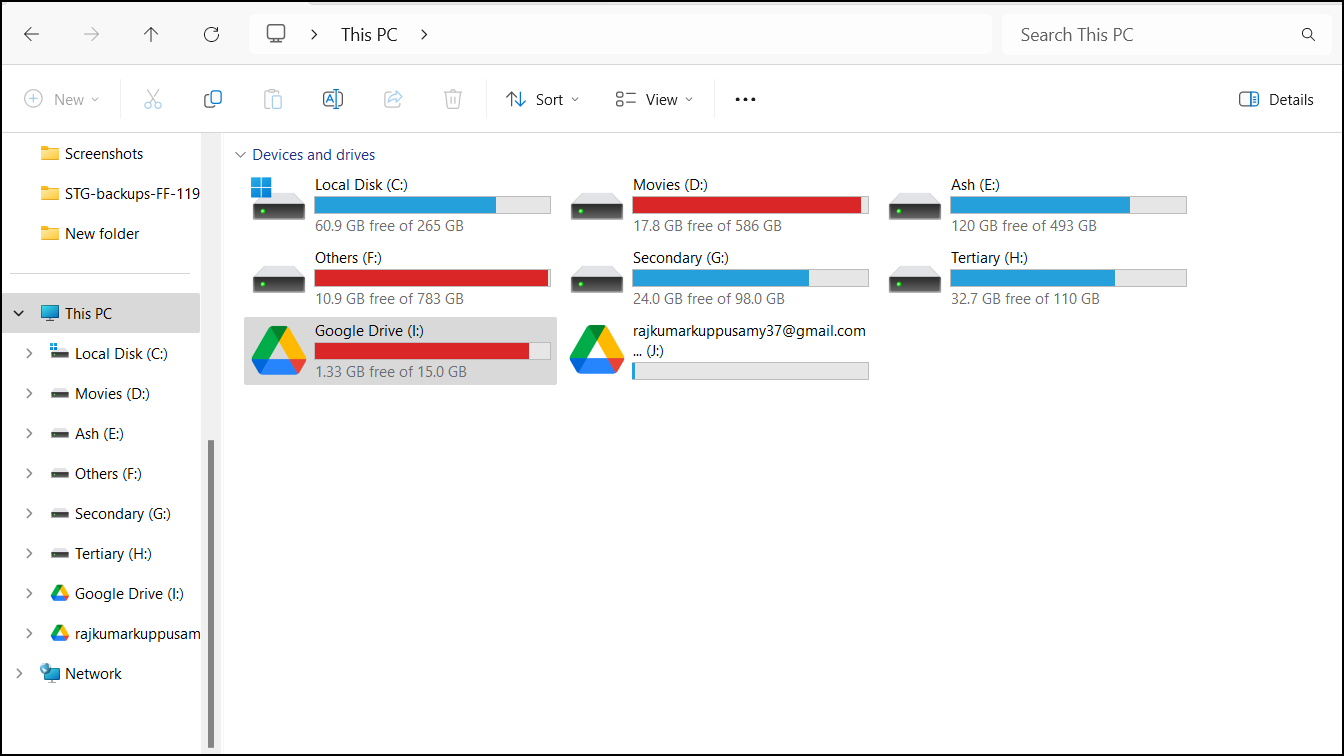
You should now see Google Drive listed both in the 'This PC' section and the left sidebar of File Explorer. Opening this drive will display your Google Drive files, which you can manage as if they were on your local hard drive.
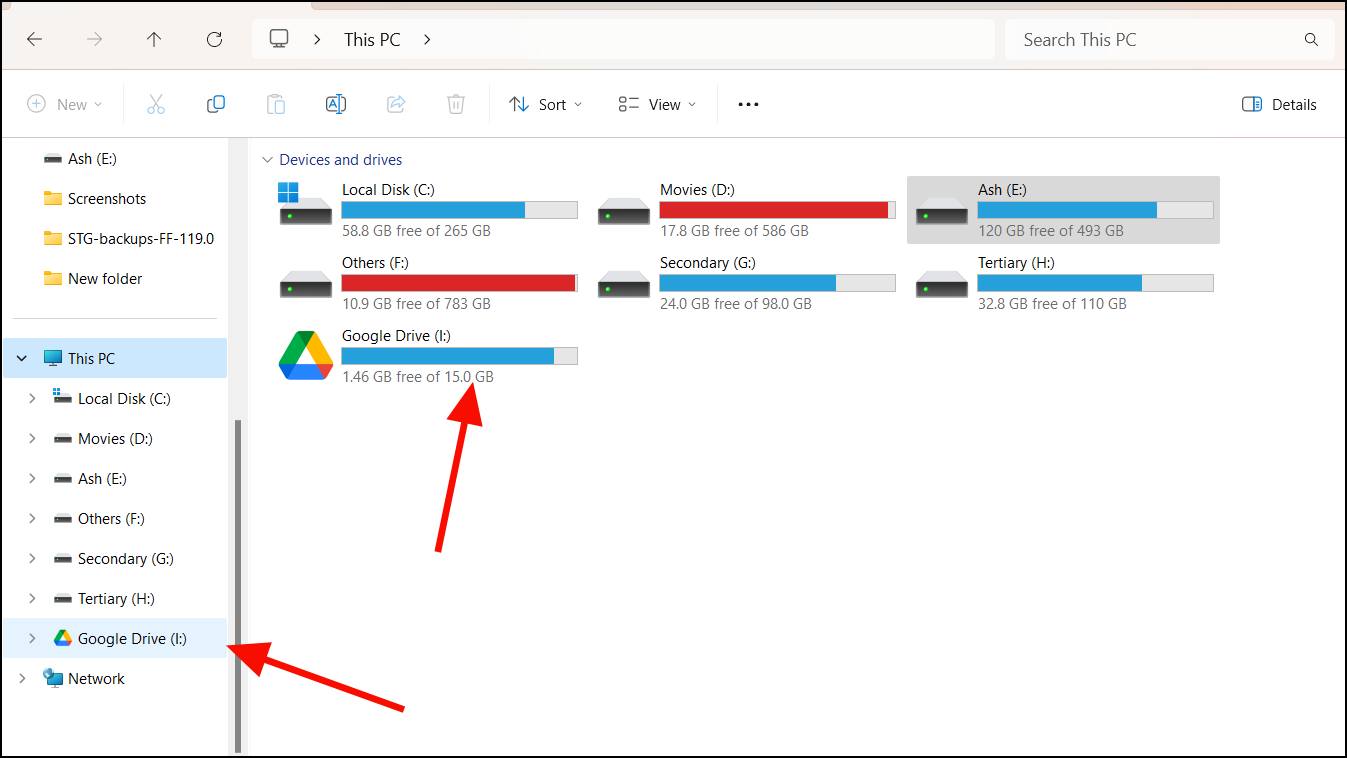
Adding Google Drive to Quick Access
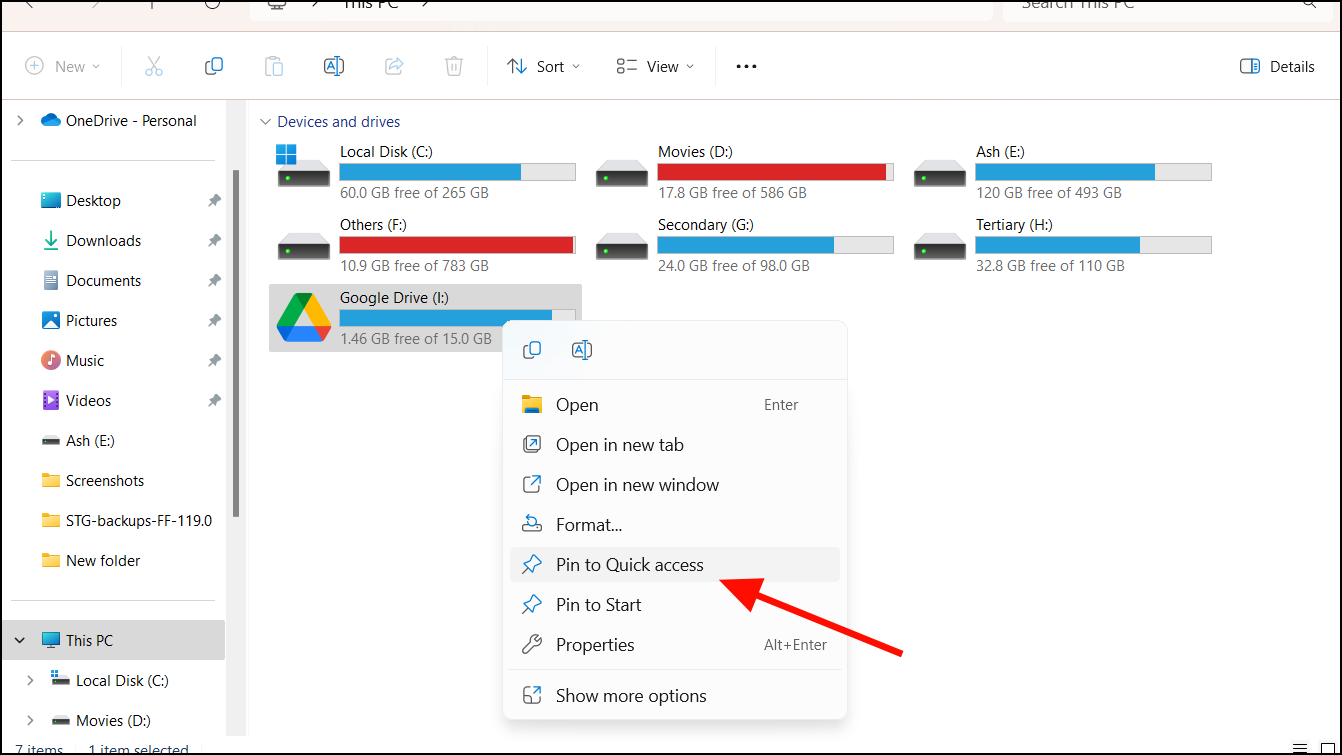
If you prefer quick access to your Google Drive, you can pin it to the Quick Access section in File Explorer.
Step 1: In File Explorer, right-click on 'Google Drive' and select 'Pin to Quick access' from the context menu.
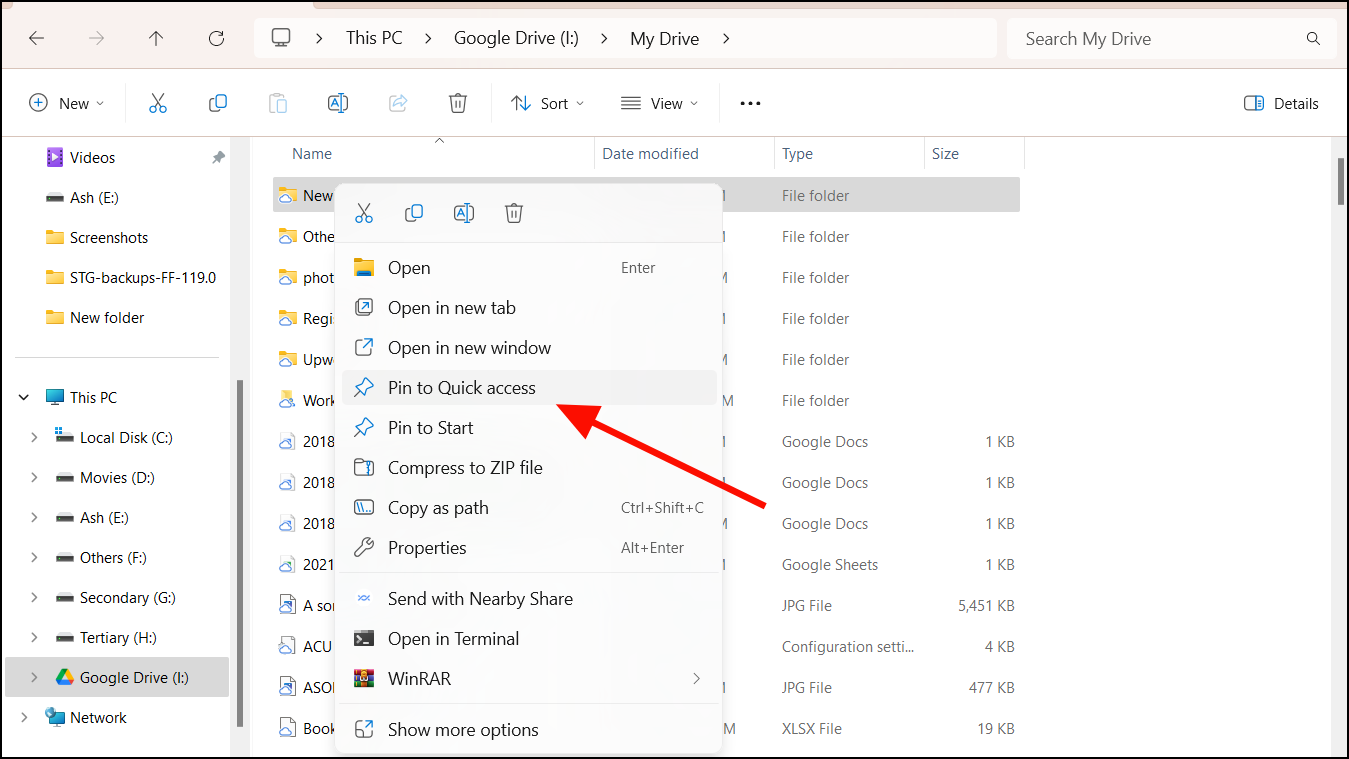
You can also pin specific folders within your Google Drive for even faster access. Simply navigate to the desired folder, right-click it, and select 'Pin to Quick access'.
Adding Google Drive as a Library
Another method to integrate Google Drive into File Explorer is by adding it as a library. This allows you to organize your Google Drive files alongside your other libraries like Documents, Music, and Pictures.
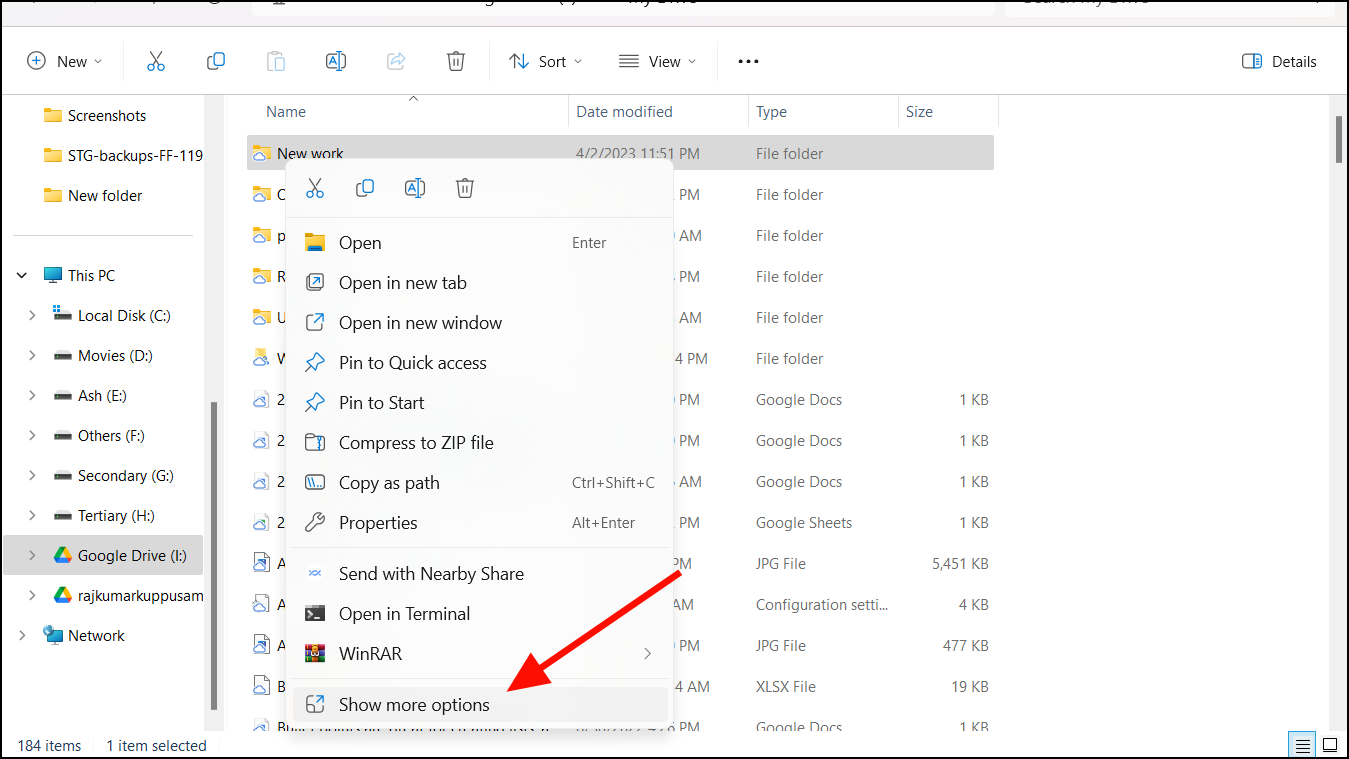
Step 1: In File Explorer, right-click on 'Google Drive' and choose 'Show more options' to access the classic context menu.
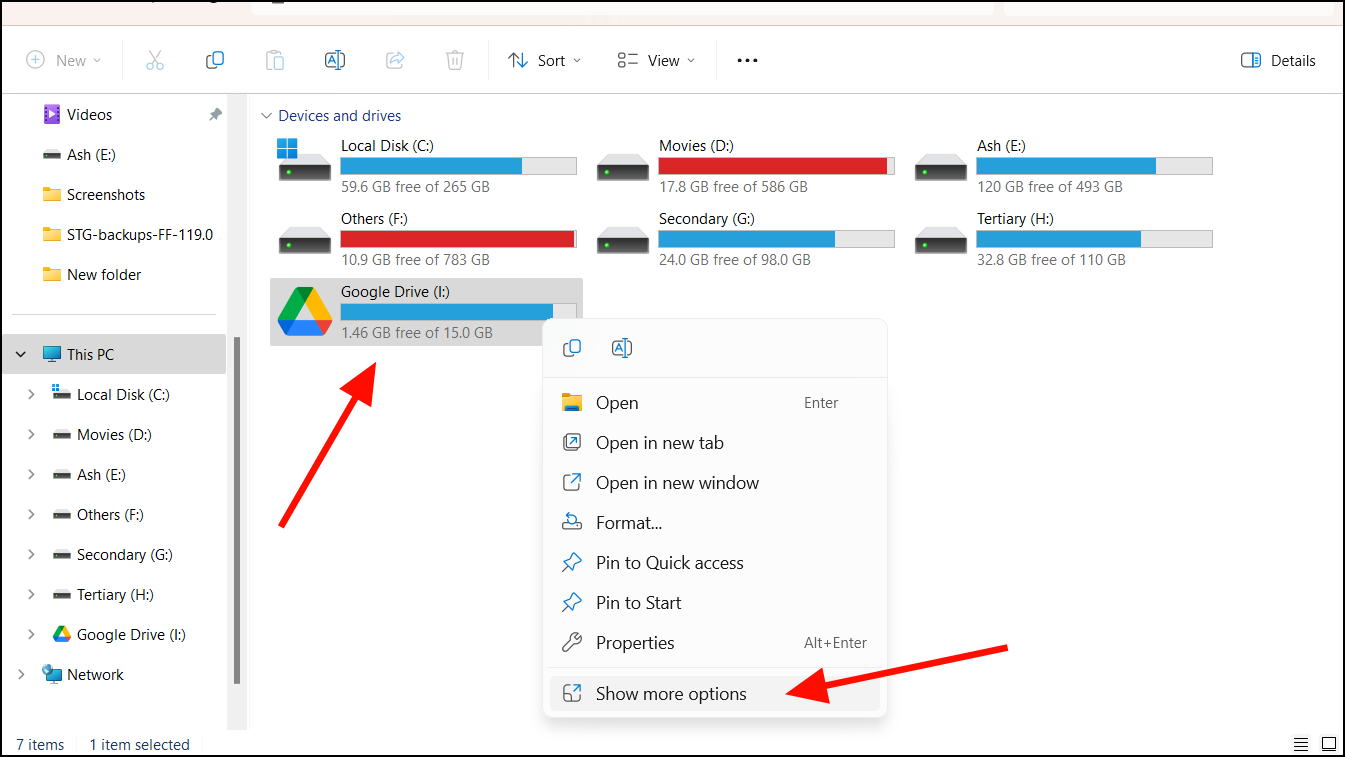
Step 2: Hover over 'Include in library' and select 'Create new library' from the submenu.
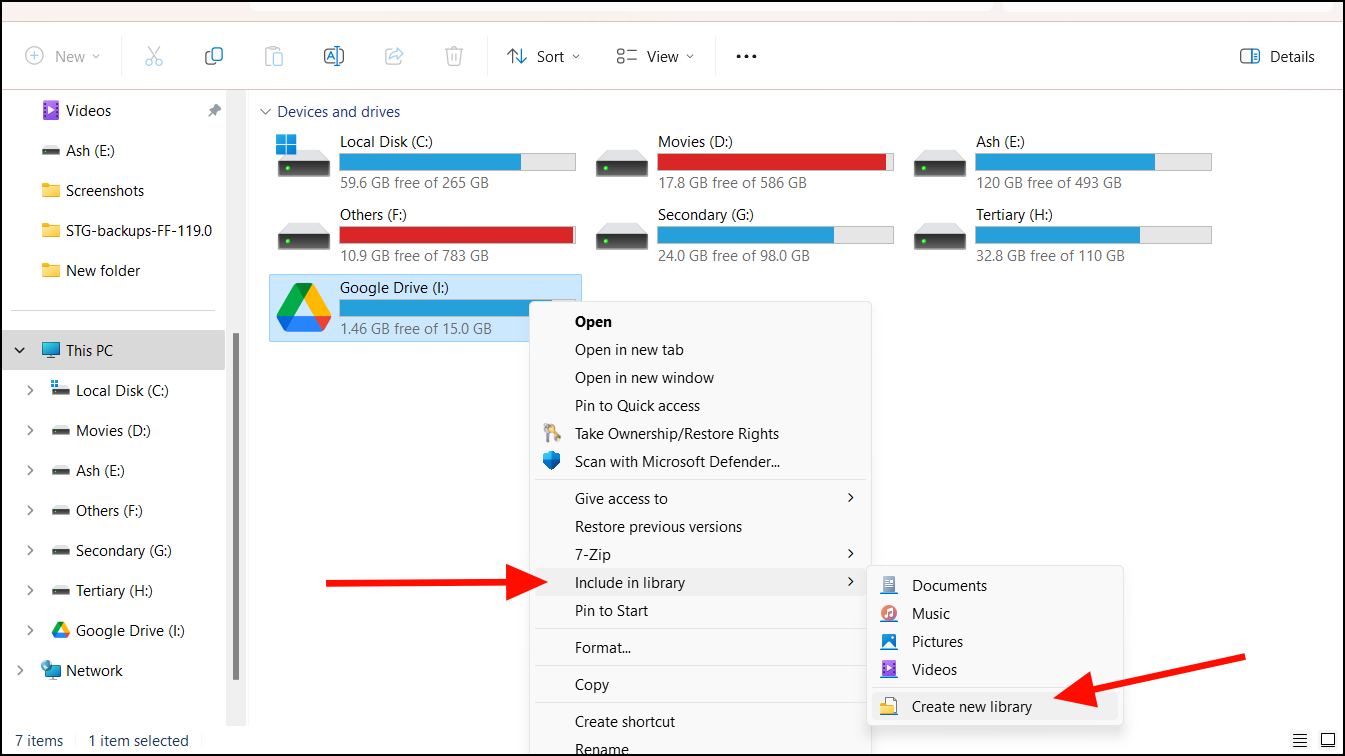
This action will create a new library named 'Google Drive', allowing you quick access to your files through the Libraries section in File Explorer.
To remove the Google Drive library, right-click it and select 'Delete'.
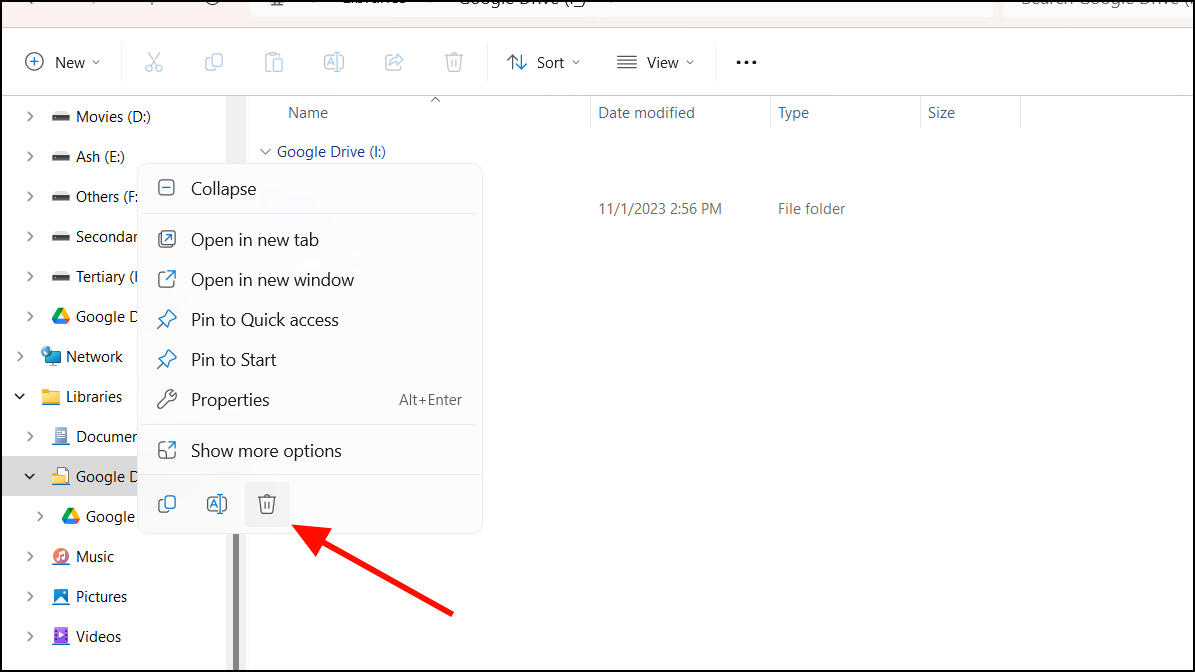
Removing Google Drive from File Explorer
If you wish to remove Google Drive from File Explorer, you can do so by quitting or disconnecting the Google Drive app.
Step 1: Locate the Google Drive icon in the system tray at the bottom-right corner of your screen. You may need to click the upward arrow to see all icons.
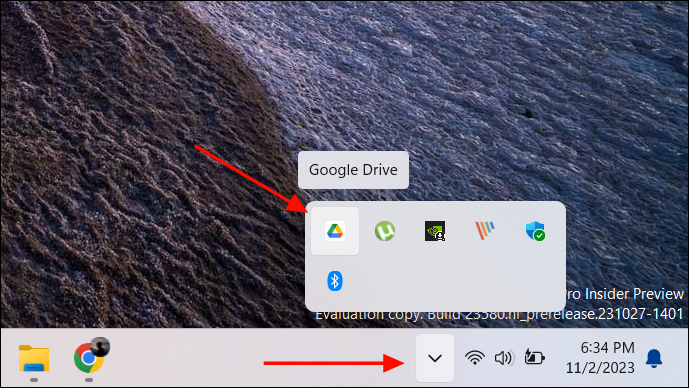
Step 2: To temporarily remove Google Drive, click the Google Drive icon, then click the settings cog and select 'Quit'. This will stop the app from running until you start it again.
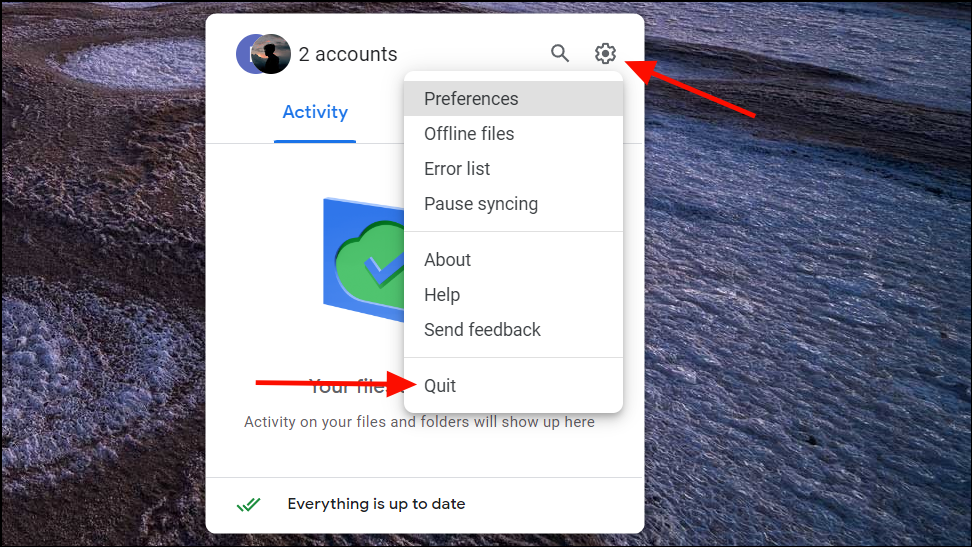
To permanently remove Google Drive from File Explorer, you'll need to disconnect your account or uninstall the app.
Copying and Moving Files Between Google Drive and Your Computer
With Google Drive integrated into File Explorer, you can easily copy or move files between your cloud storage and local folders.
You can drag and drop files between Google Drive and your computer, or use the copy (Ctrl + C) and paste (Ctrl + V) commands as you would with any other files.
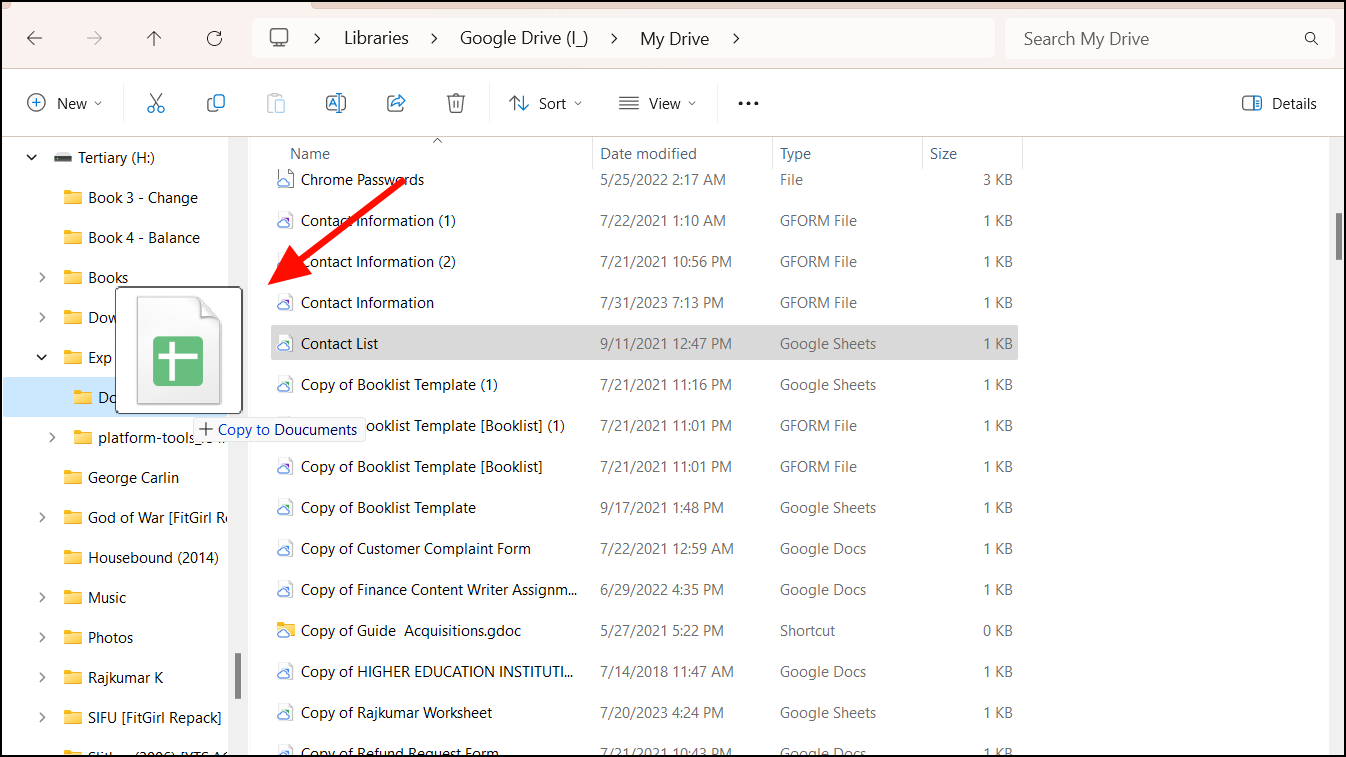
You can also search, sort, and organize your Google Drive files within File Explorer, making file management more efficient.
Making Google Drive Files Available Offline
To access your Google Drive files without an internet connection, you can make them available offline.
Step 1: In File Explorer, navigate to the Google Drive folder and locate the file or folder you want to access offline.
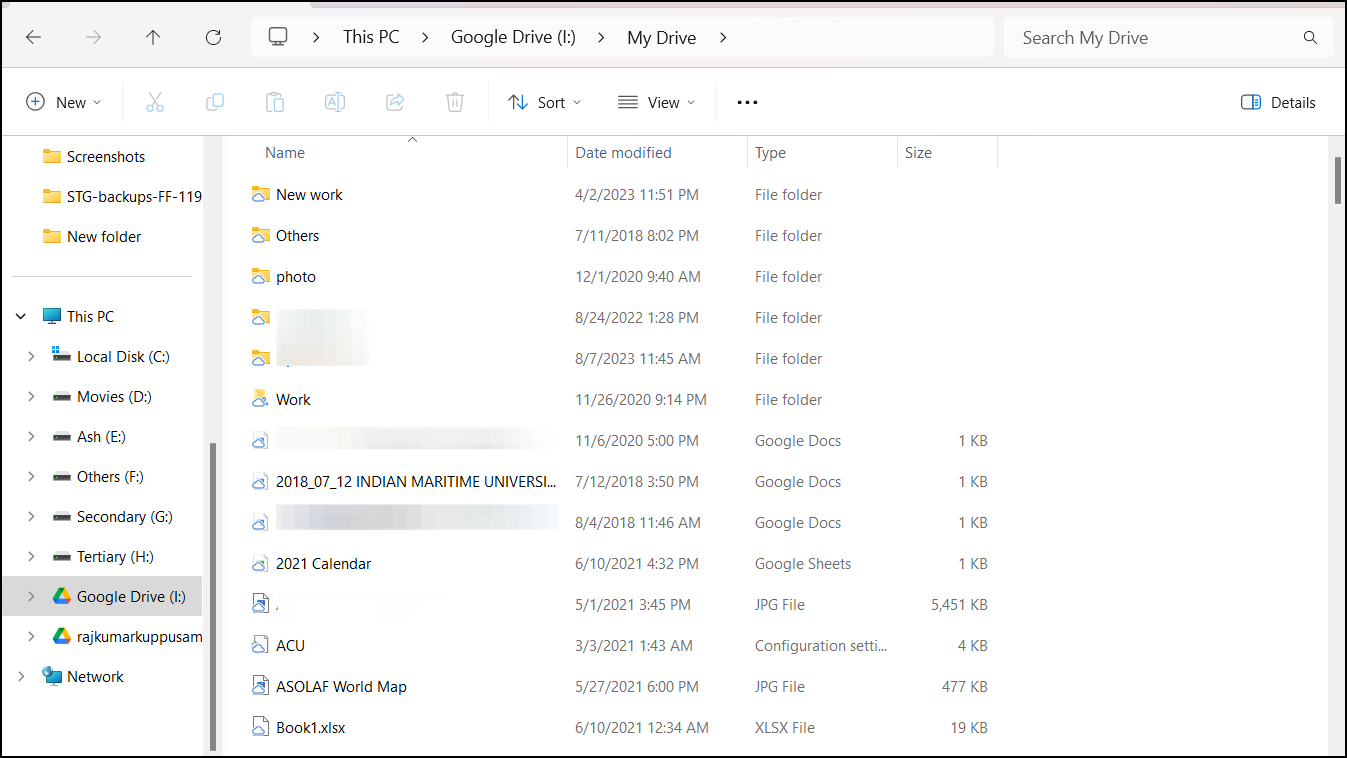
Step 2: Right-click on the file or folder, select 'Show more options', hover over 'Offline access', and choose 'Available offline'.
These files will now be accessible even when you're not connected to the internet, and any changes you make will sync when you're back online.
Configuring Google Drive Settings in Windows 11
You can customize the Google Drive app to suit your preferences and optimize its performance on your computer.
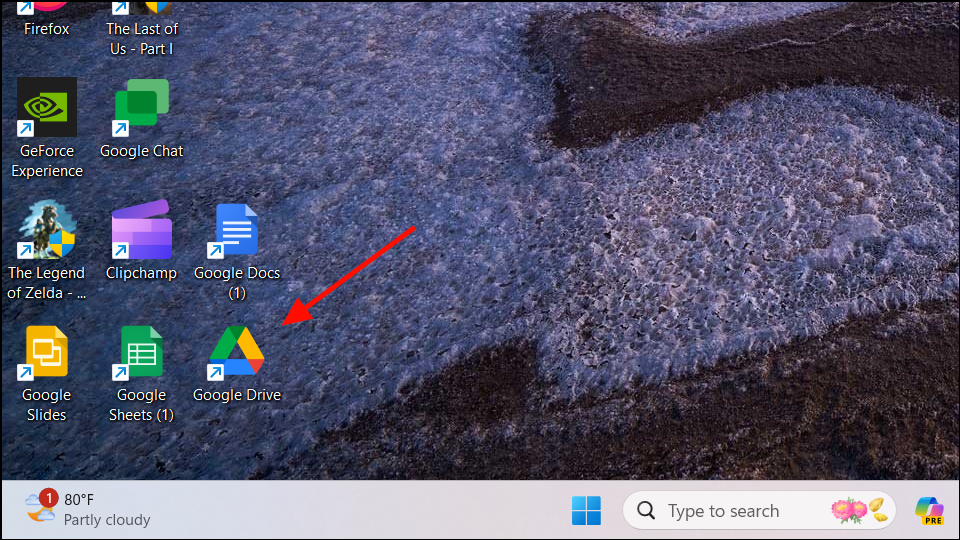
Step 1: Open the Google Drive app by double-clicking the desktop shortcut or clicking the icon in the system tray.
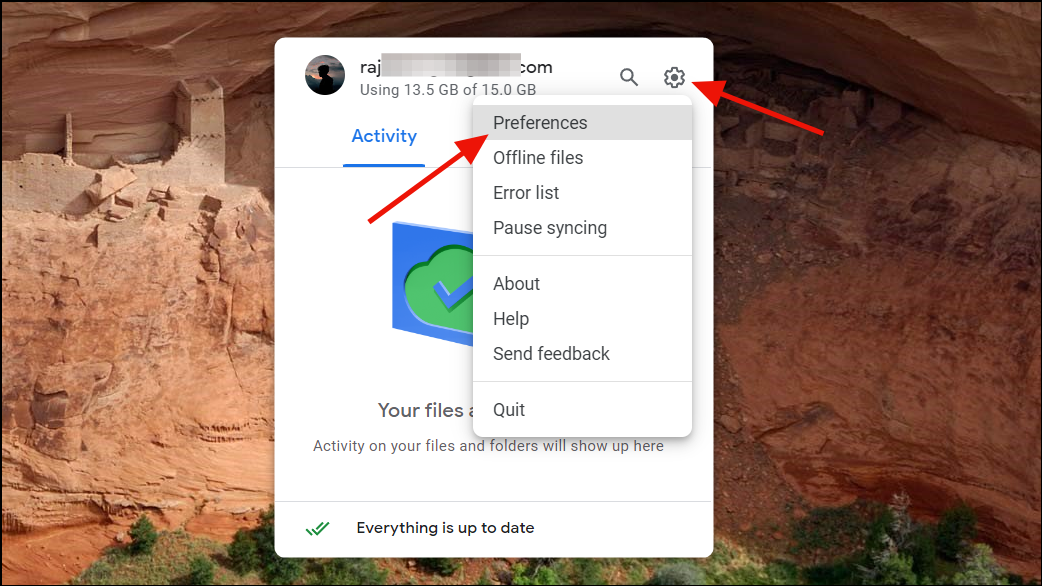
Step 2: Click the settings cog in the app window and select 'Preferences'.
Managing Synced Folders
You can add or remove folders for syncing or backup at any time.
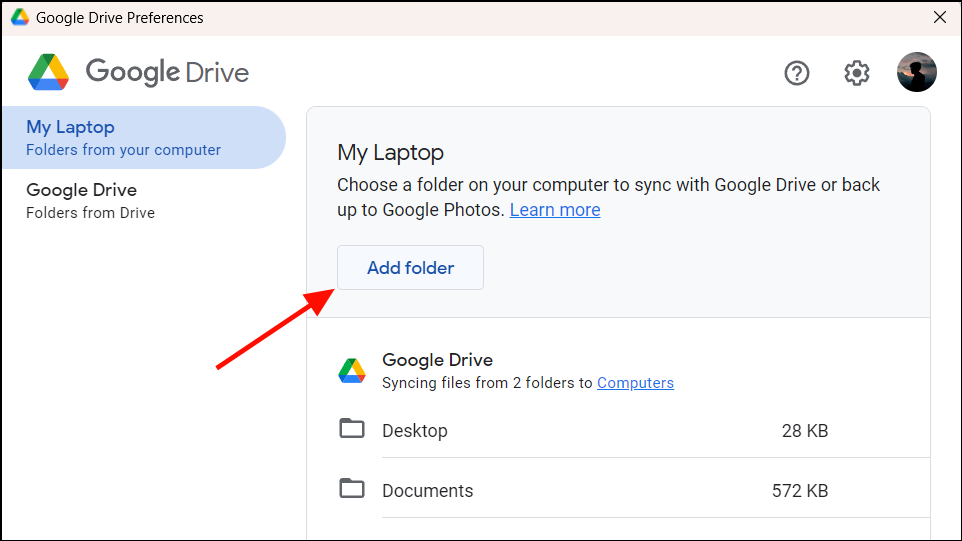
Step 1: In the Preferences window, go to the 'My Laptop' or 'My Computer' tab and click 'Add folder'.
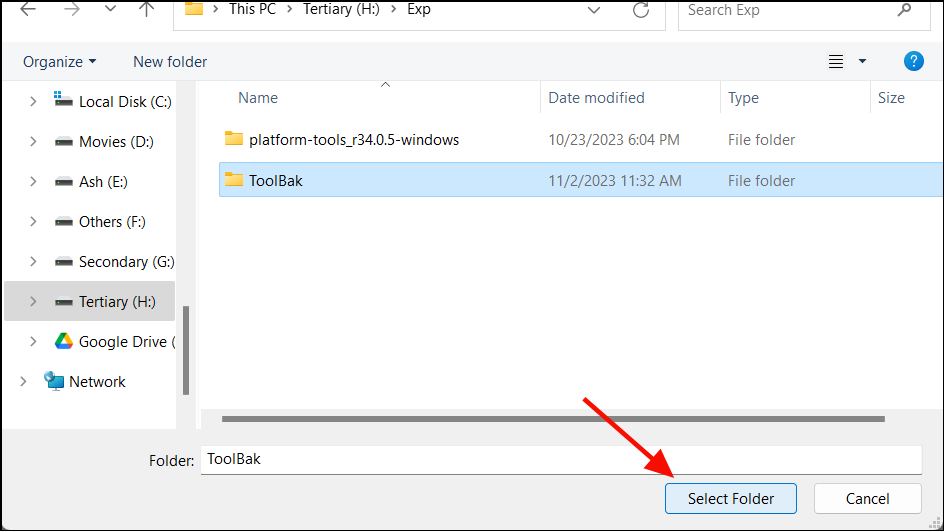
Step 2: Select the folder you want to sync or back up and click 'Select Folder'.
Step 3: Choose whether to sync the folder to Google Drive, back it up to Google Photos, or both. Click 'Done' to confirm.
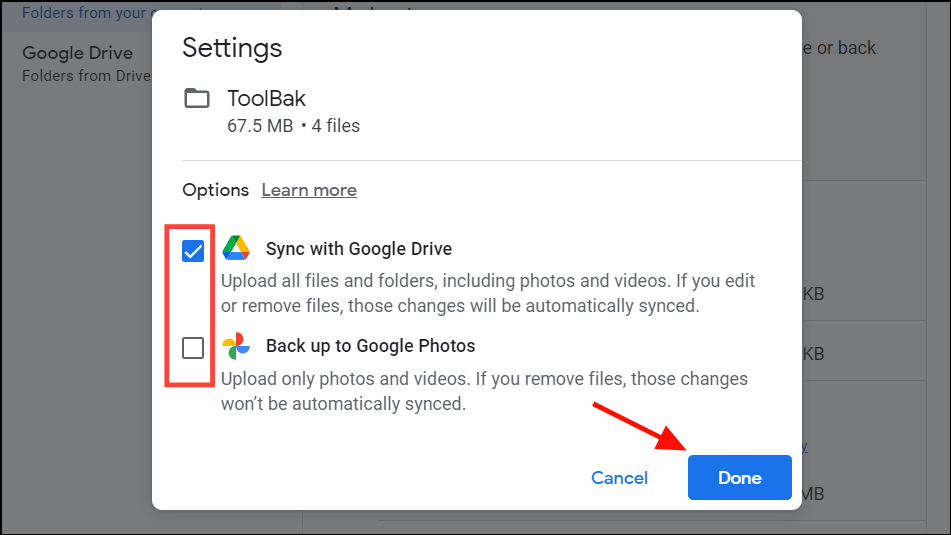
To adjust sync settings or remove a folder, click on the folder in the Preferences window and modify the options as needed.
Changing Sync Methods
Google Drive offers two methods for syncing files: 'Stream files' and 'Mirror files'.
Stream files: This option allows you to access your files without downloading them, saving space on your computer. Files are available online, but you can mark important files for offline access.
Mirror files: This option stores all your Google Drive files on your computer, providing access even when you're offline. However, it uses local storage space equivalent to the size of your Drive content.
Step 1: In the Preferences window, navigate to the 'Google Drive' tab and select your preferred sync method.
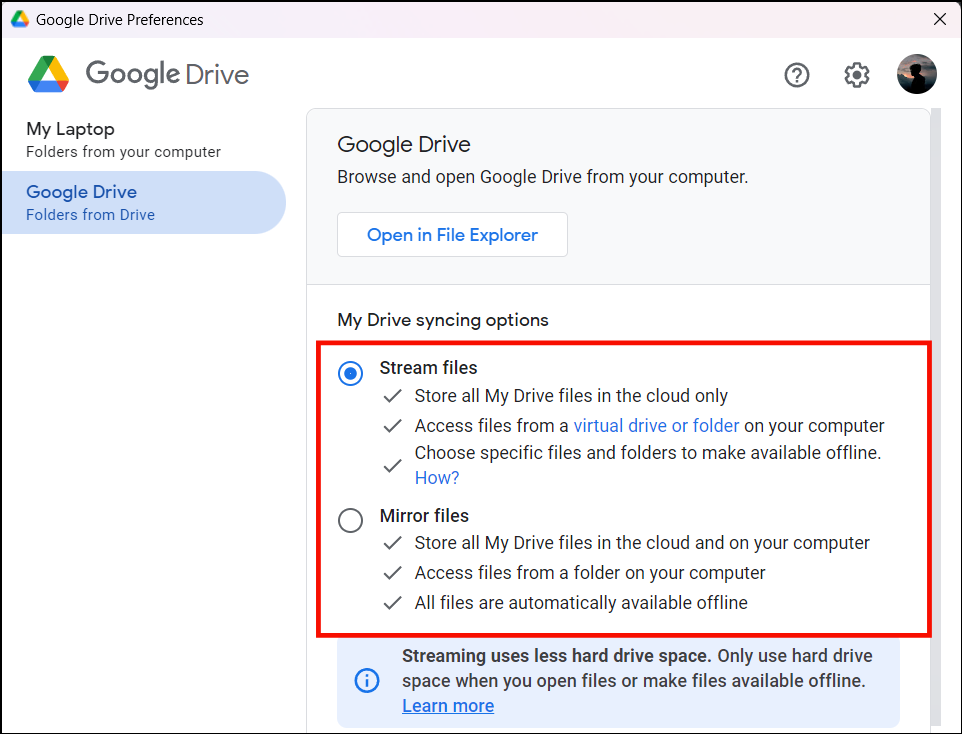
If choosing 'Mirror files', you can specify the local folder where your files will be stored by clicking 'Change folder location'.
Managing Multiple Accounts
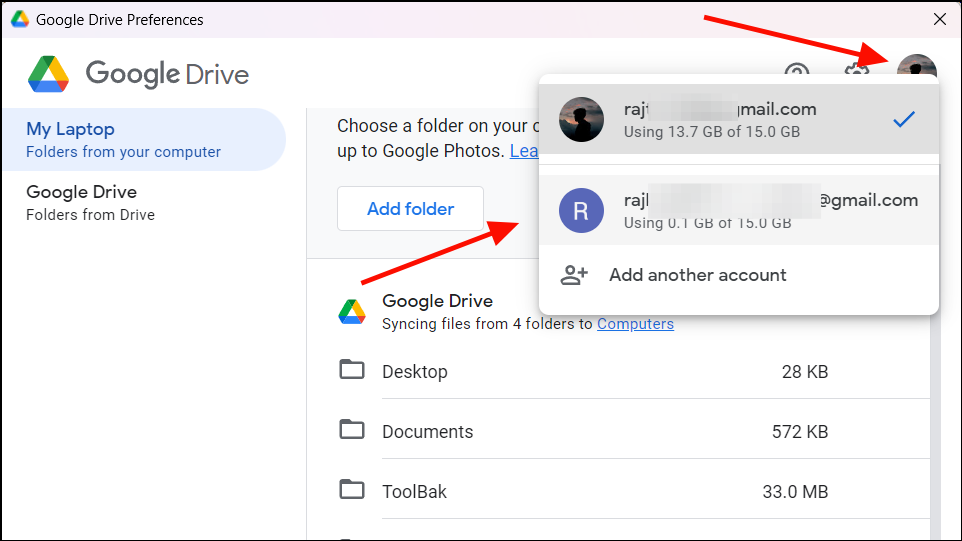
You can add multiple Google accounts to the Google Drive app, allowing you to access files from different accounts in File Explorer.
Step 1: In the Preferences window, click your profile icon and select 'Add another account'.
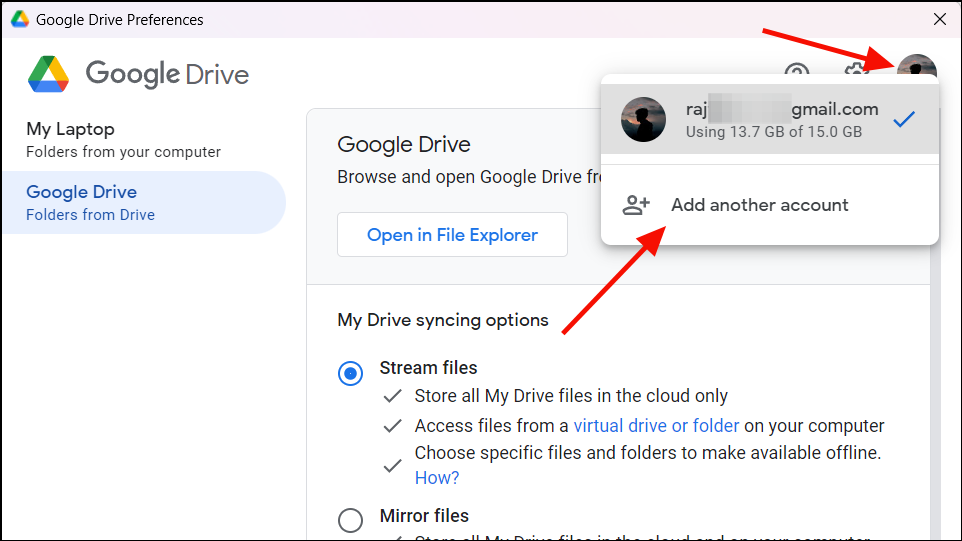
Step 2: Sign in to the additional Google account and grant the necessary permissions.
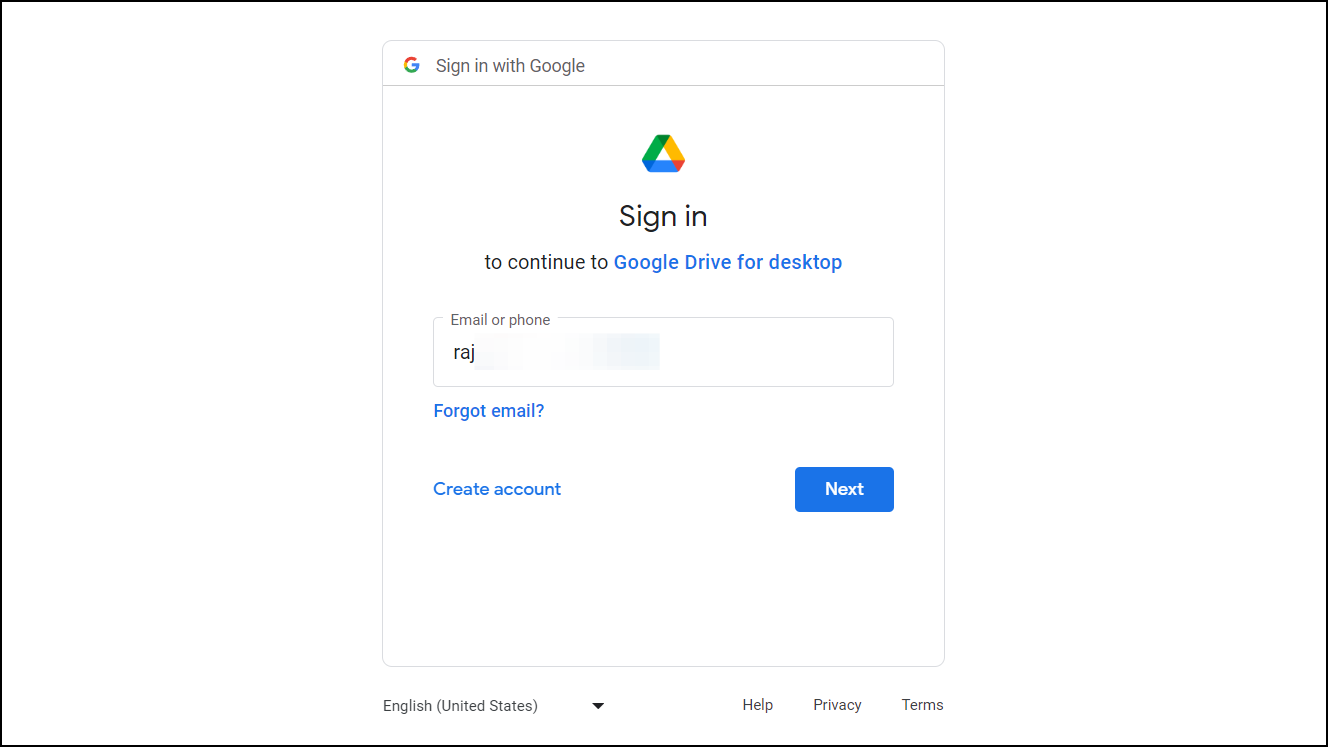
Both accounts will now appear in File Explorer, each with its own Google Drive folder.
To switch between accounts or adjust settings, click the profile icon and select the desired account.
To remove an account, select it in the Preferences window, click the settings cog, and choose 'Disconnect account'.
Adjusting App Settings
You can customize various settings within the Google Drive app to optimize its performance.
Step 1: In the Preferences window, click the settings cog to access the app settings.
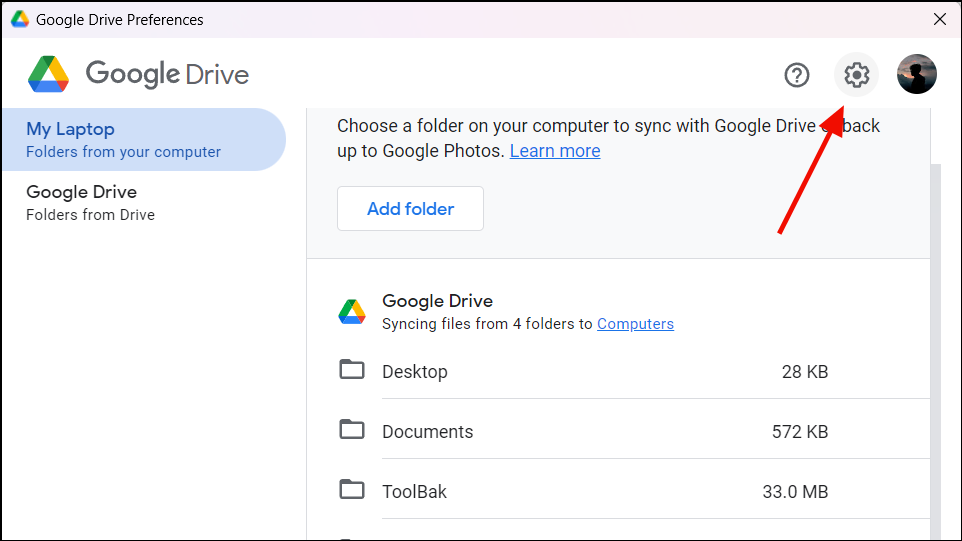
Here, you can change options such as the drive letter, proxy settings, launch preferences, and bandwidth limits.
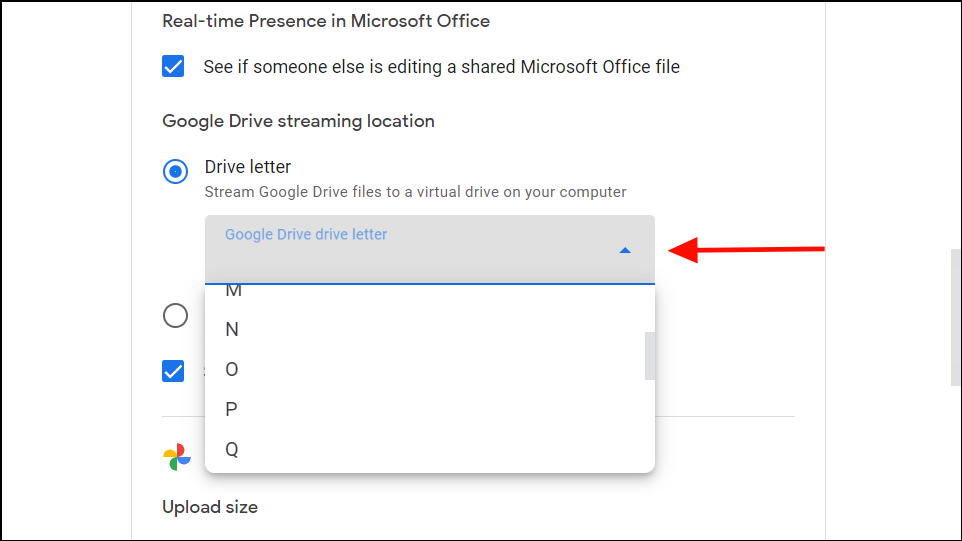
For example, to assign a different drive letter to Google Drive, select your preferred letter from the 'Drive letter' dropdown menu.
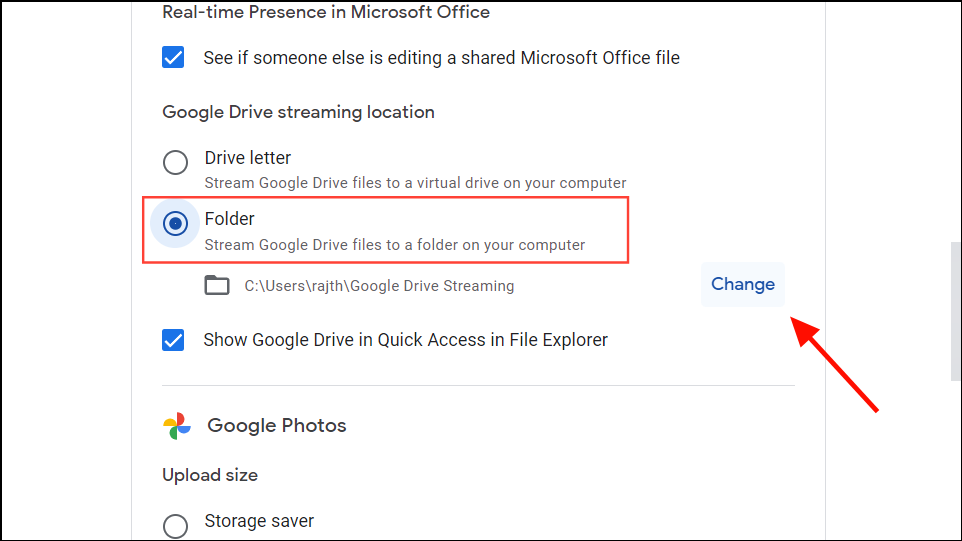
If you wish to change the default folder for streaming files, select 'Folder', click 'Change', and choose a new location.
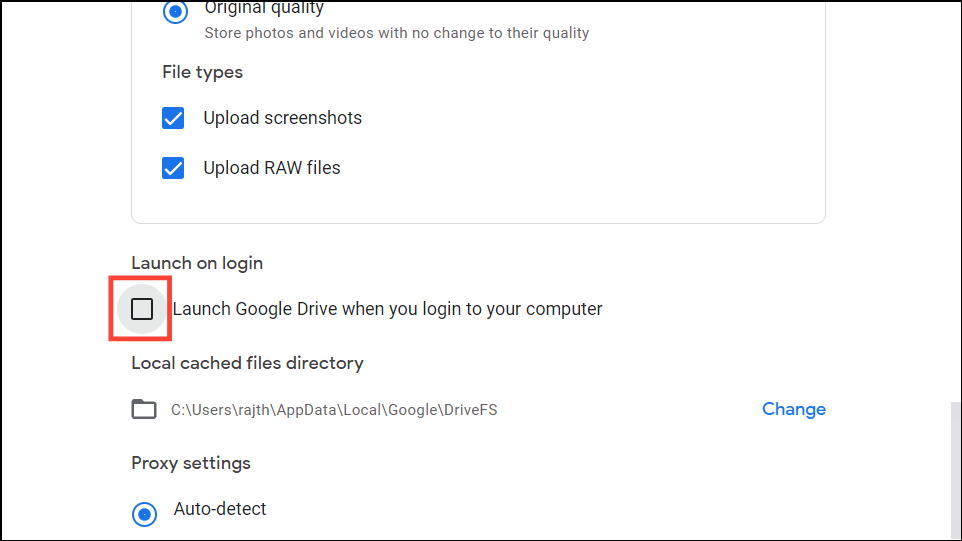
By default, the app starts when you log into Windows. To disable this, uncheck 'Launch Google Drive when you login to your computer'.
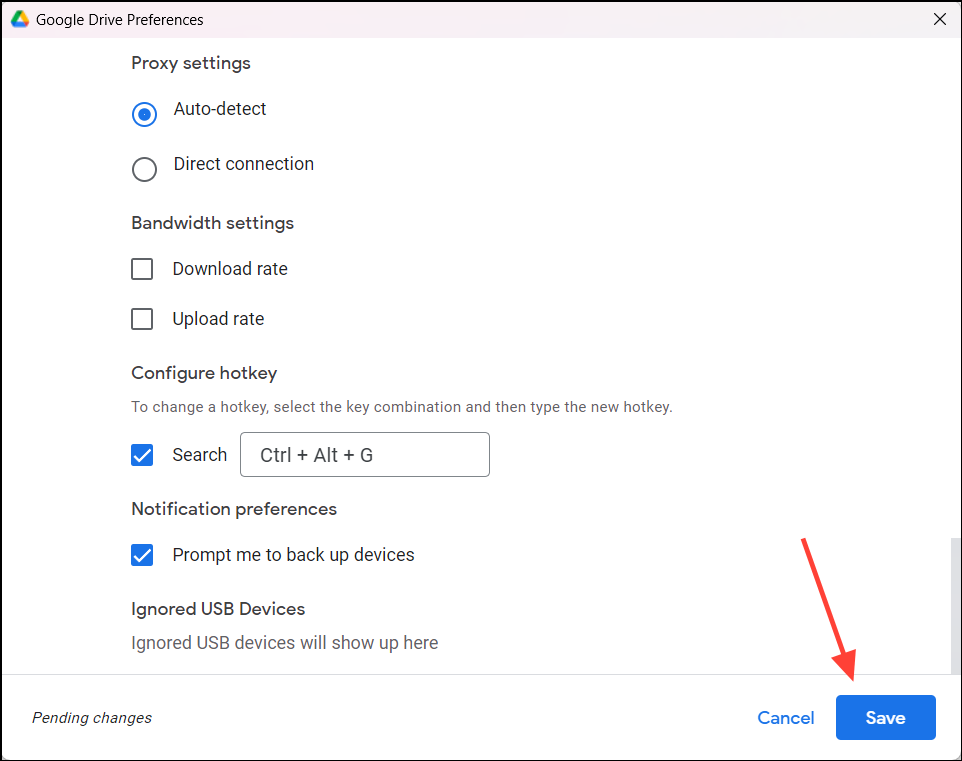
After adjusting your settings, click 'Save' to apply the changes.
Integrating Google Drive with Windows File Explorer streamlines your workflow by allowing you to manage cloud files alongside local ones. By following these steps, you can set up Google Drive to suit your preferences, access files offline, and efficiently organize your documents and media directly from your Windows 11 computer.

