In today’s digital age, Zoom has become an essential tool for virtual meetings, online classes, and connecting with loved ones. Recording these meetings can be incredibly helpful for revisiting important discussions or sharing with those who couldn’t attend.
To enable automatic recording, sign in to your Zoom account on zoom.us. After logging in, click on the ‘Settings’ option in the left-hand panel and select the ‘Recording’ tab from the settings menu.

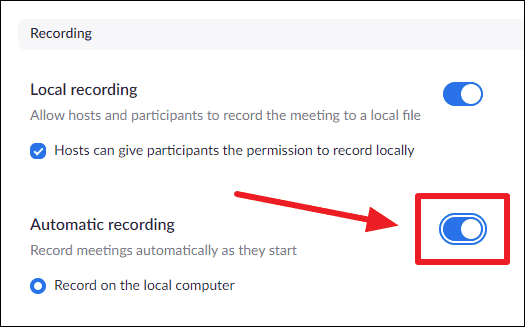
Ensure that the ‘Local recording’ feature is enabled. Then, turn on the toggle switch next to ‘Automatic recording’. This will automatically record your Zoom meetings on your computer when using the desktop client.
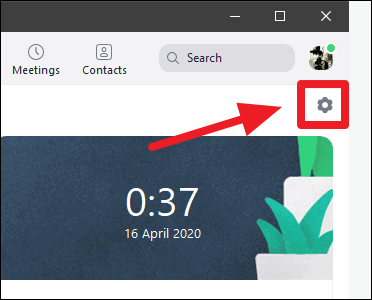
To locate where Zoom saves your recordings, open the Zoom desktop application and click on ‘Settings’.

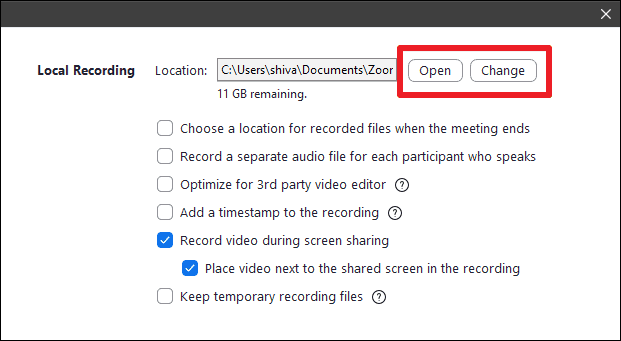
Under the ‘Local Recording’ section, you’ll see the file path where your recordings are stored next to ‘Location:’. Click the ‘Open’ button to access this folder. If you’d like to change where recordings are saved, click ‘Change’ and select a new destination.
If you don’t see the ‘Local recording’ option in the Zoom desktop app, make sure you’re using version 4.0 or later. Update the app if necessary to access this feature.
By setting up automatic recording in Zoom, you’ll have all your meetings saved for future reference, ensuring you never miss any important details.


