Taking notes during a class can be complicated. Often, it’s all going too fast for you to jot it down. There are even moments where you have to decide between being fully present and understand the lecture or write it down for future reference but at the expense of complete understanding.
These challenges only get magnified in online classes. It’s already too difficult to focus in virtual classes. What with a completely different setup than a normal classroom and other constraints of a “virtual meetup”, everyone knows virtual classes are overwhelming, whether you are a younger or an older student. Now, add note-taking to the mix, you’ve got a recipe for disaster at your hands.
Fortunately, with Microsoft Word, the crisis can be averted firmly. You can dedicate your focus to being present in the class and let Word take care of the notes for you. We’re talking about the Dictate tool here. Sounds intriguing, doesn’t it? Let’s jump right into the details.
What is the Dictate tool in Microsoft Word?
Microsoft Word’s wonderful feature, Dictate, can convert the speech into text on your Word page. Dictate is available across devices – Windows, Mac, iOS, Android, and even the Web. So, you can use it no matter the type of device you’re using to meet.
Dictate is available for nearly 20 languages with more set to come in the future. The supported languages include:
- English (United States)
- Chinese (China)
- English (Canada)
- English (United Kingdom)
- German (Germany)
- Italian (Italy
- Spanish (Spain)
- Spanish (Mexico)
- Danish
- Dutch (Netherlands)
- English (Australia)
- English (India)
- Finnish
- French (Canada)
- Japanese
- Norwegian (Bokmål)
- Portuguese (Brazil)
- Swedish (Sweden)
Some of these languages (the latter part of the list from Dutch to Swedish) are still in preview, though. So, dictation may not be entirely accurate sometimes or punctuation may be limited.
Dictate is available on Microsoft Word for Web for free. But for the Windows and Mac desktop apps, the tool is only available to Microsoft 365 subscribers.
Using Dictate in Microsoft Word
Open Microsoft Word, either the desktop app if you’re a Microsoft 365 subscriber, or in Chrome, Edge, or Firefox browsers if you’re using Office for Web. Log in to your Microsoft account if you’re using Word Online.
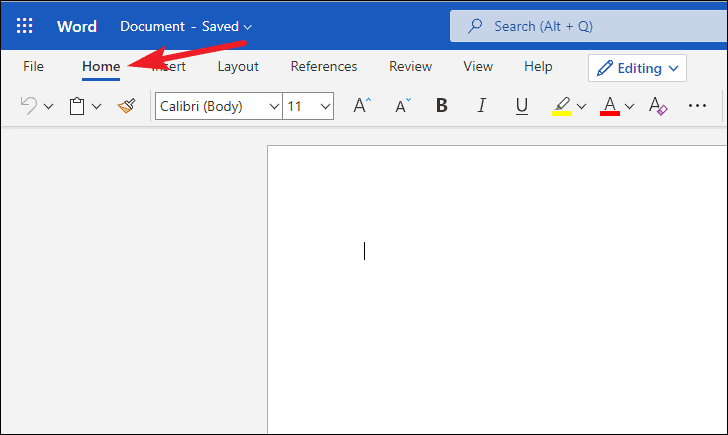
Now, go to the ‘Home’ tab from the menu bar.
From the Home tab, go to ‘Dictate’. Instead of Dictate, the toolbar might have only the ‘Microphone’ icon but it’ll say ‘Dictate’ when you hover over it. Click the icon to start dictating.
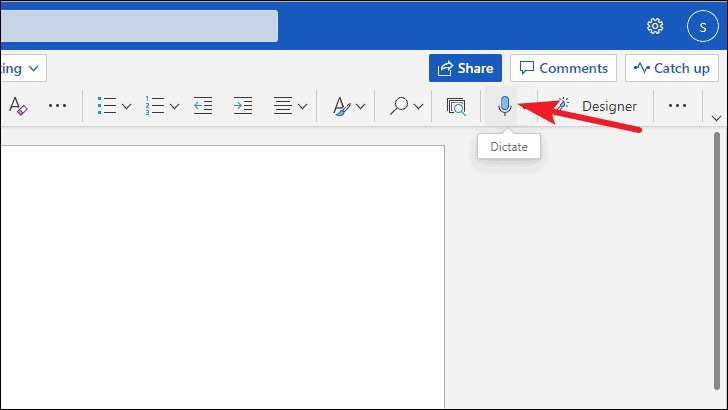
Note: When using a Windows PC, you can also the Alt + ` (backquote) keyboard shortcut to turn on Dictate.
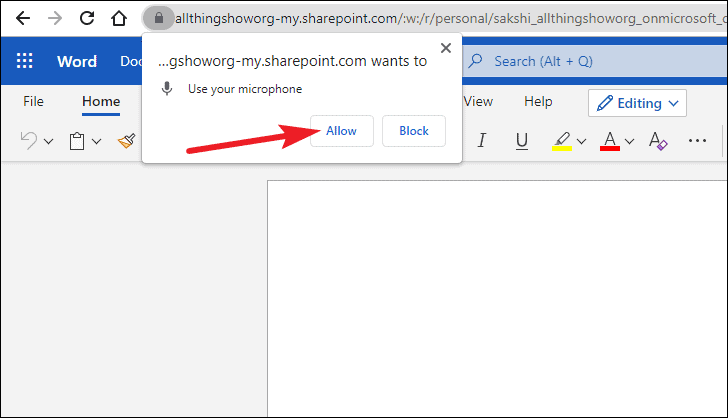
For web users, if you’re using dictation for the first time, you’d have to provide browser access to your microphone. Click ‘Allow’ from the pop-up box that appears.
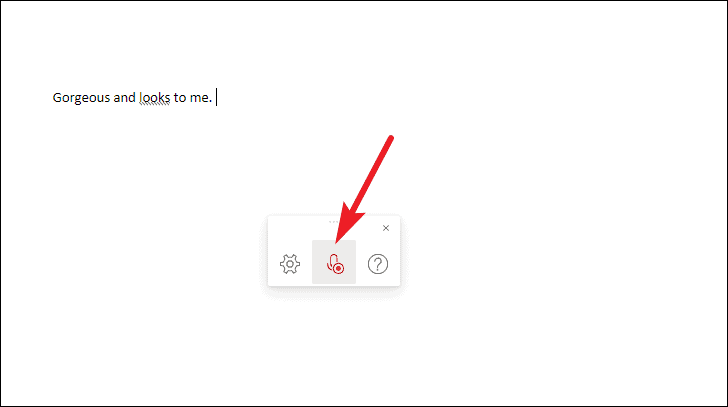
The Dictate tool will become active. You’ll know as a small pop-up box with a Microphone will appear on the screen. You can move it around on the screen anywhere. The Microphone will have a red dot when it’s actively listening.
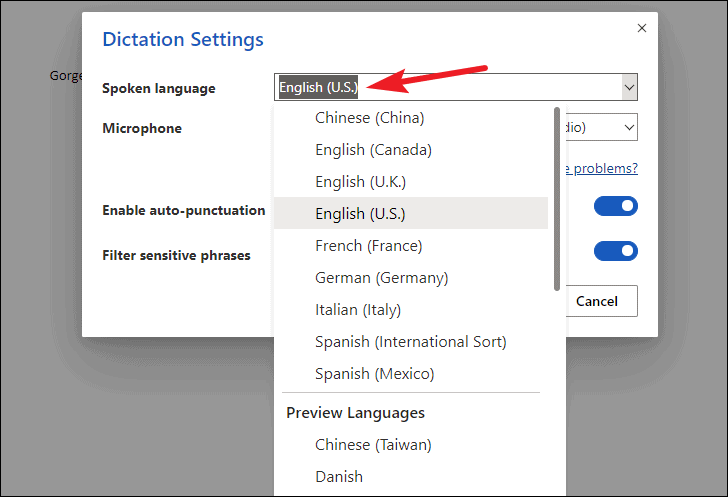
To change the language of the dictation tool, go to the Dictate pop-up and click the ‘Settings’ (gear) icon.

The dictation settings window will open. Click the drop-down menu next to the ‘Spoken Language’ option and select one of the available languages.
Now, you can enter punctuation or start a new line by dictating those commands explicitly. Generally, it’s as good a way as any. But when using Dictate to take notes, it’s best to turn on auto-punctuation. To enable ‘Auto-punctuation’, go to Settings for Dictate.
From the options that appear, turn on the toggle for ‘Enable Auto-Punctuation’. Auto-punctuation might not always be spot-on, especially for Preview languages. But it’ll still make your notes more legible than no punctuation at all.
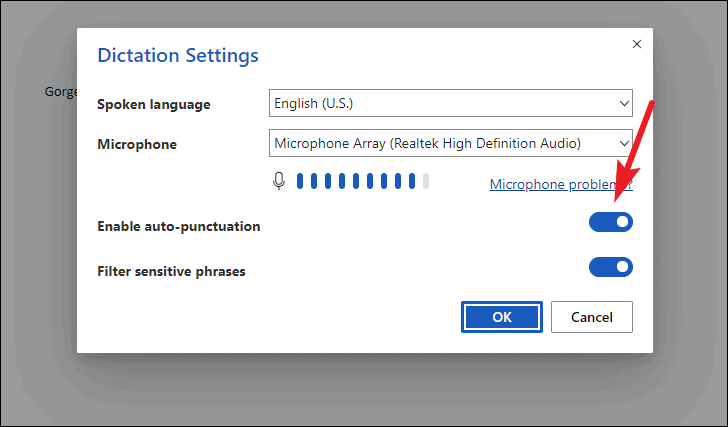
Dictate also has a filter for sensitive phrases that is on by default. It automatically masks potentially sensitive words or phrases with ****
Sometimes, markings may appear under some words. They indicate alternatives that Word may have misheard. When you click it, suggestions will appear. You can choose one of the suggestions, or click ‘Ignore’ if it was already correct.
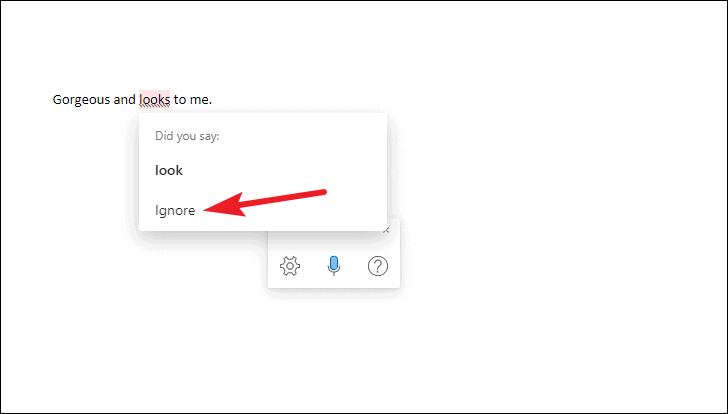
You can also correct anything using your keyboard without stopping the dictation.
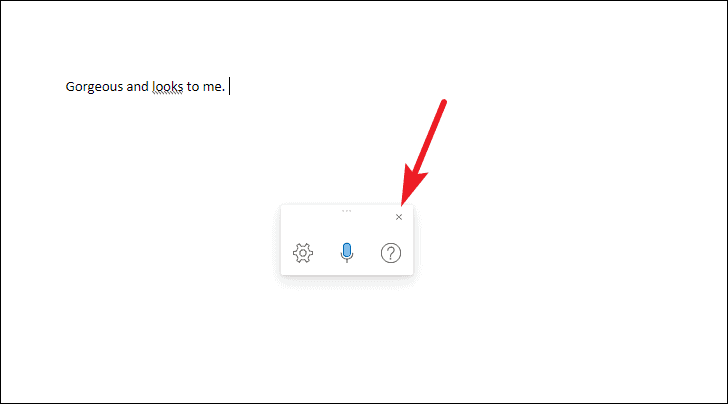
To pause the dictation, click the Microphone from the pop-up. To exit dictation, click the ‘Close’ (X) button on the Dictate pop-up.
Note: Dictation might stop if the Word window is not active on the screen. So, place your meeting and Word windows side-by-side for this to work perfectly.
There you go! A perfect way to take notes in your online classes, just make sure that you’re using the speaker and not headphones to listen to the meeting. Of course, you can use the tool in not just online but in normal classes as well.