Making some changes to your PC? Make sure you take a backup and know how to restore from a backup in case things go sideways.
Making some changes to your PC? Make sure you take a backup and know how to restore from a backup in case things go sideways.
by Parth Sawhney
Regular backups are vital to ensure that your personal files and folders remain safe from unexpected system issues such as malware attacks, hardware failures, or problems that arise after software updates. Windows 11 includes a built-in Backup and Restore feature that makes it easy to back up your important data and restore it when necessary. In this guide, we’ll walk you through the process of creating a backup using this tool and how to restore your files if needed.
Create a backup on Windows 11 using Backup and Restore wizard
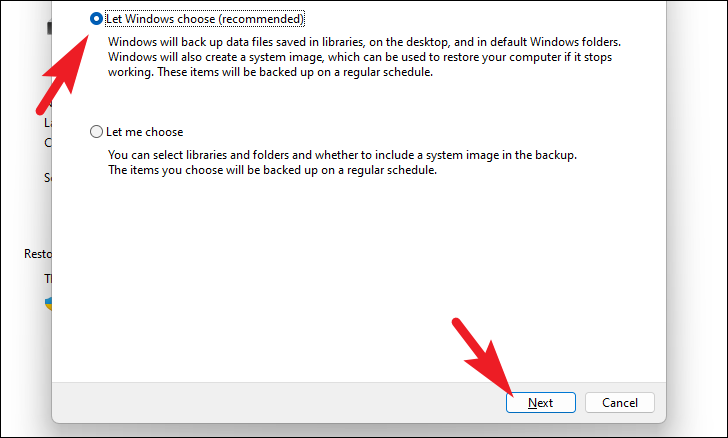
Choose what you want to back up. You can either let Windows choose (recommended for most users), which will back up data files saved in libraries, on the desktop, and in default Windows folders, or you can select the files and folders manually.
To select manually, click the radio button next to Let me choose, then click Next.
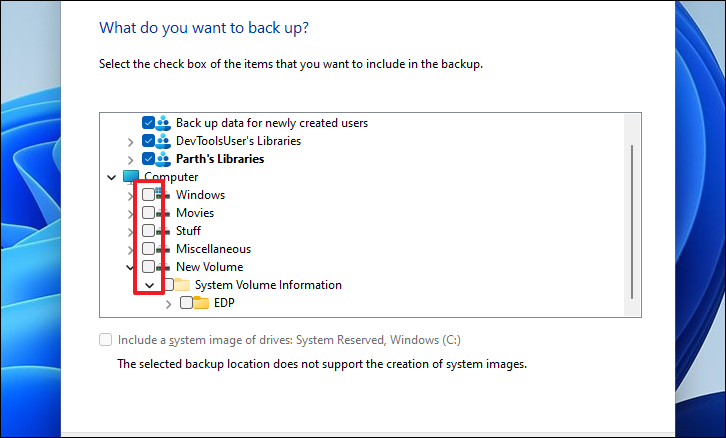
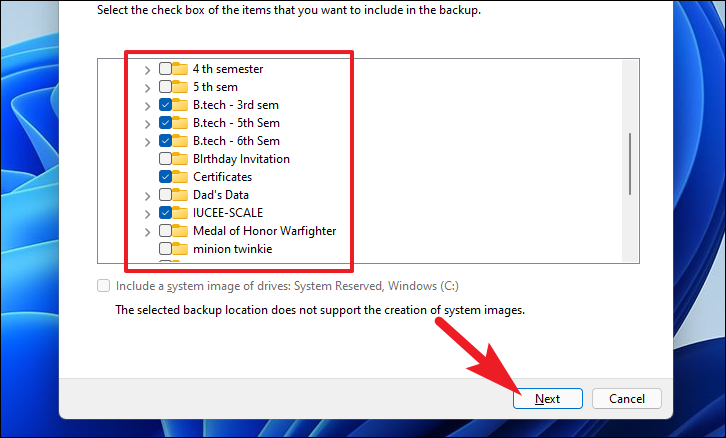
If you chose to select files manually, you’ll see a list of drives, folders, and files. Check the boxes next to the items you want to include in the backup. You can expand folders to select specific subfolders by clicking the small arrow next to each folder.
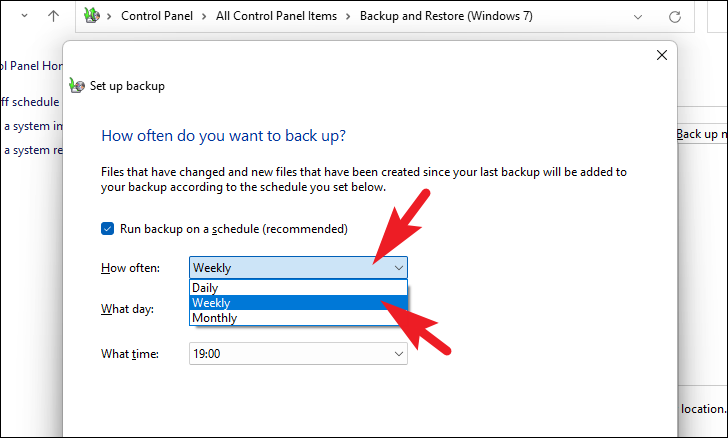
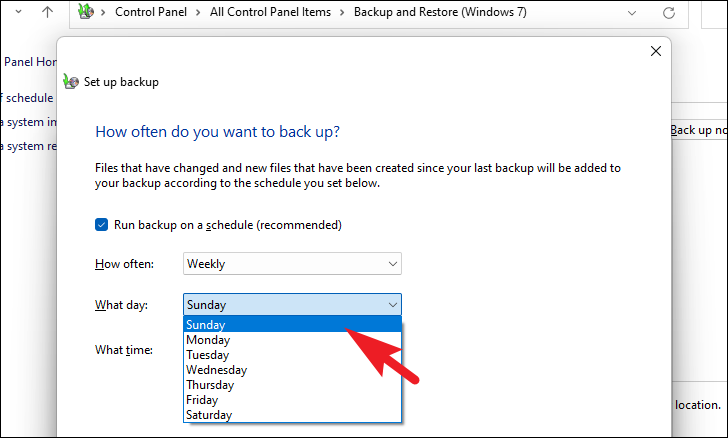
In the Schedule Settings window, choose how often you want Windows to back up your files (e.g., daily, weekly, monthly) by selecting an option from the How often drop-down menu. For most users, a weekly backup is sufficient.
Select the day and time for the backup to run by choosing options from the What day and What time drop-down menus. Pick a time when your computer is likely to be on but not in heavy use.
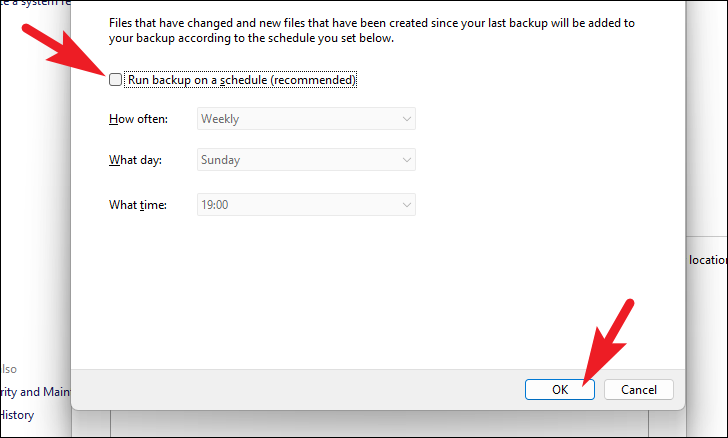
Note: Ensure your PC is powered on and the backup drive is connected at the scheduled backup time to avoid any interruptions.
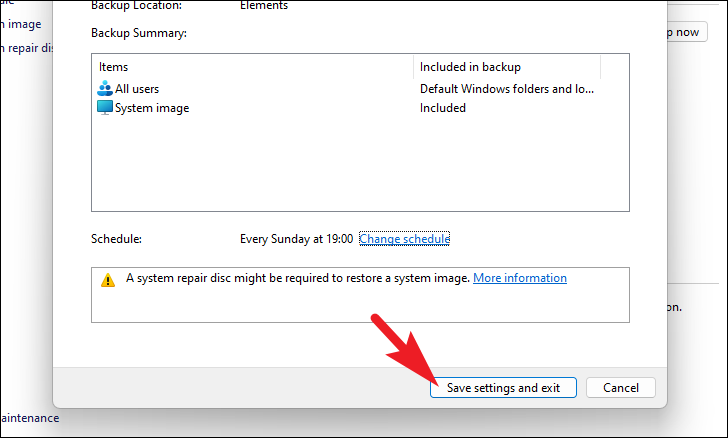
If you do not want to run scheduled backups, uncheck the box next to Run backup on a schedule. Once you’re satisfied with the schedule settings, click OK to return to the backup summary.
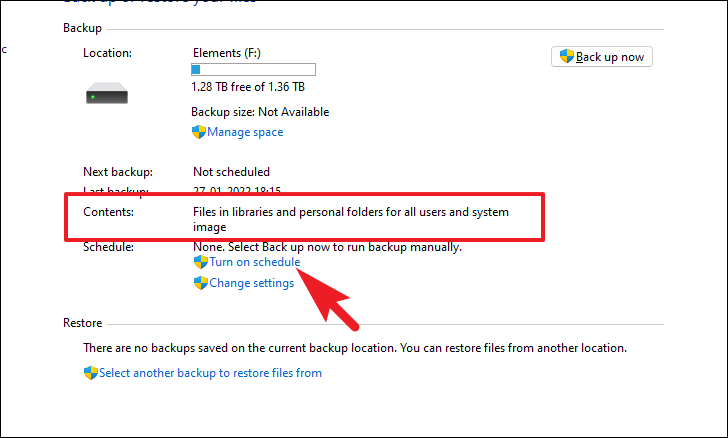
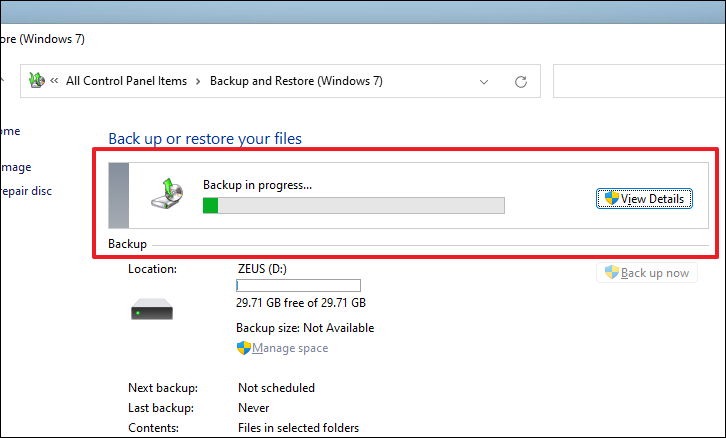
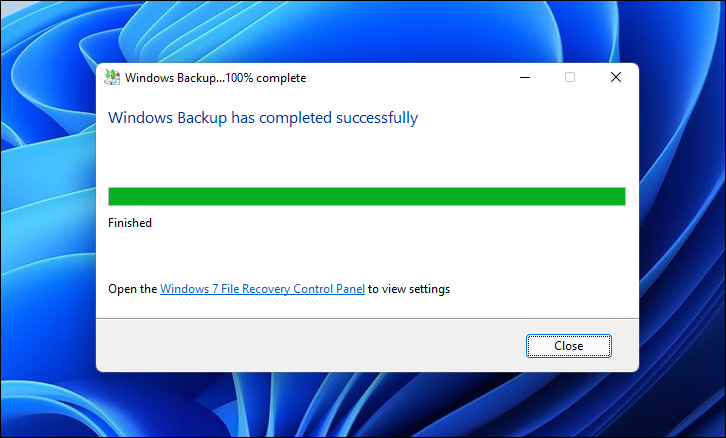
Windows will begin creating the backup. You can monitor the progress in the Control Panel window. This process may take some time depending on the size of the files and folders you are backing up.
Once the backup is complete, Windows will notify you. Your files are now safely backed up to the selected drive.
With your data backed up, you have peace of mind knowing that your important files are safe. Next, we’ll look at how to restore your files from this backup if needed.
Restore your files from a backup
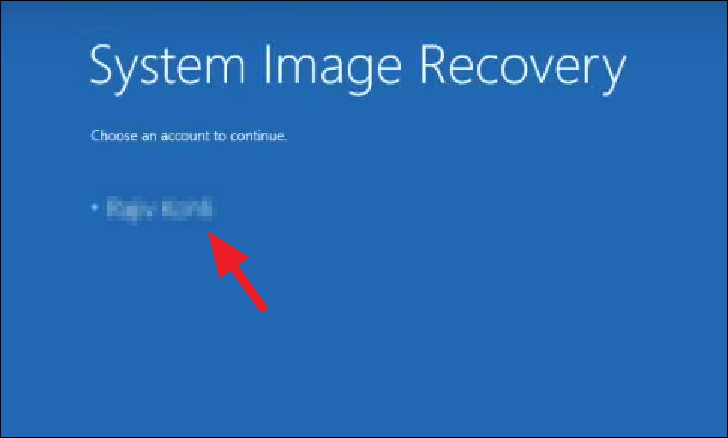
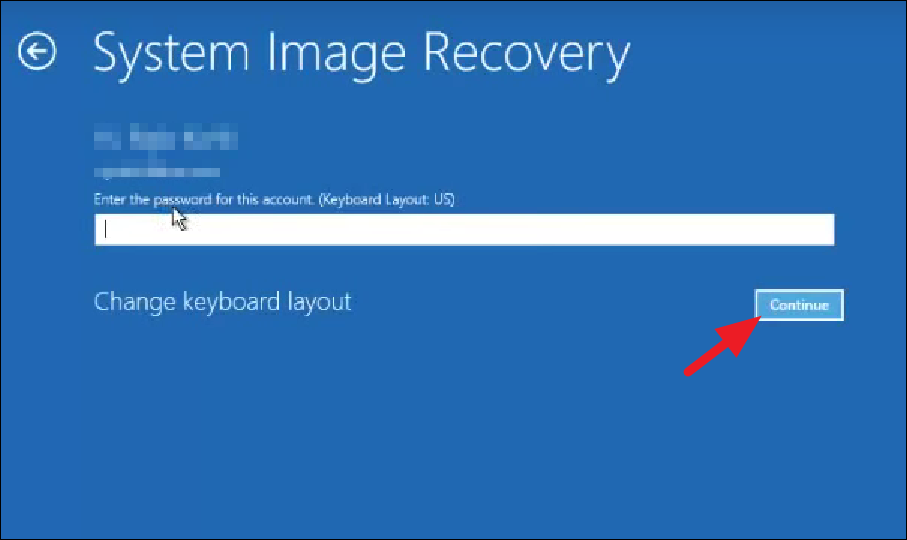
If you need to restore your computer using the backup you created, Windows 11 makes the process straightforward.
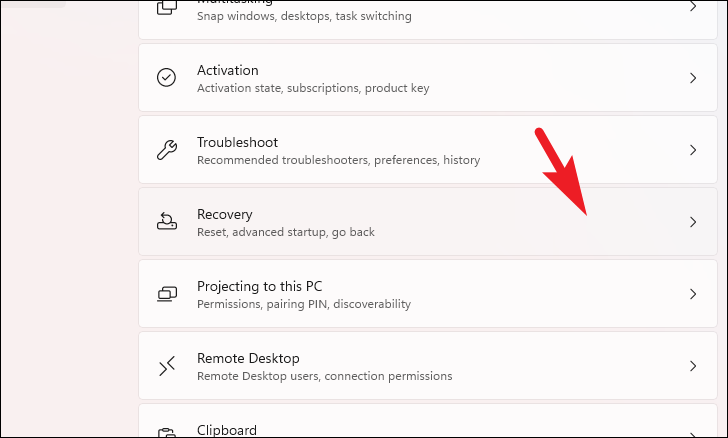
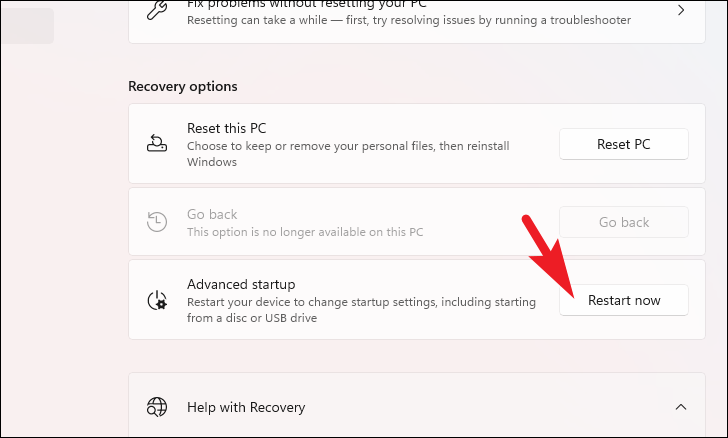
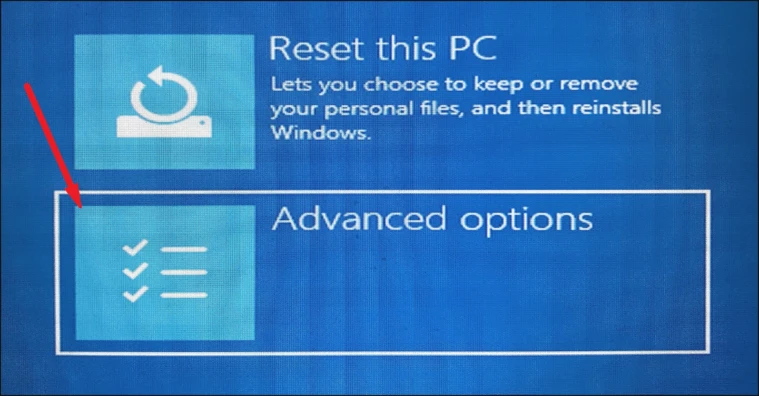
Under the Recovery options section, find Advanced startup and click on Restart now. This will reboot your computer into the Advanced Startup options menu.
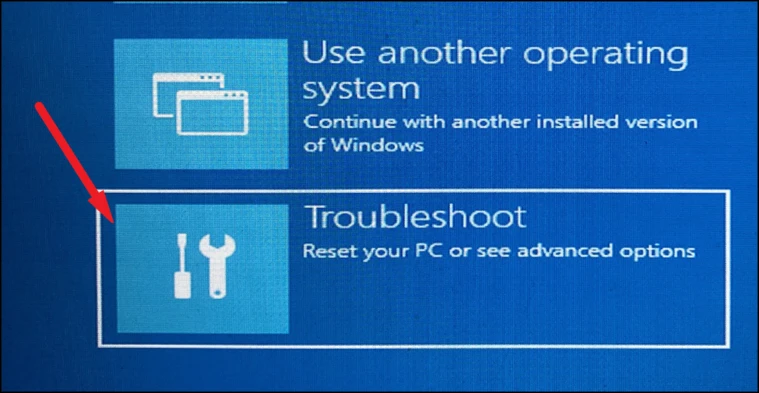
Note: If your computer isn’t booting properly, you can access Advanced Startup by interrupting the normal boot process. To do this, turn on your PC and as soon as you see the Windows logo, press and hold the power button for about 10 seconds to force a shutdown. Repeat this process three times. On the fourth start, Windows will automatically enter the Recovery Environment.
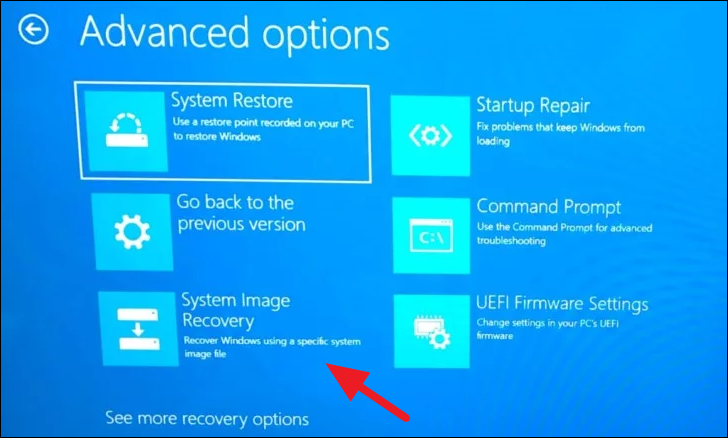
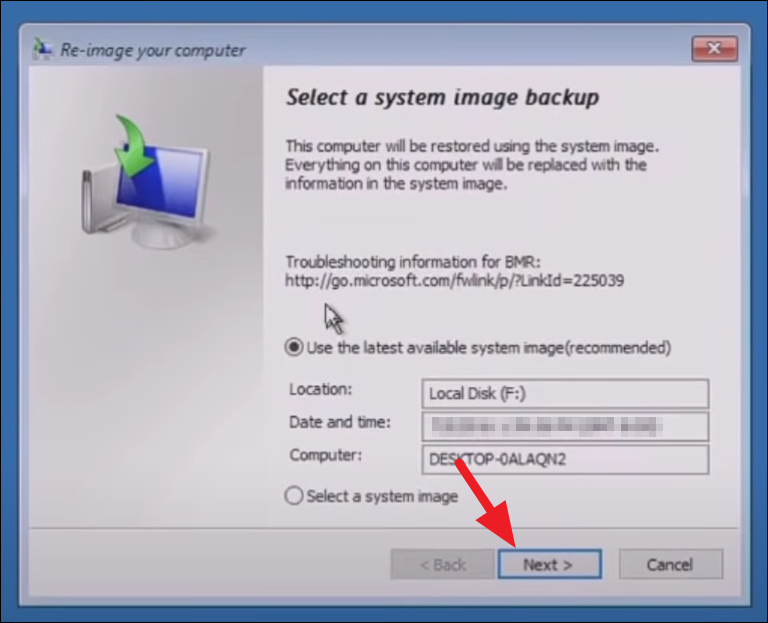
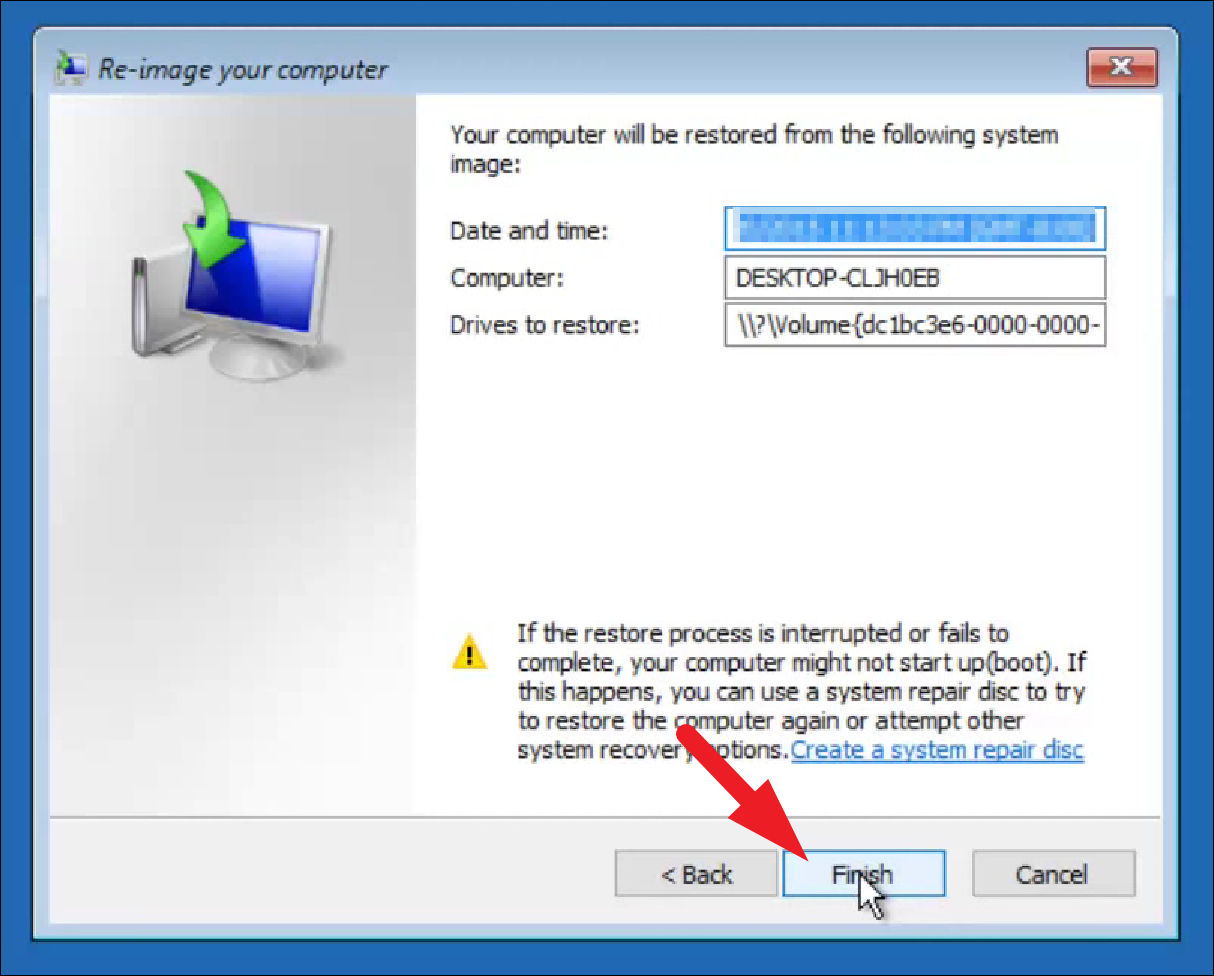
On the Select a system image backup screen, choose the Use the latest available system image option to restore from the most recent backup. Click Next to continue.
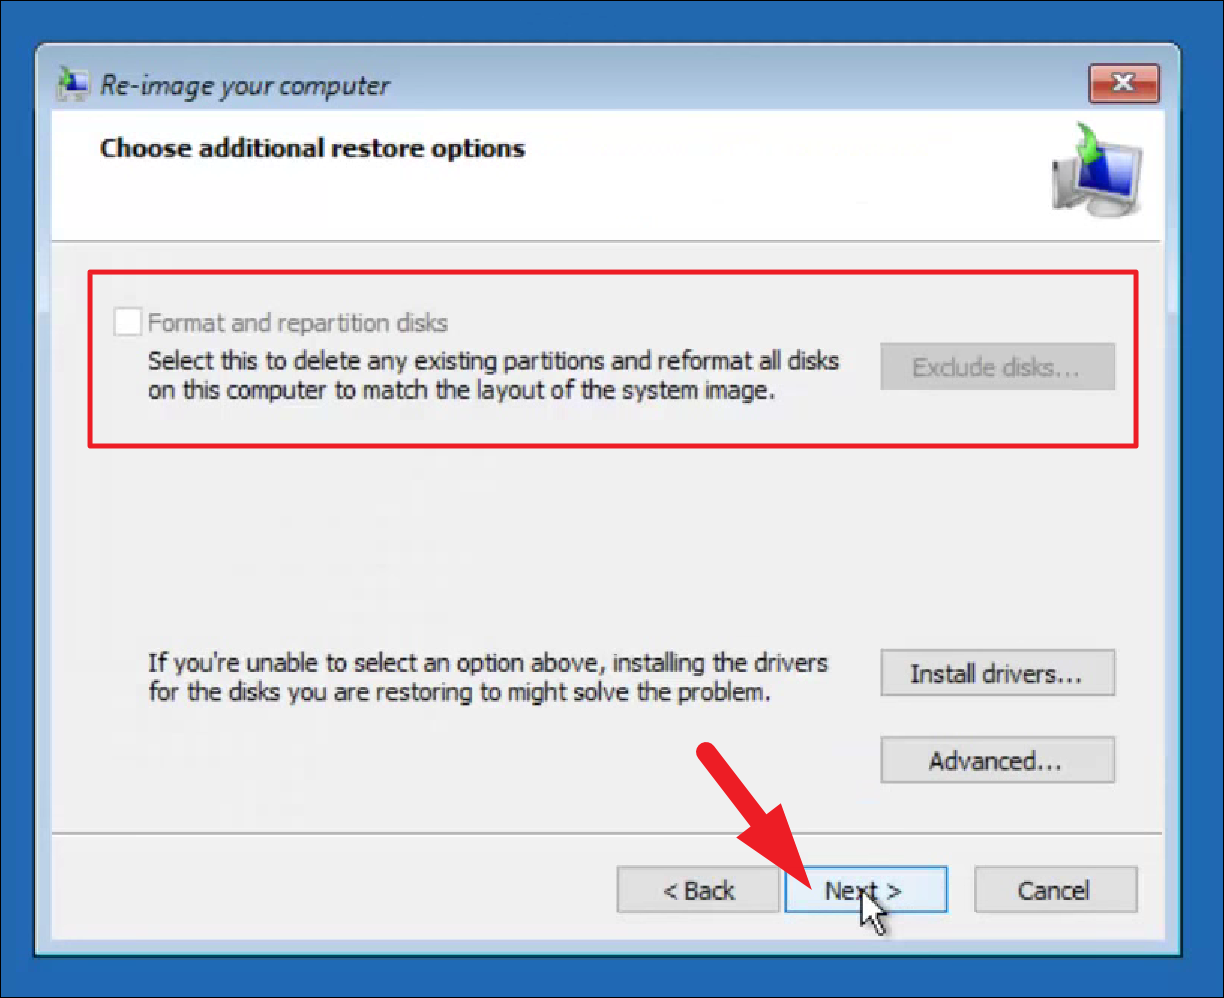
If you’re restoring the backup to a new hard drive or a computer with a different disk configuration, you may need to format and partition the disk. Under the Format and repartition disks section, you can exclude disks from the restore process or install necessary drivers by clicking on Install drivers. Once ready, click Next.
Windows will begin restoring your system from the backup. This process may take some time. Once completed, you will be prompted to restart your computer. Click Restart to finish.
By following these steps, you can effectively back up and restore your Windows 11 computer, ensuring that your important files and settings are preserved.