To change DNS in Windows 11, go to Settings > Network & Internet > Ethernet > DNS server assignment > Edit > Manual > IPv4 > On > Enter Preferred DNS > Encrypted preferred, unencrypted allowed > and Save your changes.
DNS (Domain Name System) plays a vital role in connecting and accessing the internet. While many users rely on their Internet Service Provider’s default DNS server, this may not always be the best option. A slow DNS server can significantly slow down your internet connection or even leave you disconnected. As such, it’s crucial to use a reliable and fast DNS server to ensure stable connectivity.
If you’re not familiar with DNS and how it works, there’s no need to worry. This guide will cover everything you need to know about DNS, including its functionality and importance. By the end of this guide, you’ll have a better understanding of DNS and be able to optimize your internet connection for a faster and more stable browsing experience.
What is a DNS and Why Should you Change it?
DNS (Domain Name System), as the name suggests, maps the domain name with IP addresses that enables you to use a name for a website such as ‘google.com’ while all the connected computers use an IP address to locate the website you wish to visit using your browser.
This functionality of DNS is enabled through DNS servers that are machines dedicated to answering DNS queries. Simply put, you can think of DNS as the phonebook of the internet which helps users to remember names instead of complex series of numbers to access a website on the internet.
Usually, the default DNS server provided by the ISP gets the job done. However, if you are experiencing a lot of ‘DNS server not responding’ errors or ‘server DNS could not be found’ messages when trying to connect to the internet, it is time you shall switch to a better DNS provider.
There are many free, reliable, secure, and publicly available DNS servers on offers from some tech giants to help users be more secure and safe while browsing the internet. Some of the DNS servers also offer parental controls that provide parents a granular control to filter out inappropriate content on a device their child might be using.
Reliable Public DNS Servers
- Google Public DNS: 8.8.8.8 / 8.8.4.4
- Cisco OpenDNS: 208.67.222.222 / 208.67.220.220
- Quad9: 9.9.9.9 / 149.112.112.112
All the above-mentioned DNS servers are free to use and do not require any kind of account setup.
Now, that you are acquainted with the DNS, let’s get you started on how to change DNS on your Windows computer.
Change DNS From the Settings on Windows 11
Changing DNS has never been a herculean task; it has always been just a matter of knowing where to look and what to do. With these simple steps mentioned below, you will be able to change the DNS address of a computer in a swish.
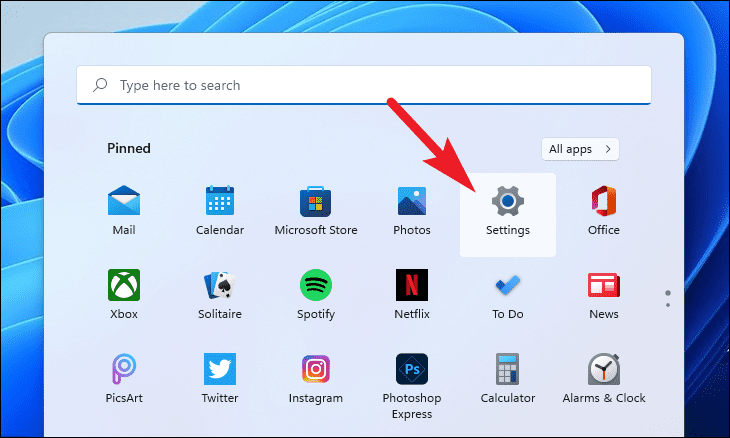
To do so, first, click on the ‘Start Menu’ icon present on the taskbar of your computer. Then, click on the ‘Settings’ option to launch the app. Alternatively, you can also press the Windows+I shortcut on your keyboard to access it.
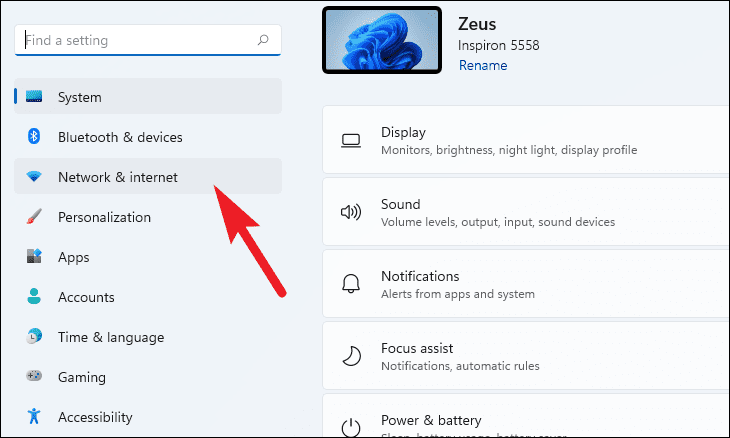
On the Settings screen, click on ‘Network & Internet’ option from the left panel of the window.
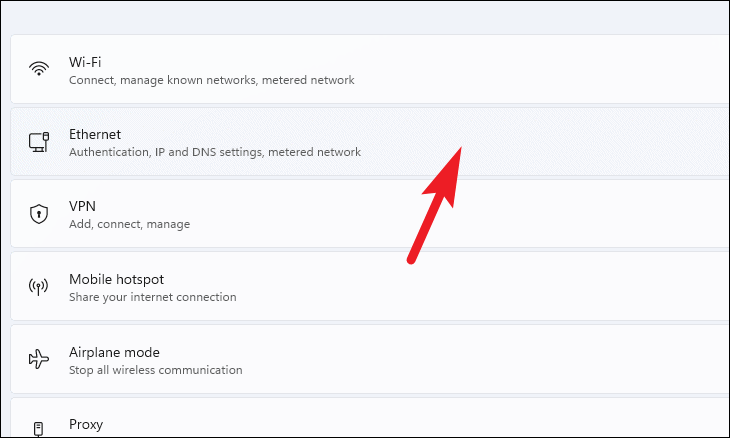
After that, click on the ‘Ethernet’ tile present to the right of your screen.
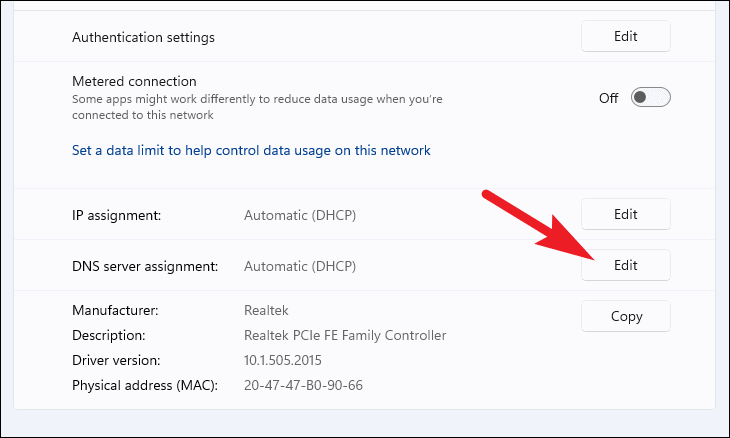
Then, locate the ‘DNS server assignment’ field and click on the ‘Edit’ button present on the far right edge of it. This will open an overlay dialog box on your screen.
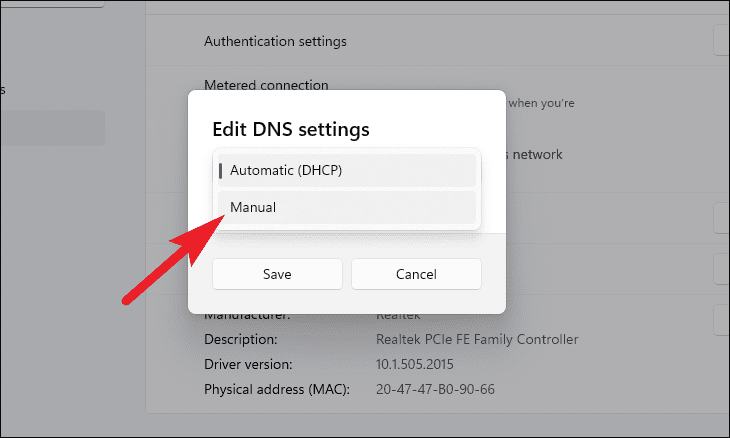
On the Edit DNS settings dialog, click on the drop-down menu and select the ‘Manual’ option.
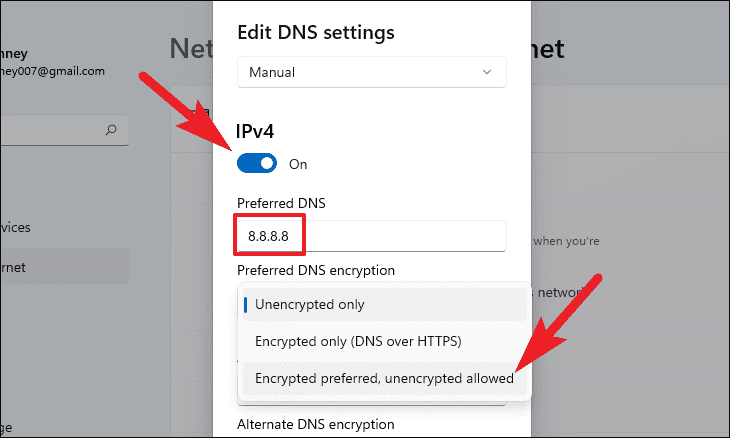
Once selected, click on the toggle switch present under the ‘IPv4’ option to push it to the ‘On’ position.
Next, enter your Preferred DNS address in the text box present under the respective field. Now, click on the drop-down menu present under the ‘Preferred DNS encryption’ field and choose the ‘Encrypted preferred, unencrypted allowed’ option.
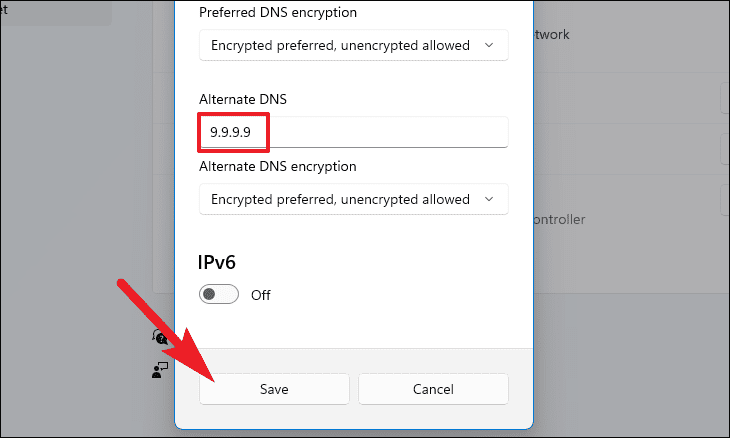
You can also choose an alternate DNS address in case the primary goes down. To do so, enter the alternate address in the text box under the field stating so. Once you set everything according to your preference, click on the ‘Save’ button from the bottom of the overlay panel to confirm your settings and close the window.
Note: You can also enter an alternate DNS address from a different service provider here.
And that’s it you have successfully changed the DNS settings on your Windows 11 machine.
Change DNS Settings From Control Panel on Windows 11
Windows also allow you to change your DNS settings from the Control Panel. Moreover, using Control Panel you can set different DNS servers for different connection modes if you wish to do so.
For example, on your home WiFi, you wish to use your default ISP-provided DNS address whilst use any other preferred DNS service when you connect with LAN on your work network.
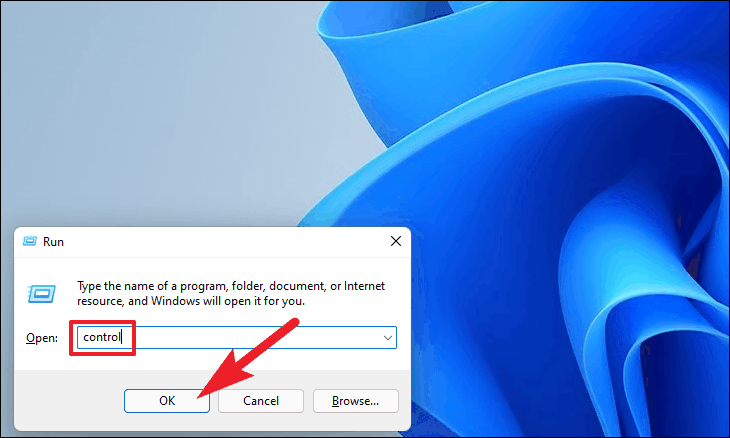
To do so, press the Windows+R shortcut on your keyboard to bring up the ‘Run Command’ utility. Then, type control and hit Enter on your keyboard to launch the Control Panel.
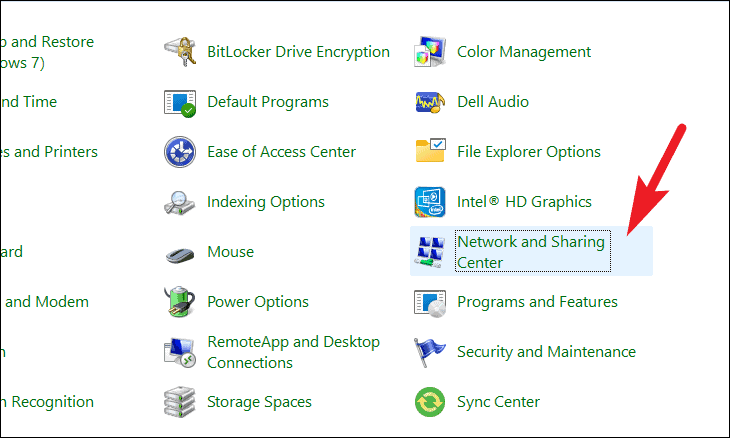
From the Control Panel window, locate and click on the ‘Network and Sharing center’ option.
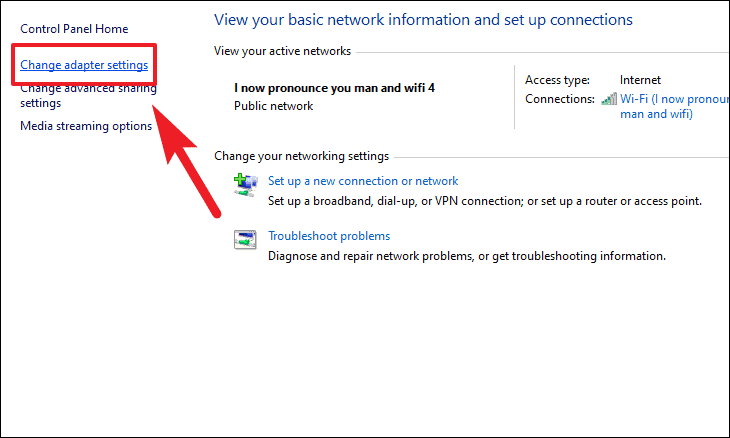
Then, click on the ‘Change adapter settings’ present on the left section of the screen. This will open another Control Panel window on your screen.
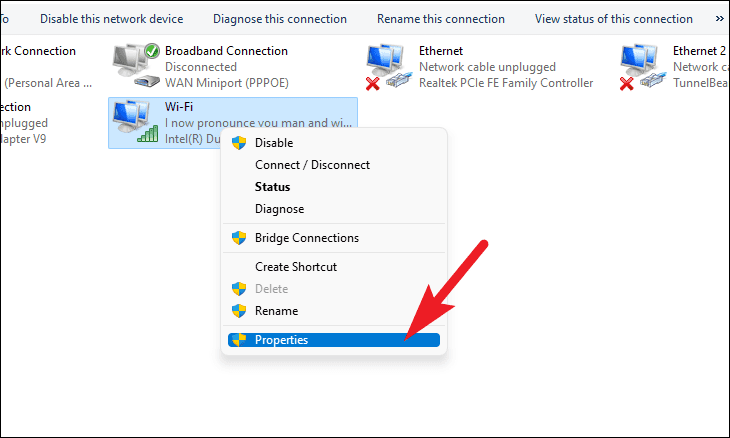
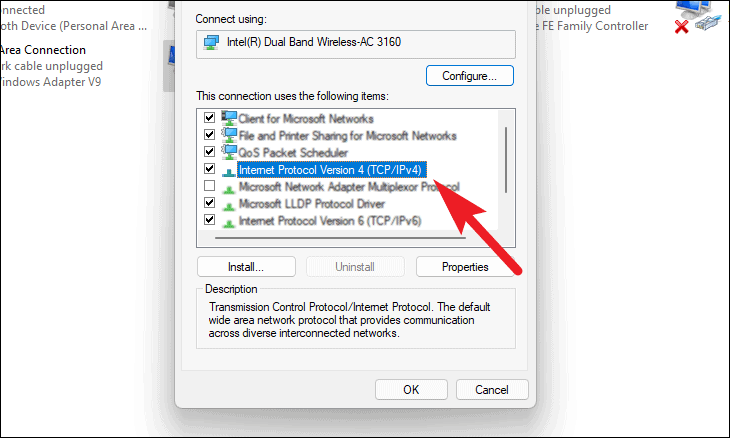
After that, right-click on your preferred connection mode and choose the ‘Properties’ option from the context menu.
Now, from the ‘Properties’ window, locate the ‘Internet Protocol Version 4 (TCP/IP4)’ option and double-click on it. This will open a new window on your screen.
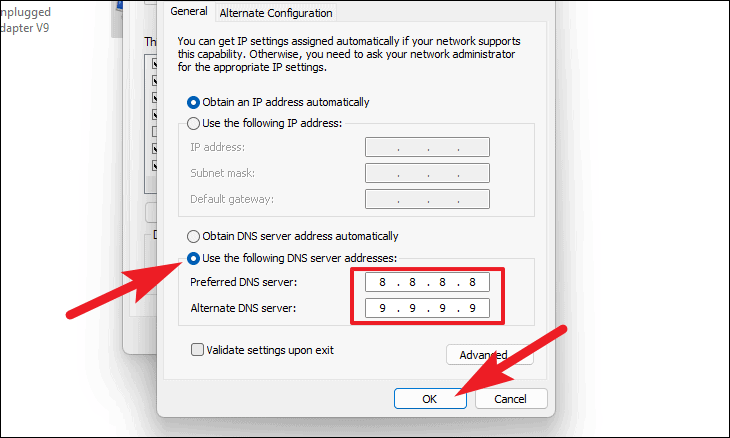
Next, from the ‘Internet Protocol Version 4 (TCP/IP) Properties’ window, click on the radio button preceding the ‘Use the following DNS server addresses:’ option. Then, enter your preferred DNS address in the space provided and click ‘OK’ to confirm and close.
Conclusion
Changing your DNS server on Windows 11 is a simple yet effective way to enhance your internet connectivity and security. By using reliable and fast DNS servers like Google Public DNS, Cisco OpenDNS, or Quad9, you can ensure stable performance and even enable parental controls to filter out inappropriate content. Whether you choose to change your DNS settings from the Settings app or the Control Panel, following the step-by-step guide provided above will enable you to make the necessary changes in no time. So, go ahead and switch to a better DNS provider to enjoy a faster and more secure browsing experience.


