Customizing icons on Windows 11 allows you to give your desktop a personal touch. Whether you're looking to refresh the look of your folders, shortcuts, or even the drives, changing icons can make your system more visually appealing. This guide will walk you through various methods to change icons, including using custom images and built-in options.
Change icons with custom images
If you want to personalize your icons beyond the default options, you can use custom images. This method allows you to download any image and set it as an icon after converting it to the ICO format recognized by Windows.
Step 1: Download the desired icon images from websites like flaticon.com. It's recommended to download images in PNG format for easier conversion.
Step 2: Convert the downloaded PNG images to ICO format. Visit cloudconvert.com, upload your PNG files, and convert them to ICO format. Download the converted ICO files to your computer.
Step 3: Move the ICO files to a dedicated folder where they won't be moved or deleted. This ensures Windows can consistently locate the icon files.
Step 4: Right-click on the folder you want to customize and select Properties from the context menu. Alternatively, select the folder and press ALT + ENTER to open its properties.
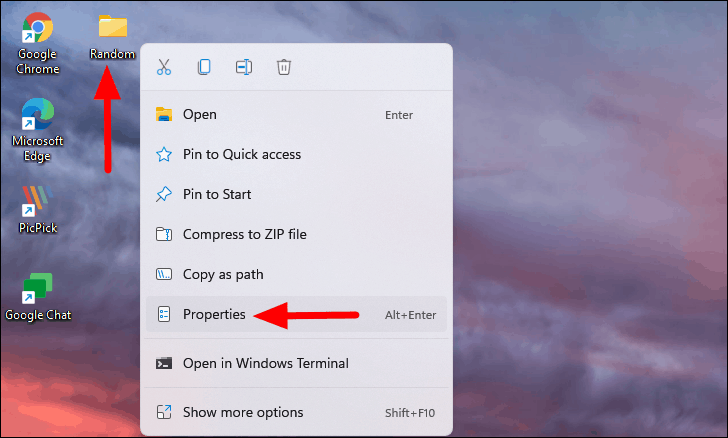
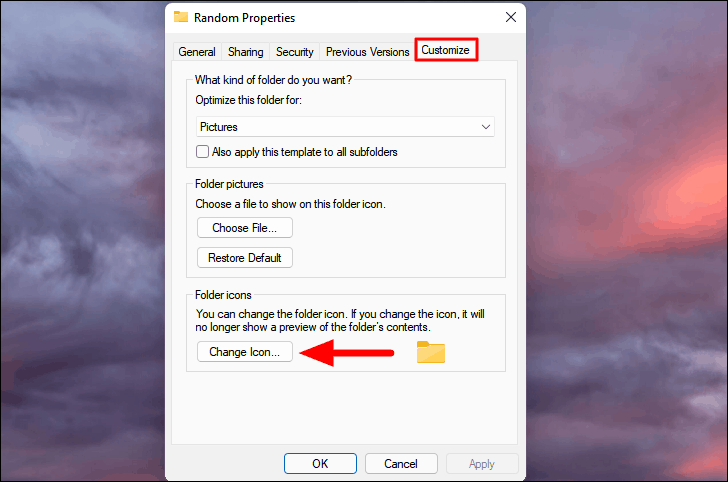
Step 5: In the properties window, navigate to the Customize tab and click on Change Icon under the Folder icons section.
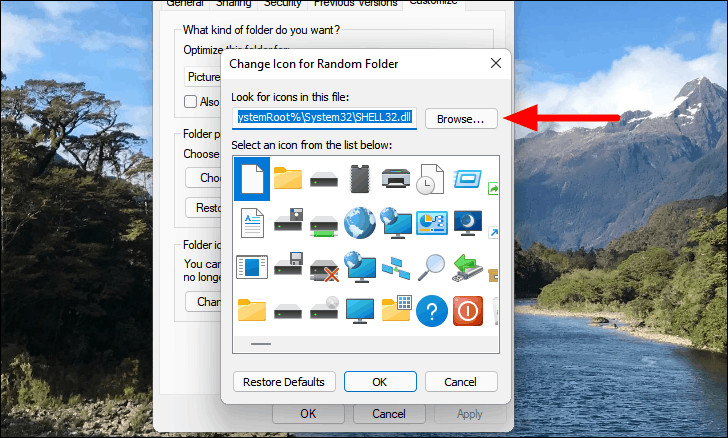
Step 6: Click on Browse to locate your custom ICO file.
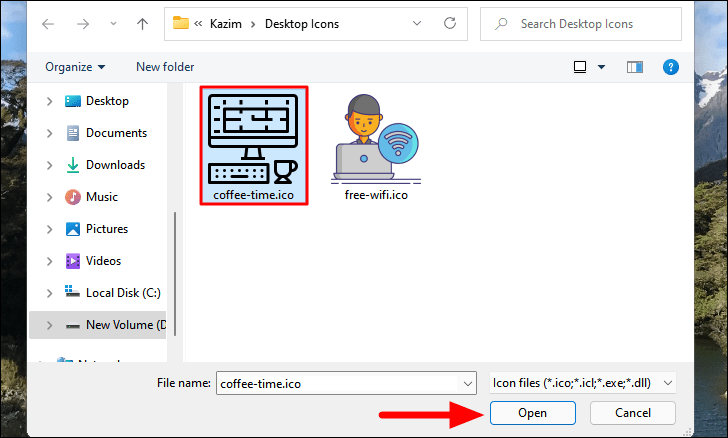
Step 7: Navigate to the folder containing your ICO files, select the desired file, and click on Open.
Step 8: Click OK to confirm the icon selection.
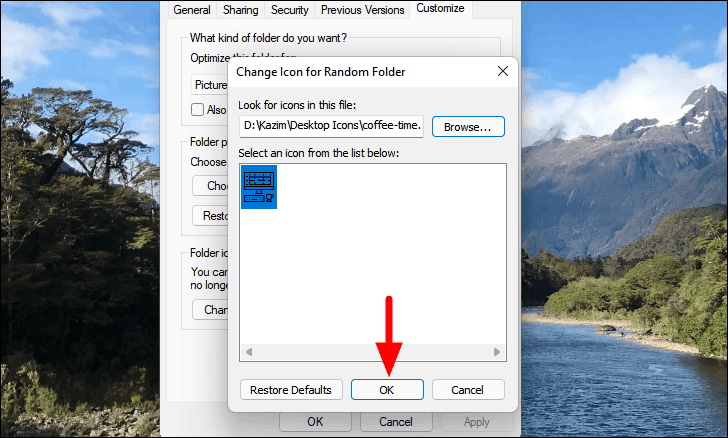
Step 9: Finally, click OK at the bottom of the properties window to apply the changes.
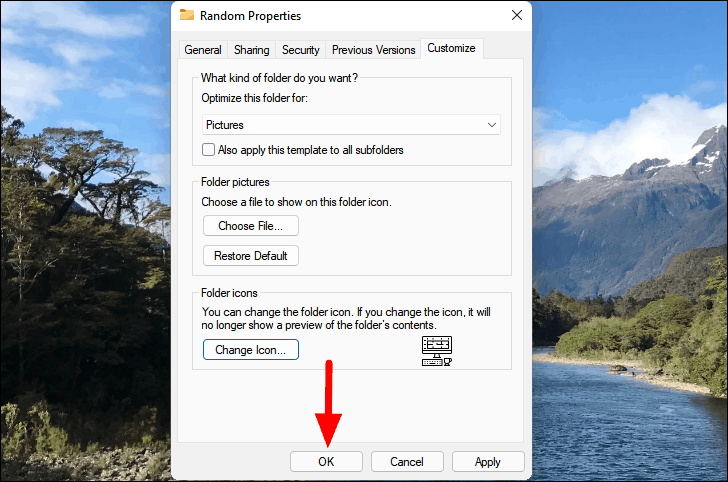
The folder icon will now display your custom image. If the change doesn't appear immediately, refresh the desktop, and the new icon should be visible.

You can use this method to change icons for other items like shortcuts and programs pinned to the taskbar. When changing icons for these items, follow similar steps, but access the icon change option through their respective properties windows.
Change icons using built-in options
Windows 11 offers a variety of built-in icons that you can use to customize folders, desktop icons, shortcuts, and programs pinned to the taskbar without downloading any additional files.
Change icons for folders
Step 1: Right-click on the folder you wish to customize and select Properties. Alternatively, select the folder and press ALT + ENTER to open its properties.
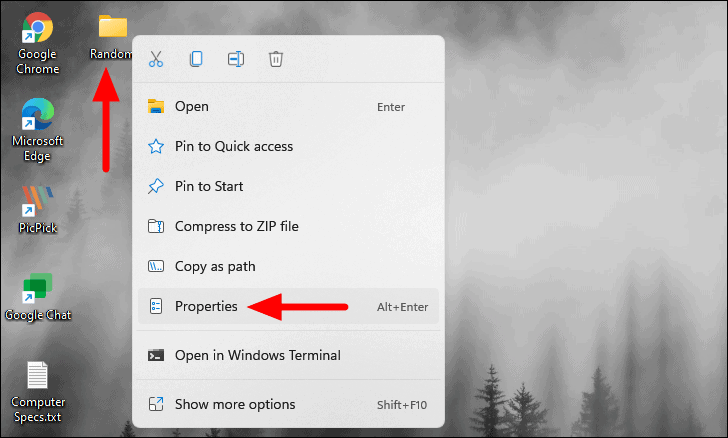
Step 2: In the properties window, go to the Customize tab and click on Change Icon under the Folder icons section.
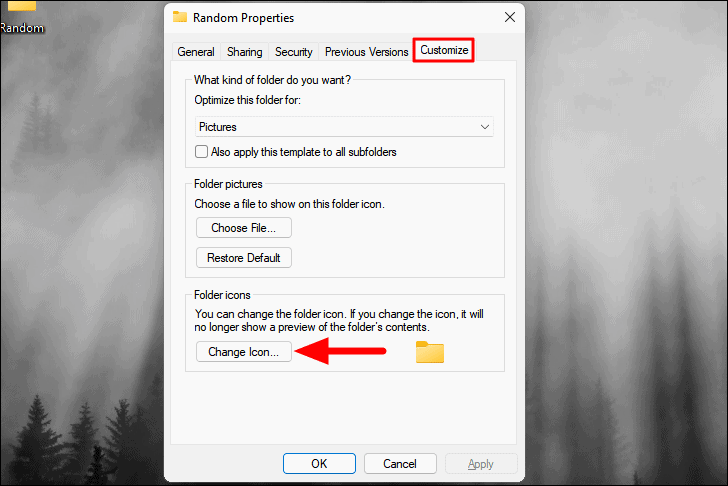
Step 3: Choose an icon from the list provided. Scroll through to see all available options. Once you've selected an icon, click OK.
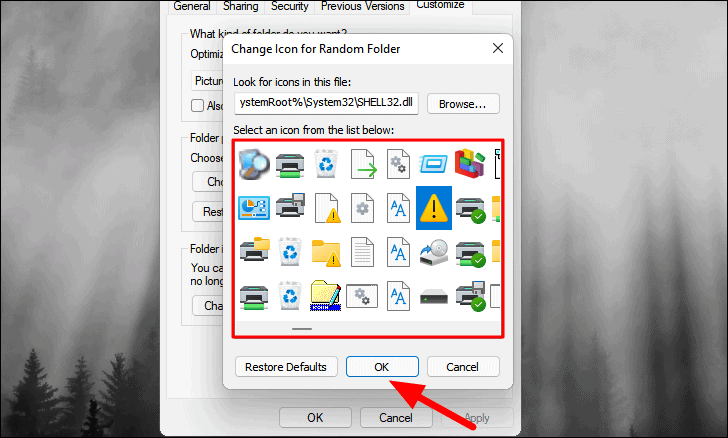
Step 4: Click OK again in the properties window to apply the changes.
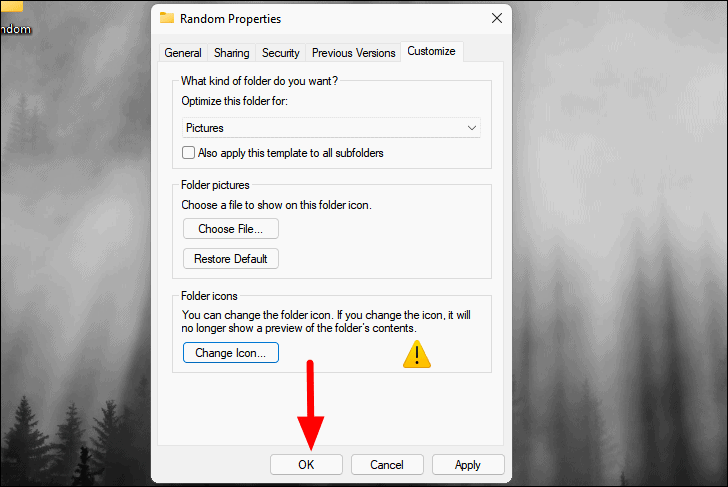
If the folder icon doesn't update immediately, right-click on the desktop and select Refresh, or press F5.

Change icon for desktop icons
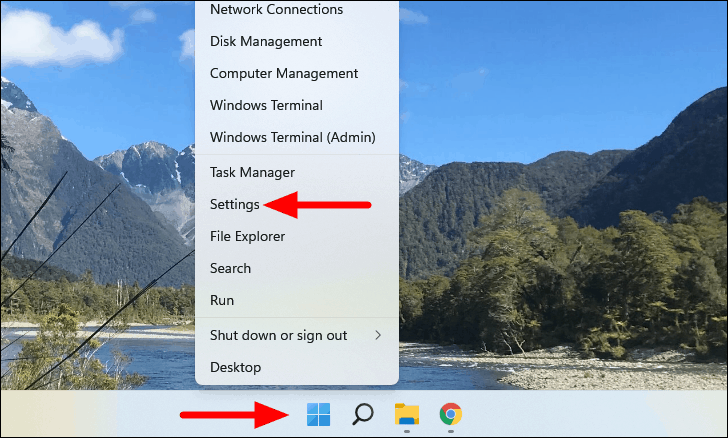
Step 1: Open the Settings app by right-clicking the Start button and selecting Settings, or press WINDOWS + I.
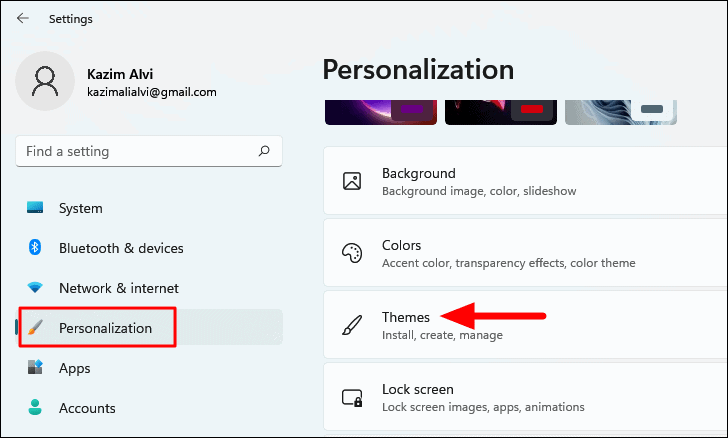
Step 2: In Settings, select Personalization from the left-hand menu, then click on Themes.
Step 3: Scroll down and click on Desktop icon settings under the Related settings section.
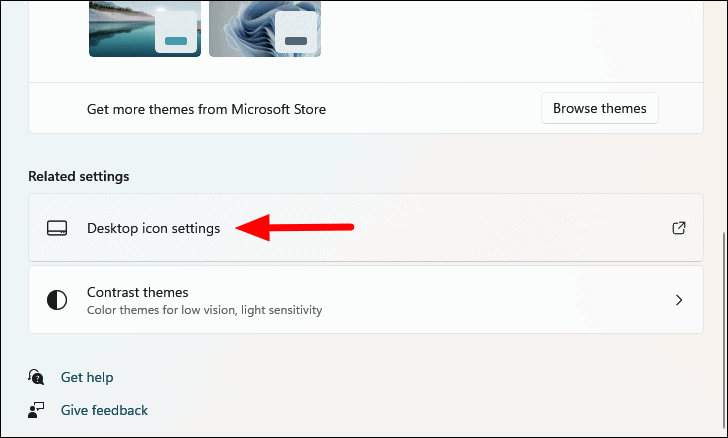
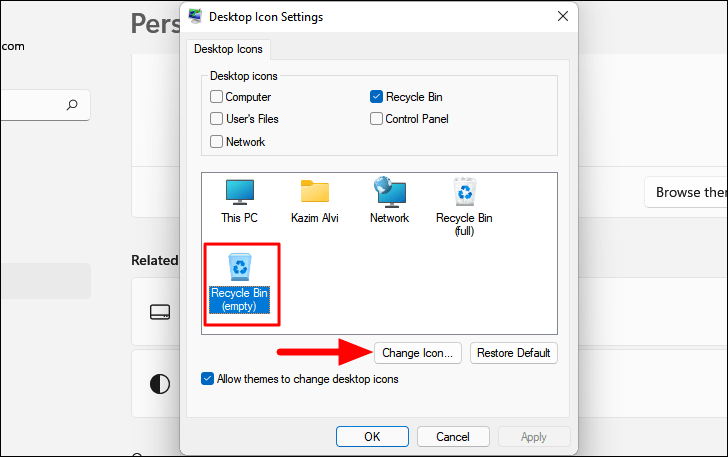
Step 4: In the Desktop Icon Settings window, select the desktop icon you want to change and click on Change Icon.
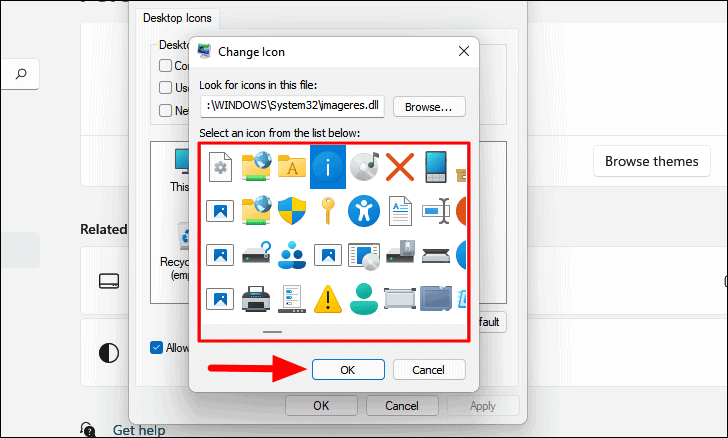
Step 5: Choose a new icon from the list and click OK.
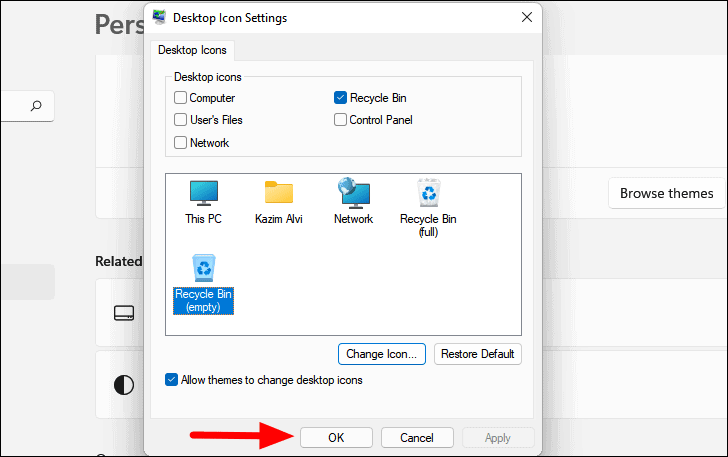
Step 6: Click OK again in the Desktop Icon Settings window to apply the changes.
Change the icon for shortcuts
Step 1: Right-click on the shortcut you want to customize and select Properties. Alternatively, select the shortcut and press ALT + ENTER.
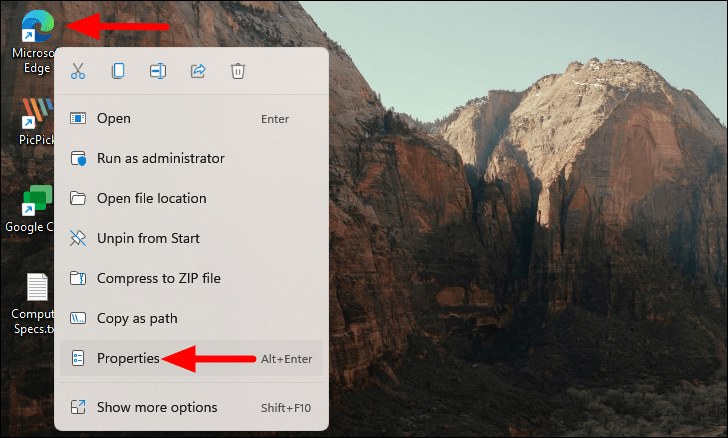
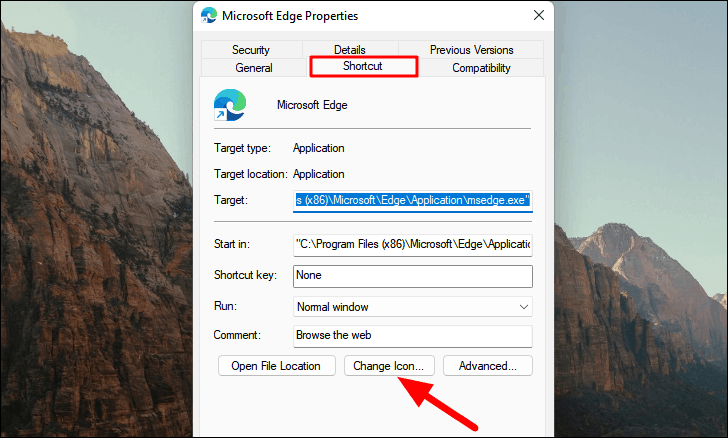
Step 2: In the properties window, ensure you're on the Shortcut tab and click on Change Icon.
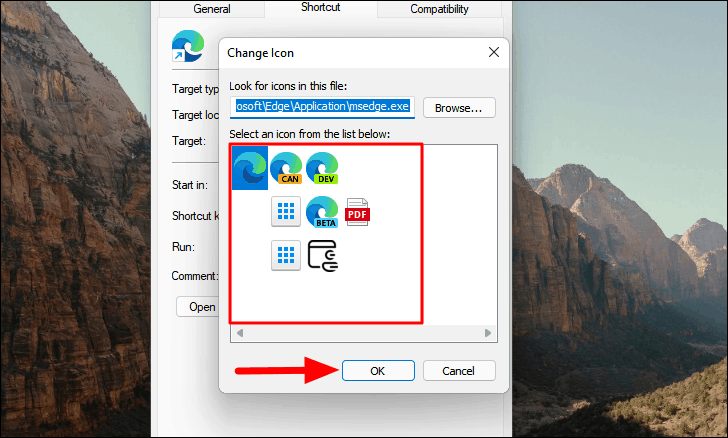
Step 3: Select an icon from the list and click OK.
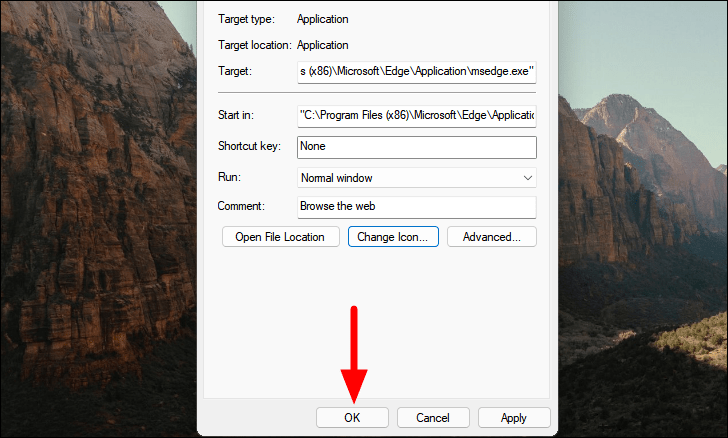
Step 4: Click OK in the properties window to apply the new icon.
This method works for app shortcuts, folder shortcuts, and even command prompt shortcuts. The change will only affect the specific shortcut you modify.
Change the icon for programs pinned to the taskbar
Step 1: Right-click on the program icon pinned to the taskbar. Then, right-click on the program name from the context menu and select Properties.
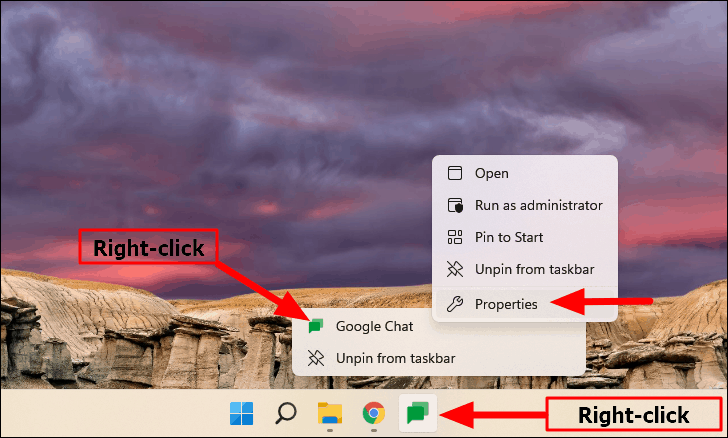
Step 2: In the properties window, click on Change Icon, select a new icon, and click OK.
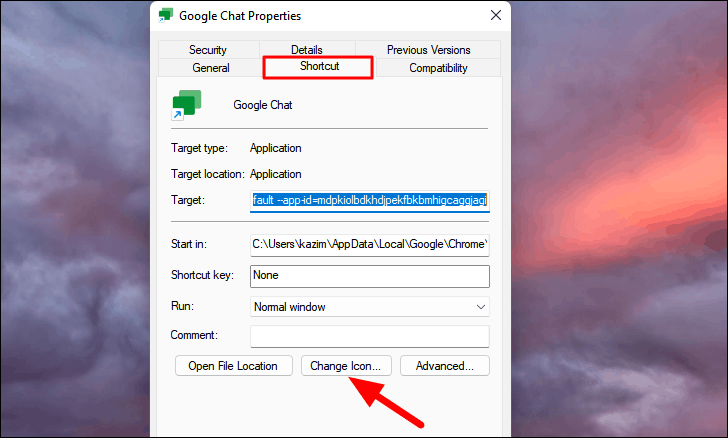
Step 3: Click OK in the properties window to apply the change.
The taskbar icon will now display the new icon you've selected.
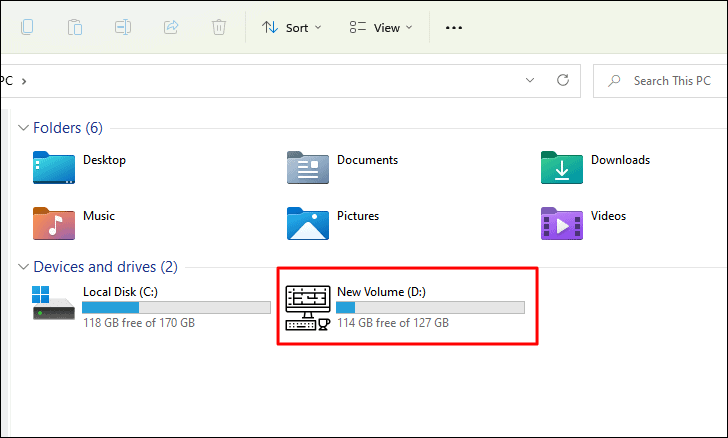
Changing icon for drives
Changing the icon for drives involves modifying the Windows Registry. Before proceeding, ensure you back up your registry to prevent any unintended issues.
Step 1: Prepare your custom icon in ICO format and place it in a folder where it won't be moved or deleted.
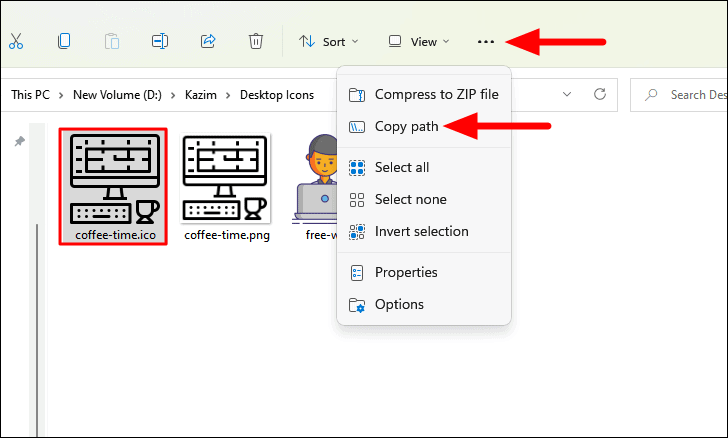
Step 2: Copy the full path of the ICO file. Navigate to the folder, select the ICO file, click on the See more button (three dots) at the top of the File Explorer window, and choose Copy path.
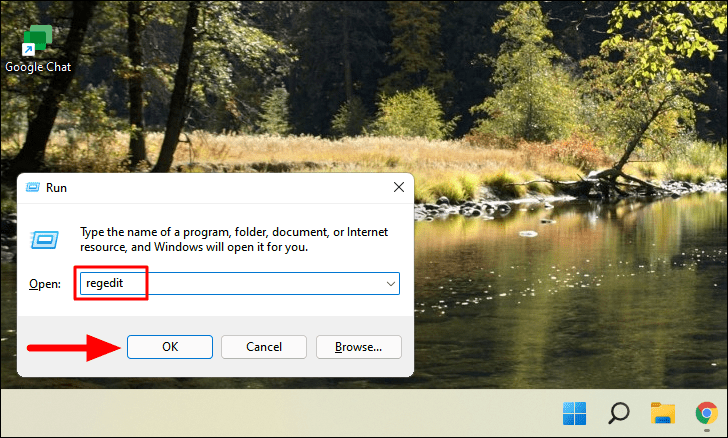
Step 3: Press WINDOWS + R to open the Run dialog box, type regedit, and press ENTER to open the Registry Editor. Confirm any prompts that appear.
Step 4: Navigate to the following registry path:
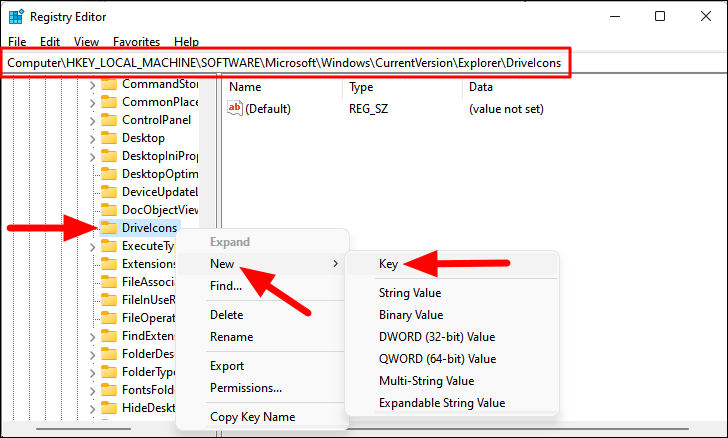
HKEY_LOCAL_MACHINE\SOFTWARE\Microsoft\Windows\CurrentVersion\Explorer\DriveIconsStep 5: Right-click on DriveIcons, select New, and then Key. Name the new key with the drive letter you want to change the icon for (e.g., D).
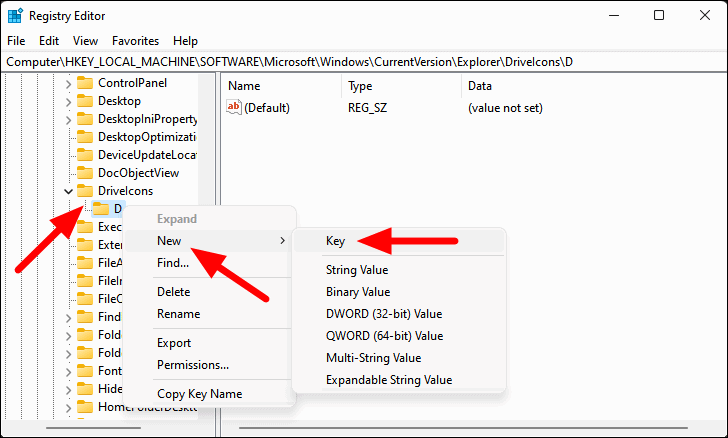
Step 6: Right-click on the new key you created (the drive letter), select New, and then Key again. Name this key DefaultIcon.
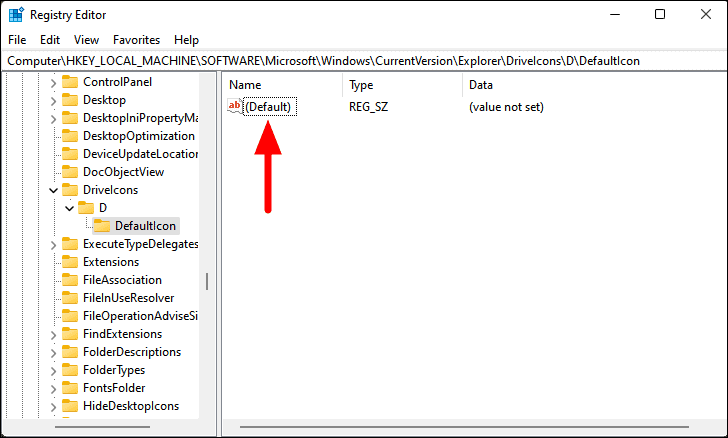
Step 7: Click on the DefaultIcon key. In the right pane, double-click on the (Default) value to modify it.
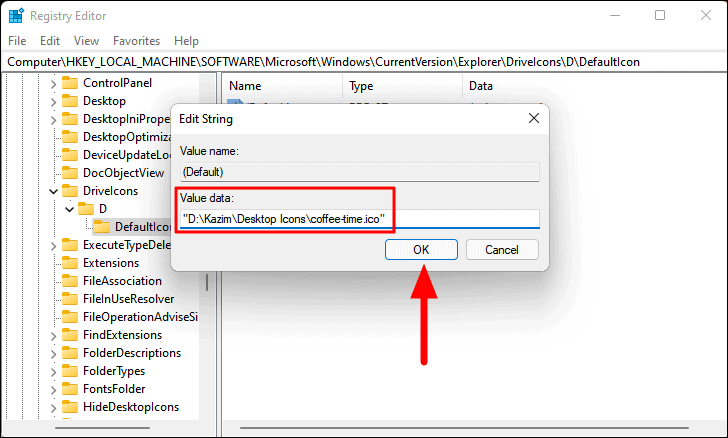
Step 8: In the Value data field, paste the full path of your ICO file, enclosed in double quotes ("C:\Icons\drive_icon.ico"), and click OK.
Step 9: Close the Registry Editor. The drive icon should update automatically in File Explorer. If not, restart your computer.
By following these methods, you can customize Windows 11 icons to suit your personal style, making your computing experience more enjoyable and tailored to your preferences.








Member discussion